Debunking the Myths: The Ultimate Homemade White Chocolate Recipe (It’s Easier Than You Think!)
Let’s talk about the world’s most misunderstood dessert ingredient. The one that people love to hate, usually shouting, “It’s not even real chocolate!” Yes, I’m talking about White chocolate. But here’s the secret: when you use real high-quality cocoa butter and skip the weird fillers, it transforms into a rich, velvety, intensely creamy confection that is pure heaven. You could buy a processed bar, or you could embark on a quick, fascinating kitchen adventure to make your own perfect, custom-flavored batch. Get ready to prove the haters wrong with the ultimate White chocolate recipe.
Why This Homemade White Chocolate Recipe Is Pure Alchemy
Why make white chocolate when you could spend that time debating whether it’s actually chocolate? Because this recipe is awesome, that’s why. It delivers a rich, velvety smooth texture and a deep, true vanilla flavor that only comes from controlling the cocoa butter content.

First, the quality is unmatched. We use pure cocoa butter, which is the key to its luxurious melt. Second, it’s ridiculously customizable—you can add any flavor, spice, or color you want! Third, it’s a fantastic conversation starter. Imagine handing someone a bar and saying, “Oh, I made that.” Plus, the process of turning simple ingredients into a glossy, solid bar is surprisingly satisfying. Who needs store-bought mystery bars when you can create a pure, pristine white chocolate masterpiece?
Ingredients: The Cocoa Butter Base

The core of white chocolate is simple: cocoa butter, sugar, and milk solids.1 Precision is key in melting!
H3: The Core Base
- 1 cup Cocoa Butter Wafers or Chopped Block: Crucial! This is the fat that gives white chocolate its incredible melt and texture.
- ½ cup Powdered Sugar: Sifted, to ensure a perfectly smooth finish. Granulated sugar leaves a grainy texture.
- ½ cup Whole Milk Powder: Mandatory! This provides the necessary milk solids for flavor and creaminess. Do not use liquid milk!
- 1 teaspoon Vanilla Extract: Adds depth and warmth.
H3: Optional Enhancers
- Pinch of Salt: Just a tiny pinch cuts the sweetness and enhances the overall flavor.
- 1 tablespoon Heavy Cream Powder (Optional): Increases the richness and creaminess.
- 1 teaspoon Soy Lecithin Powder (Optional): An emulsifier that gives a professional, snappy texture.

Key Substitutions:
- Cocoa Butter Swap: There is no substitute. You must use cocoa butter; any other fat (like coconut oil) results in a chocolate coating, not true white chocolate.
- Milk Powder Swap: You must use milk powder. You can use full-fat powdered goat milk or coconut milk powder for dairy-free alternatives.
- Sweetener Swap: Powdered erythritol or monk fruit blend can be used as a keto/sugar-free substitute for the powdered sugar.
Tools & Kitchen Gadgets Used: Your Tempering Toolkit
Melting and tempering chocolate requires careful temperature control.
- Double Boiler Setup: A heatproof bowl set over a saucepan of simmering water. Essential for gentle melting!
- Rubber Spatula or Whisk: For gentle stirring.
- Digital Kitchen Thermometer: CRUCIAL for tempering! Chocolate is a temperature diva; you must monitor it.
- Fine Mesh Sieve/Sifter: Mandatory for sifting the powdered sugar and milk powder.
- Small Mold (Candy Molds, Ice Cube Tray, or Lined Pan): For setting the chocolate into bars or shapes.
- Parchment Paper: For lining your molds/pan.
Step-by-Step Instructions: The Art of the Perfect Melt
White chocolate scorches easily and seizes with moisture. Gentle heat and dry ingredients are the golden rules.
H3: Step 1: Prep the Powders (Sift, Sift, Sift!)
In a medium bowl, whisk together the powdered sugar and the whole milk powder. Sift this mixture thoroughly to remove any clumps. Clumps in the powder will make your finished chocolate grainy! Set aside.
H3: Step 2: Melt the Cocoa Butter (Low and Slow)
Set up your double boiler. Ensure the bottom of the top bowl does not touch the simmering water. Add the cocoa butter wafers to the top bowl. Stir gently until the cocoa butter is completely melted and reaches $115^{\circ}\text{F}$ ($46^{\circ}\text{C}$).
H3: Step 3: Mix the Powders into the Fat
Remove the bowl from the heat. Gradually whisk in the sifted powdered sugar and milk powder mixture (and salt/lecithin, if using) a little at a time. Whisk until a thick, uniform paste forms.
H3: Step 4: The Vanilla & Final Smoothness
Stir in the vanilla extract. Continue stirring until the mixture is perfectly smooth and glossy. At this point, the chocolate is melted but often not “tempered” (meaning it won’t set shiny or snap well).
H3: Step 5: Tempering (The Optional Step for Professionals)
To temper the chocolate: Let the mixture cool, stirring frequently, until it reaches $82^{\circ}\text{F}$ ($28^{\circ}\text{C}$). Then, return it briefly to the double boiler and gently reheat, stirring, until it reaches $86^{\circ}\text{F}$ ($30^{\circ}\text{C}$). This quick temperature curve ensures a glossy, snappy bar. Skip this if you don’t have a thermometer—the chocolate will still taste great, but might be softer.
H3: Step 6: Mold and Chill
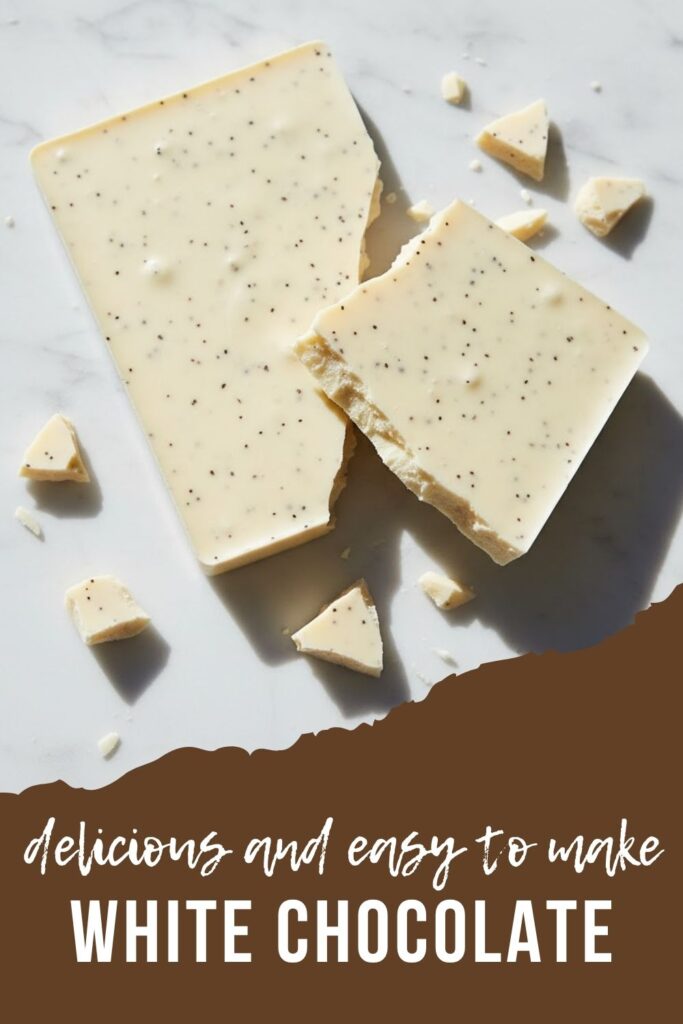
Pour the finished, liquid White chocolate into your prepared mold or a parchment-lined pan. Tap the mold gently on the counter to release any air bubbles. Add any mix-ins now! Place the mold in the refrigerator or a cool spot to set completely (this takes 1-2 hours). Once firm, unmold and enjoy!
Calories & Nutritional Info: The Decadent Details

White chocolate is high in fat and sugar, but this homemade version lacks the mysterious hydrogenated oils. These estimates are approximate per 1-ounce serving.
- Estimated Calories per serving (1 oz): 150-180 calories
- Fat: 12-15g (from cocoa butter)
- Carbohydrates: 8-12g (from sugar)
- Protein: 1-2g (from milk powder)
- The Bottom Line: A rich, high-fat dessert ingredient. A little goes a long way!
Common Mistakes to Avoid: Stop Seizing the Chocolate!
White chocolate is notoriously fragile. Heed these warnings!
- Getting Water in the Mix: Water is chocolate’s arch-nemesis! Even a drop will cause the cocoa solids/sugar particles to clump, resulting in a thick, grainy, unsalvageable mess known as “seizing.” Ensure your bowl is dry and no steam escapes into the chocolate.
- Using Granulated Sugar: Granulated sugar doesn’t dissolve completely in the cocoa butter, resulting in a noticeably grainy texture. Powdered sugar is essential for smoothness.
- Overheating: Cocoa butter burns easily! Never microwave white chocolate or melt it over direct heat. Always use the gentle heat of a double boiler or a very low-powered microwave setting.
- Using Liquid Milk: Liquid milk contains too much water and will seize the chocolate. You must use milk powder (milk solids) for the creamy flavor and texture.
Variations & Customizations: Your Inner Chocolatier
Once you master the base, the flavor possibilities are endless!
- Matcha Green Tea White Chocolate: Whisk in 1 tablespoon of sifted ceremonial grade matcha powder along with the milk powder mixture. The color and earthy flavor are stunning.
- Spicy Ginger-Cardamom: Add 1 teaspoon of grated fresh ginger and ½ teaspoon of ground cardamom to the melted cocoa butter right after removing it from the heat. Strain before molding for a smooth texture, or leave the ginger in for a chewy bite.
- Fruity Pistachio Bar: Add ¼ cup of finely chopped toasted pistachios and ¼ cup of dried cranberries to the mold right before setting. The crunch and tartness are a perfect foil to the sweet white chocolate.
FAQ Section: Answering Your Sweetest Science Questions
You’ve got questions about this sweet confection. I’ve got answers.
H3: Q1: What is the main ingredient in white chocolate?
A1: The main ingredient in high-quality white chocolate is cocoa butter, which is the fat derived from the cocoa bean.2
H3: Q2: Why did my white chocolate seize and become grainy?
A2: The most common reason is that water or steam accidentally contaminated the mixture. Another reason is overheating the chocolate, which causes the sugar to crystallize.
H3: Q3: Is homemade white chocolate vegan?
A3: Not usually. Traditional white chocolate uses whole milk powder. However, you can make a vegan version by substituting the whole milk powder with coconut milk powder or powdered soy milk.
H3: Q4: What does “tempering” chocolate mean?
A4: Tempering is the process of precisely heating and cooling chocolate to control the crystallization of the cocoa butter fat. Properly tempered chocolate sets hard, snaps cleanly, and looks glossy.
H3: Q5: Can I melt white chocolate in the microwave?
A5: Yes, but carefully! Use a low power setting (50%) and microwave in 15-second intervals, stirring thoroughly between each interval. Do not rush it, or it will scorch and seize.
H3: Q6: What can I use white chocolate for?
A6: Everything! Use it for dipping pretzels or strawberries, making truffles, flavoring ganache, baking cookies, or pouring into molds to create custom bars.
H3: Q7: How should I store homemade white chocolate?
A7: Store homemade white chocolate in an airtight container in a cool, dark place (like a pantry) for up to 6 months. Avoid the refrigerator, as the moisture can cause sugar bloom (white streaks).
Final Thoughts: White Chocolate Victory!
You did it! You created a batch of rich, velvety smooth, and pure White chocolate that will make all those processed bars taste like plastic. Go ahead, snap off a piece and enjoy that smooth melt. Doesn’t that taste exactly like pure culinary triumph? I knew it would. You are now a master chocolatier. Are you ever going back to buying low-quality white chocolate again? I highly doubt it. Enjoy your smooth, sweet victory!