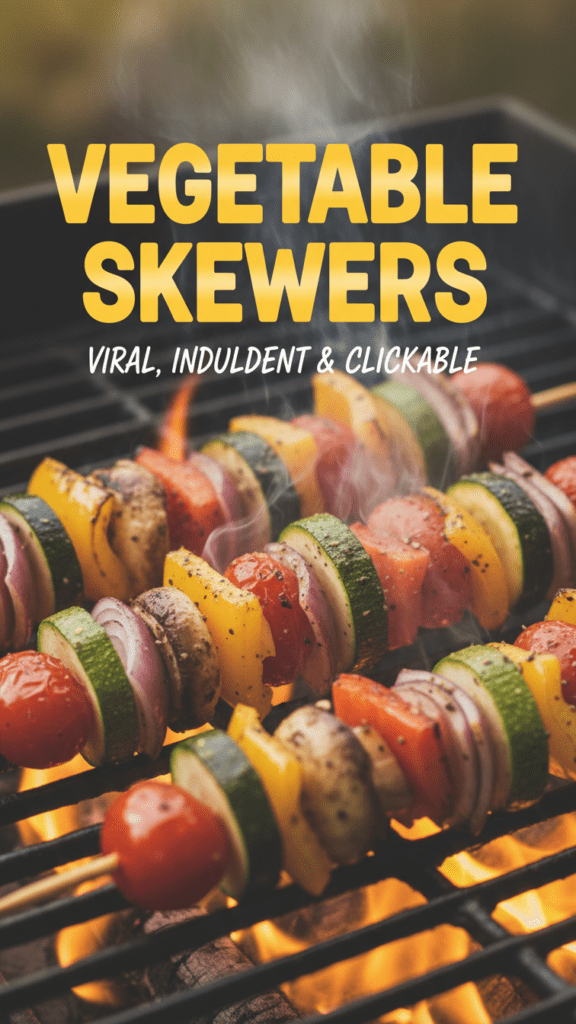
The Ultimate Grilled Vegetable Skewers: BBQ Glory Without the Meat Sweat
Ever been to a backyard cookout where the only “vegetarian option” was a sad, lukewarm bag of potato chips and a single, lonely slice of watermelon? It’s a tragic scene. We’ve all stood there, watching the “grill master” flip twenty burgers while we contemplate if eating the decorative parsley is socially acceptable. But today, we reclaim the grates. I’m showing you how to build vegetable skewers so vibrant, charred, and ridiculously flavorful that even the most hardcore carnivores will try to “sample” them off your plate.
Why These Skewers Are the Real MVP
Most people treat grilled veggies like an afterthought—basically just something to fill the gaps between the steaks. This recipe changes that because we focus on the two things usually missing from veggie kabobs: actual seasoning and proper timing. Why settle for a mushy mushroom when you can have a caramelized, smoky bite of heaven?
You’ll love this recipe because it’s high-impact and low-stress. It’s essentially edible art on a stick. It makes you look like a culinary genius while you’re actually just stabbing things with wood. Plus, it’s the perfect way to use up that random zucchini in your fridge that’s currently staring you down. IMO, there is no better way to survive a summer party than with a drink in one hand and a perfectly charred skewer in the other.
The Ingredient Lineup: Rainbow on a Stick
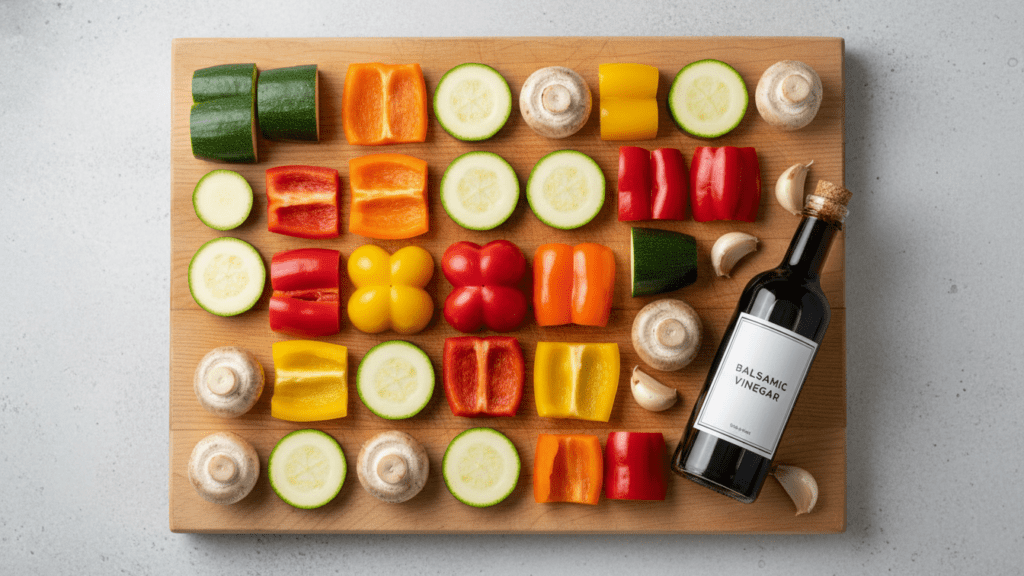
Don’t just grab whatever is rolling around in your crisper drawer. You want vegetables that can handle the heat without turning into a puddle of sadness.
- 2 Large Zucchini (Sliced into thick rounds; don’t go too thin or they’ll commit suicide through the grill grates).
- 1 Red and 1 Yellow Bell Pepper (Cut into 1-inch squares for that sweet, charred crunch).
- 1 Red Onion (The flavor MVP; cut into thick wedges that actually stay on the stick).
- 8 oz Whole Cremini Mushrooms (Keep them whole so they stay juicy and “meaty”).
- 1 cup Cherry Tomatoes (The little flavor bombs that pop when you bite them).
- 1 block Extra Firm Tofu or Halloumi (Optional, but great for a protein boost).
The “Liquid Gold” Marinade
- 1/4 cup Olive Oil (The vehicle for all things delicious).
- 3 tbsp Balsamic Vinegar (For that tangy, caramelized sweetness).
- 2 cloves Garlic, minced (Because we aren’t vampires).
- 1 tsp Dried Oregano and 1 tsp Smoked Paprika (The smoky-earthy duo).
- Salt and Black Pepper (Season like you mean it).
Tools of the Trade: Your Kabob Kit
You can’t do this with your bare hands (well, you can, but I don’t recommend it). Grab these gadgets to make the process smoother than a fresh jar of tahini.
- Bamboo or Stainless Steel Skewers (If using wood, soak them in water for 30 minutes unless you want a literal campfire).
- Large Rimmed Baking Sheet (Perfect for marinating and transporting the goods).
- Silicone Basting Brush (To paint on that extra flavor while they grill).
- Long-Handled Grill Tongs (Save your arm hair, people).
- Sharp Chef’s Knife (Uniform pieces cook at the same rate—it’s science).
- Large Mixing Bowl (For the pre-game marinating session).
Step-by-Step: From Garden to Grill
Ready to become the hero of the patio? Follow these steps, keep an eye on the flames, and try not to poke your eye out with the sticks.
Step 1: The Chop Shop
Slice your zucchini, peppers, and onions into uniform, 1-inch chunks. You want them roughly the same size as the mushrooms. If you cut the onions too small, they’ll break and fall into the abyss of the grill. We don’t mourn lost onions in this house.
Step 2: The Marinade Bath
In your large bowl, whisk together the olive oil, balsamic, garlic, and spices. Toss all your veggies in there and give them a good massage. Let them hang out for at least 20 minutes. They need time to soak up the vibes (and the vinegar).
Step 3: The Assembly Line
Thread the veggies onto the skewers. Alternate colors like you’re making a friendship bracelet in middle school. Pro tip: Leave a tiny bit of space between each vegetable so the heat can circulate. If you pack them too tight, they’ll steam instead of char.
Step 4: Fire It Up
Heat your grill to medium-high. Clean the grates! Nobody wants their bell peppers tasting like last week’s salmon. Lightly oil the grates right before you start to prevent any tragic sticking incidents.
Step 5: The Sizzle
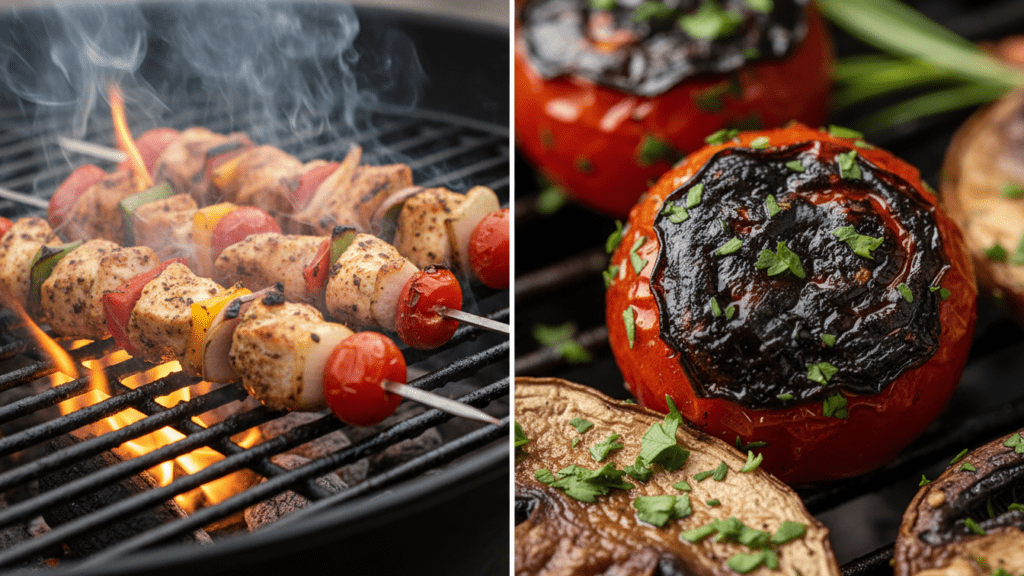
Place the skewers on the grill. Cook for about 10-12 minutes, turning them every 3-4 minutes. You’re looking for those beautiful, dark grill marks and edges that look slightly burnt (in a cool, intentional way). Use your basting brush to slap on any leftover marinade during the last few minutes.
Step 6: The Great Escape
Remove them from the heat and let them rest for two minutes. This prevents you from searing your taste buds off. Serve them over quinoa, inside a pita, or just eat them straight off the stick like the outdoor warrior you are.
Calories & Nutritional Info (Per Skewer)
Since we’re mostly dealing with water and sunshine here, the stats are pretty friendly. This assumes a standard large skewer.
- Calories: 85 kcal
- Total Fat: 6g
- Carbohydrates: 8g
- Fiber: 2g
- Protein: 2g
- Vitamin C: 110% (You’re basically immune to everything now).
Common Mistakes to Avoid (The “Don’t Be That Person” List)
Grilled veggies seem easy, but there are plenty of ways to ruin the vibe. Avoid these classic blunders.
- Not Soaking Wooden Skewers: Unless you want your dinner to double as a sparkler, soak the sticks for 30 minutes in water before threading.
- Cutting Veggies Too Thin: Thin zucchini slices will go limp and fall off the stick faster than your New Year’s resolutions. Keep them chunky.
- Crowding the Skewer: If the veggies are touching too much, the centers stay raw while the outsides burn. Give them some breathing room.
- Skipping the Marinade: Raw grilled veggies taste like… hot raw veggies. Use the balsamic marinade to get that caramelization.
Variations & Customizations
Once you master the basic rainbow, start experimenting with these fun twists.
- The Tropical Heat: Add pineapple chunks and swap the balsamic for a teriyaki glaze. It’s sweet, salty, and feels like a vacation.
- The Mediterranean Vibe: Add halloumi cheese cubes and use lemon juice and dried mint in the marinade. Serve with a side of tzatziki.
- The Spicy Tex-Mex: Use poblano peppers and corn on the cob (cut into small discs). Season with lime juice and chili powder.
FAQ: Your Grilling Grievances Answered
Can I make these in the oven? Yes! If it’s raining or you’re out of propane, pop them on a parchment-lined sheet at 400°F for 20 minutes. You won’t get the smoke, but they’ll still be delicious.
How do I keep the vegetables from spinning on the skewer? The struggle is real. Use double skewers (two sticks per kabob) to lock the veggies in place so they actually flip when you want them to.
What is the best oil for grilling? Use a neutral oil with a higher smoke point like canola or avocado oil if your grill is screaming hot. Regular olive oil works fine for medium-high heat.
Can I use frozen vegetables? TBH, no. Frozen veggies have already lost their structural integrity. They will turn into mush the second they hit the grill. Stick to fresh.
How long do leftovers last? Keep them in an airtight container for 3 days. They are actually great cold in a salad or tossed into a pasta the next day.
Do I need to peel the zucchini? Nope. The skin helps hold the slice together on the stick. Just wash it well and you’re good to go.
Can I add meat to the same stick? You can, but I don’t recommend it. Meat takes longer to cook than peppers. By the time the chicken is safe, the zucchini will be a memory. Keep meat and veggies on separate sticks.
Final Thoughts
There you have it—the only vegetable skewers recipe you need to dominate the BBQ circuit. It’s colorful, it’s healthyish, and it finally gives the vegetarians something to cheer about. Now go out there, fire up the grill, and show everyone that “eating your greens” can actually be the highlight of the party. Just try not to get too smug when the burger-eaters start asking for a bite. Happy grilling!