
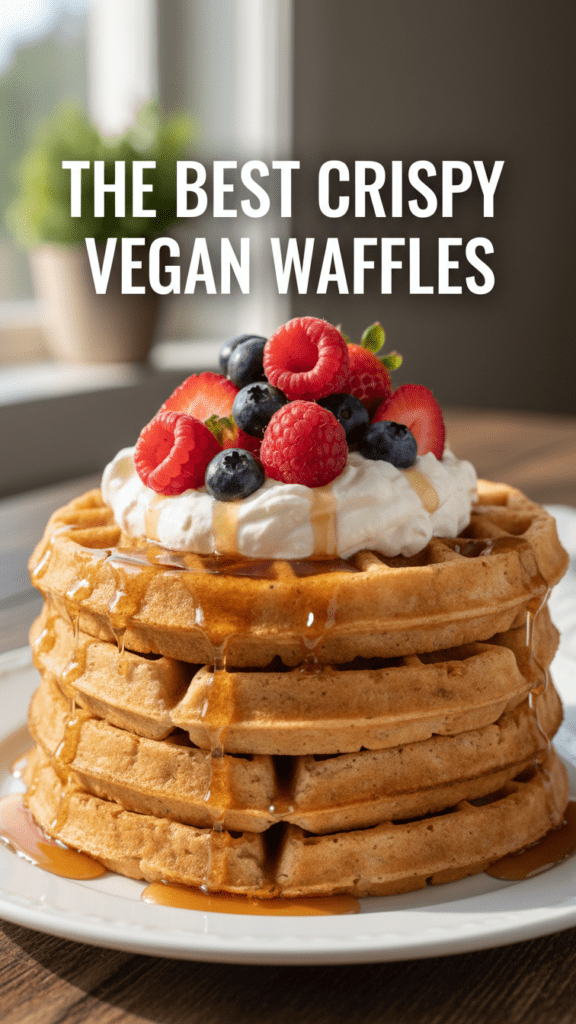
The Ultimate Vegan Waffles: Crispy, Fluffy, and So Good They’ll Make You Question Everything
Let’s be brutally honest for a second: we’ve all been there. It’s Sunday morning, you wake up craving a stack of crispy, golden waffles, then remember you’re trying to be “healthy” or “plant-based” or some other self-imposed dietary restriction. You pull out a sad box mix, add some water, and end up with something resembling a glorified pancake with a grid pattern. You take a polite bite, trying to smile while your soul quietly yearns for real butter and eggs. It’s a culinary tragedy, really. But what if I told you that vegan waffles actually exist that are so golden, so crispy on the outside, so fluffy on the inside, and so unapologetically elite that your dairy-loving friends will literally accuse you of lying about the ingredients?
I first mastered this recipe for a friend who thinks “vegan” is just a fancy word for “culinary disappointment.” One bite of this airy, vanilla-infused miracle later, and she was scraping the waffle iron, questioning her entire identity as a milk-enthusiast. This isn’t just a “safe option” for the plant-based crowd; it is objectively elite comfort food. If you want to shut down the skeptics and reclaim your kitchen dignity without the post-dairy bloat, you’re in the right place. Ready to ruin standard breakfast diners for yourself forever? Let’s get to the whisking.
Why This Recipe is the G.O.A.T. of Brunch
Why should you bother whipping up a batch of vegan waffles when you could just buy a box mix? Because your taste buds deserve a party, not a funeral. First off, the texture is a masterpiece of balance—think a shatteringly crisp exterior playing tag with a light, airy, and fluffy interior. It isn’t just “good for a vegan waffle”; it is a vibrant, complex breakfast that makes you feel like a Michelin-star chef in your own pajamas.
Secondly, it is ridiculously easy to assemble. If you can stir a spoon and press a button on a waffle iron without needing medical attention, you’ve already won. It’s a two-bowl wonder that makes you look sophisticated while the pantry staples do 90% of the heavy lifting. Plus, it impresses guests every single time—nothing says “I have my life together” like a perfectly golden waffle that doesn’t collapse under the weight of maple syrup. TBH, it’s the most empowering thing you can do with a handful of flour and some baking powder. 🙂
The Grocery List: Clean, Simple, and High-End

Don’t overcomplicate your life by searching for rare starches harvested under a blue moon. We are using powerhouse staples that actually play well together.
- All-Purpose Flour: 1.5 cups. (The foundation of our crispy stack).
- Plant Milk: 1.5 cups. Almond, oat, or soy—whatever is currently chilling in your fridge.
- Granulated Sugar: 2 tablespoons. Just a little extra sweetness, you deserve it.
- Baking Powder: 1 tablespoon. Our tiny worker for that epic rise and crispy texture.
- Neutral Oil: 1/4 cup. Melted coconut oil or avocado oil works perfectly.
- Apple Cider Vinegar: 1 tablespoon. This is our secret “egg” that helps activate the baking powder and creates fluff.
- Vanilla Extract: 1 teaspoon. We want it fragrant!
- Sea Salt: 1/2 teaspoon. It makes the flavors pop, trust me.
Tools & Kitchen Gadgets You’ll Actually Use
To make this the smoothest cooking experience of your life, snag these basics. I’ve linked my favorites so you can treat your kitchen to the upgrades it deserves!
- Waffle Iron: Essential for creating those perfect golden grids. Check out this highly-rated non-stick waffle iron on Amazon.
- Large Glass Mixing Bowl: Essential for whisking with enthusiasm. Check out this sturdy set on Amazon.
- Medium Mixing Bowl: For combining dry ingredients cleanly. Grab a sturdy set here.
- Stainless Steel Whisk: Perfect for getting that batter perfectly smooth. Try this ergonomic whisk.
- Ladle or Measuring Cup: For pouring batter cleanly into the waffle iron. Get a heat-resistant one here.
Step-by-Step Instructions: How to Win at Breakfast
Follow these steps precisely. IMO, the order of operations is the difference between a masterpiece and a gummy flat disk.
1. The Stage Setup
Preheat your waffle iron according to the manufacturer’s instructions. This is crucial for crispiness, so don’t rush it. Also, grab two mixing bowls. Yes, two. We’re going for efficiency.
2. The Dry Marriage
In your medium mixing bowl, whisk together the all-purpose flour, granulated sugar, baking powder, and sea salt. Whisk until there are no visible lumps. If you see a giant lump of flour, squash it. We have no room for negativity here.
3. The Wet Marriage
In your large glass mixing bowl, combine the plant milk, oil, apple cider vinegar, and vanilla extract. Whisk vigorously until everything is combined. FYI: the vinegar reacts with the baking powder to create those beautiful bubbles that make waffles fluffy. 🙂
4. The Grand Union
Pour the dry ingredients into the wet mixture. Whisk gently, just until combined. Do not over-mix! A few small lumps of flour are totally okay; over-mixing develops gluten, and we’re making fluffy waffles, not rubber tires. The batter should be slightly thick, but still pourable.
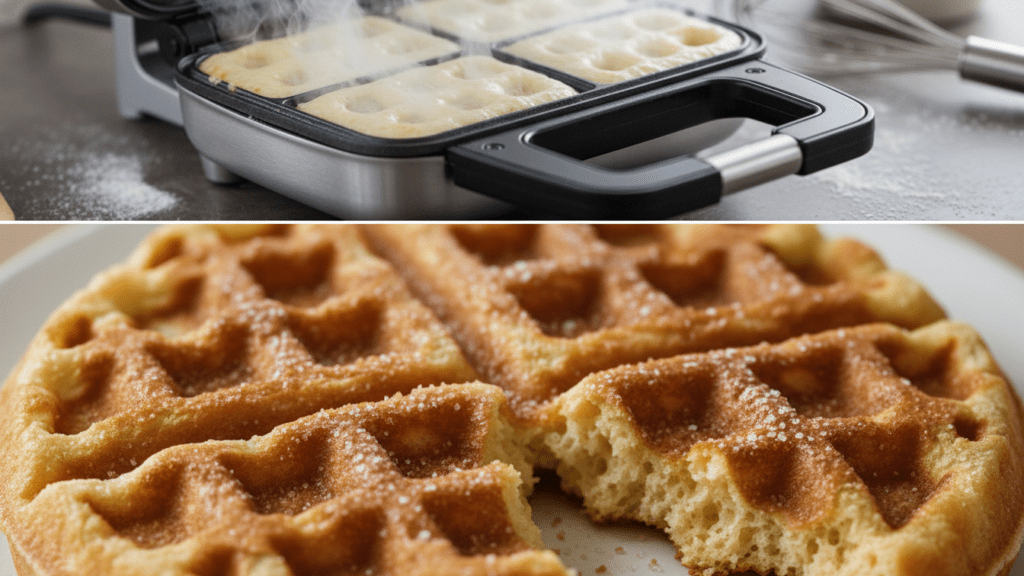
5. The Waffle Magic
Lightly grease your preheated waffle iron with a little more oil or cooking spray. Pour about 1/2 to 3/4 cup of batter onto the center of the iron (adjust for your specific waffle iron). Close the lid.
6. The Golden Grid
Cook for 4-6 minutes, or until the steam stops escaping and the waffles are deep golden brown and crispy. If you open it too early, you might rip your waffle. Patience, grasshopper.
7. The Patience Test
Carefully remove the cooked waffle with a fork or tongs. Transfer it to a plate. If you’re making more than one, keep them warm in a low oven (around 200°F/90°C) on a wire rack to maintain crispness. TBH, the hardest part is not eating them all straight off the iron.
Calories & Nutritional Info
For those of you who track your stats like a part-time job, here is the lowdown per waffle (makes 4-6 waffles, depending on your iron):
- Calories: ~210 kcal
- Net Carbs: ~29g (The fuel for your morning soul).
- Protein: ~4g (Basically a rounding error, but hey!).
- Fat: ~9g (Mostly healthy plant-based fats).
- Calcium: 10% DV (Thanks, fortified plant milk!).
Common Mistakes to Avoid: Don’t Be That Person
Even a recipe this simple can go sideways if you get cocky. Avoid these blunders to keep your kitchen dignity.
- Under-Heating the Waffle Iron: If it’s not hot enough, your waffles will be pale and soggy. Preheat your iron properly.
- Over-mixing the Batter: This is the https://www.google.com/search?q=%231 killer of fluffy waffles. Mix just until combined.
- Opening the Iron Too Early: You’ll cause a temperature drop and potentially tear your waffle. Wait for the steam to nearly stop.
- Not Greasing the Iron: Unless you have a truly magical non-stick surface, you need a little oil. Grease it lightly.
- Using Expired Baking Powder: If your baking powder is dead, your waffles will be flat and dense. Check its freshness. 🙂
Variations & Customizations
Feeling adventurous? Here are three ways to flip the script on these vegan waffles:
The “Chocolate Chip” Elite
Fold in 1/2 cup of dairy-free dark chocolate chips before cooking. It turns a breakfast item into a dessert that should probably be illegal.
The Berry Burst
Fold in 1/2 cup of fresh blueberries or raspberries into the batter. They burst on the iron and create beautiful tart pockets of joy. Keep a glass of plant milk nearby.
The Savory Twist
Skip the sugar and vanilla. Add 1/4 teaspoon of garlic powder and onion powder to the dry ingredients. Serve with vegan fried “chicken” for a comfort food explosion.
FAQ Section: You Asked, I Answered
Why are my vegan waffles not crispy? You might not have heated your waffle iron enough, or you pulled them too early. Cook until the steam almost stops for maximum crispiness.
Can I use any plant milk? Yes, almond, oat, or soy milk all work well. Oat milk tends to make them slightly richer.
How do I store leftover waffles? Keep them in an airtight container in the fridge for up to 3 days. Reheat in a toaster or oven for ultimate crispness.
Can I make these gluten-free? Absolutely! Swap the flour for a 1-to-1 gluten-free baking blend. IMO, King Arthur or Bob’s Red Mill work best for maintaining that fluffy texture.
What toppings go best with these? Maple syrup (duh), fresh fruit, vegan whipped cream, chopped nuts, or even a dollop of vegan yogurt. The world is your oyster.
Do I need a stand mixer? Nope! A simple whisk and a bowl are all you need for this recipe. It’s low-tech, high-reward breakfast at its finest.
Can I make the batter ahead of time? You can make the dry mix ahead, but don’t mix wet and dry until right before cooking. The baking powder starts reacting once wet, losing its oomph over time.
Final Thoughts
There you have it. A vegan waffles recipe that actually respects your time and your taste buds. They’re golden, they’re crispy, and they’re the only breakfast that makes me feel like I’m winning at adulthood on a random Tuesday. Once you make these, you’ll realize that store-bought mixes are just a sad, expensive lie. Go forth, plug in that waffle iron, and enjoy the arrangement. Just don’t be surprised when your neighbors start “accidentally” dropping by at brunch time. 🙂

