
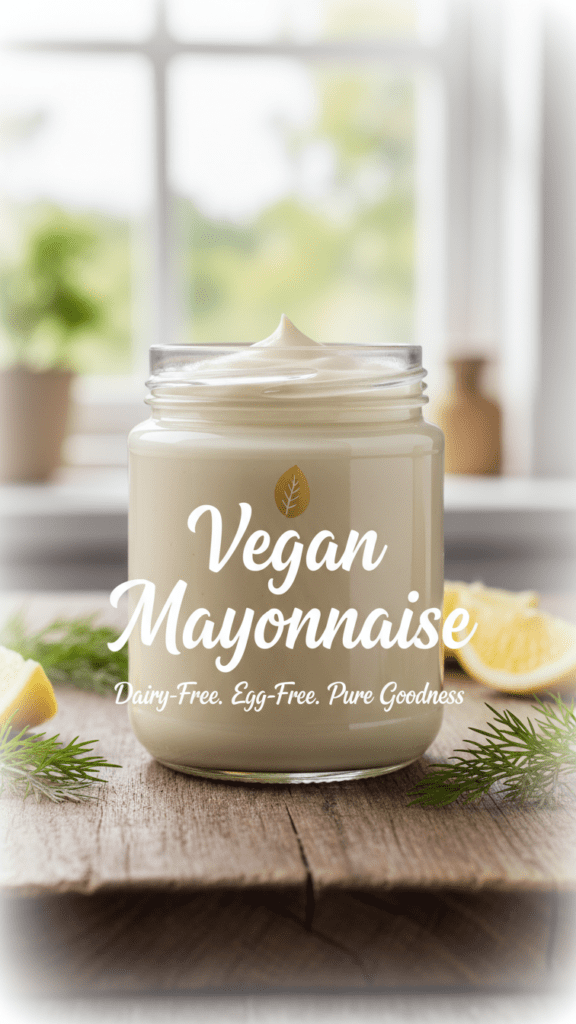
The Ultimate Creamy Vegan Mayonnaise: Better Than the Jar and Twice as Smug
Have you ever stood in the grocery store aisle, staring at a tiny jar of “artisanal” vegan mayonnaise, and nearly choked on the $9 price tag? We’ve all been there, clutching our wallets and wondering if the oil in that jar was blessed by a tech billionaire. It’s a tragic scene, really. You want the creamy, tangy goodness for your sandwich, but you don’t want to take out a second mortgage to get it. Usually, plant-based mayo substitutes taste like either whipped cardboard or a chemistry project gone wrong. But what if I told you that you could play food scientist in your own kitchen and create a mayo so lush, thick, and velvety that your egg-eating friends will start questioning their entire culinary worldview?
Why This Mayo Is the Actual G.O.A.T.
Most store-bought vegan condiments rely on a laundry list of gums and stabilizers that sound more like construction materials than food. This recipe changes the game because we use the biological magic of aquafaba (that’s fancy talk for chickpea water) to create an emulsion that defies the laws of physics. Why settle for a chemical cocktail when you can have a fresh, rich masterpiece made with ingredients you can actually pronounce?
You’ll love this version because it requires exactly three minutes of effort—most of which is spent finding the “on” switch for your blender. It’s the ultimate “impress your guests” move for potato salads or vegan burgers. When you serve this, guests won’t ask if it’s vegan; they’ll ask which high-end deli you raided. TBH, once you taste the fresh zing of real lemon against a silky oil base, you’ll realize that traditional mayo was just a boring phase you went through. 🙂
The Ingredient Lineup: No Mystery Lab Chemicals

Grab your shopping bags, but leave the skepticism at the door. We need quality over quantity here. If you use cheap, smelly oil, your mayo will taste like a garage—don’t say I didn’t warn you.
- 1/4 cup Aquafaba (The liquid from a can of chickpeas; it’s the secret “egg” replacement).
- 1 cup Neutral Oil (Grapeseed, Sunflower, or Avocado oil only—Extra Virgin Olive Oil is too bitter here).
- 1 tsp Dijon Mustard (Acts as a flavor bomb and a secondary emulsifier).
- 1 tbsp Fresh Lemon Juice (Freshly squeezed only—don’t even think about the plastic yellow bottle).
- 1 tsp Apple Cider Vinegar (The secret to that authentic “Best Foods” tang).
- 1/2 tsp Sea Salt (Salt wakes up the acidity and makes everything pop).
- Optional: 1/4 tsp Garlic Powder (For an “aioli” vibe that slaps).
Key Substitution: If you don’t have chickpeas, you can use soy milk (unsweetened!) as the base, but aquafaba provides a much closer texture to the “real” stuff. FYI, IMO, aquafaba is king.
Tools & Kitchen Gadgets: Your Creamy Command Center
You can’t make velvet with a blunt rock, and you can’t make thick mayo with a whisk and a prayer. Assemble these gadgets to ensure your kitchen doesn’t turn into a greasy mess of failed dreams.
- Immersion Blender (Stick Blender) (This is non-negotiable; a standard blender is much harder to work with for this).
- Wide-Mouth Pint Mason Jar (The perfect vessel; the blender head should just barely fit inside).
- Silicone Spatula (To scrape every precious drop of that liquid gold out of the jar).
- Measuring Spoons (Precision is a virtue, my friend).
- Lemon Squeezer (To get that juice out without the seeds).
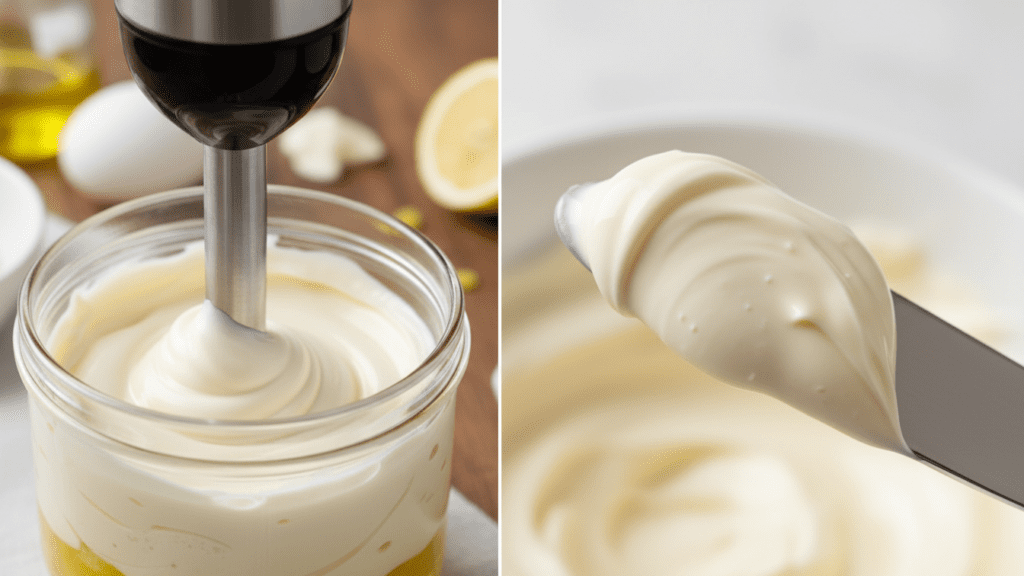
Step-by-Step: The 180-Second Journey to Perfection
Follow these steps closely. Don’t go rogue and try to “drip the oil slowly” like it’s 1950. We have technology now.
Step 1: The Layering Ritual
Dump your aquafaba, lemon juice, vinegar, mustard, and salt into the bottom of your mason jar. Ensure they are all sitting comfortably at the bottom before you pour in the oil. Do not stir! You want the oil to sit in a distinct layer on top of the watery ingredients.
Step 2: The Anchor Position
Lower your immersion blender all the way to the bottom of the jar. You want the blender head to be trapping that aquafaba mixture underneath it. Don’t turn it on yet! Just let it sit there for a second and contemplate your life choices.
Step 3: The Big Bang
Switch the blender to high. Do not move the blender for the first 20-30 seconds. You will see white, thick clouds of mayo starting to bloom from the bottom and rise through the oil. It looks like a lava lamp, but it’s much more edible.
Step 4: The Gentle Lift
Once the bottom 75% of the jar is white and opaque, slowly tilt and lift the blender to incorporate the remaining oil from the top. Use a slow, up-and-down motion. Within seconds, the entire jar will transform into a thick, glossy, spreadable dream.
Step 5: The Final Polish
Taste your creation. Does it need more salt? Another squeeze of lemon? Adjust it now. Give it one last five-second blast with the blender to finalize the deal.
Step 6: The Chill Factor
Screw the lid on and put it in the fridge. While you can eat it immediately, the texture becomes significantly thicker after at least 2 hours of chilling. IMO, the wait is the hardest part of the entire day.
Calories & Nutritional Info (Per 1-tbsp Serving)
This makes about 1.25 cups of mayo. It’s mostly oil, so let’s keep the portions somewhat tethered to reality.
- Calories: 95 kcal
- Total Fat: 10g
- Carbohydrates: 0.5g
- Fiber: 0g
- Protein: 0.2g
- Sodium: 75mg
Common Mistakes to Avoid (The “Soup” Hall of Shame)
Don’t let your condiment become a cautionary tale. Watch out for these easy-to-fix blunders.
- Moving the Blender Too Fast: If you lift the stick blender immediately, the emulsion will break. Be patient and stay at the bottom until it’s thick!
- Using Warm Ingredients: If your aquafaba is hot from the can, the mayo will be runny. Use room temp or cold ingredients for the best set.
- Bitter Oil Choice: Extra Virgin Olive Oil contains compounds that get bitter when whipped at high speeds. Stick to neutral oils like grapeseed.
- Wet Jar Syndrome: Even a drop of water can mess with an emulsion. Ensure your jar and blender are dry before you start.
Variations & Customizations
Once you master the base, the world is your non-dairy oyster. Try these three tweaks to keep your sandwiches interesting.
- The Sriracha Fire: Stir in 1 tbsp of Sriracha after blending for a spicy dip that is lethal on sweet potato fries.
- The Pesto Power: Fold in 2 tbsp of vegan basil pesto for a green, aromatic spread that screams Mediterranean vacation.
- The Truffle Flex: Add a few drops of truffle oil to the neutral oil before blending. It’s sophisticated, earthy, and makes you look rich.
FAQ: Your Mayo Mysteries Solved
Why is my vegan mayonnaise still runny? You likely moved the blender too soon or your ratio was slightly off. Don’t toss it! Add another tablespoon of aquafaba and try the blending process again from the bottom up.
How long does it stay fresh? Store it in an airtight jar in the fridge for up to 10 days. Since there are no eggs, it’s actually safer than traditional mayo, but the lemon juice will eventually lose its zing.
Can I use a food processor? You can, but you’ll have to use the “slow drip” method for the oil, which takes forever. The immersion blender method is vastly superior for home cooks.
Does it taste like chickpeas? Surprisingly, no. The mustard, vinegar, and lemon completely neutralize the bean flavor. It just tastes like pure, creamy indulgence.
Is this mayo safe for keto? Yes! If you use avocado oil and skip the maple syrup (not in this recipe anyway), it is 100% keto-friendly and high in healthy fats.
Can I freeze it? Please don’t. Emulsions don’t handle freezing well; you’ll end up with a separated mess of oil and water when it thaws.
Why is it whiter than regular mayo? Egg yolks give traditional mayo a yellow tint. Since aquafaba is clear/tan, the result is a bright, clean white that looks beautiful on a plate.
Final Thoughts
There you have it—the only vegan mayonnaise recipe you’ll ever need to survive a world full of dry bread. It’s creamy, it’s zingy, and it proves that plants (and bean water) are actually magic. Go ahead, fill a jar, and try not to feel too smug when you realize you never have to buy store-bought again. If you manage to save some for your leftovers, you have more willpower than I do. Happy blending!

