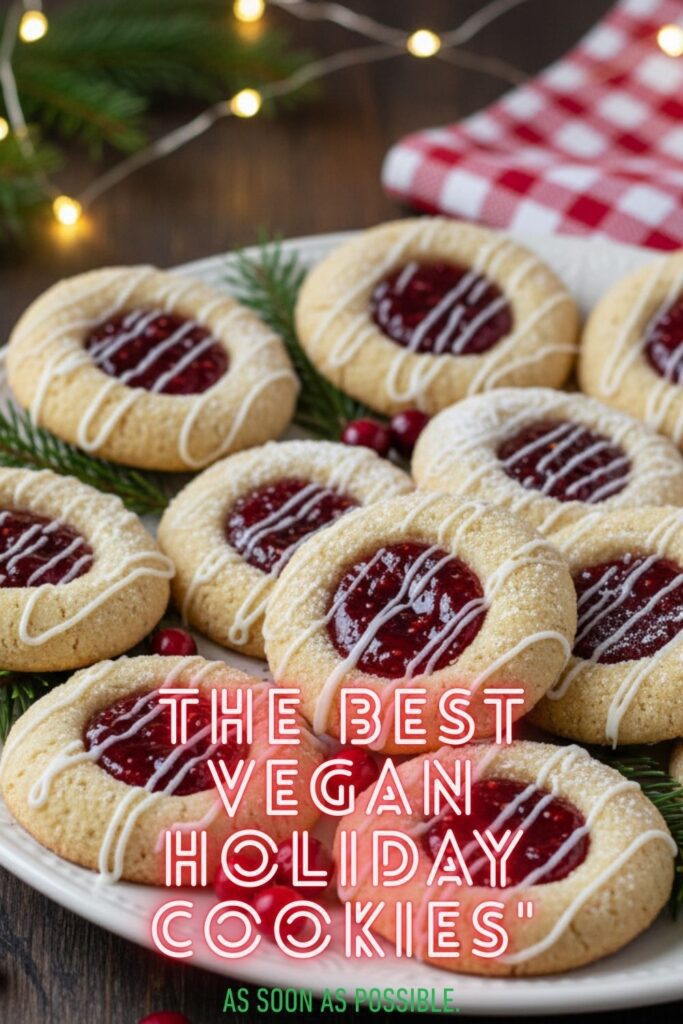
The Vegan Thumbprint Cookies That’ll Fool Your Grandma
Ah, the holiday cookie exchange. A beautiful tradition where friends and family gather to share their most beloved baked goods. It’s also the time of year when, as a vegan, you face the dreaded question: “Can you even eat any of these?” Well, this year, you’re not just showing up with a sad store-bought alternative. You’re showing up with the most buttery, tender, and delicious vegan holiday cookies on the planet: Classic Jam Thumbprints.
Get ready to blow some minds. These cookies are so good, so melt-in-your-mouth perfect, that your guests will accuse you of secretly using butter and eggs. This recipe is your delicious proof that you don’t need dairy or eggs to create a holiday cookie that’s worthy of center stage on the dessert table.
Why This Recipe is an Absolute Game-Changer

Let’s talk about why these thumbprints are superior. First, the texture is divine. We’re talking a rich, tender, crumbly shortbread that dissolves in your mouth, all thanks to a few simple vegan baking tricks. They are the polar opposite of the dry, cardboard-like vegan cookies that give plant-based baking a bad name.
Second, they are incredibly easy and fun to make! The dough is simple, and the process of rolling, pressing, and filling them with jewel-toned jam is pure, therapeutic holiday joy. They look stunning on a platter, they’re perfect for gifting, and they will, without a doubt, convert even the most hardcore vegan-skeptic in your life.
The Plant-Powered Ingredient List


Here’s what you need to create these little bites of buttery, vegan bliss. The quality of your vegan butter really matters here, so choose wisely!
For the Shortbread Cookies:
- 1 cup (226g) Vegan Butter Sticks: MUST be the kind in sticks, not from a tub. It needs to be firm and cold. My go-to is Miyoko’s Kitchen Cultured Vegan Butter or Melt Organic Vegan Butter.
- ½ cup (60g) Powdered Sugar: Sifted. Powdered sugar gives the cookies that signature melt-in-your-mouth texture.
- 1 tsp Vanilla Extract: Because it’s not a cookie without vanilla.
- ½ tsp Almond Extract (optional): This is the secret ingredient that gives them that classic, bakery-style shortbread flavor.
- 2 cups (240g) All-Purpose Flour: Spooned and leveled.
- 2 tbsp Cornstarch: Another secret weapon! Cornstarch makes the cookies extra tender.
- ¼ tsp Salt: To balance the sweetness.
For the Filling & Glaze:
- ¼ cup of Your Favorite Jam: Raspberry or apricot are classic choices, but use whatever makes you happy!
- Optional Glaze: ½ cup powdered sugar mixed with 1-2 teaspoons of plant-based milk.
Tools & Kitchen Gadgets Used
No need for a professional pastry chef’s setup. Here’s the simple gear you’ll need:
- Electric Mixer (Hand or Stand): Essential for properly creaming the vegan butter and sugar.
- Large Mixing Bowl: The command center for your cookie operation.
- Baking Sheets: You’ll need at least two.
- Parchment Paper: For a stick-free, easy-cleanup baking experience. Don’t be a hero; use the parchment paper.
- Measuring Spoons and Cups: Precision is key in baking.
- Small Spoon or Piping Bag: For neatly filling the cookies with jam.
Step-by-Step Guide to Cookie Perfection
Alright, let’s get our bake on. It’s easier than you think!
H3: Make the “Buttery” Dough
- Cream the Butter and Sugar: In your large mixing bowl, beat the cold, cubed vegan butter and the sifted powdered sugar with your electric mixer on medium-high speed. Keep beating for about 2-3 minutes until it’s light, pale, and fluffy.
- Add the Flavor: Beat in the vanilla and almond extracts until they are just combined.
- Combine the Dry Stuff: In a separate medium bowl, whisk together the flour, cornstarch, and salt.
- Bring It All Together: With the mixer on low speed, gradually add the dry ingredients to the creamed butter mixture. Mix until the dough just starts to come together. Do not overmix, or your cookies will be tough instead of tender. Use your hands to gently form the last bits into a cohesive ball of dough.
H3: The All-Important Chill Time
- Wrap and Chill: Flatten the dough into a disc, wrap it tightly in plastic wrap, and refrigerate for at least 30 minutes. This step is crucial! Chilling the dough solidifies the vegan butter, which prevents your beautiful cookies from spreading into flat, sad puddles in the oven.
H3: Shape, Fill, and Bake
- Preheat & Prep: When you’re ready to bake, preheat your oven to 350°F (175°C) and line your baking sheets with parchment paper.
- Roll ‘Em Up: Scoop out about 1 tablespoon of the chilled dough and roll it into a smooth ball between your palms. Place the balls about 2 inches apart on the prepared baking sheets.
- Make Your Mark: Use your thumb (or the back of a ½ teaspoon measuring spoon) to gently press an indentation into the center of each dough ball. Don’t press all the way through!
- Fill with Jam: Carefully spoon about ¼ to ½ teaspoon of jam into each indentation. Be careful not to overfill, or the jam will bubble over and burn.
- Bake: Bake for 12-15 minutes, until the edges are just barely starting to turn a light golden brown. The tops should still be pale.
- Cool Down: Let the cookies cool on the baking sheet for 5-10 minutes before carefully transferring them to a wire rack to cool completely. They are delicate while warm!
H3: The Optional (But Recommended) Drizzle
- Mix the Glaze: Once the cookies are completely cool, whisk together the powdered sugar and 1 teaspoon of plant-based milk. Add more milk, a few drops at a time, until you have a thick but drizzle-able consistency.
- Drizzle Away: Use a spoon or a piping bag to drizzle the glaze over your cooled cookies. Let the glaze set before storing.
Calories & Nutritional Info

Here’s a rough estimate per cookie, because information is power.
- Calories: Approximately 95 kcal
- Fat: 5g
- Carbohydrates: 12g
- Sugar: 5g
- Protein: 1g
(Disclaimer: This is just an estimate and will vary based on the specific vegan butter, jam, and serving size.)
Common Mistakes to Avoid (You’re Welcome)
Let’s make sure your vegan cookies are flawless. Avoid these common blunders.
- Using Soft Vegan Butter/Margarine: I’m begging you. Use firm, stick-style vegan butter. The soft stuff in a tub has a higher water content and will cause your cookies to spread into thin, greasy crisps.
- Over-mixing the Dough: Once you add the flour, mix only until it’s just combined. Over-mixing develops the gluten in the flour, which will make your shortbread tough and dense instead of tender and crumbly.
- Skipping the Chill: Are you sensing a theme in baking? If you don’t chill the dough, the vegan butter will melt too quickly in the oven, and your cookies will lose their shape. A minimum of 30 minutes in the fridge is non-negotiable.
- Overbaking: These cookies are done when the bottoms and edges are a very light golden brown. The tops should remain pale. If you wait for the tops to get color, you’ve gone too far, and they’ll be dry and hard.
Variations & Customizations
This recipe is a perfect canvas for your creativity!
- Gluten-Free Thumbprints: Swap the all-purpose flour for a good quality 1-to-1 gluten-free baking flour blend that contains xanthan gum.
- Chocolate Lover’s Dream: Reduce the flour by 2 tablespoons and add 2 tablespoons of unsweetened cocoa powder to the dry ingredients. Fill the thumbprints with melted vegan chocolate or a raspberry jam for a classic chocolate-raspberry combo.
- Nutty Perfection: Before making the indentation, roll the dough balls in finely chopped pecans, almonds, or even festive pistachios for a crunchy, toasty coating.
FAQ: Your Vegan Baking Questions, Answered
Let’s tackle some of the most common questions about making vegan cookies.
1. What is the best brand of vegan butter for baking?
Brands that come in a firm stick or block form, designed to mimic dairy butter, are best. Miyoko’s Kitchen, Melt, and Country Crock Plant Butter (in the avocado or olive oil sticks) are all excellent choices that provide great flavor and texture.
2. How do these cookies hold up without eggs?
In a shortbread-style cookie like this, the primary binder is the fat (vegan butter). The cornstarch also helps to bind and create a tender texture, so you don’t even miss the eggs!
3. Why did my vegan cookies spread so much?
This is almost always due to one of two things: your vegan butter was too soft/the wrong kind (from a tub), or you didn’t chill the dough long enough. Chilling is key!
4. Can I make the dough ahead of time?
Yes! The dough can be made and refrigerated for up to 3 days. You can also freeze the dough disc for up to 3 months. Just thaw it in the fridge before you plan to bake.
5. Can I use a different type of sweetener?
While powdered sugar is best for the texture, you could use regular granulated sugar, but the cookies will be slightly crispier rather than melt-in-your-mouth. For a refined sugar-free option, you could try powdered coconut sugar.
6. My jam is too thick/thin. What should I do?
If your jam is too thick to spoon easily, you can warm it in the microwave for 10-15 seconds to loosen it up. If it’s too thin, you can simmer it in a small saucepan for a few minutes to reduce and thicken it.
7. How do I store these cookies?
Store them in an airtight container at room temperature for up to 5 days. If you stack them, place a sheet of parchment paper between the layers to protect the jam and glaze.
Final Thoughts
You are now fully equipped to bake the best vegan holiday cookies of your life. These little thumbprints are more than just a dessert; they’re proof that compassionate, plant-based baking can be every bit as decadent and celebratory as the traditional stuff. So go ahead, bake a double batch, and get ready to share the delicious, vegan holiday spirit!