
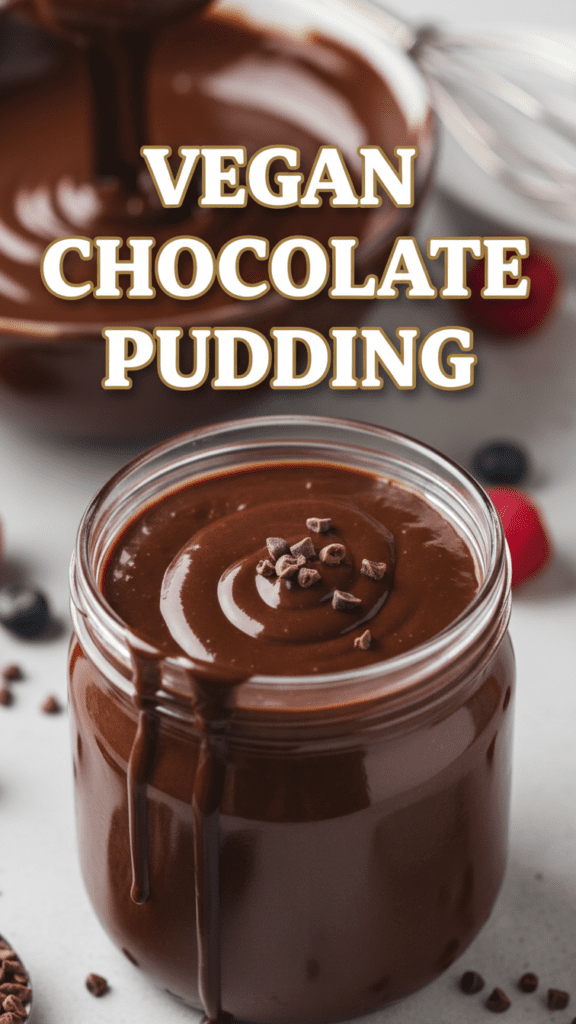
The Ultimate Silky Vegan Chocolate Pudding: Better Than Your Childhood Snack Pack
Have you ever had a midnight craving so intense you contemplated eating a chocolate-scented candle? We’ve all been there, standing in front of the fridge at 1 AM, searching for a sign of cocoa life and finding only a half-empty jar of pickles. It’s a tragic scene. Usually, when we think of a quick fix, we reach for those plastic cups of “pudding” that have a shelf life longer than most civilizations. But what if I told you that you could whip up a vegan chocolate pudding so decadent, so velvety, and so rich that you’d never look at a Snack Pack the same way again? Honestly, this recipe is the culinary equivalent of finding a twenty-dollar bill in your old jeans.
Why This Pudding Is the Absolute G.O.A.T.
Most people assume “vegan” is just code for “tastes like a wet cardboard box.” This recipe flips the script because it relies on high-quality cocoa and natural thickeners to create a texture that defies the laws of physics. Why settle for a gritty, bland mess when you can have a glossy masterpiece that actually loves you back?
You’ll love this version because it requires exactly zero fancy equipment and takes about ten minutes of actual work. It’s the perfect “I’m a sophisticated adult” dessert for dinner parties, yet it’s simple enough for a Tuesday night binge-watching session. Plus, it uses pantry staples you likely already have hidden behind that bag of quinoa. TBH, once you taste the way the vanilla interacts with the dark chocolate, you’ll realize your life was previously just a series of missed opportunities. 🙂
The Ingredient Lineup: No Mystery Lab Chemicals
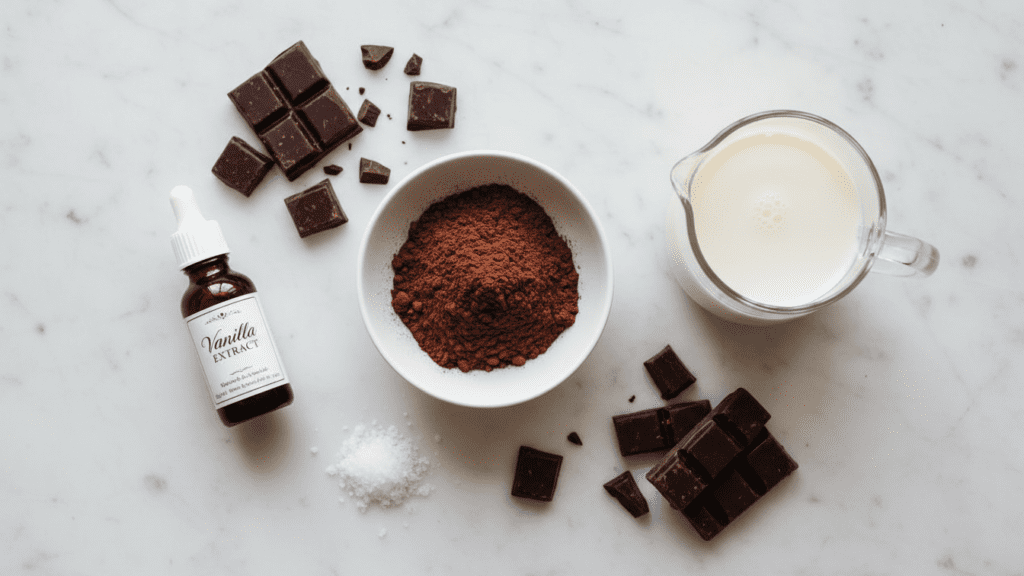
Grab your shopping bags, but leave the skepticism at the door. We need quality here, not quantity. If you can’t find one specific plant milk, don’t panic—I’ve got you covered.
- 2 cups Unsweetened Plant Milk (Soy or Oat milk works best for that “dairy-like” creaminess).
- 1/2 cup Granulated Sugar (Or coconut sugar if you’re feeling extra earthy).
- 1/3 cup High-Quality Cocoa Powder (This is the star, so don’t buy the cheap dusty stuff).
- 3 tbsp Cornstarch (The magic “thickening” agent).
- 1/4 tsp Sea Salt (Salt wakes up the chocolate and makes it sing).
- 1 tsp Pure Vanilla Extract (Measure this with your heart).
- 2 oz Vegan Dark Chocolate, chopped (Optional, but highly recommended for an extra punch of luxury).
Key Substitution: If you have a corn allergy, swap the cornstarch for arrowroot powder. It provides the same silky finish without the corn.
Tools & Kitchen Gadgets: Your Dessert Arsenal
You can’t build a masterpiece with a plastic fork and a prayer. Assemble these tools to make the process smoother than a fresh jar of tahini.
- Medium Heavy-Bottomed Saucepan (Prevents the chocolate from scorching like my ex’s heart).
- Stainless Steel Whisk (Essential for banishing those pesky cocoa lumps).
- Measuring Cups and Spoons (Precision is a virtue, my friend).
- Small Glass Ramekins or Jars (For that professional “I have my life together” presentation).
- Silicone Spatula (To scrape every delicious molecule out of the pot).
- Plastic Wrap or Parchment Paper (To prevent the dreaded “pudding skin”).
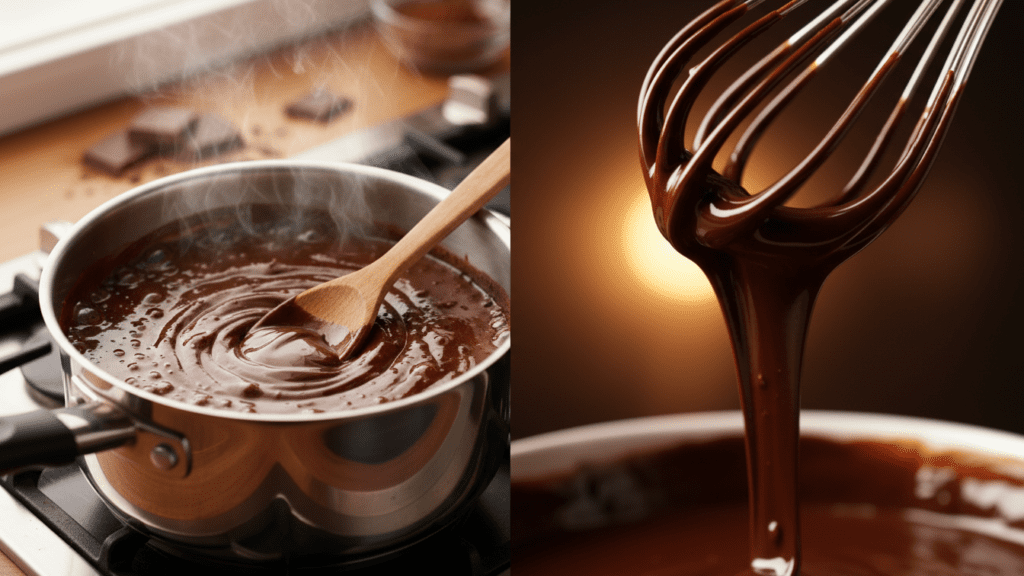
Step-by-Step: From Cocoa to Creamy Perfection
Ready to cook? Follow these steps closely. Don’t go rogue and try to “healthy-up” the recipe by skipping the sugar—that’s how you end up with chocolate-colored soup, and nobody invited soup to this party.
Step 1: The Dry Mix
Whisk together the sugar, cocoa powder, cornstarch, and sea salt in your saucepan while it’s still cold. Doing this before adding liquid ensures you won’t have to chase tiny dry lumps around the pot for twenty minutes.
Step 2: The Cold Pour
Slowly whisk in the plant milk. Start with a splash to make a thick paste, then add the rest. This “slow-mo” technique is the only way to guarantee a texture smoother than a silk robe.
Step 3: Heat It Up
Turn the stove to medium heat. Whisk constantly. This is your workout for the day. Do not walk away to check TikTok! The second you leave, the bottom will burn. Keep whisking until the mixture starts to bubble and thicken.
Step 4: The Finishing Moves
Once it thickens (it should coat the back of a spoon), remove it from the heat. Stir in the vanilla extract and the chopped dark chocolate. The extra chocolate melts in and adds a layer of depth that makes people think you actually know what you’re doing.
Step 5: Portions and Prep
Pour the liquid gold into your ramekins. If you hate “pudding skin,” press a piece of plastic wrap directly onto the surface of the pudding while it’s still hot. If you’re a weirdo who likes the skin, leave it open. (I won’t judge, but I will be confused).
Step 6: The Big Chill
Let the pudding cool to room temperature, then slide it into the fridge for at least 2-3 hours. This allows the starch to set and the flavors to finalize their meeting. IMO, the wait is the hardest part of the entire day.
Calories & Nutritional Info (Per Serving)
Since we are being transparent, here is the damage for one of four standard servings. It’s a treat, not a kale salad, so adjust your expectations accordingly.
- Calories: 215 kcal
- Total Fat: 6g
- Carbohydrates: 38g
- Fiber: 3g
- Protein: 2g
- Sodium: 160mg
Common Mistakes to Avoid (The “Lumpy Mess” Guide)
Don’t let your dessert become a cautionary tale. Avoid these classic blunders if you want to keep your foodie reputation intact.
- Whisking Too Weakly: If you aren’t putting some muscle into it, the cornstarch will clump. Whisk like you mean it.
- Walking Away From the Stove: Chocolate burns faster than a cheap candle. Stay at your post until it thickens.
- Using Cold Milk in a Hot Pan: If you add milk to a hot pan of dry ingredients, you’ll get “cocoa pebbles” instead of pudding. Start cold.
- Forgetting the Salt: Without salt, the chocolate is one-dimensional. Add that pinch to unlock the flavor.
Variations & Customizations
Once you master the basic silk, try these three twists to keep your palate guessing. Why settle for plain when you can have a party in a jar?
- The Mexican Hot Chocolate: Add a pinch of cinnamon and a tiny dash of cayenne pepper to the dry mix for a heat that lingers.
- The Salted Caramel: Drizzle vegan caramel sauce and sprinkle extra flaky sea salt over the top right before serving.
- The Peanut Butter Dream: Swirl a tablespoon of creamy peanut butter into each ramekin before chilling. It’s basically a Reese’s cup in a jar.
FAQ: Your Pudding Problems Answered
Why is my vegan chocolate pudding still runny? You likely didn’t let it reach a full simmer. The cornstarch needs heat to activate its “thickening powers.” Simmer for 1 minute while whisking!
Can I use almond milk? You can, but almond milk is naturally thinner. IMO, Soy or Oat milk provides a much better, richer mouthfeel for puddings.
Do I have to use dark chocolate? No, but it adds a “luxury” factor that cocoa powder alone can’t achieve. It’s the difference between a motel and a five-star resort.
How long does it stay fresh? Store it in the fridge for up to 4 days. It actually gets slightly thicker and better on day two!
Is this pudding gluten-free? Yes! Cornstarch is naturally gluten-free. Just check your plant milk label to ensure there’s no “hidden” gluten in the stabilizers.
Can I make it sugar-free? You can swap the sugar for a liquid sweetener like Stevia or Monk fruit, but you may need to adjust the cornstarch slightly to get the right set.
Why does my pudding taste like cornstarch? This happens if you don’t “cook out” the starch. Make sure you let the mixture simmer for a full minute to get rid of that floury taste.
Final Thoughts
There you have it—the only vegan chocolate pudding recipe you’ll ever need to survive a midnight snack crisis. It’s rich, it’s silky, and it proves that plants are actually magic. Go forth, fill a jar, and try not to feel too smug when you realize you never have to buy store-bought again. If you manage to save even one ramekin for tomorrow’s breakfast, you have more willpower than I do. Happy whisking!
Would you like me to help you create a shopping list for these ingredients?

