
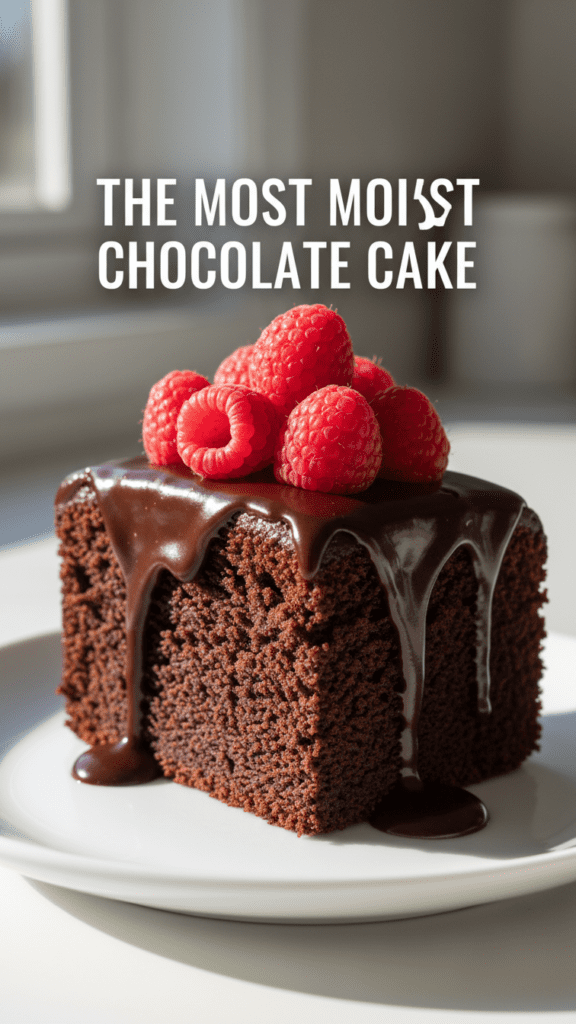
The Ultimate Vegan Chocolate Cake: A Moist Masterpiece That Defies Logic
Let’s be brutally honest for a second: we’ve all been there. You’re at a birthday party, someone announces there’s a “special” dessert, and out comes a block of something that looks like a brown brick and tastes like sweetened sawdust. You take a polite bite, trying to smile while your soul quietly yearns for real butter and eggs. It’s a culinary tragedy, really. But what if I told you that a vegan chocolate cake actually exists that is so dark, so moist, and so unapologetically elite that your dairy-loving friends will literally accuse you of lying about the ingredients?
I first mastered this recipe for a friend who thinks “vegan” is just a fancy word for “culinary disappointment.” One bite of this silky, cocoa-infused miracle later, and she was scraping the plate, questioning her entire identity as a milk-enthusiast. This isn’t just a “safe option” for the plant-based crowd; it is objectively elite comfort food. If you want to shut down the skeptics and reclaim your kitchen dignity without the post-dairy bloat, you’re in the right place. Ready to ruin standard bakery cakes for yourself forever? Let’s get to the mixing.
Why This Recipe is the G.O.A.T. of Plant-Based Desserts
Why should you bother whisking up a vegan chocolate cake when you could just buy a box mix? Because your taste buds deserve a party, not a funeral. First off, the flavor profile is a masterpiece of balance—think the intense depth of Dutch-processed cocoa playing tag with the subtle warmth of vanilla and a secret pinch of coffee. It isn’t just “good for a vegan cake”; it is a vibrant, complex dessert that makes you feel like a Michelin-star pastry chef in your own pajamas.
Secondly, it is ridiculously easy to assemble. If you can stir a spoon and press a button on an oven without needing medical attention, you’ve already won. It’s a one-bowl wonder that makes you look sophisticated while the pantry staples do 90% of the heavy lifting. Plus, it impresses guests every single time—nothing says “I have my life together” like a perfectly crumbed cake that doesn’t fall apart. TBH, it’s the most empowering thing you can do with a bag of flour and some vinegar. 🙂
The Grocery List: Clean, Simple, and High-End
Don’t overcomplicate your life by searching for rare starches harvested under a blue moon. We are using powerhouse staples that actually play well together.
- All-Purpose Flour: 1.5 cups. (The foundation of our cocoa empire).
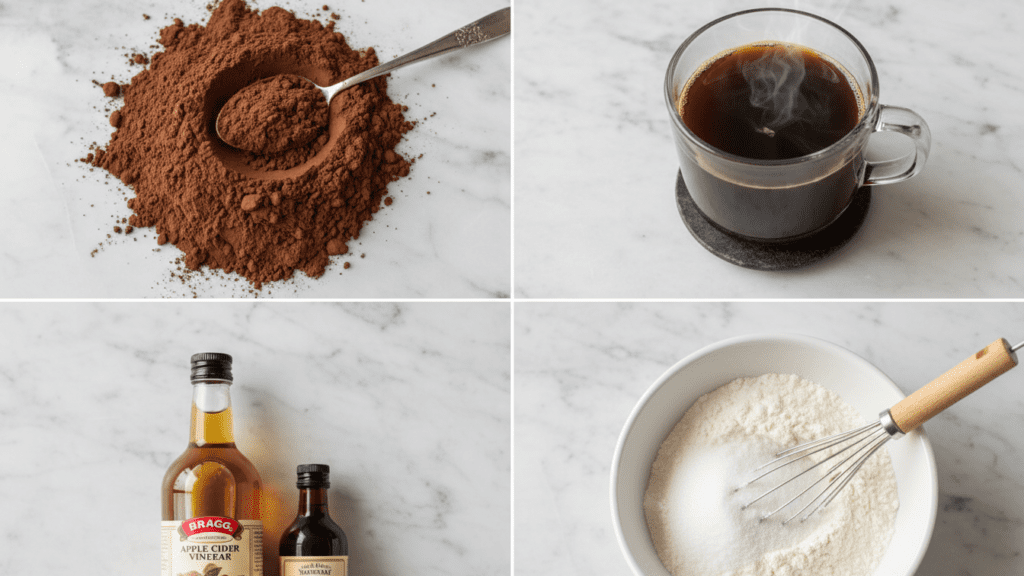
- Unsweetened Cocoa Powder: 1/2 cup. Use Dutch-processed for that “viral” dark look.
- Granulated Sugar: 1 cup. (Because we aren’t making a salad).
- Baking Soda: 1 teaspoon. Our tiny worker for that perfect rise.
- Sea Salt: 1/2 teaspoon. It makes the chocolate actually show up for work.
- Warm Water or Coffee: 1 cup. Pro-tip: Coffee makes the chocolate taste “expensive.”
- Neutral Oil: 1/3 cup. Think avocado or canola oil.
- Apple Cider Vinegar: 1 teaspoon. This is the secret “egg” that creates the fluff.
- Vanilla Extract: 1 tablespoon. Yes, a whole tablespoon. We want it fragrant!
Tools & Kitchen Gadgets You’ll Actually Use
To make this the smoothest baking experience of your life, snag these basics. I’ve linked my favorites so you can treat your kitchen to the upgrades it deserves!
- 8-inch Round Cake Pan: Essential for that classic height. Check out this professional-grade pan on Amazon.
- Parchment Paper: Because “scraping cake bits off a pan” is a hobby nobody wants. Grab a heavy-duty roll here.
- Stainless Steel Whisk: Perfect for getting that batter perfectly smooth. Try this ergonomic whisk.
- Large Glass Mixing Bowl: You need room to whisk with enthusiasm. Grab a sturdy set here.
- Wire Cooling Rack: The secret to preventing a soggy bottom. Get a professional one here.
Step-by-Step Instructions: How to Win at Baking
Follow these steps precisely. IMO, the order of operations is the difference between a masterpiece and a starchy puddle.
1. The Stage Setup
Preheat your oven to 350°F (175°C). Grease your cake pan and line the bottom with parchment paper. Trust me, skipping the parchment is the fastest way to turn a cake into a pile of “rustic crumbles.”
2. The Dry Marriage
In your large mixing bowl, sift together the flour, cocoa powder, sugar, baking soda, and salt. Whisk them until the mixture looks like a uniform, chocolatey cloud. If you see a giant lump of cocoa, squash it. We have no room for negativity here.
3. The Liquid Integration
Make a well in the center of the dry ingredients. Pour in the warm water (or coffee), oil, vinegar, and vanilla. Whisk gently starting from the center and moving outward. FYI: the vinegar reacts with the baking soda to create bubbles—that’s your cake “breathing.” 🙂
4. The Final Whisk
Whisk until the batter is smooth and glistening like it’s about to go on a first date. Don’t over-mix! If you beat it like it owes you money, the gluten will toughen up, and you’ll be eating a chocolate-flavored tire.
5. The Golden Window
Pour the batter into the prepared pan. Slide it into the oven for 25-30 minutes. You are looking for a surface that springs back when poked and a toothpick that comes out with just a few moist crumbs. If the kitchen smells like heaven, you’re on the right track.
6. The Patience Test
Remove from the oven and let it sit in the pan for exactly 10 minutes. Then, flip it onto your wire cooling rack. Do not frost it yet. If you put frosting on a warm cake, it will vanish into the abyss, leaving you with a sticky, invisible mess. Let it cool completely. TBH, this is the hardest part of the recipe.
Calories & Nutritional Info
For those of you who track your stats like a part-time job, here is the lowdown per slice (serves 8):
- Calories: ~210 kcal
- Net Carbs: ~34g (The fuel for your soul).
- Protein: ~3g (Basically a rounding error, but hey!).
- Fat: ~9g (Mostly healthy plant-based fats).
- Iron: 10% DV (Thanks, cocoa power!).
Common Mistakes to Avoid: Don’t Be That Person
Even a recipe this simple can go sideways if you get cocky. Avoid these blunders to keep your kitchen dignity.
- Using Cold Coffee/Water: Warm liquid helps bloom the cocoa powder for a deeper flavor. Go warm.
- Skipping the Vinegar: The vinegar is the chemical “magic” that makes it fluffy. Don’t skip it.
- Opening the Oven Early: You’ll cause a temperature drop and your cake might collapse. Patience is a flavor.
- Measuring Flour by Volume: Scooping packs the flour down. Whisk the flour first then scoop, or use a scale.
- Using Cheap Cocoa: If the cocoa tastes like cardboard, the cake will too. Buy the good stuff. 🙂
Variations & Customizations
Feeling adventurous? Here are three ways to flip the script on this vegan chocolate cake:
The Spicy Mayan Kick
Add a 1/2 teaspoon of cinnamon and a tiny pinch of cayenne pepper to the dry mix. It creates a heat that hits the back of your throat and makes the chocolate taste even deeper.
The Berry Blast
Fold in 1/2 cup of fresh raspberries before baking. They burst in the oven and create beautiful tart pockets of joy. Keep a glass of water nearby. 🙂
The “Almond Joy” Fusion
Swap the water for coconut milk and add 1/2 teaspoon of almond extract. Top with shredded coconut for a tropical vacation in every bite.
FAQ Section: You Asked, I Answered
Can I make this vegan chocolate cake gluten-free? Absolutely! Swap the flour for a 1-to-1 gluten-free baking blend. IMO, King Arthur or Bob’s Red Mill work best for maintaining that “real cake” texture.
Why did my cake sink in the middle? You probably under-baked it or used expired baking soda. Check your dates! Also, don’t slam the oven door; treat the cake like a sleeping baby.
Can I use white vinegar instead of apple cider vinegar? Yes, you can. It won’t have that slight fruity undertone, but it will still provide the necessary acidic reaction for the rise.
How do I store leftovers? Keep it in an airtight container at room temperature for 3 days or in the fridge for 5. FYI: it actually gets fudgier on day two!
Can I make these as cupcakes? You absolute genius. Yes! Bake at the same temperature for 18-22 minutes. You’ll get about 12 cupcakes of pure joy.
Do I need a stand mixer? Nope! A simple whisk and a bowl are all you need. This is low-tech, high-reward baking at its finest.
What is the best frosting for this? A simple vegan chocolate ganache (dairy-free chocolate + coconut milk) is the elite choice. It’s rich, glossy, and takes 2 minutes.
Final Thoughts
There you have it. A vegan chocolate cake recipe that actually respects your time and your taste buds. It’s dark, it’s fresh, and it’s the only dessert that makes me feel like I’m winning at adulthood on a random Tuesday. Once you make this, you’ll realize that store-bought “health” cakes are just a sad, expensive lie. Go forth, whisk some cocoa, and enjoy the arrangement. Just don’t be surprised when your neighbors start “accidentally” dropping by at dessert time. 🙂

