
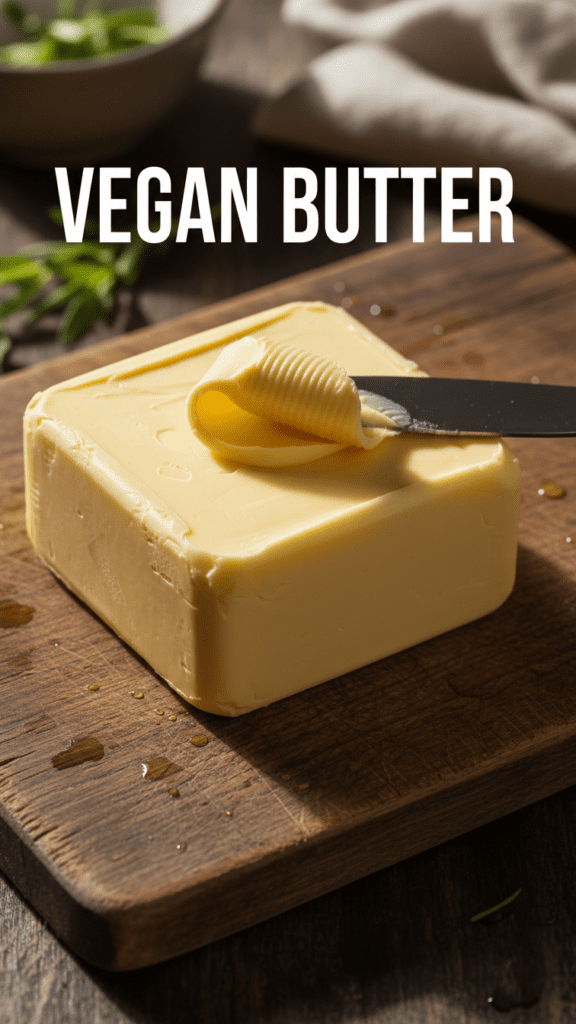
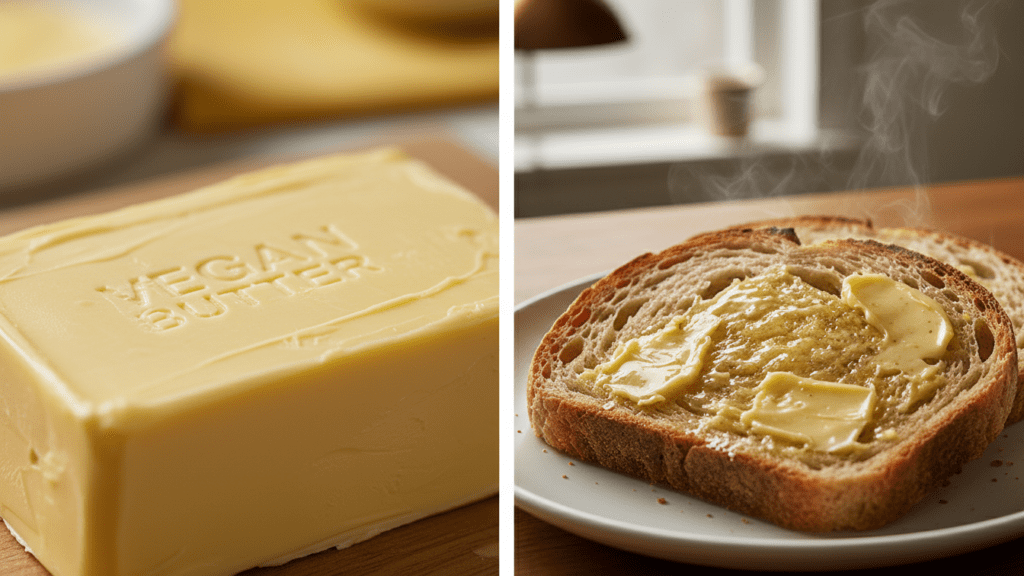
The Ultimate Easy Vegan Butter Recipe: Better Than The Real Thing?
So, you finally decided to ditch the dairy, but you realized that toast without a salty, melty schmear feels like a personal tragedy? I get it. We’ve all been there, staring at a tub of overpriced “oil-based spread” in the grocery store that tastes like disappointment and sadness. What if I told you that you could whip up a batch of creamy, decadent vegan butter in your own kitchen that actually melts and browns?

Believe it or not, you don’t need a degree in food science or a laboratory in your basement to pull this off. You just need a few basic ingredients and a tiny bit of patience. Are you ready to stop settling for mediocre substitutes and start living your best plant-based life? Let’s dive into the world of homemade fats.
Why This Vegan Butter is Absolutely Essential
First of all, the flavor profile of this vegan butter blows every store-bought brand out of the water. Most commercial options rely on palm oil and “natural flavors” (which is just code for mystery chemicals). This recipe uses real food to create that signature tang and richness you crave.

Secondly, you will save a small fortune. Have you seen the price of premium plant-based sticks lately? It’s practically a down payment on a house. By making your own, you control the quality and the cost, all while feeling like a culinary wizard.
Finally, the bragging rights are immense. Imagine hosting a brunch and casually mentioning that the butter on the warm biscuits is handcrafted and dairy-free. Your friends will either be deeply impressed or slightly intimidated. Honestly, TBH, both outcomes are a win in my book. 🙂
The Ingredient Lineup
Gather your supplies, because we aren’t messing around with “fake” ingredients here. Each item plays a specific role in the texture and stability of your final product.
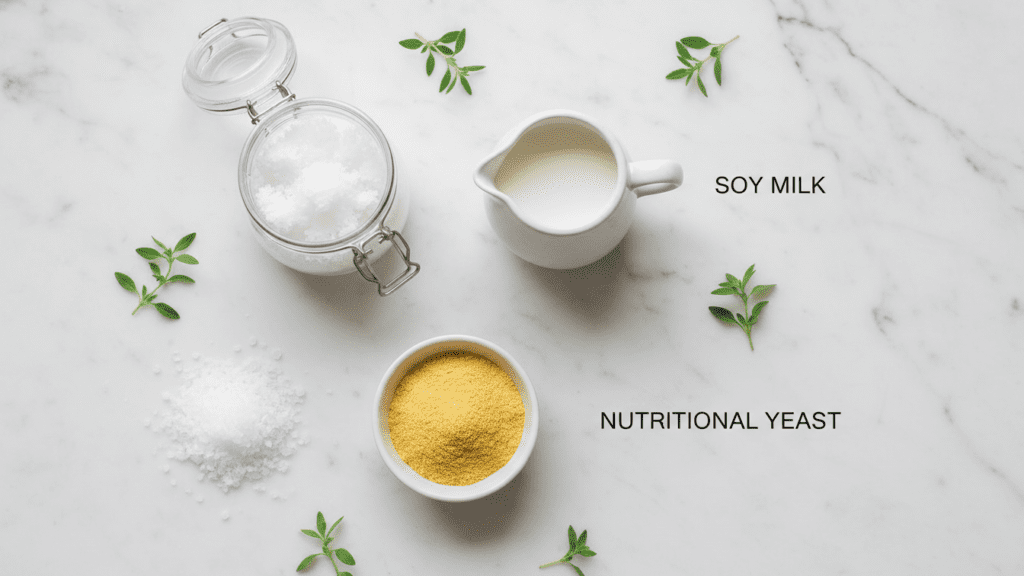
- Refined Coconut Oil: This is non-negotiable. You must use refined coconut oil so your butter doesn’t taste like a tropical vacation. It provides the structural integrity that makes the butter solid at room temperature.
- Unsweetened Soy Milk: This acts as the base. Soy milk contains natural emulsifiers (lecithin) that help the fat and liquid stay together instead of separating into an oily mess.
- Neutral Oil: Think avocado oil or grapeseed oil. This keeps the butter spreadable even when it’s straight out of the fridge.
- Apple Cider Vinegar: This provides that slight fermented tang that mimics the lactic acid in real dairy butter.
- Nutritional Yeast: Just a pinch! It adds a subtle savory depth and that golden hue we all love.
- Salt: Because unsalted butter is just a crime against humanity. Use a high-quality sea salt if you want to feel fancy.
- Liquid Lecithin (Optional): If you want your butter to be ultra-stable for high-heat baking, a teaspoon of sunflower lecithin goes a long way.
Tools You Will Need to Succeed
Don’t try to whisk this by hand unless you’re looking for a serious forearm workout that you didn’t sign up for. Use these tools to get that professional, silky-smooth finish.
- High-Speed Blender: A good blender like a Vitamix or Ninja ensures the oils and milk emulsify perfectly.
- Silicone Butter Molds: These make your butter look like actual sticks, which is strangely satisfying.
- Small Glass Jars: If you prefer a spreadable version, a Mason jar works perfectly.
- Measuring Cups and Spoons: Precision matters when you’re playing with fat ratios.
- Silicone Spatula: You’ll want to scrape every last bit of that liquid gold out of the blender.
Step-by-Step Instructions for Liquid Gold
1. The Acid Trip
Start by pouring your unsweetened soy milk into a small bowl and adding the apple cider vinegar. Let it sit for about five minutes. You’re essentially making a vegan buttermilk here. Does it look a little curdled? Good. That means it’s working.
2. Melt the Foundation
Gently melt your refined coconut oil until it is completely liquid. Make sure it isn’t scorching hot; it should be just warm enough to be clear. If you overheat it, you might break the emulsion later, and nobody likes a greasy puddle.
3. The Great Emulsification
Add the “buttermilk” mixture, the melted coconut oil, the neutral oil, nutritional yeast, and salt into your high-speed blender. If you’re using lecithin, toss that in now too.
4. Blend Like You Mean It
Turn that blender on high and let it rip for about 60 seconds. You want the mixture to look completely uniform and slightly frothy. Are you questioning if this liquid will actually turn into butter? Trust the process, my friend.
5. The Chill Factor
Pour the liquid into your silicone butter molds or glass jars. Place them in the refrigerator immediately. It needs at least 3 to 4 hours to firm up, though overnight is even better. Avoid the temptation to poke it every twenty minutes.
Calories & Nutritional Info
Let’s be real: it’s butter. It’s not a salad. However, it’s good to know what’s going on under the hood of your toast.
- Calories: Approximately 100 calories per tablespoon.
- Total Fat: 11g (mostly from the coconut oil).
- Saturated Fat: Around 7g.
- Sodium: Depends on how heavy-handed you were with the salt shaker!
- Note: This version is naturally cholesterol-free, which is a huge win for your heart health compared to the dairy version.
Common Mistakes to Avoid
Do not use unrefined coconut oil. Unless you want your garlic bread to taste like a Piña Colada, stick to the refined stuff. This is the most common mistake beginners make, and it’s a one-way ticket to the trash can.
Don’t skip the soy milk. People often ask if they can use almond or oat milk. While you can, the lower protein and lecithin content in those milks makes the butter more likely to separate. Stick to soy for the best results.
Avoid the “room temperature” trap. If you leave this butter out on a hot summer day, it will return to its liquid state faster than dairy butter. Keep it in the fridge when you aren’t actively using it. Why would you leave it out anyway?
Variations & Customizations
Once you master the base, you can start acting like a gourmet chef.
- Garlic & Herb: Fold in roasted garlic and fresh parsley after the butter has chilled slightly but isn’t fully hard. It’s basically an instant flavor bomb for pasta.
- Honey-Style Spread: Stir in a tablespoon of maple syrup or agave for a sweet version that belongs on a warm pile of pancakes.
- Keto-Friendly: This recipe is already naturally low-carb! Just ensure your soy milk has zero added sugars to keep it strictly keto.
FAQ: Everything You’re Dying to Know
Can I use this vegan butter for baking?
Absolutely! This recipe works beautifully in pie crusts, cookies, and cakes. Because it has a similar fat-to-water ratio as dairy butter, you can usually swap it 1:1.
Does it actually melt?
Yes, it melts perfectly on hot corn on the cob or toast. Because of the coconut oil base, it has a very distinct melting point that mimics dairy fat quite well.
How long does it stay fresh?
In an airtight container in the fridge, it will last for about 2 to 3 weeks. You can also freeze it for up to 3 months if you’re a “prep ahead” kind of person.
Can I use a food processor instead of a blender?
You can, but the emulsion might not be as tight. A blender provides more shear force, which is what you need to marry those oils and liquids together forever.
Why is my butter white instead of yellow?
If you skip the nutritional yeast or a tiny pinch of turmeric, it will be very pale. If you want that classic butter look, the nutritional yeast is your best friend.
Is this butter healthier than margarine?
IMO, yes. You are avoiding the trans fats and highly processed preservatives found in cheap margarines. Plus, you know exactly what went into it! 🙂
Can I brown this butter?
It won’t brown exactly like dairy butter (which relies on milk solids), but the proteins in the soy milk will toast slightly, giving you a deeper, nuttier flavor than plain oil.
Final Thoughts
Making your own vegan butter is one of those small kitchen wins that makes you feel like you’ve hacked the system. No more reading labels in the grocery store aisle or settling for oily spreads that don’t satisfy the soul. You have the power now!
Now, go forth and slather this on everything you own. Just don’t blame me when you start putting it on crackers just as an excuse to eat more of it. Ready to level up your vegan game even further? Why not try making some homemade bread to go with it?
Meta Description: Learn how to make the best homemade vegan butter with this easy recipe. It melts, spreads, and tastes better than store-bought! Simple ingredients, 100% plant-based.

