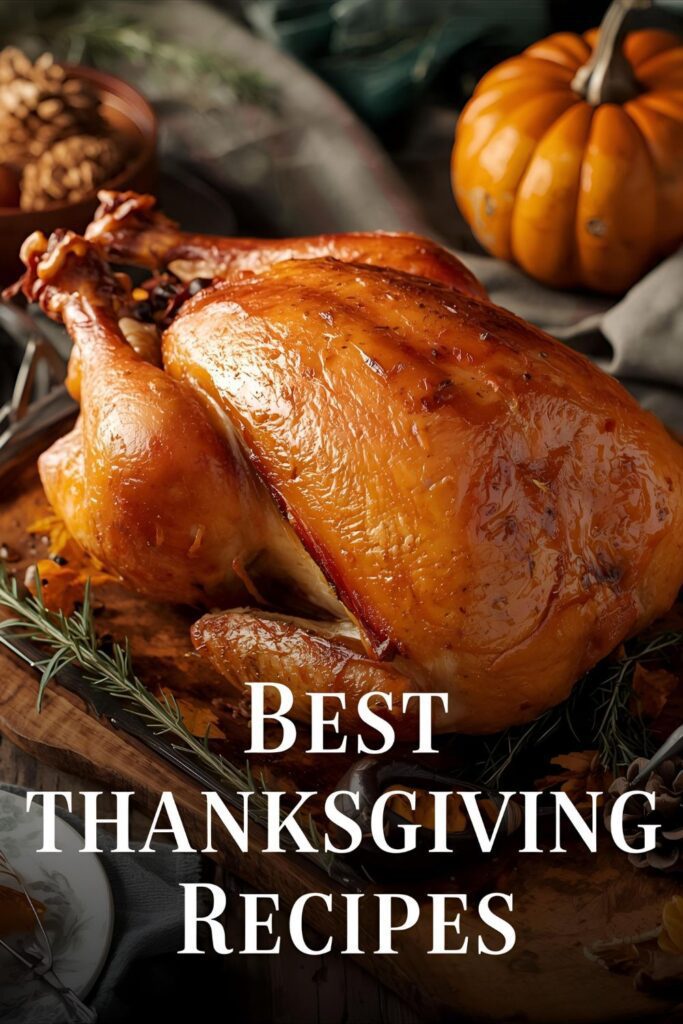
How to Make the Best Turkey Gravy Recipe from Scratch
Let’s be honest, we’ve all been there. You spend hours—okay, fine, maybe an entire day—roasting a gorgeous turkey. It’s golden, it’s juicy, it’s a work of art. The table is set, the family is seated, and you pull out that tiny packet of powdered gravy mix. A collective groan echoes around the room. A beautiful roast deserves a better fate. You can do better, and I’m here to show you how. This turkey gravy recipe is your chance to redeem yourself. It’s a simple, foolproof method that will make you the undisputed monarch of gravy forevermore.
Why This Recipe Is Your New Best Friend
Forget the watery, flavorless stuff from a can. We are making rich, glossy, and impossibly savory gravy using the one ingredient you already have: turkey drippings. This recipe turns the delicious, fatty liquid at the bottom of your roasting pan into liquid gold. It’s incredibly easy, tastes a million times better than anything from a jar, and will have your guests fighting over who gets the last spoonful. Plus, the process takes less than 15 minutes. Yes, really. It’s the perfect way to make everyone think you’re a culinary wizard without actually having to cast any complicated spells.
Ingredients
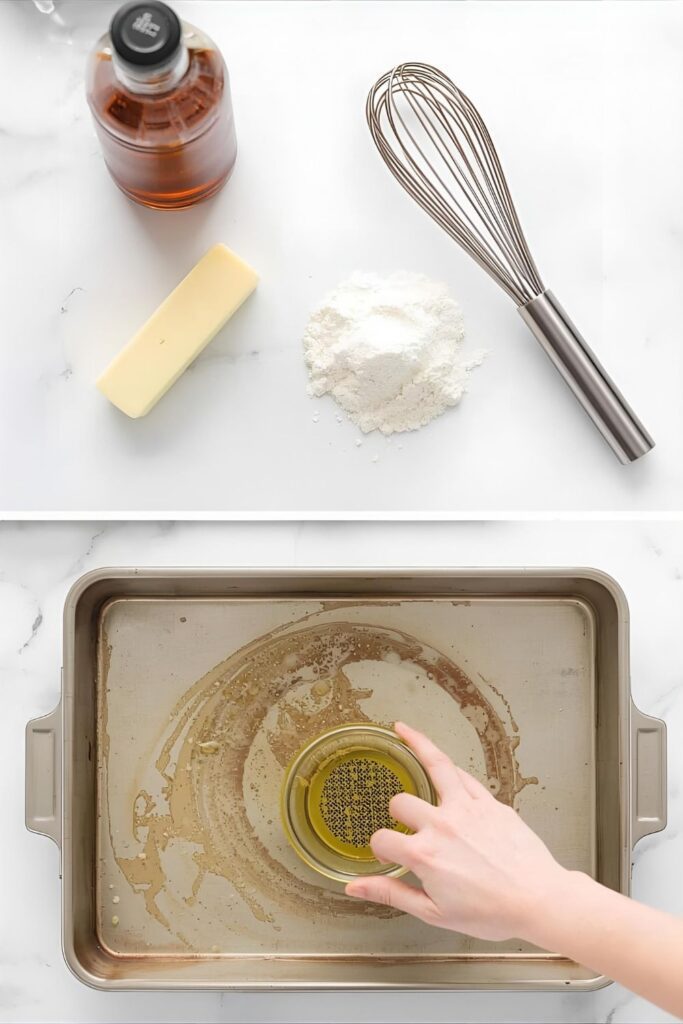
- 1/4 cup All-Purpose Flour: This is your thickening agent.
- 3-4 cups Turkey or Chicken Broth: Use the turkey’s own broth or a good-quality store-bought version.
- 1/4 cup Fat from the Turkey Drippings: The key to all the flavor.
- 1 tbsp Unsalted Butter: For extra richness and shine.
- Salt and Black Pepper: To taste. Be generous.
- Optional: A splash of sherry or red wine for a more complex flavor.
- Optional: Fresh thyme or sage for an herby kick.
Substitutions:
- Flour: You can use cornstarch to make a gluten-free version. Just mix 2 tablespoons of cornstarch with an equal amount of cold water to create a slurry. Add this at the end to thicken.
- Broth: Use any high-quality broth you have on hand, but turkey or chicken broth is best.
- Butter: You can use the fat from the drippings instead of butter, or a good-quality vegetable oil.
Tools & Kitchen Gadgets Used
- Fat Separator: The number one secret weapon for any gravy maker. It separates the fat from the drippings easily.
- Saucepan: A medium-sized saucepan is perfect for this job.
- Whisk: A good, sturdy whisk is your best friend for a lump-free gravy.
- Strainer: To strain out any bits and pieces from the drippings.
- Measuring cups and spoons: The basics, but you need them.
- Gravy boat: Because serving it in the pan just feels wrong.
Step-by-Step Instructions
- Collect Those Drippings: After you pull your magnificent turkey out of the oven, tilt the roasting pan and carefully pour all the delicious liquid into a fat separator. The liquid (the drippings) will settle at the bottom, and the fat will rise to the top. This is the crucial first step.
- Separate the Fat: Let the drippings sit for a minute or two. The fat will float to the top. Pour the fat off the top and measure out 1/4 cup. Discard the rest, or save it for another use (hello, roasted potatoes!).
- Build Your Roux: Place your saucepan over medium heat. Add the 1/4 cup of turkey fat and the tablespoon of butter. Once the butter melts, sprinkle the 1/4 cup of all-purpose flour into the pan. Whisk it constantly for about 2 minutes. You are cooking out the raw flour taste and creating a roux. This is the thickening base of your gravy. Don’t stop whisking!
- Add the Broth: This is the fun part. Slowly, and I mean slowly, pour in the turkey or chicken broth, whisking the entire time. Start with about 2 cups. The goal is to avoid lumps. If you pour it too fast, you’ll have a lumpy, clumpy mess and nobody wants that. TBH, this is where most people go wrong.
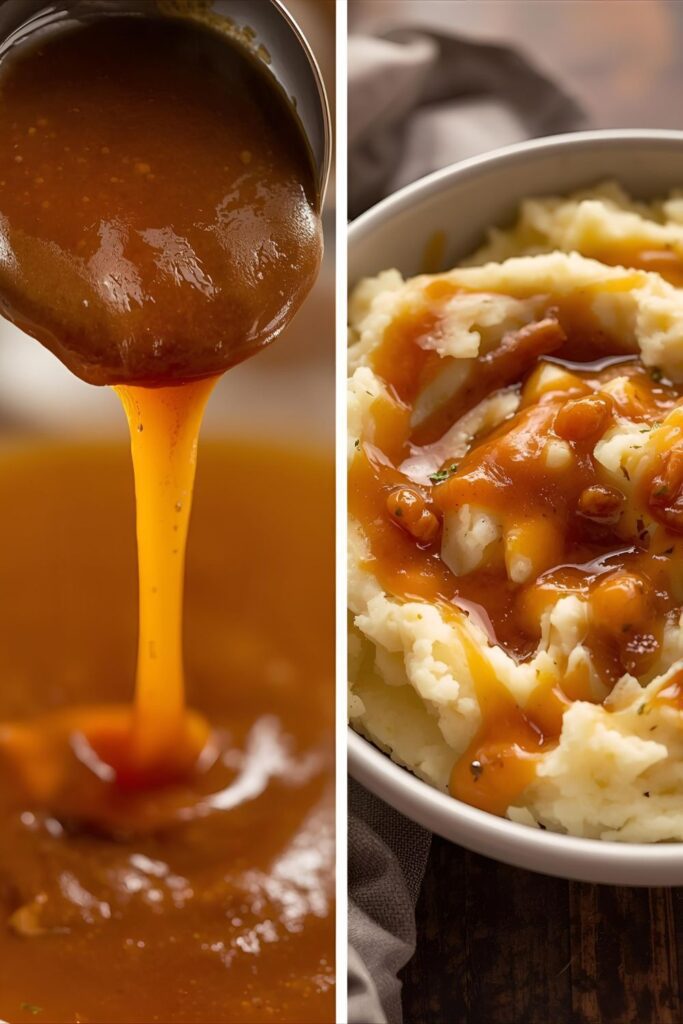
- Simmer and Thicken: Bring the mixture to a gentle simmer. Whisk it often. The gravy will start to thicken as it simmers. Let it cook for about 5-7 minutes. If it gets too thick, add a little more broth. If it’s too thin, let it simmer for a few more minutes. It’s a choose-your-own-adventure kind of thing.
- Season to Perfection: Now for the grand finale. Season the gravy generously with salt and black pepper. Remember, you’ve seasoned the turkey, but the gravy needs its own seasoning. Taste it. Does it need more salt? A little pepper? Be brave. You’re the chef here.
- Serve It Up: Pour the finished gravy into your gravy boat and get ready for the compliments to roll in. Drizzle it over everything: turkey, mashed potatoes, stuffing, heck, even your brother-in-law’s plate if he’s being a jerk.
Calories & Nutritional Info

Disclaimer: These are estimated values and will vary based on your specific ingredients and serving sizes.
- Serving Size: Approximately 1/4 cup (60g)
- Calories: ~50-70 kcal
- Fat: ~5-7g
- Sodium: ~150-200 mg (varies based on broth and added salt)
- Carbohydrates: ~2-3g
- Protein: ~1g
- Nutritional Notes: This gravy is all about flavor, not health. It contains fat from the drippings and butter, which adds calories. The sodium content can be high, so consider using low-sodium broth if you’re watching your salt intake.
Common Mistakes to Avoid
- Not Using a Fat Separator: Seriously, get one. Trying to skim the fat off with a spoon is a fool’s errand and will result in greasy, uneven gravy.
- Skipping the Roux: Just adding flour to the liquid will give you a lumpy, pasty mess. You must cook the flour and fat together first to create a smooth, lump-free base. This is non-negotiable.
- Adding Cold Broth Too Quickly: The biggest mistake you can make. The sudden temperature change shocks the roux and creates lumps. Add the broth slowly and whisk constantly to incorporate it smoothly.
- Not Seasoning Enough: Broth and drippings have flavor, but they need a little help. Taste your gravy before you serve it. Chances are it needs more salt and pepper. Don’t be afraid to season to your heart’s content!
- Over-simmering: If you let your gravy cook for too long, it will get way too thick and gloopy. You can always add a little more broth to thin it out, but it’s better to stay vigilant.
Variations & Customizations
- Mushroom Gravy: Sauté 1/2 cup of finely chopped mushrooms in the saucepan before you add the flour. Cook until the mushrooms are soft and the water has evaporated. Then proceed with the recipe. This adds a fantastic earthy flavor.
- Spicy Gravy: For a little kick, add a pinch of red pepper flakes or a dash of hot sauce to the simmering gravy. It’s an unexpected twist that will wake up everyone’s taste buds.
- Vegetarian Gravy: No turkey drippings? No problem. Use a good vegetable broth and sauté some finely diced onions and carrots in the butter to build a deep flavor base before you add the flour. You can also add a splash of soy sauce or a spoonful of mushroom powder for extra umami.
FAQ Section
1. Can I make this gravy in advance? Yes, you absolutely can! You can make it up to three days ahead of time. Just store it in an airtight container in the fridge.
2. How do you reheat turkey gravy? Gently reheat the gravy in a saucepan over low heat. If it’s too thick, whisk in a splash of turkey or chicken broth until you reach your desired consistency.
3. What if my gravy is too thick? Simply whisk in a little more broth, a tablespoon at a time, until it thins out to the consistency you prefer.
4. How do you fix lumpy gravy? Strain the gravy through a fine-mesh sieve into a new saucepan. Then reheat it. You can also carefully use an immersion blender to smooth it out, but that’s a last resort.
5. Why is my gravy so greasy? You probably didn’t separate enough of the fat from the drippings. Use a fat separator for a cleaner, less greasy gravy.
6. Can I use cornstarch instead of flour? Yes, for a gluten-free option. Create a slurry with equal parts cornstarch and cold water, then whisk it into the hot gravy at the end. Simmer for a minute until it thickens.
7. How do I make gravy without turkey drippings? You can use turkey or chicken broth and add a tablespoon or two of butter for flavor. Sauté some chopped onions and celery in the butter before adding the flour to build a flavor base.
Final Thoughts
This simple recipe is proof that the best things in life—and on the dinner table—are homemade. You’ve put so much love and effort into your meal, so why cut corners at the finish line? Seriously, don’t buy that bland, gelatinous stuff from a can ever again. Make this gravy, wow your family, and bask in the glory you deserve. Now go forth and conquer the world, one spoonful of homemade gravy at a time.