

Clone the Classic: The Secret to Making Authentic Texas Roadhouse Rolls at Home
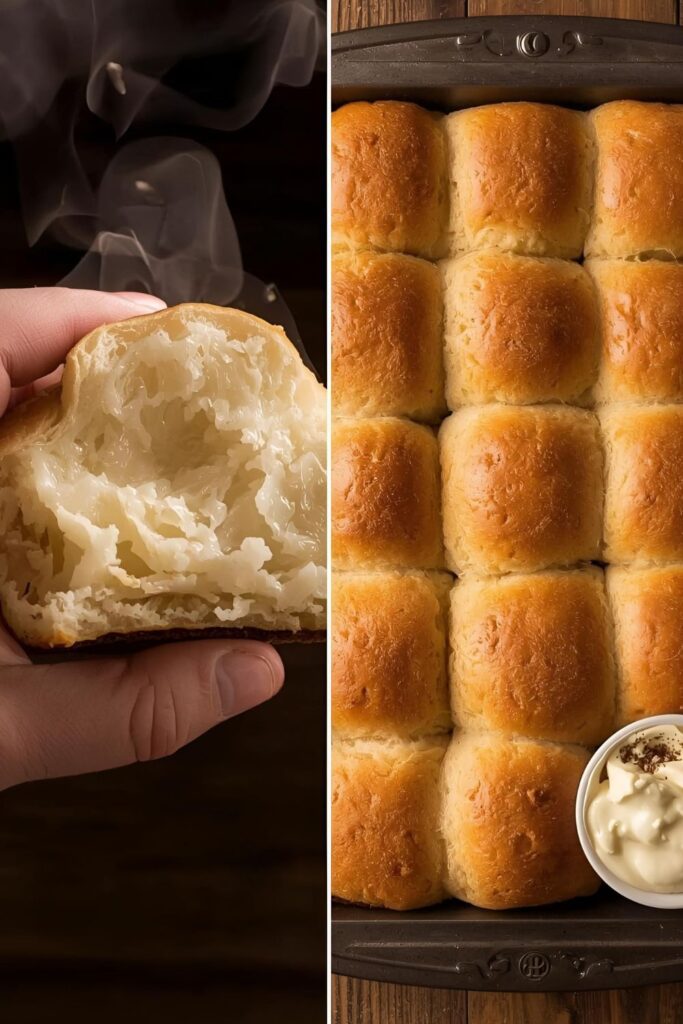
Let’s talk about the one reason, the only reason, anyone ever goes to that famous steakhouse: the bread basket. You know the one. That little brown paper-lined basket arrives at your table, steam billowing off those giant, fluffy, cloud-like rolls, and suddenly, the steak is a distant second priority. You start contemplating how many baskets you can possibly ask for without being judged. It’s an addiction. Well, put down the keys, friend. I cracked the code. We’re making homemade Texas Roadhouse rolls and their glorious, cinnamon-honey butter right here, right now. Get ready to never crave the drive-thru again, because these will change your life.
Why Baking These Rolls Will Make You a Kitchen Legend

Seriously, why bother? Because these aren’t just rolls; they are a comfort food experience. They are soft, slightly sweet, impossibly airy, and they carry that buttery glaze like a tiny, edible trophy.
You need to make this recipe because it achieves the impossible: replicating restaurant-quality bread without needing a culinary degree. The dough is forgiving, the flavor is spot-on, and the resulting rolls are so impressive, your guests will bow down. Who needs complicated dessert when you can just pass around a second basket of these beauties? IMO, these rolls are the best way to impress a crowd with minimal technical skill. It’s time to unleash your inner bread wizard!
The Essential Ingredients for Roadhouse Roll Perfection
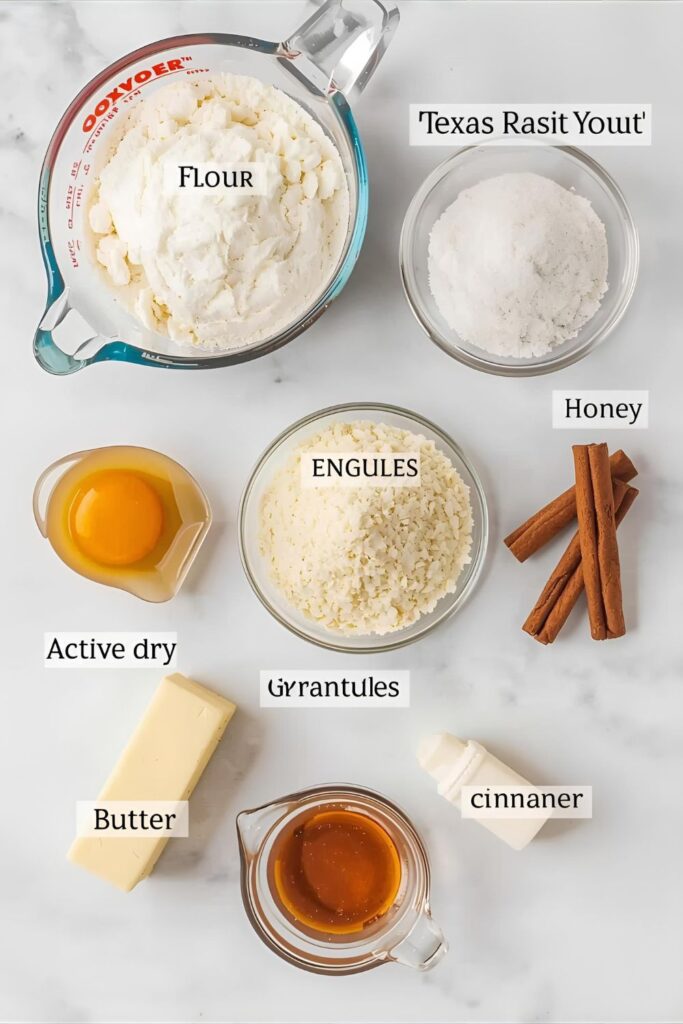

The ingredients are simple, but the technique is what elevates them. Don’t cheap out on the yeast, and please, for the love of all that is holy, use real butter.
The Rolls (Fluffy Cloud Base):
- Warm Water: Around $105-115^\circ \text{F}$. Too hot kills the yeast; too cold and it sleeps in. FYI: Use a thermometer to be sure!
- Active Dry Yeast: This is the life force. Don’t use old yeast!
- Granulated Sugar: Feeds the yeast and adds that classic sweetness.
- All-Purpose Flour: Use unbleached if possible for a slightly better texture.
- Salt (Kosher or Fine Sea Salt): Crucial for flavor balance. Don’t skip or skimp.
- Egg: Adds richness, color, and helps the rolls stay soft.
- Unsalted Butter (Melted): The secret to tenderness.
The Honey-Cinnamon Butter (The G.O.A.T. Glaze):
- Salted Butter (Softened): Make sure it’s room temperature soft.
- Powdered Sugar (Confectioners’ Sugar): For a smooth texture.
- Honey: The star sweetener. Use good quality honey!
- Ground Cinnamon: Adds that signature warmth and spice.
Key Substitutions:
- Yeast: Use Instant Yeast instead of Active Dry? Skip the first “proofing” step and just dump it in with the dry ingredients. Easy peasy.
- Butter (Rolls): Use an equal amount of oil (like canola or vegetable) in the dough if you absolutely must avoid dairy, but TBH, butter is best here.
- Flour: You can use up to half Bread Flour for a slightly chewier roll, but All-Purpose gives you that classic soft texture.
Tools & Kitchen Gadgets Used
While you can do this by hand and torture your biceps, a stand mixer makes this ridiculously easy. This recipe is all about convenience, so invest in the right tools!
- Stand Mixer with Dough Hook Attachment: Your biceps will thank you. This machine does all the heavy kneading effortlessly.
- Liquid Measuring Cup & Dry Measuring Cups/Spoons: Accuracy matters in baking!
- Digital Food Thermometer: Essential for checking the water temperature for the yeast. Seriously, don’t guess.
- Large Mixing Bowl: For the first proofing (if not using the stand mixer bowl).
- Rolling Pin: For rolling out the dough before cutting.
- 9×13 Inch Baking Pan (Metal or Ceramic): For baking the rolls, ensuring they nestle together and stay soft.
- Small Electric Mixer or Whisk: For whipping the honey-cinnamon butter until it’s light and fluffy.
- Pastry Brush: For brushing the rolls with melted butter right when they come out of the oven.
Step-by-Step Instructions: The Fluffiest Rolls of Your Life
Dough can smell your fear, but don’t worry. Follow these steps, and you’ll be fine. Embrace the sticky!
H3: Part I: The Dough Magic
- Activate the Yeast (The Wake-Up Call): Pour 1 cup of warm water (remember, $105-115^\circ \text{F}$!) into your mixing bowl. Stir in the yeast and 1 tablespoon of sugar. Let it sit for 5-10 minutes until it gets foamy and bubbly. That foam means your yeast is alive and ready to party! If it doesn’t foam, your water was probably too hot—start over.
- Mix the Wet Stuff: Once foamy, add the remaining sugar, the egg, and the melted butter to the yeast mixture. Give it a quick whisk to combine everything evenly.
- Add the Dry Ingredients: Gradually add the flour and salt to the bowl. If using a stand mixer, start on low speed. Mix until a shaggy dough forms, then switch to the dough hook.
- Knead (The Muscle Phase): Knead the dough for 5-7 minutes in the stand mixer on medium-low speed, or about 10 minutes by hand. The dough should become smooth, elastic, and slightly tacky, but it should not stick to the sides of the bowl anymore.
- The First Rise (The Nap): Place the dough in a lightly oiled bowl, turn it once to coat, and cover it with a kitchen towel or plastic wrap. Let it rise in a warm, draft-free place for about 1 to $1.5$ hours, or until it has doubled in size.
H3: Part II: Shaping and Baking
- Punch and Roll: Gently punch the risen dough down to release the air (that’s the fun part!). Turn the dough out onto a lightly floured surface. Use your rolling pin to roll the dough into a large rectangle (roughly $12 \text{ inches by } 18 \text{ inches}$ and about a $\frac{1}{2} \text{ inch}$ thick).
- Cut and Place: Cut the rectangle into 24 equal squares (a $4 \times 6$ grid works well). Arrange the squares side-by-side in your greased 9×13 inch baking pan. They should be touching slightly.
- The Second Rise (Pre-Game Stretch): Cover the pan again and let the rolls rise for another 30-45 minutes. They should look puffy and close together—this ensures they bake up soft and pull-apart delicious.
- Bake to Golden Glory: Bake the rolls in a preheated $350^\circ \text{F} (175^\circ \text{C})$ oven for $15-20$ minutes. Look for that beautiful, light golden-brown color.
- Butter Blast: As soon as the rolls come out of the oven, immediately brush them generously with melted butter.
H3: Part III: The Heavenly Honey-Cinnamon Butter
- Whip the Magic: In a small bowl, combine the softened salted butter, powdered sugar, honey, and cinnamon. Use a small electric mixer or a sturdy whisk to whip the mixture for $2-3$ minutes until it is noticeably lighter in color, smooth, and fluffy.
- Serve and Devour: Serve the warm rolls alongside the fluffy, sweet butter. Watch your guests lose all self-control.
Calories & Nutritional Info
Listen, these are not health food, okay? But you made them yourself, so they are made with love! This is a rough estimate per single roll (assuming 24 rolls total) without the butter glaze.
- Estimated Calories Per Roll: $\approx 150-180$ calories
- Carb Count: Expect $\approx 25-30\text{g}$ of carbohydrates per roll (it’s bread, after all).
- Fat Content: Primarily from the butter in the dough, contributing to the incredible texture.
- Low Protein/Fiber: This is a light, airy white bread, so don’t look here for your daily fiber intake. Pair it with a big salad (which you will promptly ignore while eating a third roll).
Common Mistakes to Avoid (The Oopsie List)
Baking is a science, and science can be unforgiving. Steer clear of these pitfalls!
- Mistake #1: Water Temperature Issues: The biggest culprit! Water that is too hot (above $130^\circ \text{F}$) will kill your yeast, leaving you with dense, sad rolls. Water that is too cold won’t activate the yeast fully. Use a thermometer!
- Mistake #2: Skipping the Kneading: You need to develop that gluten for the signature airy texture. Don’t under-knead the dough! Knead until the dough passes the windowpane test (you can stretch a small piece thin enough to see light through it).
- Mistake #3: Not Letting Them Touch: For that perfect soft, pull-apart center, the rolls need to bake while snuggled up tightly in the pan. If you space them too far apart, they develop crusty sides, and we don’t want that here.
- Mistake #4: Using Cold Butter for the Glaze: Trying to whip cold butter is a recipe for a grainy, clumpy mess. Ensure the butter for the glaze is genuinely soft, room-temperature butter.
- Mistake #5: Opening the Oven Door: Be patient during the bake! Opening the oven door in the first 10 minutes can drop the temperature, causing the rolls to deflate. Keep that door shut!
Variations & Customizations
Once you master the basic dough, you can seriously mess around with the flavor profile. Get creative!
- Garlic Parmesan Savory Rolls: Skip the sugar in the dough. After baking, brush them with a mixture of melted butter, minced fresh garlic, and grated Parmesan cheese instead of the cinnamon butter. Perfect for Italian night!
- Whole Wheat Hearty Rolls (The “Healthy” One): Substitute up to one cup of the all-purpose flour with whole wheat flour. You might need to add a touch more liquid, as whole wheat absorbs more. The rolls will be slightly denser but offer more fiber and a nuttier flavor.
- Sweet Orange Zest Rolls: Add the zest of one orange to the dough before kneading. For the topping, swap the cinnamon for a little more zest and a splash of orange juice in the honey butter. Hello, brunch!
FAQ Section: Your Most Pressing Roll Questions Answered
We cover the questions everyone is too polite to ask.
Q: Can I make the dough for Texas Roadhouse rolls ahead of time?
A: Yes! After the first rise, punch the dough down, wrap it tightly in plastic wrap, and refrigerate it for up to 24 hours. When ready to use, take it out, let it warm up slightly for about 30 minutes, then roll, cut, and proceed with the second rise.
Q: Why are my homemade rolls dense and not fluffy?
A: The most common reason is a dead or inactive yeast (usually from water that was too hot or too cold), or not enough kneading. The gluten structure needs to be fully developed to trap the gases and make the rolls rise tall and airy.
Q: How do I store leftover Texas Roadhouse rolls?
A: Store cooled leftovers in an airtight container at room temperature for up to 3 days. To reheat, wrap them loosely in foil and warm them in a $350^\circ \text{F}$ oven for 5-7 minutes.
Q: Can I freeze these rolls?
A: Absolutely! Freeze the rolls after they have fully baked and cooled (without the butter glaze). Place them in a freezer bag. They keep well for up to 3 months. Thaw them at room temperature, and then brush with melted butter before warming in the oven.
Q: What is the ideal temperature for the first rise?
A: Yeast loves a warm, cozy environment, ideally around $75-85^\circ \text{F}$. Try placing the covered bowl on top of your warm oven while it preheats or place it in a turned-off oven with the light on.
Q: Can I use a different type of sugar in the dough?
A: Yes, you can substitute the granulated sugar with honey or maple syrup, but you need to account for the liquid, so reduce the water by a corresponding amount. Stick with granulated sugar for the closest authentic flavor, TBH.
Q: How can I tell if the rolls are done baking?
A: The rolls are done when they reach a light golden-brown color on top and an internal temperature of $200-205^\circ \text{F}$. If they look pale, give them another minute or two.
Final Thoughts
You just bypassed the long waits and the questionable table-side service, and you brought the single best part of the restaurant straight into your kitchen. See? You’re basically a genius. Now that you know the secret to making perfect Texas Roadhouse rolls and that divine honey-cinnamon butter, you’ll never settle for a pre-sliced loaf again. Go forth, fill your kitchen with the smell of sweet, buttery bread, and share the wealth! Or don’t share. I won’t judge.

