No Soak, No Wait: Your Guide to Swift Dosa (Crispy Perfection in 90 Minutes)
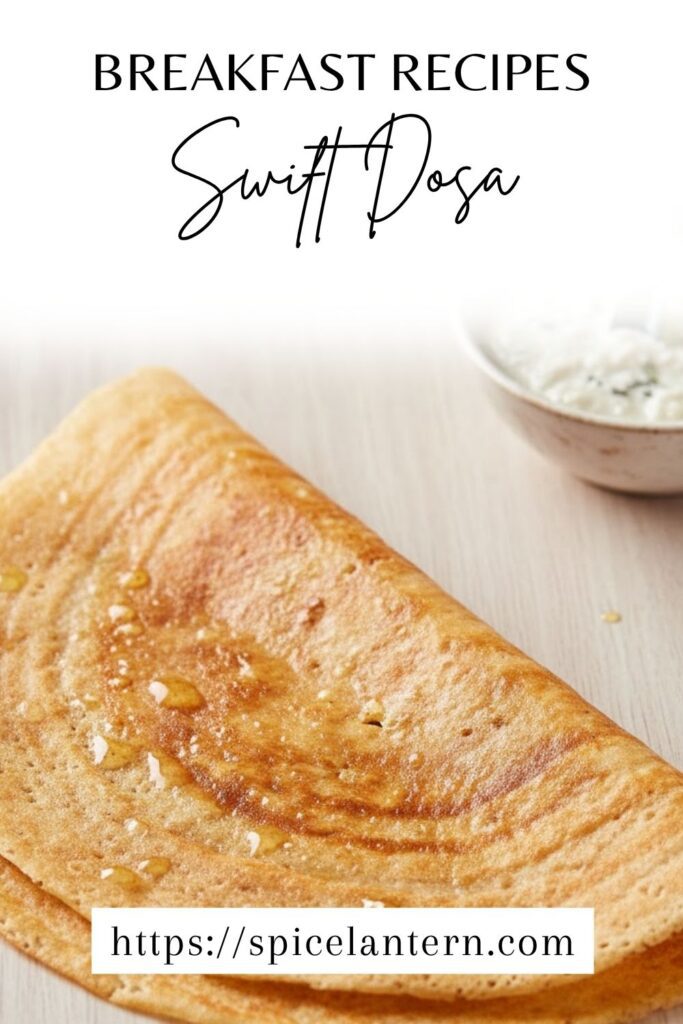
Let’s not pretend. The traditional Dosa process—soaking rice and lentils overnight, grinding for hours, and then waiting 8 to 12 hours for fermentation—is a commitment only true saints and South Indian grandmothers can maintain. You want that magnificent, crisp, airy pancake that pairs perfectly with coconut chutney, and you want it now. I cracked the code on Swift Dosa, a beginner-friendly hack that uses a few clever ingredients and a secret resting time to achieve a beautifully crisp texture and a lovely, subtle tang in about 90 minutes total. Why plan dinner a day in advance when you can have Dosa ready before the sun sets?
Why This Recipe Is Awesome (It’s Crispy, Fast, and Guilt-Free)
This recipe is a time traveler’s dream, delivering instant gratification with serious flavor.
- Lightning Speed: We use Rava (Semolina) and rice flour to bypass the hours of soaking and grinding. Our “fermentation” is a quick resting period enhanced by a secret souring agent. Ready in 90 minutes!
- The Crispy Crunch: The combination of rice flour and Rava ensures the Dosa gets that incredible, paper-thin, golden-brown crispness that makes the traditional version so addictive. No rubbery texture here!
- Naturally Vegetarian/Vegan: This is a simple, plant-based power food. You get a light, healthy meal that’s perfect for breakfast, lunch, or dinner. Plus, you get to swirl batter onto a hot pan, which is surprisingly zen.
Ingredients: The Instant Dosa Toolkit
We swap complex starches for quicker alternatives. Precision in batter consistency is key!
- 1 cup Rava (Fine Semolina/Sooji): The main component, giving the Dosa body and texture.
- ½ cup Rice Flour: CRUCIAL for crispiness. This is the crispness agent!
- 1 cup Plain Yogurt (or Sour Curd): The souring/fermenting agent. Use sour yogurt for a more authentic tang.
- 1 cup Water (or more, as needed): For adjusting the final batter consistency.
- 1 teaspoon Salt: Essential seasoning.
- ½ teaspoon Baking Soda (or Eno fruit salt): The final leavening boost right before cooking.
- Oil or Ghee: For roasting the Dosa on the pan.
Key Substitutions:
- Rava/Semolina: No good substitute here, but you can try all rice flour for a very thin Dosa.
- Yogurt/Curd: Use Vegan Yogurt (thick, plain) mixed with 1 tablespoon of lemon juice for a dairy-free version.
- Rice Flour: Use All-Purpose Flour only in a pinch, but your Dosa will be softer, not crispy.
Tools & Kitchen Gadgets Used: The Tawa Team
A specialized pan helps, but a good non-stick is a worthy substitute.
- Blender or Mixer Grinder: MANDATORY. For grinding the semolina into a finer powder (if not already fine).
- Large Mixing Bowl: For the batter and the resting period.
- Dosa Tawa (Griddle) or Large Non-Stick Skillet (Flat-bottomed): CRITICAL. A flat, wide pan is essential for spreading.
- Ladle (Round Bottom): The traditional tool for pouring and spreading the batter into a thin circle.
- Small Bowl: For water/oil mixture to wipe the pan.
- Spatula (Thin, flexible): For scraping the sides and folding the Dosa.
Step-by-Step Instructions: The Crispy Crepe Method
Consistency and heat are your masters. We work fast once the pan is hot!
Step 1: Grind and Combine (5 Minutes)
- Fine Grind (If needed): If you are using coarse Rava, pulse it quickly in a blender until it is a finer powder.
- Mix the Batter: In your mixing bowl, whisk together the Rava, rice flour, salt, and yogurt.
- Add Water: Gradually add the water, whisking until the batter is smooth and resembles thick pancake batter. It should pour easily but not be runny. TBH, this consistency is the trickiest part.
Step 2: The Mandatory Rest (60 Minutes)
- Cover the bowl and let the batter rest on the counter for 60 minutes. This is essential.
- Why? The resting time allows the Rava and rice flour to fully hydrate and soften. Skipping this step results in a gritty, brittle Dosa.
- Final Check: After the rest, the batter should have thickened slightly. If it’s too thick, add a tablespoon or two of water to regain that easy pouring consistency.
Step 3: The Baking Soda Boost (2 Minutes)
- Just before cooking, gently stir the batter.
- Add the baking soda (or Eno) and give it one last, quick stir. The batter will foam slightly, giving you the necessary lift and air pockets for crispiness. Do this immediately before heading to the stove!
Step 4: Swirl and Roast (3 Minutes per Dosa)
- Heat the Tawa: Heat your Dosa Tawa or non-stick pan over medium-high heat until it is hot (a sprinkle of water should sizzle and evaporate immediately).
- Cool and Wipe: Reduce the heat to medium-low. Dip a paper towel in a mixture of oil and water and quickly wipe the pan to cool the surface slightly and evenly distribute a thin layer of fat. This is the non-stick secret.
- Pour and Spread: Take a ladleful of batter. Pour it onto the center of the hot pan. Immediately use the bottom of the ladle to quickly spread the batter in a spiral, starting from the center and moving outward to create a thin, even circle.
- Roast: Drizzle a little oil or ghee around the edges. Cook on medium-low heat for 2-3 minutes until the Dosa turns deep golden-brown and crispy. Do not flip!
Step 5: Fold and Serve (Immediately!)
- Use a thin spatula to gently scrape the Dosa from the edges toward the center.
- Fold it in half or roll it up and serve immediately with chutney and Sambar. Dosa is best eaten piping hot!
Calories & Nutritional Info: The Healthy Crunch (Estimated)
These are estimates for one large plain Dosa, without filling.
- Calories per serving (1 Dosa): ~150-200 calories
- Carbohydrates: ~25-35g
- Protein: ~5-7g
- Fat: ~3-5g (Varies depending on oil/ghee used for roasting.)
- Note: This Dosa is high in complex carbohydrates and provides a quick source of energy. It is lower in fat than many Western breakfast items.
Common Mistakes to Avoid: The Dosa Don’ts
Avoid these pitfalls, or you’ll end up with rubbery, sticking Dosa.
- Not Resting the Batter: Skipping the 60-minute rest is the fastest way to a gritty, brittle Dosa. The Rava needs time to hydrate.
- Overheating the Pan (The Sticking Point): If the pan is too hot, the batter will stick and tear when you try to spread it. Always wipe the Tawa with the oil/water mix to cool the surface slightly between Dosas.
- Thick Batter Blunder: If your batter is too thick, you cannot spread it thinly, resulting in a thick, soft pancake (Uthappam), not a crispy Dosa. Add water until it’s pourable!
- Over-spreading: Spreading the batter too slowly or applying too much pressure will make the Dosa tear. Use the bottom of the ladle with quick, light circular movements.
- Adding Baking Soda Too Soon: Baking soda’s bubbles start working immediately. Add it right before cooking to ensure the air is released into the Dosa, not into the bowl.
Variations & Customizations: Your Dosa Diner
Once you master the plain Dosa, you can open your own imaginary Dosa diner.
- Masala Magic (Vegetarian Staple): Before folding, spread a thin layer of spiced potato mash (Aloo Masala) across the Dosa. The heat from the Dosa warms the filling perfectly.
- Podi Spice Bomb: Before drizzling oil, sprinkle the raw batter with a generous dusting of Dosa Podi (a dry, spicy lentil powder). Drizzle the oil on top, and roast until the Podi is fragrant and crunchy.
- Cheesy Onion Crunch: Sprinkle finely chopped onions, green chilies, and grated Monterey Jack cheese over the wet batter immediately after spreading it on the Tawa. Cook as usual.
FAQ Section: The Crispy Questions
Let’s address the inevitable questions about this South Indian staple.
Q1: Why is this called “Swift Dosa” when it takes 90 minutes?
A: Traditional Dosa batter requires 8-12 hours (or up to 3 days) of soaking, grinding, and wild yeast fermentation. This recipe is considered rapid because it uses instant leaveners to cut that process to a mere 60-minute rest.
Q2: What is the best pan for making Dosa?
A: A well-seasoned cast-iron Tawa (griddle) is ideal for high heat and crispness. A flat-bottomed, high-quality non-stick skillet is the best substitute for a beginner.
Q3: Why does my Dosa stick to the pan and tear?
A: The pan is likely too hot (which causes sticking), or the batter is too thick. Use the oil/water wipe to regulate the temperature and thin the batter slightly.
Q4: How do I get my Dosa paper-thin and crispy?
A: Use rice flour in the batter, ensure the pan is hot, and maintain a thin, pourable batter consistency. Spread the batter quickly with light pressure.
Q5: Can I store the leftover Dosa batter?
A: Yes. Store leftover Swift Dosa batter tightly covered in the refrigerator for 2-3 days. It may lose a little of its rising power, so you might need to add a pinch of baking soda before using it again.
Q6: Is Dosa naturally gluten-free?
A: Traditional Dosa made only from rice and urad dal (lentils) is naturally gluten-free. This express version uses Rava (wheat semolina), so you must use a certified Gluten-Free Rava substitute for a truly GF product.
Q7: Should I flip the Dosa while cooking?
A: No. Dosa is traditionally cooked only on one side. The thin batter cooks through quickly, and the edges are sealed by the oil/ghee. Flipping often makes it tear or become less crisp.
Final Thoughts: Breakfast Just Got Way Better
You just conquered the Swift Dosa and produced a pile of golden, crispy perfection. No overnight soaking, no all-day grinding—just pure, delicious efficiency. Go ahead and grab that coconut chutney. You are now the master of rapid, crispy South Indian cuisine.


