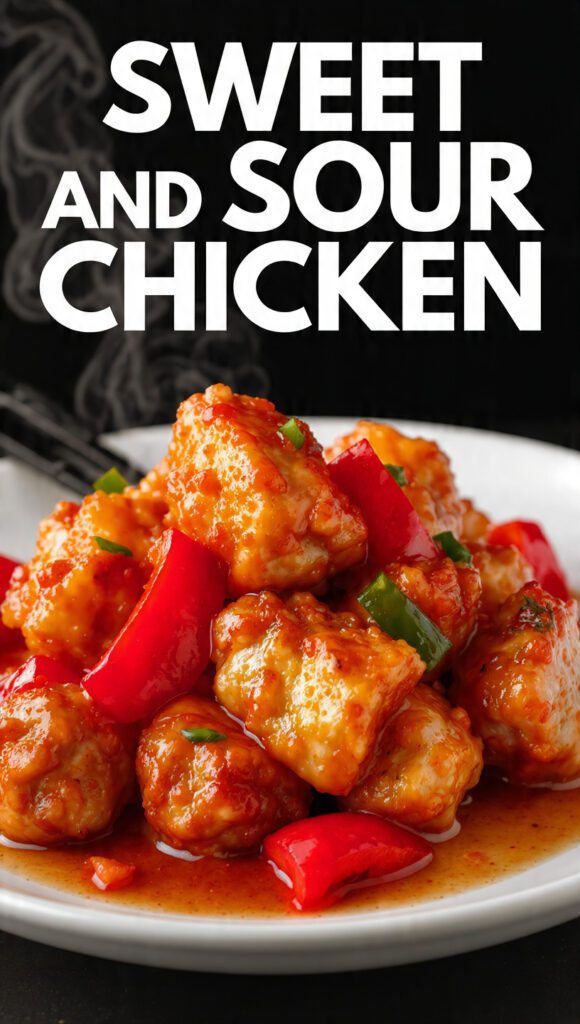
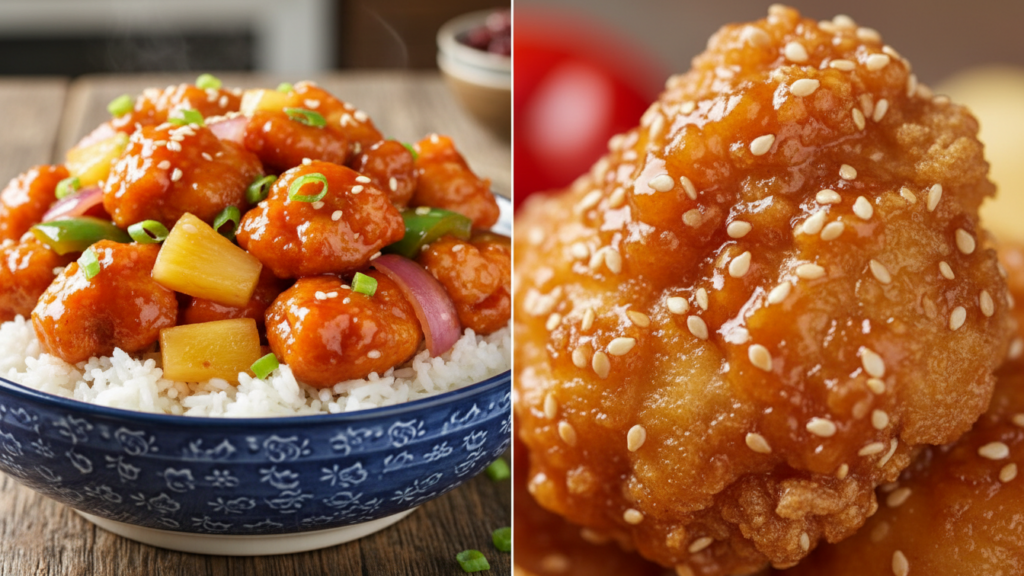
The Ultimate Better-Than-Takeout Sweet and Sour Chicken Recipe
We have all walked that dark path at 8:00 PM on a Tuesday. You stare into the fridge, realize a single limp scallion and a jar of pickles won’t make a meal, and reach for the delivery app. But let’s be real for a second: why pay twenty bucks for sweet and sour chicken that arrives with the structural integrity of a wet sponge? You deserve better than mystery meat coated in neon-orange corn syrup.

Don’t you want that satisfying “crunch” that actually echoes in your ears? Making this classic at home sounds like a chore, but it actually takes less time than the driver spends getting lost in your apartment complex. I promise you this: once you taste this sauce, you will want to bathe in it. (Please don’t actually do that, it’s very sticky).
Why This Recipe Is Actually Awesome
Why should you bother heating up oil when a stranger can drop a box at your door? Because your kitchen is about to become the best restaurant in town. This recipe hits that perfect, elusive balance of tangy vinegar and sweet bliss without tasting like a liquid candy bar.

Plus, you get to control the quality of the chicken. No more “is this a tendon or a rubber band?” guessing games! It’s fast, it’s vibrant, and it makes you look like a total culinary wizard to anyone lucky enough to snag a bite. Are you ready to ruin takeout for yourself forever?
The Goods: What You Need
I kept this list simple because nobody wants to go on a scavenger hunt for rare Himalayan peppers. Most of this stuff probably lives in your pantry already.
The Protein & Crunch
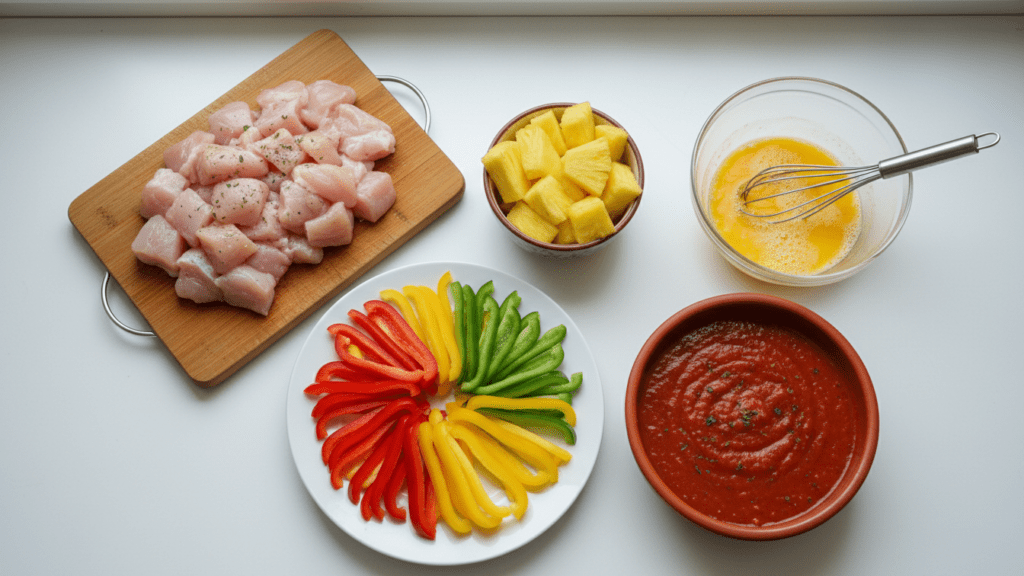
- 1.5 lbs Chicken Breast or Thighs: Cut these into 1-inch chunks. Thighs stay juicier, but breasts work if you’re feeling “virtuous.”
- 2 Large Eggs: Whisked and ready for action.
- 1/2 cup Cornstarch: This provides that glass-like crunch.
- 1/4 cup All-Purpose Flour: This gives the coating some “heft.”
- Oil for Frying: Vegetable, Canola, or Peanut oil. Do not use your expensive extra virgin olive oil unless you want a smoky kitchen disaster.
The Sauce (The Real Star)
- 3/4 cup Granulated Sugar: Yes, it’s a lot. It’s in the name, friend.
- 1/2 cup Apple Cider Vinegar: This provides a much better depth than plain white vinegar.
- 1/4 cup Ketchup: Don’t judge; it adds the perfect color and tang.
- 1 tbsp Soy Sauce: Use the low-sodium kind if you actually care about your salt intake.
- 1 tsp Garlic Powder: Because garlic makes everything better.
The Veggie Vibes
- 1 Bell Pepper: Any color works, but red or green looks the most “authentic.”
- 1/2 White Onion: Cut into chunky squares.
- 1 cup Pineapple Chunks: Fresh is great, but canned (in juice!) works perfectly.
- Sesame seeds & Green Onions: For the garnish, because we are fancy now.
Tools & Kitchen Gadgets
If your kitchen tools are currently limited to a plastic fork and a microwave, you might need an upgrade. Here is what I use to get that restaurant-quality finish.
- Large Non-Stick Wok: Essential for tossing everything without a mess.
- Deep-Fry Thermometer: Because guessing oil temperature is a game for losers.
- Stainless Steel Spider Strainer: The best tool for rescuing crispy chicken from hot oil.
- Glass Mixing Bowl Set: You need space to toss that chicken without flour flying everywhere.
- Heavy Duty Whisk: For a sauce so smooth it should have its own jazz album.
Step-by-Step Instructions: Don’t Mess This Up
Step 1: The Prep Work
Start by cutting your chicken into even pieces. Season your chicken chunks with salt and pepper before you do anything else. If you don’t season the meat itself, your dinner will taste like a sad, bland lie. Set up a little assembly line: one bowl for eggs, one for the flour/cornstarch mix.
Step 2: The Double Dip
Dip the chicken in the egg, then dredge it in the flour/cornstarch mixture. Shake off the excess! You want a crispy coating, not a heavy winter parka of dough. Lay them on a wire rack for five minutes. This helps the coating stick so it doesn’t fall off the second it hits the oil. IMO, this is the most important step for maximum crunch.
Step 3: Into the Fire
Heat about an inch of oil in your wok or skillet until it reaches 350°F. Carefully drop the chicken in. Do not crowd the pan. If you put too much chicken in at once, the oil temp drops, and you get greasy, soggy nuggets. Fry until golden brown and crispy, then move them to a paper towel-lined plate.
Step 4: The Sauce Symphony
While the chicken drains, whisk the sugar, vinegar, ketchup, soy sauce, and garlic powder in a bowl. It’ll look very liquidy—don’t panic. Wipe out your wok (carefully!), add a tiny splash of oil, and sauté your peppers, onions, and pineapple for 2-3 minutes. You want them tender but still snappy.
Step 5: The Grand Finale
Pour the sauce into the wok with the veggies. Let it come to a simmer. Once it starts bubbling, toss the crispy chicken back in. Stir it like your life depends on it until the sauce thickens into a glistening, sticky glaze that clings to every nook and cranny.
Step 6: Serve and Brag
Plate it up immediately. Sprinkle those sesame seeds and sliced green onions over the top. Serve it over jasmine rice and prepare for the standing ovation. You did it!
Calories & Nutritional Info
I know, we don’t talk about Bruno or calories, but here is the breakdown for one serving (recipe makes 4).
- Calories: ~480 kcal (Hey, it’s better than the 1,200 kcal takeout version!)
- Protein: 32g
- Total Fat: 18g
- Carbohydrates: 48g
- Sugar: 35g (It’s a treat, okay?)
Common Mistakes to Avoid
- Using Cold Oil: If the oil isn’t hot, the chicken just drinks it. Always test your oil with a small piece of bread or a thermometer first.
- Cutting Pieces Too Big: If the chicken chunks are huge, the outside burns before the inside cooks. Keep them bite-sized!
- Overcooking the Veggies: Nobody wants a mushy bell pepper. Sauté them quickly so they keep their vibrant color and crunch.
- Skipping the Cornstarch: Flour alone won’t give you that signature “shatter” when you bite in. Do not skip the cornstarch.
Variations & Customizations
Want to shake things up? Try these fun twists:
- The Spicy Kick: Add a tablespoon of Sriracha or red chili flakes to the sauce. It turns into a “sweet and spicy” masterpiece.
- The Veggie Swap: Use cauliflower florets or extra-firm tofu instead of chicken for a vegetarian delight. Just make sure to press the tofu first to get the water out!
- The Keto-ish Version: Swap the sugar for a monk fruit sweetener and use almond flour/xanthan gum for the coating. TBH, it won’t be exactly the same, but it keeps the carbs low.
FAQ: Your Burning Questions Answered
Is sweet and sour chicken actually healthy?
Well, it has protein and vegetables! But let’s be real: it’s a fried dish with a sugary sauce. It’s “soul healthy,” which is arguably more important.
Can I make this in an air fryer?
You can! Spray the breaded chicken pieces generously with oil and air fry at 400°F for 12 minutes. It won’t be as decadent as the fried version, but it’s a solid weeknight hack.
Why is my sauce not thickening?
The cornstarch on the chicken usually does the work. If it’s still runny, mix 1 tsp of cornstarch with a splash of water and stir it into the bubbling sauce.
Can I use fresh pineapple instead of canned?
Yes! Fresh pineapple is amazing, but it’s less sweet than canned. You might need to add a tiny splash of pineapple juice to the sauce to balance it out.
How long do leftovers last?
It stays good in the fridge for 2-3 days. FYI, the chicken will lose its crunch in the microwave. Reheat it in the oven or air fryer to bring that crispiness back to life!
What kind of rice goes best with this?
Jasmine rice is the gold standard. Its floral aroma and fluffy texture soak up that extra sauce perfectly.
Can I use chicken thighs instead of breasts?
Absolutely. Chicken thighs are much harder to overcook and stay incredibly juicy. Most restaurants actually use thighs for this very reason.
Final Thoughts
There you have it. You are now the master of your own sweet and sour chicken destiny. No more sad, soggy boxes. No more mystery ingredients. Just pure, crispy, tangy perfection made right in your own kitchen.
Go ahead, take a photo and make your friends jealous. Just don’t blame me when they start texting you every Friday night asking “what’s for dinner?” 🙂