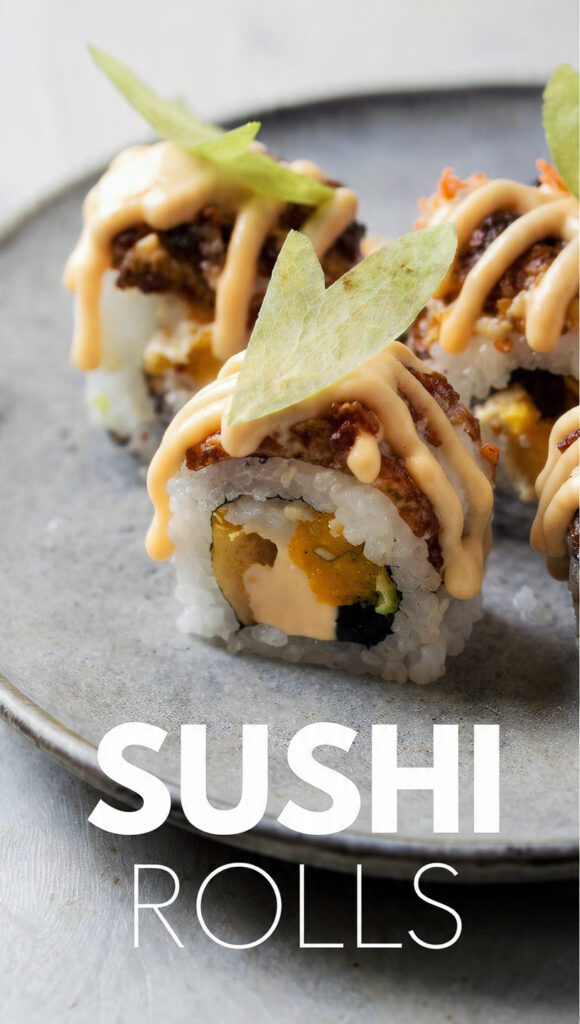
🍣 The “Rolling with the Homies” Guide: Mastering the Ultimate Homemade Sushi Rolls
Let’s be brutally honest: most of us have looked at a colorful, precision-cut platter of sushi rolls and thought, “There is no way I can recreate that without a ten-year apprenticeship under a master in Tokyo.” We’ve all been there—paying eighteen dollars for a single “signature roll” at a trendy bistro, only to find it’s 90% rice and one sad sliver of avocado. It’s a culinary heist! But then, you realize that homemade sushi is basically just a very sophisticated adult version of a craft project, and suddenly, your kitchen feels like a Michelin-starred eatery.
I once served a mountain of “imperfect” rolls to a group of friends who genuinely believed that sushi only came from plastic containers at the supermarket or high-end omakase bars. After the first bite of the seasoned, vinegared rice and buttery salmon, they actually stopped talking for ten minutes. They essentially became one with the ginger. That, my friends, is the power of a proper bamboo mat and a little bit of sass. Are you ready to stop being intimidated by seaweed and start building legendary sushi masterpieces in your own kitchen?
🏆 Why This Sushi Strategy is the Actual GOAT

Why should you bother fanning rice and slicing cucumbers when you could just click an app? Because this method delivers a level of freshness and customization that a delivery driver simply cannot preserve in transit. We are talking about rice that is still slightly warm, paired with fish that hasn’t been sitting in a refrigerated display case since sunrise.
This recipe is awesome because it’s a high-impact, ego-stroking flex for any home cook. It impresses guests because it looks incredibly technical (look at those spirals!), when in reality, you just know how to use a bamboo mat and a wet knife effectively. Plus, it’s the ultimate “fridge raid” victory. If you have rice, vinegar, and some leftover veggies, you’re halfway to glory. It’s the undisputed heavyweight champion of weekend wins, IMO.
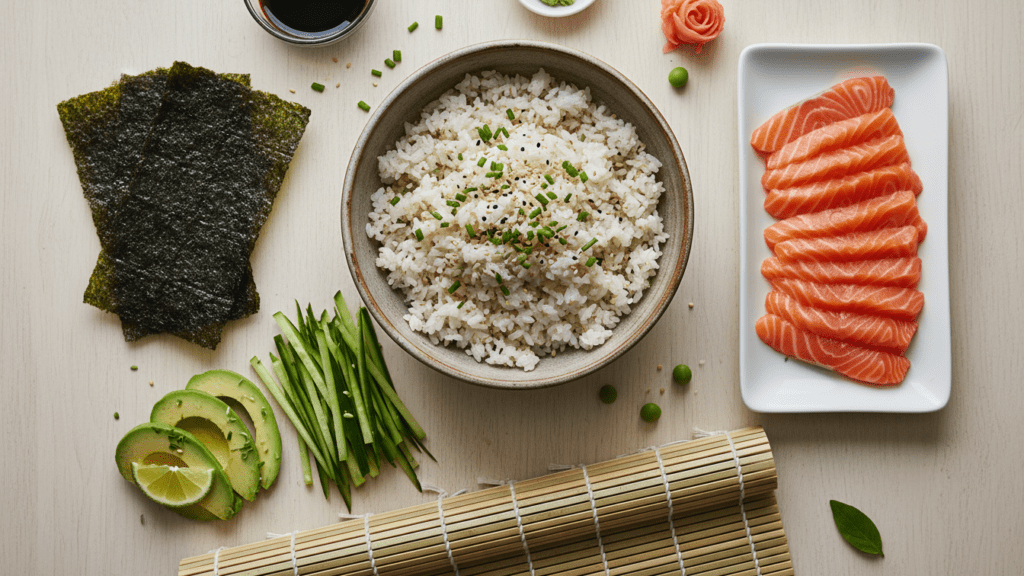
🍚 The “Vinegar-Elite” Ingredient List

Success depends entirely on the quality of your grain and the temperature of your rice. If you try to use “long-grain” jasmine rice here, we are no longer on speaking terms. 🙂
- 2 Cups Sushi Rice (Short-Grain): CRUCIAL. You need that high starch content to make the rice stick to itself and not your floor.
- 1/4 Cup Rice Vinegar: The soul of the seasoning.
- 1 Tablespoon Sugar & 1 Teaspoon Salt: To create that iconic sweet-and-tangy “shari” flavor.
- Nori Sheets (Seaweed): Look for the “Gold” grade for that crisp snap.
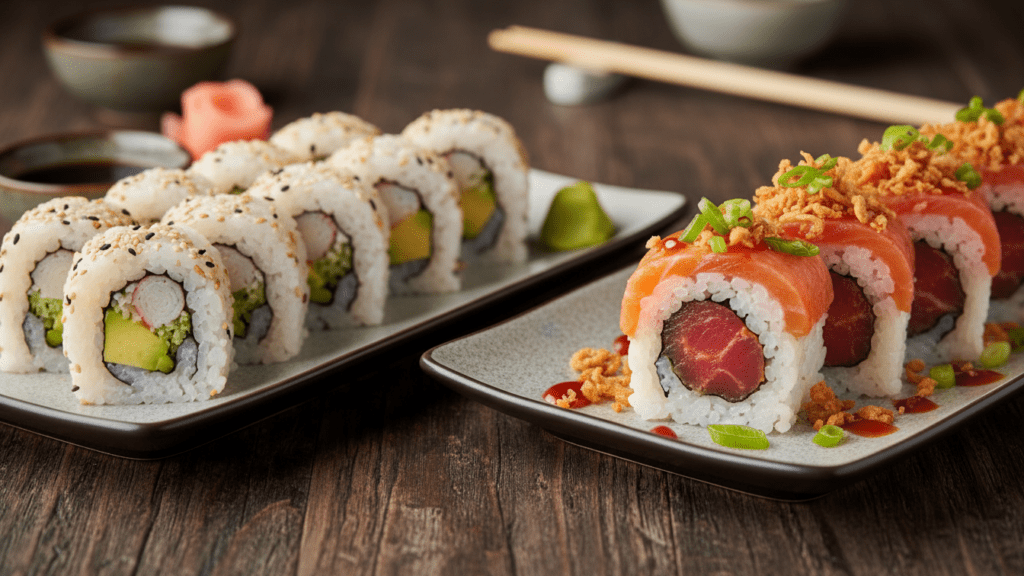
- Protein of Choice: Sashimi-grade salmon, tuna, or imitation crab (the “California” classic).
- Veggie Load: Cucumber (julienned), avocado (sliced thin), and carrots.
- The “Kick”: Wasabi, pickled ginger, and high-quality soy sauce.
- Optional Finish: Spicy mayo (Sriracha + Kewpie) and toasted sesame seeds.
Key Substitutions
- The Protein Swap: Use extra-firm tofu or sweet potato tempura for a vegetarian miracle.
- The Vinegar Swap: If you’re out of rice vinegar, use apple cider vinegar with a pinch of extra sugar, though it’s a bit of a “cowboy” move.
- The Grain Swap: Use cauliflower rice mixed with a bit of cream cheese if you’re trying to pretend you’re on a keto kick.
🔪 Tools & Kitchen Gadgets Used
You don’t need a professional sushi bar, but a few basics make this a twenty-minute job instead of a sticky struggle.
- Bamboo Rolling Mat (Makisu): The absolute MVP for achieving those tight, viral-worthy cylinders. Check out the best bamboo mats here!
- Wooden Rice Paddle (Shamoji): To fold the vinegar into the rice without crushing the grains. Grab a sturdy one here!
- Very Sharp Chef’s Knife: CRUCIAL for clean cuts. Dull knives lead to squashed sushi. Check out top-rated knives here!
- Plastic Wrap: To cover your bamboo mat so the rice doesn’t become a permanent part of the wood.
- Large Mixing Bowl: Preferably wooden (Hangiri), but glass works too.
👩🍳 Step-by-Step Instructions: The Path to Rolling Glory
Follow these steps precisely. Sushi is a game of speed and “moisture management.” Keep a bowl of vinegared water nearby to dip your fingers in.
1. The Rice Meditation
Rinse your sushi rice until the water runs clear. Cook it with slightly less water than usual (ratio of 1:1.1). TBH, many people skip the rinse, but that extra starch is the enemy of a fluffy roll.
2. The Seasoning Strike
While the rice is hot, fold in the rice vinegar, sugar, and salt mixture. Use a slicing motion with your paddle—don’t mash it! Let it cool to room temperature. FYI, putting hot rice on nori will turn your seaweed into a soggy green mess.
3. The Mat Preparation
Cover your bamboo mat in plastic wrap. Place a sheet of nori on top, shiny side down. If you’re making “inside-out” (uramaki) rolls, the rice goes on first.
4. The Rice Spread
Wet your fingers in the vinegar water. Spread a thin, even layer of rice over the nori, leaving about an inch of empty space at the top. Bold Key Info: Do not press the rice down! It needs to be airy and light, not a dense brick.
5. The Topping Ceremony
Place your protein and veggies in a neat horizontal line across the bottom third of the rice. Don’t overfill it, or you’ll be making a “sushi burrito” instead of a roll.
6. The Great Roll
Lift the edge of the mat and roll it over the fillings. Use your fingers to tuck everything in tight. Give it a firm squeeze through the mat to set the shape. Continue rolling until you reach the empty nori strip.
7. The Surgical Cut
Remove the mat. Use your sharpest knife, wipe it with a damp cloth, and slice the roll in half. Bold Key Info: Slice in one long, smooth motion. Wipe the knife after every single cut to prevent the rice from sticking. 🙂
8. The Final Presentation
Top with spicy mayo, sesame seeds, and ginger. Serve immediately. Do not wait! Sushi waits for no one.
📊 Calories & Nutritional Info (The Justification)
Since it’s mostly rice and fresh fish, we can legally pretend this is a high-protein wellness meal. Right?
- Estimated Calories Per Roll: $\approx$ 280–380 kcal.
- Omega-3s: Massive amounts if you’re using fresh salmon or tuna.
- Iodine: A healthy hit from the seaweed (nori).
- Carbs: High (it’s rice, what did you expect?).
- Mood: 100% improved after the first spicy, salty bite.
🚨 Common Mistakes to Avoid (The Sushi Crimes)
Avoid these if you want people to actually keep talking to you at the dinner table.
- Using Hot Rice: It steams the nori and makes it chewy and gross. Cool it down!
- Overfilling the Roll: If you can’t close the roll, it’s a failure. Less is more.
- Dull Knives: If you squash the roll while cutting, you’ve essentially made a “sushi pancake.” Sharpen that blade.
- Dry Fingers: If you don’t wet your hands, the rice will become a permanent part of your skin. Stay hydrated. 🙂
✨ Variations & Customizations
Because you’re the boss of this raw fish circus.
1. The Keto-Friendly “Naked” Roll
Ditch the rice! Use thinly sliced cucumber or soy paper and fill it with extra salmon, cream cheese, and avocado. It’s a low-carb explosion of flavor.
2. The “Fire-Breather” Version
Mix chopped tuna with Sriracha and a drop of sesame oil. Top with fresh jalapeño slices for a roll that actually fights back.
3. The Crunchy Tempura Hack
Sprinkle some panko breadcrumbs (toasted in a pan with butter) over the top of your rolls. It gives you that “restaurant crunch” without the deep-frying mess.
❓ FAQ Section: Your Sushi Queries Answered
What is the difference between Sushi and Sashimi?
Sushi refers specifically to the seasoned vinegared rice. Sashimi is just the raw fish served on its own without any rice.
Can I use regular white rice for sushi?
IMO, no. Long-grain rice isn’t sticky enough. You need short-grain Japonica rice to ensure your rolls don’t fall apart the second you pick them up.
Is it safe to eat raw fish at home?
Yes, but check the labels. Look for “Sashimi Grade” or “Sushi Grade” fish. This means the fish was frozen at a low enough temperature to kill parasites.
Why is my sushi nori chewy?
You likely used warm rice or let the rolls sit out for too long. Moisture is the enemy of crisp seaweed!
How do I store leftovers?
Sushi is best eaten immediately. If you must, wrap it in plastic wrap and keep it in the fridge for no more than 24 hours. TBH, the rice will get hard, so eat up!
What is the “green paste” actually made of?
Most commercial wasabi is actually horseradish with green food coloring. Real wasabi is a grated root and is significantly more expensive.
How do I stop the rice from sticking to my hands?
Keep a bowl of Tezu (a mix of water and rice vinegar) nearby. Dip your fingers constantly!
🥂 Final Thoughts: Go Forth and Roll!
You’ve done it. You’ve successfully navigated the world of “Sticky Rice and Seaweed” without having a public breakdown. You are now a titan of the bamboo mat and a hero of the dinner table. Go ahead, have that second roll—it’s mostly just “fish and plants,” right? Just don’t tell me if you used a microwave to “sear” the salmon; I have a reputation to maintain. 😉