
The Ultimate Sheet Pan Pancakes That Will Make You Retire Your Griddle
Let’s talk about the Great Pancake Paradox. The fantasy is a lazy Sunday morning, a happy family gathered around the table, a towering stack of perfectly golden, fluffy pancakes. The reality? You, the cook, are a spatula-wielding short-order cook, flipping flapjacks one by one, while everyone else eats in shifts. By the time you finally sit down, your own pancakes are cold, and the kitchen looks like a flour bomb went off. What if you could make a dozen perfect, fluffy pancakes for everyone, all at once, with almost zero effort? My friends, I am here to introduce you to the life-altering magic of Sheet pan pancakes.

This isn’t just a recipe; it’s a breakfast revolution. It’s the ultimate brunch hack that delivers all the fluffy goodness you crave with none of the standing, flipping, or general chaos. Prepare to reclaim your weekend mornings and become an undisputed breakfast hero.
Why This Recipe Is a Breakfast Game-Changer
Still clinging to your trusty skillet and a heart full of hope? Let me show you a better, lazier way.

First and foremost, everyone eats at the same time. I cannot overstate the sheer joy of this. You pour the batter, pop it in the oven, and a few minutes later, you have one giant, perfect pancake ready to be sliced and served to a chorus of applause. No more cold pancakes for the cook!
Second, it’s insanely easy and hands-off. Once the pan is in the oven, your work is done. You are free to sip your coffee, read the news, or just stare blankly into space for 15 minutes. There is no hovering, no worrying about burnt bottoms or raw centers, no frantic flipping.
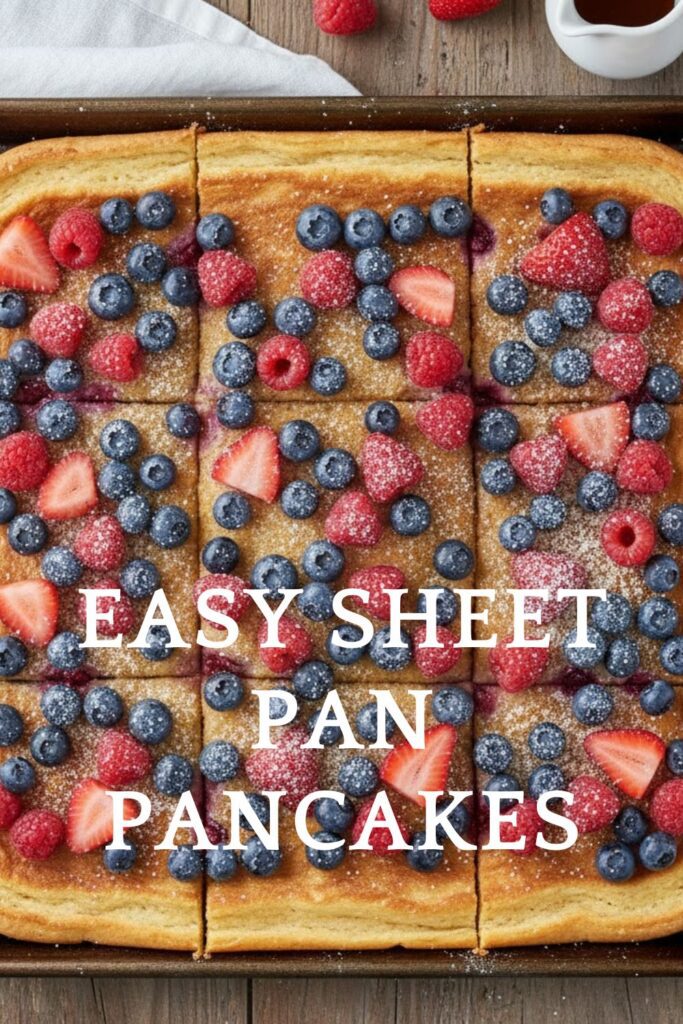
Finally, it’s the ultimate customizable breakfast. Do the kids want chocolate chips while you want blueberries? No problem! You can designate different “zones” on your giant pancake for different toppings. It’s a choose-your-own-adventure breakfast where everyone wins.
The Ingredient Lineup (Or Just Use a Box Mix, I Won’t Tell)

We’re making a simple, classic pancake batter here. But let’s be real, a good quality box mix works beautifully and makes this even easier. No judgment here.
For the Pancake Batter:
- All-Purpose Flour: 2 cups.
- Granulated Sugar: 2 tablespoons.
- Baking Powder: 2 teaspoons. Make sure it’s fresh! Old baking powder is the leading cause of sad, flat pancakes.
- Salt: 1/2 teaspoon.
- Milk: 1.5 cups. Whole milk or buttermilk will give you the richest results.
- Large Eggs: 2 of them.
- Melted Unsalted Butter: 4 tablespoons (1/2 stick), plus more for greasing the pan.
- Vanilla Extract: 1 teaspoon.
For the Toppings (The Fun Part!):
- Fresh Berries: Blueberries, sliced strawberries, raspberries.
- Chocolate Chips: Mini or regular.
- Sliced Bananas
- Chopped Nuts
- Sprinkles!
Tools & Kitchen Gadgets for Pancake Perfection
You don’t need a professional kitchen, just a few key players.
- A Large Rimmed Baking Sheet (Sheet Pan): This is the MVP. A standard half-sheet pan (18×13 inches) is perfect.
- Parchment Paper (Optional but Recommended): For guaranteed non-stick and a cleanup so easy it feels like cheating.
- Large Mixing Bowl: For your dry ingredients.
- A Separate Medium Bowl or Large Measuring Cup: For your wet ingredients.
- Whisk: For banishing lumps from your batter.
- Rubber Spatula: For scraping the bowl and spreading the batter.
- Pizza Cutter: The absolute best tool for slicing your finished pancake into neat squares. A knife works too, but where’s the fun in that?
Step-by-Step to Pancake Paradise
Ready for the easiest pancake-making experience of your life? Let’s do this.
Step 1: Get the Oven Hot and the Pan Ready
First, preheat your oven to 425°F (220°C). A hot oven is key for a good rise. Generously grease your sheet pan with butter or line it with parchment paper and then grease the paper. Don’t skimp on this step unless you enjoy chiseling food off of metal.
Step 2: Mix Your Batter
In your large bowl, whisk together the flour, sugar, baking powder, and salt. In your separate medium bowl, whisk together the milk, eggs, melted butter, and vanilla extract.
Now, pour the wet ingredients into the dry ingredients. Whisk them together just until combined. A few small lumps are perfectly fine! Do not overmix the batter. Overmixing develops the gluten and will give you tough, rubbery pancakes instead of light, fluffy ones.
Step 3: Pour and Spread
Pour the pancake batter into your prepared sheet pan. Use your spatula to gently spread it into an even layer, making sure it reaches all the corners.
Step 4: The Topping Extravaganza
Now, go wild. Sprinkle your chosen toppings all over the batter. You can cover the whole thing in blueberries, or create different sections: a chocolate chip corner for the kids, a banana-nut section for you. Live your best life.
Step 5: Bake to Golden Perfection
Carefully place the sheet pan in your preheated oven. Bake for 12-15 minutes, or until the pancake is puffed up, golden brown, and a toothpick inserted into the center comes out clean.
Step 6: Slice and Serve
Let the pancake cool in the pan for a few minutes. This makes it easier to slice. Use a pizza cutter or a knife to cut it into squares. Serve immediately with a generous drizzle of maple syrup and an extra pat of butter. Prepare for the applause.
Calories & Nutritional Info (A Delicious Disclaimer)

It’s a giant pancake. It’s made of flour and sugar. Let’s not pretend it’s a kale smoothie.
- Calories: Approximately 150-250 kcal per square (assuming 12 squares per pan, without toppings).
- Fat: Around 8-12g.
- Carbohydrates: Roughly 20-30g.
- The Bottom Line: It’s a joyful, comforting breakfast. Enjoy it!
Common Mistakes to Avoid (Pancake Pitfalls)
Even this simple recipe can have its moments. Here’s how to avoid them.
- The Sad, Flat Pancake: This is usually the fault of old baking powder or overmixing your batter. Baking powder loses its power over time. And remember, lumps in your batter are your friends!
- A Soggy Bottom: You either didn’t grease the pan enough or your oven wasn’t hot enough. A properly preheated oven is key to getting a nice, golden-brown bottom crust.
- The Dreaded Gummy Center: You pulled it out of the oven too soon. The top might look done, but the inside is still raw batter. Do the toothpick test! It should come out clean.
- Uneven Topping Distribution: If you just dump all your toppings in the middle, you’ll have a sad, barren wasteland of plain pancake around the edges. Spread those toppings all the way to the corners.
Variations & Customizations (Your Pancake, Your Rules)
The classic is great, but this is a perfect canvas for your culinary creativity.
- Cinnamon Roll Sheet Pan Pancakes: Before baking, swirl a mixture of melted butter, brown sugar, and cinnamon all over the top of the batter. After it comes out of the oven, drizzle it with a simple cream cheese glaze.
- Funfetti Birthday Cake Pancakes: Stir a generous amount of rainbow sprinkles directly into the batter before pouring it into the pan. Top with more sprinkles before baking. It’s a party on a pan!
- Savory Sheet Pan Pancakes: Omit the sugar and vanilla from the batter. Stir in 1 cup of shredded cheddar cheese, some chopped chives, and cooked, crumbled bacon or sausage. Serve with a dollop of sour cream instead of syrup.
FAQ: Your Burning Pancake Questions, Answered
Let’s clear up some common questions about this breakfast marvel.
1. Can I use a boxed pancake mix?
Absolutely! This is the ultimate shortcut. Just prepare the batter according to the package directions (you’ll likely need about 3 cups of prepared batter for a half-sheet pan) and proceed with the recipe.
2. How do I know when the sheet pan pancake is done?
The pancake should be puffed and golden brown, and the edges should be pulling away from the sides of the pan. The most reliable way is the toothpick test: insert a toothpick into the center, and it should come out clean.
3. Can I make this ahead of time?
You can! You can bake the whole pancake, let it cool, and store it in the fridge. The squares are perfect for a quick breakfast throughout the week.
4. What’s the best way to store and reheat leftovers?
Store the cooled pancake squares in an airtight container in the refrigerator for up to 3 days, or in the freezer for up to 2 months. To reheat, you can pop them in the toaster, microwave, or an air fryer for a few minutes until warm and slightly crispy.
5. Can I use a different size pan?
Yes, but you’ll need to adjust the baking time. A smaller pan will result in a thicker pancake that will need more time to cook through. A larger pan will create a thinner pancake that will cook faster.
6. Can I make this gluten-free or vegan?
Easily! For gluten-free, use your favorite 1-to-1 gluten-free flour blend. For vegan, use a flax egg (1 tbsp ground flaxseed + 3 tbsp water per egg), your favorite non-dairy milk, and a vegan butter or oil.
7. Why did my toppings all sink to the bottom?
This can happen with heavy toppings like large chunks of fruit. To prevent this, you can try tossing your toppings (especially berries) in a tablespoon of flour before sprinkling them on top. This helps them stay suspended in the batter.
Final Thoughts
You are now officially a Sheet Pan Pancake Pro. You hold the power to create a perfect, crowd-pleasing breakfast with minimal effort and maximum glory. No more flipping, no more eating in shifts, no more pancake-related stress. Just pure, unadulterated, fluffy goodness for everyone, all at once.
So go on, retire your griddle. Give it a nice farewell party. It served you well, but its time is over. The future is a giant, glorious, golden-brown rectangle of pure happiness.

