
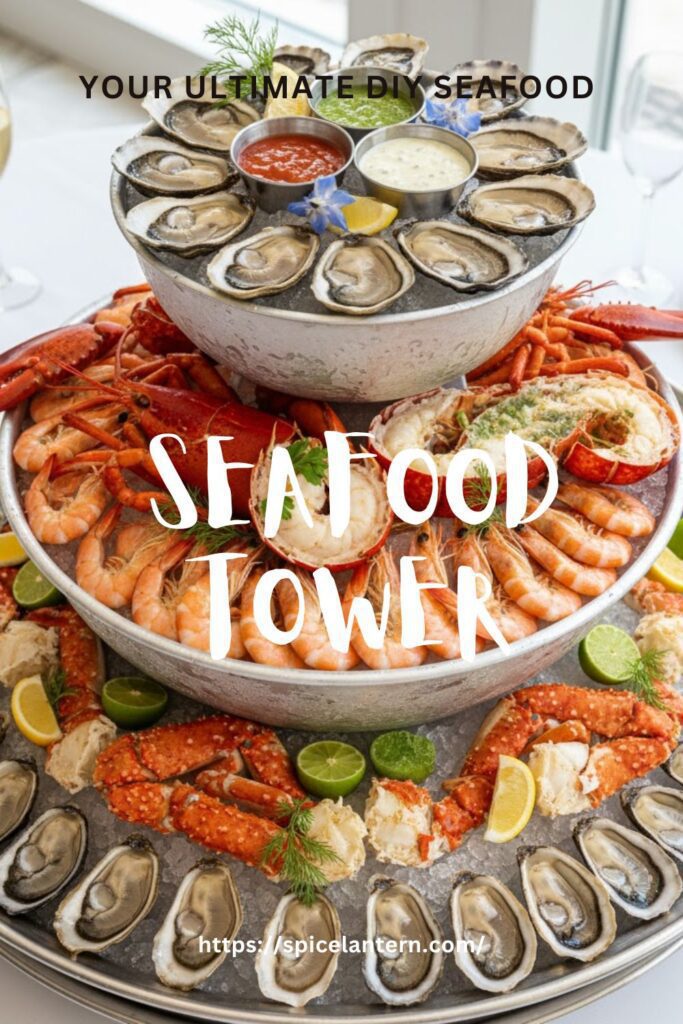
Skip the Michelin Star: Your Ultimate DIY Seafood Tower Guide (Impress Everyone, Even Yourself!)
Let’s face it: there are certain dining experiences that just scream “I’ve made it.” And high on that list? The glorious, shimmering, multi-tiered seafood tower. It’s pure culinary theater, right? But then you see the price tag, and suddenly that luxurious dream turns into a financial nightmare. Who wants to take out a second mortgage for some shrimp? Nobody, that’s who. Well, tell your wallet to relax because I’m here to show you how to build your own showstopping seafood tower at home, no Michelin stars required.
Why Building Your Own Seafood Tower Is Pure Genius

Why bother assembling a tower of expensive seafood yourself? Because this recipe isn’t just a meal; it’s an experience. It delivers all the wow-factor of a fancy restaurant appetizer with a fraction of the cost and all the bragging rights.
First, it’s customizable perfection. You pick your favorite seafood. Crab, oysters, lobster, shrimp—whatever makes your heart sing (and your wallet weep slightly less). Second, it’s surprisingly easy to assemble. Seriously, it’s mostly about presentation and keeping things cold. Third, the visual impact is off the charts. You’ll impress your guests so much they might actually believe you’re a secret millionaire. Plus, it’s a fantastic way to enjoy fresh, high-quality seafood without a dress code or a snooty waiter.
Ingredients: Your Ocean’s Bounty (Choose Your Fighters Wisely!)


This is where you get to play seafood sommelier. Think variety, freshness, and what you actually love to eat.
H3: The Stars of Your Tower (Pick 3-5 of these)
- 1 dozen Oysters (East Coast and/or West Coast): Shucked on ice. Freshness is key here. Ask your fishmonger to shuck them if you’re nervous!
- 1 lb Large Cooked Shrimp (21/25 count): Peeled and deveined, tail-on. Buy them pre-cooked to save time, or quickly steam/poach yourself.
- 1 lb Snow Crab Legs or King Crab Legs: Pre-cooked and cracked. Pure indulgence.
- ½ lb Cooked Lobster Tail Meat: Or a whole cooked and split lobster. Decadence personified.
- ½ lb Cooked Mussels or Clams: Steamed open, shells cleaned.
- ½ lb Seared Scallops or Ahi Tuna: Quickly seared and thinly sliced for a fancier touch.
H3: The Essential Accompaniments (Don’t Skip These!)
- 1 cup Cocktail Sauce: Store-bought is fine, or make your own (see variations!).
- ½ cup Mignonette: For oysters. It’s a game-changer! (Red wine vinegar, minced shallots, black pepper.)
- 2 Lemons: Cut into wedges. Fresh lemon brightens everything.
- Fresh Horseradish: Grated, for those who like a kick.
- Hot Sauce (e.g., Tabasco): For extra heat.
- Melted Butter (Optional): For dipping crab and lobster. IMO, mandatory for crab.
- Fresh Parsley or Dill: For garnish. Makes it look fancy.
Key Substitutions:
- Seafood Choices: Don’t like oysters? Skip ’em! Love ceviche? Add it! This is your tower. Focus on quality, fresh seafood you genuinely enjoy.
- Pre-Cooked vs. Fresh: While pre-cooked shrimp saves time, freshly cooked shrimp (poached or steamed for just a few minutes) has a far superior texture. TBH, worth the extra 5 minutes.
- Mignonette Swap: Just lemon wedges are fine for oysters, but a good mignonette really elevates the experience.
Tools & Kitchen Gadgets Used: Your Seafood Command Center
You mostly need serving pieces and a few basic prep tools.
- Tiered Serving Stand (Seafood Tower Stand): The iconic centerpiece! Look for a 2 or 3-tier version.
- Large Platter or Bowl (for the base): To hold ice and initial seafood.
- Plenty of Crushed Ice: Crucial for keeping everything chilled and looking magnificent. Buy a bag, or make lots!
- Oyster Shucker (if shucking oysters yourself): And a thick towel or glove for safety!
- Seafood Forks/Picks: For extracting every last bit of deliciousness from crab and lobster.
- Nut Crackers or Crab Crackers: For, well, cracking crab and lobster shells.
- Small Serving Bowls: For cocktail sauce, mignonette, etc.
- Cutting Board and Sharp Knife: For lemons and any prep.
- Tongs: For easy serving.
Step-by-Step Instructions: Building Your Edible Masterpiece
This is less about cooking and more about assembly and presentation. Think architect, but for deliciousness.
H3: Step 1: Prep Your Seafood (The Hard Work)
If you’re cooking shrimp: Bring a pot of salted water to a boil. Add shrimp and cook for 1-2 minutes until pink and opaque. Immediately plunge into an ice bath to stop cooking. Drain and chill thoroughly. If cooking mussels/clams: Steam in a little white wine or water until they open (discard any that don’t!). Chill. If searing scallops/tuna: Pat dry, season, quickly sear in a hot pan (1-2 minutes per side), then chill and slice. Ensure ALL your seafood is thoroughly chilled before assembly. This is for safety and optimal enjoyment!
H3: Step 2: Assemble Your Sauces & Garnishes
Prepare your cocktail sauce, mignonette (if making from scratch), grate fresh horseradish, and slice your lemons into wedges. Arrange them in small, elegant serving bowls. Set aside, ready for action.
H3: Step 3: Create the Icy Foundation
Fill the bottom tier or large platter of your seafood tower stand generously with crushed ice. This is crucial for keeping your bounty cold and visually stunning. The more ice, the better the presentation and food safety.
H3: Step 4: Arrange the Largest Pieces (The Anchor)
Start by arranging your largest seafood pieces on the bottom tier, nestled directly into the ice. Think crab legs, split lobster, or a generous pile of large shrimp. Arrange them artistically—we’re going for “abundant elegance,” not “seafood disaster.”
H3: Step 5: Build Up the Layers (The Middle Management)
Place your next tier onto the stand. Fill this tier with more crushed ice, then arrange your medium-sized seafood. This could be more shrimp, mussels, clams, or seared tuna slices. Continue to arrange neatly, ensuring easy access for your eager diners.
H3: Step 6: The Grand Finale (The Apex)
For the top tier (if using a 3-tier stand, or the top of a 2-tier), fill with crushed ice. This is often where the oysters go, beautifully presented on their half shells. You can also add more delicate items or smaller portions of other seafood here.
H3: Step 7: Garnish & Serve!
Nestle the small bowls of cocktail sauce, mignonette, and horseradish amongst the seafood on the tiers, or place them strategically around the base. Add lemon wedges and fresh herbs for color and freshness. Place seafood crackers and picks nearby. Serve immediately and enjoy the oohs and aahs!
Calories & Nutritional Info: Dive In, Guilt-Free (Mostly)

Seafood is generally a lean protein, so you’re doing better than a cheese board, right? These estimates are approximate per person (assuming 4 servings with varied seafood).
- Estimated Calories per serving (generous): 300-600 calories (highly variable based on choices)
- Protein: 40-70g (from all that glorious seafood!)
- Fat: 5-20g (less if no melted butter, more with crab/lobster)
- Carbohydrates: 5-15g (from sauces, lemon)
- Rich in Omega-3 Fatty Acids: Especially from salmon/tuna, excellent for heart health.
- Good source of Vitamins & Minerals: B vitamins, iodine, selenium.
- Low in Saturated Fat: A healthier indulgence!
Common Mistakes to Avoid: Don’t Sink Your Seafood Ship!
Building a seafood tower isn’t rocket science, but a few blunders can ruin the experience.
- Warm Seafood: This is the ultimate sin. ALL seafood must be thoroughly chilled before and during serving. No one wants warm, questionable shellfish. That’s a direct ticket to a bad time.
- Overcooking the Seafood: If you cook your own shrimp or lobster, do not overcook it! Overcooked seafood is rubbery and tasteless. Cook just until opaque.
- Lack of Ice: A skimpy layer of ice means your beautiful seafood will get warm fast. Be generous with the crushed ice. It’s functional and looks fantastic.
- Poor Quality Seafood: A seafood tower is only as good as its ingredients. Invest in the freshest, highest-quality seafood you can find. Ask your fishmonger what’s best.
- Messy Presentation: This is a visual feast. Take a few extra minutes to arrange everything artfully. Wipe off any drips, make sure shells face appealingly, and tuck in those garnishes.
Variations & Customizations: Your Ocean, Your Rules
Think beyond the traditional for truly bespoke indulgence!
- Mexican-Inspired Tower: Include shrimp ceviche in shot glasses, grilled octopus slices, and a vibrant mango salsa. Serve with lime wedges, cilantro, and a spicy avocado crema.
- Asian Fusion Tower: Feature sashimi-grade tuna and salmon slices, poached shrimp with a soy-ginger dipping sauce, and steamed edamame. Offer wasabi, pickled ginger, and a light ponzu sauce.
- Grilled & Smoked Elements: For a unique twist, include a few pieces of cold smoked salmon or a few grilled shrimp skewers (chilled, of course). The smoky flavor adds depth and intrigue to the tower.
FAQ Section: Your Most Pressing Seafood Tower Queries, Answered
You’ve got questions about this magnificent display. I’ve got the answers.
H3: Q1: How much seafood do I need for a seafood tower?
A1: Plan for about ½ to ¾ pound of mixed seafood per person if it’s the main appetizer, or about ¼ to ½ pound per person if you have other appetizers. Better to have too much than too little!
H3: Q2: Can I prepare a seafood tower ahead of time?
A2: You can do most of the prep (cooking, chilling, making sauces) a few hours ahead. However, assemble the tower just before serving, as close to guests arriving as possible, to ensure optimal freshness and chill.
H3: Q3: What is the best way to keep the seafood cold?
A3: Crushed ice, and lots of it! Nestling the seafood directly into a bed of crushed ice on each tier is the most effective way. Keep the tower away from direct sunlight or warm rooms.
H3: Q4: How do I know if my seafood is fresh enough for a tower?
A4: Trust your nose and eyes! Fresh seafood should smell briny, like the ocean, not “fishy.” Fish should have clear eyes and firm flesh. Oysters and clams should be tightly closed (discard any open ones!).
H3: Q5: What is mignonette and why do I need it for oysters?
A5: Mignonette is a condiment, typically made of minced shallots, cracked black pepper, and vinegar (often red wine or champagne vinegar). It provides a sharp, acidic counterpoint to the brininess of oysters, enhancing their flavor beautifully. IMO, a must-have.
H3: Q6: Do I need a special tiered stand for a seafood tower?
A6: While a tiered stand looks amazing, you can absolutely create a beautiful presentation using large platters and bowls stacked artfully, with plenty of ice. Get creative with what you have!
H3: Q7: Can I use frozen seafood?
A7: Yes, many frozen seafood options are excellent, especially shrimp, lobster, and crab legs. Just ensure you thaw them properly in the refrigerator overnight before use, and cook them gently if needed.
Final Thoughts: You Are Now a Seafood Sage!
You’ve done it! You created a magnificent, showstopping Seafood tower right in your own kitchen. Go ahead, take a bow. You’ve earned the admiration, the compliments, and every glorious bite of that fresh, briny goodness. Are you ever going to drop three hundred bucks on a restaurant seafood tower again? I highly doubt it. Enjoy your opulent feast, you culinary genius!

