Skip the Months, Get the Buzz: Your Guide to Rapid Rice Wine (Ready in 3 Days!)
Let’s cut to the chase: traditional Asian fermentation is a slow, methodical art that requires weeks of patience and a deep respect for mold. I respect the art, but my weekend starts Friday night! I figured out how to make Rapid Rice Wine—a sweet, potent, and delightfully simple version of jiuniang (Chinese sweet rice wine) that achieves peak flavor and alcohol content in about three days. This isn’t just fast; it’s a culinary shortcut built on the magic of specialized yeast and precise temperature control. Why wait a month when you can get a sweetly fermented buzz before you even finish that new Netflix series?
Why This Recipe Is Awesome (It’s Dessert, Plus Alcohol)

This recipe is a masterpiece of efficiency, relying on science to deliver immediate gratification.
- Lightning Fast: We use a specialized starter (often called jiuqu or a rice wine yeast ball) that contains both the mold (which converts starch to sugar) and the yeast (which converts sugar to alcohol). This dual-action starter cuts the total fermentation time dramatically.
- Sweet and Potent: This wine is known for its distinct sweetness and low alcohol percentage when young, perfect for drinking warm or adding to desserts. You control the alcohol level by controlling the timing.
- Minimal Fuss: The process is largely hands-off after the initial rice prep. No complicated mashing, no continuous stirring—just steaming, mixing, and waiting for the microbial magic to happen.
Ingredients: The Starch and the Starter

Precision with temperature and the starter is the secret to success here.
- 2 cups Glutinous Rice (Sweet Rice/Sticky Rice): MANDATORY. Its high starch content is essential for conversion to sugar. Do not use regular jasmine or basmati rice.
- 1 cup Filtered Water (for fermentation): This liquid is key for the final wine.
- 1 Rice Wine Yeast Ball (Jiuqu or similar specialized starter): CRITICAL. This is the enzyme and yeast source. You usually need about 1 small ball per 500g (2 cups) of dry rice.
- Optional Sweetener: 1 tablespoon Granulated Sugar or Honey (to ensure a faster start, though the rice provides the sugar).

Key Substitutions:
- Glutinous Rice: While some swear by other high-starch grains, stick to glutinous rice for the best texture and fastest conversion.
- Yeast Ball: Use a Koji starter (malted rice) and a small amount of wine yeast (like EC-1118) separately, but this complicates the fast process. IMO, buy the ball!
- Filtered Water: Use boiled and cooled tap water if you don’t have a filter, as chlorine can inhibit the fermentation.
Tools & Kitchen Gadgets Used: Your Fermentation Station
Sanitation is critical. You are growing friendly microbes, so keep the bad ones away!
- Fine Mesh Strainer: For washing the rice.
- Steamer Basket or Rice Cooker with Steamer Insert: For perfectly cooked, non-mushy rice.
- Glass Jar (Quart or Half-Gallon size) with a Lid: CRITICAL for fermentation and storage. Glass is best for cleanliness.
- Digital Food Thermometer: For checking the rice temperature (must be around 95°F / 35°C before mixing).
- Rolling Pin or Mortar and Pestle: For crushing the yeast ball into a fine powder.
- Sanitizing Solution: For cleaning all tools (non-rinse sanitizer or boiling water).
Step-by-Step Instructions: The 72-Hour Clock
Get ready for an easy process that requires patience only during the steaming and cooling phases.
Step 1: Prep and Steam the Rice (12 Hours Soak + 45 Minutes Steam)
- Wash and Soak: Place the glutinous rice in a large bowl. Wash and rinse it repeatedly until the water runs completely clear. Soak the rice in fresh water for at least 6-12 hours (or overnight). This ensures even cooking.
- Steam: Drain the soaked rice. Steam the rice for 30-45 minutes until it is thoroughly cooked, glossy, and sticky, but not mushy. Spread it thinly on a clean surface to cool.
Step 2: Cool and Crush (1 Hour)
- Cooling is Crucial: You must cool the rice down to 95°F (35°C). Use your thermometer! If the rice is too hot, you will kill the starter. If it is too cold, the fermentation will be sluggish.
- Crush the Starter: While the rice cools, place the yeast ball in a sealed plastic bag or use a mortar and pestle to crush it into a fine powder.
Step 3: Mix and Ferment (3 Days)
- In a clean, sanitized jar, mix the cooled rice with the crushed yeast powder and the 1 cup of filtered water. Mix gently with a sanitized spoon until everything is evenly combined.
- Compact and Center: Press the rice mixture down gently to form a firm mass, leaving a well/hole in the center for liquid to accumulate.
- Cover Loosely: Cover the jar with the lid, but do not seal it tightly for the first day. The initial phase needs a little oxygen. Place it in a warm spot (80–90°F / 26–32°C). A pilot light oven or on top of the fridge works well.
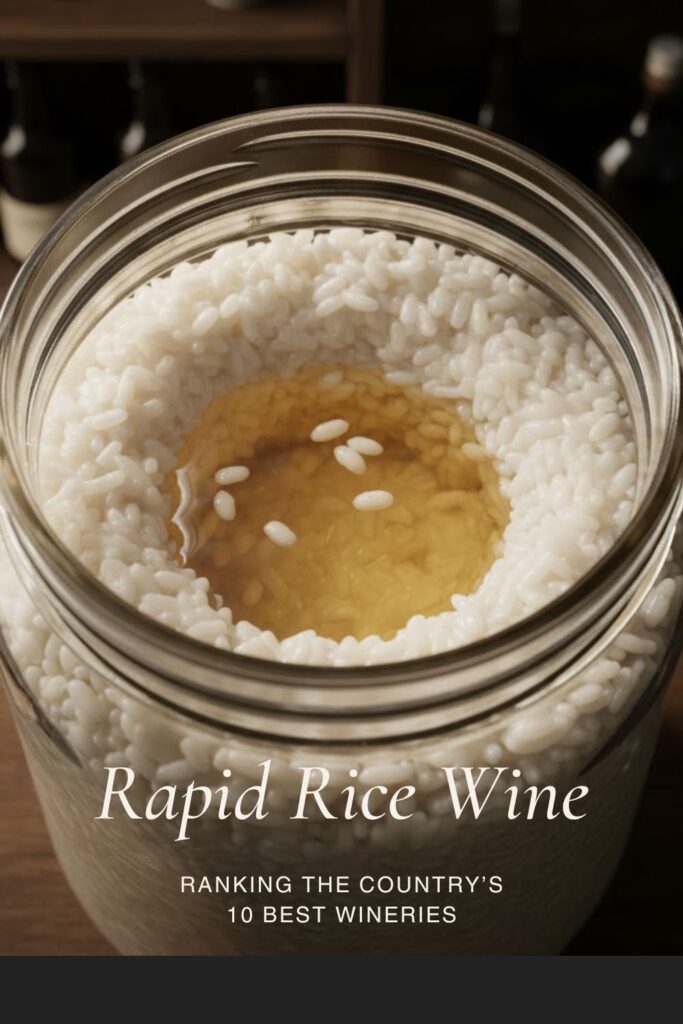
Step 4: Harvest the Wine (72 Hours)
- Check for Liquid: After 12-24 hours, you should see clear liquid (the rice wine) pooling in the center well. The rice grains will likely be floating on top.
- Taste Test: Start tasting the liquid after 48 hours. It will be sweet and slightly tangy. At 72 hours (3 days), the sweetness will start to fade as the alcohol content increases.
- Halt Fermentation: When the wine reaches the desired balance of sweetness and alcohol, tighten the lid completely and move the jar to the refrigerator. The cold stops the fermentation.
Calories & Nutritional Info: The Sweet Facts (Estimated)

These are rough estimates for a 1/2 cup (4oz) serving of the finished, sweet rice wine.
- Calories per serving (4 oz): ~100-150 calories
- Carbohydrates/Sugar: ~15-25g (Varies based on when you stop fermentation.)
- Alcohol Content: ~5-10% ABV (Varies based on fermentation time.)
- Enzyme Note: The final product contains amylase enzymes from the mold, which can aid digestion.
Common Mistakes to Avoid: The Royal Road to Ruin
Rice wine is finicky. Follow these rules religiously!
- Not Soaking the Rice: Skipping the soak results in unevenly cooked rice, which doesn’t ferment properly. Soaking is mandatory.
- Hot Rice Kills: Never add the starter to warm or hot rice! The high heat instantly kills the delicate mold and yeast in the ball. Cool it to 95°F!
- Contamination: Rice wine is highly susceptible to mold. Sanitize everything and avoid introducing foreign bacteria. Black or colored mold means the batch is ruined—toss it!
- Ignoring the Temperature: Fermenting rice wine needs to stay warm and consistent (80–90°F) for speed. If it gets cold, the process stalls, and you may get off-flavors.
- Forgetting the Final Chill: If you leave it at room temp after 3 days, the yeast will keep eating the sugar, making the wine drier and stronger than intended. Cold crashing stops the process.
Variations & Customizations: Your Asian Fermentation Lab
Get creative with your rice wine once you master the basics.
- Spicy Ginger Boost: Add 1 tablespoon of thinly sliced, raw ginger to the rice mixture in Step 3. The ginger ferments with the rice, giving the wine a lovely, warm heat.
- Purple Power: Substitute purple glutinous rice for the white variety. The resulting wine will have a beautiful purple hue and a slightly earthier flavor.
- Thicker Pudding: Use slightly less water (about ¾ cup) in Step 3. The final product will be thicker, more like a sweet rice pudding, perfect for eating with a spoon!
FAQ Section: The Sticky Science Unpacked
You’re a fermentation novice no more! Here are the common questions about this ancient process.
Q1: Is this the same as Sake?
A: No. Sake is a highly refined alcoholic beverage with a complex brewing process. This is a simpler, sweeter, low-alcohol rice wine or fermented rice pudding (jiuniang).
Q2: What is the “Rice Wine Yeast Ball”?
A: It’s a solid starter culture (known as jiuqu or ragi) that contains a mix of mold (for converting starch to sugar) and yeast (for converting sugar to alcohol). It is essential for rice wine making.
Q3: How do I know when to stop the fermentation?
A: Taste it! The longer it ferments, the less sweet and more alcoholic it becomes. Stop it (by refrigerating it) when the flavor balance is perfect for your taste—usually after 48-72 hours.
Q4: Why is my rice wine bitter or sour?
A: Sourness often means too much oxygen entered the jar, allowing Acetobacter (vinegar bacteria) to grow. Bitterness can mean too long of a fermentation or the initial rice was overcooked/mushy.
Q5: Can I use a rice cooker for this recipe?
A: Yes! Use your rice cooker to steam the glutinous rice in Step 1. Do not use the cook function, as it tends to make the rice too wet and mushy.
Q6: How long can I store the finished rice wine?
A: Store the wine in a tightly sealed jar in the refrigerator for up to 3 months. The cold slows down the fermentation process significantly.
Q7: Should I eat the fermented rice grains?
A: Yes! The fermented rice grains are soft, sweet, and edible. They often sink to the bottom and are a popular dessert, often served warm with water or soup.
Final Thoughts: Cheers to Rapid Results
You just conjured up a delicious batch of Rapid Rice Wine and saved yourself a month of agonizing waiting. You mastered the mold, charmed the yeast, and now you have a sweet, potent reward. Go ahead and pour yourself a small glass. You’re officially a fast fermentation genius.