
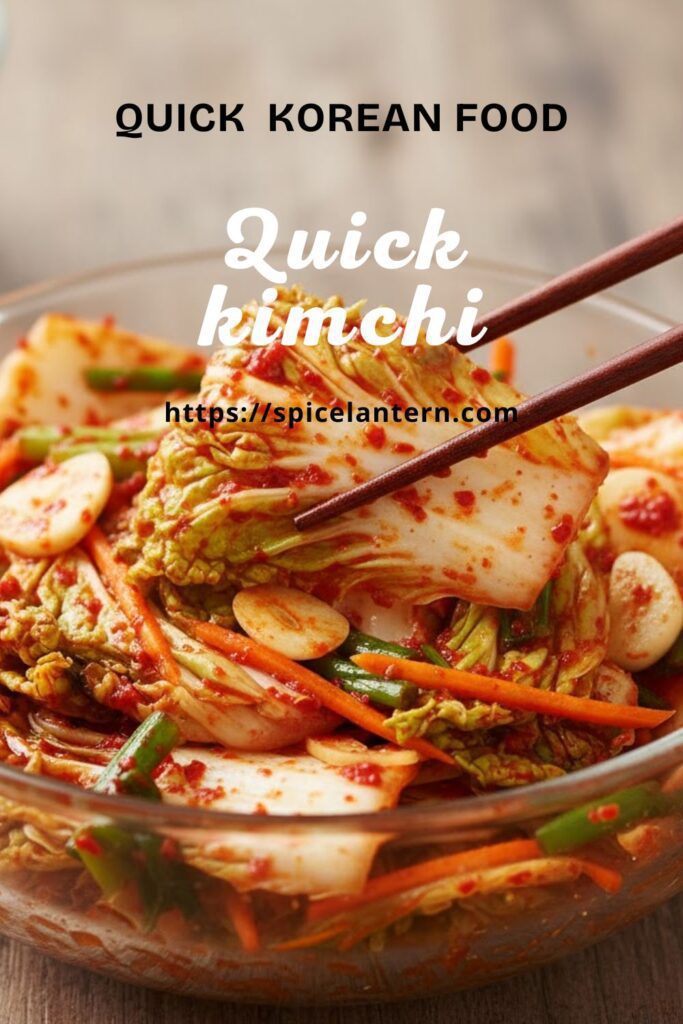
Get Your Spice On: The Easiest Quick Kimchi Recipe You’ll Ever Make!
Let’s talk kimchi. This vibrant, spicy, fermented Korean side dish has taken the world by storm, and for good reason! It’s crunchy, tangy, savory, and adds an explosion of flavor (and probiotics!) to pretty much anything. But if you’ve ever looked at traditional kimchi recipes, with their multi-day fermentation, elaborate paste-making, and the general air of a scientific experiment, you might have thought, “Nah, I’ll just buy it.” Well, guess what, buttercup? I’m here to tell you that you can achieve glorious, satisfyingly spicy quick kimchi right in your own kitchen, without the multi-day commitment. Get ready to impress yourself (and maybe your gut flora) with minimal fuss.
Why This Quick Kimchi Recipe Is Your New Kitchen Obsession
Why bother making kimchi when you can just grab a jar from the Asian market? Because this recipe is awesome, that’s why. It delivers that signature spicy, tangy, savory flavor and satisfying crunch without the weeks of waiting.
First, the flavor is punchy and fresh. We get all those classic kimchi notes – spicy, garlicky, gingery, salty – without the deep fermentation tang (which, let’s be honest, can be an acquired taste for some!). Second, it’s ridiculously easy – we skip the long brining and fermenting process, meaning you get kimchi in hours, not weeks. Third, you control the spice level. No more bland or blow-your-head-off store-bought surprises! Plus, it’s a fantastic way to introduce yourself to making fermented foods without the intimidation factor. Who doesn’t want to casually say, “Oh, this? Yeah, I whipped up some kimchi last night.”
Ingredients: The Spicy, Crunchy Squad
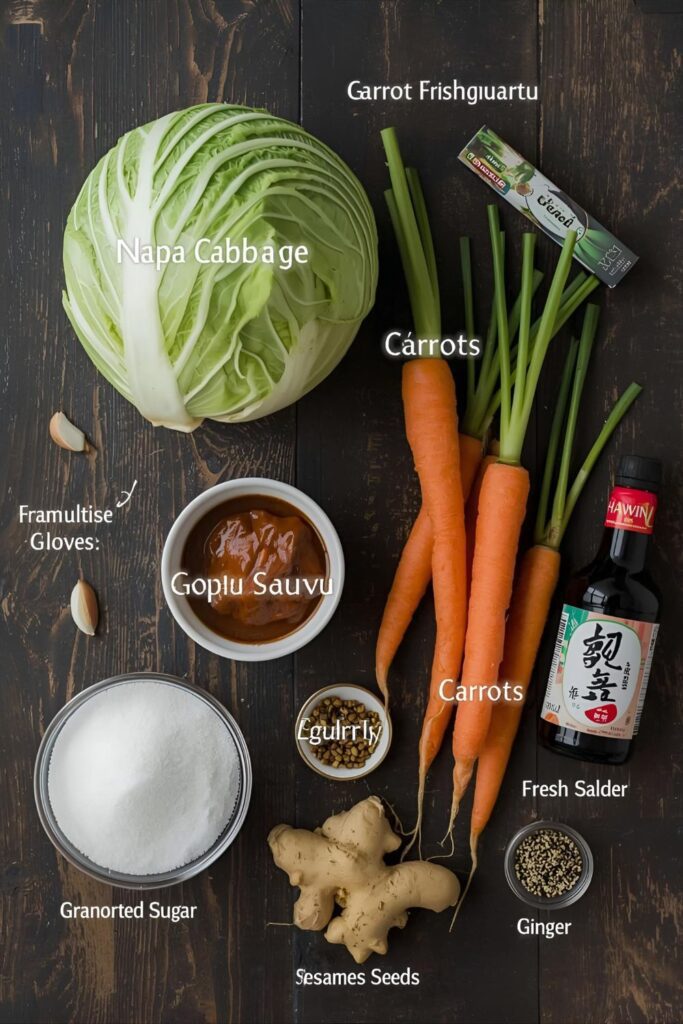
You only need a handful of essential ingredients, many of which you might already have hiding in your pantry.
H3: For the Crunchy Cabbage & Veggies
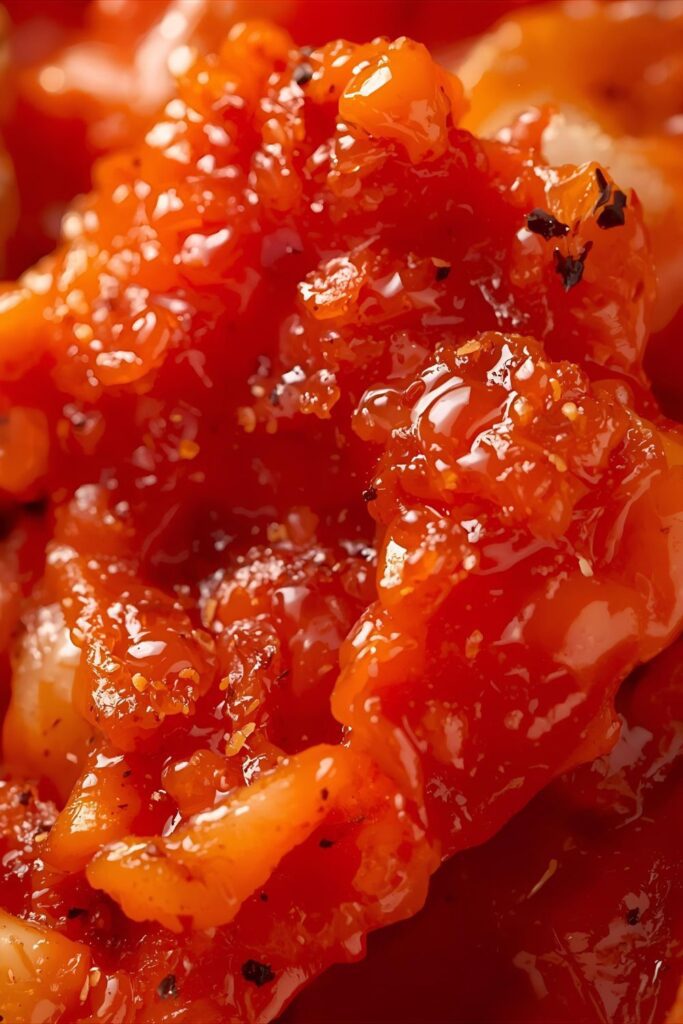
- 1 medium Napa Cabbage (about 2 lbs): Quartered lengthwise, then chopped into 1-inch pieces. This is the heart of your kimchi!
- 1 tablespoon Kosher Salt: Crucial for wilting the cabbage and drawing out moisture. Do NOT use iodized table salt.
- ½ large Carrot: Julienne or thinly slice into matchsticks. Adds color and subtle sweetness.
- 4-5 Green Onions: Chopped into 1-inch pieces. The white and green parts are both good.
H3: For the Flavor-Packed Kimchi Paste
- ¼ cup Gochugaru (Korean Chili Flakes): Absolutely essential for authentic kimchi flavor and color! Adjust to your spice preference.
- 2 tablespoons Fish Sauce: Don’t skip this! It adds crucial umami and depth.
- 1 tablespoon Minced Garlic: More garlic = more good, IMO.
- 1 tablespoon Minced Fresh Ginger: For that spicy, aromatic kick.
- 1 tablespoon Sugar: Balances the spice and salt.
- 1 teaspoon Sesame Seeds: Adds a nutty finish.
- Optional: 1 teaspoon Rice Vinegar: For an extra zing of tanginess, especially since we’re skipping the long ferment.
Key Substitutions:
- Cabbage Swap: You can use green cabbage in a pinch, but Napa cabbage has the best texture and flavor for kimchi.
- Gochugaru Alternative: If you really can’t find gochugaru, red pepper flakes (like Aleppo or regular) can be used, but the color and flavor will be different. It won’t be authentic kimchi without gochugaru, TBH.
- Fish Sauce Alternative: For a vegan version, use soy sauce or tamari mixed with a tiny pinch of seaweed flakes for umami.
- Sugar Swap: Maple syrup or agave nectar can work, but granulated sugar is classic.
Tools & Kitchen Gadgets Used: Your Kimchi Command Center
You won’t need a fancy fermentation crock, but a good bowl and gloves are a must.
- Large Mixing Bowl (extra-large!): Essential for mixing the cabbage and paste. You need ample room to get in there with your hands.
- Colander: For draining the cabbage.
- Gloves (disposable kitchen gloves): HIGHLY recommended! Gochugaru can stain your hands and cause chili burn. Don’t say I didn’t warn you!
- Chef’s Knife & Cutting Board: For chopping all those veggies.
- Measuring Cups and Spoons: For perfect paste proportions.
- Airtight Container or Mason Jar(s): For storing your delicious quick kimchi.
Step-by-Step Instructions: Kimchi in a Flash!
The key to quick kimchi is wilting the cabbage effectively and then thoroughly mixing in that glorious paste.
H3: Step 1: Salt the Cabbage (The Wilt & Drain)
First, chop your Napa cabbage into 1-inch pieces. Transfer it to your extra-large mixing bowl. Sprinkle the kosher salt over the cabbage. With clean hands (or, better yet, gloves!), massage the salt into the cabbage for 2-3 minutes. This helps draw out moisture and wilt the cabbage. Let the cabbage sit for 30-60 minutes, tossing it occasionally. You’ll notice it softens and releases water.
H3: Step 2: Rinse & Squeeze (Crispness is Key)
After the sitting time, transfer the cabbage to a colander. Rinse the cabbage thoroughly under cold running water for 1-2 minutes to wash off the excess salt. This is super important! Now, here’s the crucial part: squeeze out as much water as you possibly can from the cabbage. Use your hands, press it against the colander, or even use a salad spinner. The drier the cabbage, the crunchier your kimchi.
H3: Step 3: Prep the Veggies (Slice & Dice)
While the cabbage is doing its thing, prepare your other vegetables. Julienne or thinly slice the carrot into matchsticks. Chop the green onions into 1-inch pieces. Set aside.
H3: Step 4: Make the Kimchi Paste (The Flavor Bomb)
In a separate small bowl, combine all the ingredients for the kimchi paste: gochugaru, fish sauce, minced garlic, minced ginger, sugar, sesame seeds, and rice vinegar (if using). Mix well until you have a thick, vibrant paste. Give it a taste. Need more spice? Add more gochugaru!
H3: Step 5: Mix It All Up (The Red Hand Dance)
Return the squeezed, rinsed cabbage to your (clean) extra-large mixing bowl. Add the prepped carrots and green onions. Pour the glorious kimchi paste over the vegetables. Now, put on those gloves! With your hands, thoroughly massage and mix the paste into the vegetables, ensuring every piece of cabbage and every veggie is coated in that fiery red goodness. This takes a few minutes, so get in there!
H3: Step 6: Pack & Chill (The Instant Gratification)
Once everything is perfectly coated, tightly pack the quick kimchi into your airtight container(s) or Mason jars. Press down firmly to remove any air pockets. Seal the container. You can eat it immediately, or for best flavor, let it chill in the refrigerator for at least 2-4 hours (or overnight!). The flavors will deepen and meld.
H3: Step 7: Serve & Savor!
Grab a serving of your homemade quick kimchi. It’s fantastic as a side dish, mixed into fried rice, piled onto tacos, or even in a grilled cheese sandwich (don’t knock it ’til you try it!). Prepare for compliments and demands for the recipe!
Calories & Nutritional Info: The Healthy-ish Truth
Kimchi is notoriously good for you, so feel pretty guilt-free here! These estimates are approximate per ½ cup serving.
- Estimated Calories per serving (½ cup): 25-40 calories
- Fat: 0-1g
- Carbohydrates: 4-7g (from cabbage, sugar)
- Sugar: 2-4g
- Sodium: 250-400mg (varies, but high due to salt and fish sauce – it’s a condiment!)
- Fiber: 2-3g
- Probiotics: Loads of them, even in quick kimchi!
- Vitamins/Minerals: Excellent source of Vitamins A, C, K, and B vitamins.
- The Bottom Line: A super healthy, flavor-packed addition to any meal.
Common Mistakes to Avoid: Don’t Ruin Your Kimchi Journey!
Kimchi is generally forgiving, but these slip-ups can prevent true deliciousness.
- Not Rinsing the Cabbage Enough: If you don’t thoroughly rinse the salt off the cabbage after wilting, your kimchi will be way too salty. Taste a piece after rinsing to check!
- Not Squeezing Out Enough Water: This is crucial for crunchy kimchi. If you leave too much water, your kimchi will be soggy and dilute the flavor of the paste.
- Skipping the Gochugaru: Gochugaru is non-negotiable for authentic kimchi flavor and color. Other chili flakes won’t cut it. Seriously.
- Forgetting the Gloves: Chili burn is real, my friends. Gochugaru can irritate your skin and stain your hands. Wear disposable gloves during mixing, unless you enjoy a fiery tingle for hours.
- Packing Too Loosely: When packing the kimchi into your container, press it down firmly. This helps remove air and keeps the vegetables submerged in their own juices and paste, which is ideal for flavor development.
Variations & Customizations: Your Kimchi, Your Rules!
Once you nail the basic quick kimchi, feel free to get creative!
- Radish Kimchi (Kkakdugi): Use this exact paste recipe, but chop daikon radish into ½-inch cubes instead of Napa cabbage. Salt and drain the radish cubes similarly. It’s wonderfully crunchy!
- Vegan Quick Kimchi: Replace the fish sauce with soy sauce (or tamari for gluten-free) and a dash of mushroom umami seasoning or blended rehydrated dried shiitake mushrooms for depth.
- Extra Spicy Kimchi: Add an extra tablespoon or two of gochugaru to the paste. You can also mix in some fresh finely minced Thai chilies if you dare!
- Fruity Kimchi: Blend a quarter of an apple or a small Asian pear into your kimchi paste. This adds a subtle sweetness and a traditional Korean touch.
FAQ Section: Your Kimchi Conundrums Answered
Got more questions about this spicy sensation? I’m here for you.
H3: Q1: How long does quick kimchi last in the fridge?
A1: Quick kimchi is best eaten within 1-2 weeks when stored in an airtight container in the refrigerator. While it won’t spoil quickly, it will continue to ferment, becoming more sour over time.
H3: Q2: What’s the difference between quick kimchi and traditional kimchi?
A2: Traditional kimchi involves a longer brining process (often hours) and a natural fermentation period (days to weeks) at room temperature, developing deeper, more complex sour flavors and a richer probiotic profile. Quick kimchi skips or shortens these steps, focusing on fresh, vibrant flavors that are ready faster.
H3: Q3: Where can I buy Gochugaru?
A3: You can find Gochugaru at most Asian grocery stores, especially Korean markets. It’s also readily available online from retailers like Amazon. Don’t confuse it with regular chili powder!
H3: Q4: Is kimchi healthy for you?
A4: Yes, absolutely! Kimchi is packed with probiotics (beneficial bacteria for gut health), fiber, and a wide array of vitamins and minerals, including Vitamins A, C, and K. It’s a true superfood.
H3: Q5: My kimchi is too salty. What can I do?
A5: If it’s too salty, you likely didn’t rinse the cabbage enough after salting. You can try to rinse a small portion again and re-mix it with a little more paste (if you have extra) or dilute it with some unsalted shredded cabbage. For future batches, ensure thorough rinsing.
H3: Q6: Can I use a food processor to chop the cabbage?
A6: You can use a food processor for chopping the cabbage, but be careful not to over-process it into mush. You want discernible pieces, not a slaw. Pulse it a few times to get 1-inch pieces.
H3: Q7: What are some good ways to eat quick kimchi?
A7: Quick kimchi is amazing as a side dish with any meal, mixed into fried rice, served alongside ramen or noodles, on tacos or burgers, or even as a flavorful topping for eggs. It adds a fantastic crunch and tang!
Final Thoughts: Your Kimchi Journey Begins Now!
You did it! You’ve whipped up a batch of glorious, spicy, crunchy quick kimchi with minimal fuss and maximum flavor. Go ahead, take a proud bite. Does it taste exactly like the vibrant, fresh kimchi you’ve been craving? I knew it would. You are now officially a kimchi whiz. Are you ever buying an expensive jar of kimchi again just for a quick fix? I highly doubt it. Enjoy your spicy, tangy victory!

