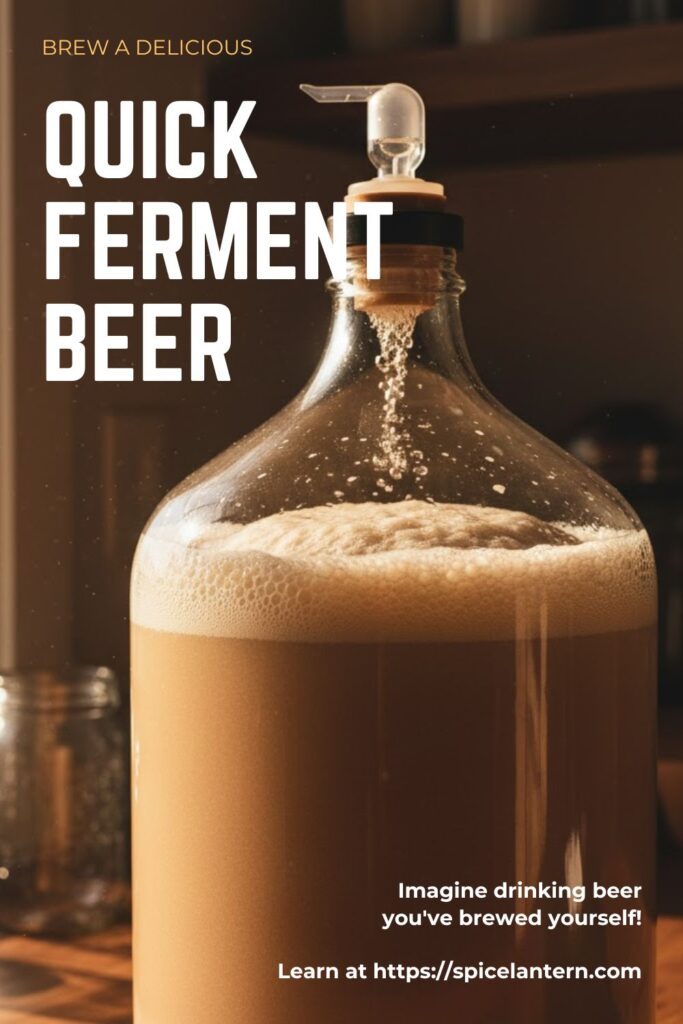
Brew Fast, Drink Faster: Your Guide to Quick-Ferment Beer (Ready in Days, Not Weeks)
Let’s address the biggest lie in homebrewing: the wait time. You mix your magical wort, pitch the yeast, and then the recipe demands you stare at a bubbly airlock for three agonizing weeks. Who has that kind of patience? I once tried that, and by the time the beer was ready, the party I brewed it for had already moved to another city. Forget the slow-and-steady approach! We’re diving into Quick-ferment beer, leveraging modern techniques and a special kind of yeast to cut the primary fermentation time down to mere days. This isn’t about the perfect Hefeweizen; this is about getting a delicious, drinkable beer into your glass fast. Time to speed up the hobby!
Why This Recipe Is Awesome (It’s a Time Traveler’s Brew)
Why is this speedy brew worth your time? Because it defeats the main barrier to entry: instant gratification.
- Lightning Fermentation: We use Kveik yeast, the Scandinavian powerhouse that thrives at high temperatures. This means your primary fermentation can finish in 3 to 7 days, drastically shortening your wait time.
- Minimal Gear Required: You don’t need a fancy temperature-controlled fermentation chamber. Kveik yeast laughs at high room temperatures, which makes this perfect for beginners in warm apartments.
- Flavor-Packed Speed: Unlike high-temperature ferments with normal yeast (which produce terrible off-flavors), Kveik handles the heat like a boss, delivering clean, slightly fruity, and highly drinkable beer. Why wait a month when you can get flavor in a week?
Ingredients: The Speedster’s Shopping List

We’ll use a simple extract kit to keep the boil time minimal. This is about fermentation, not mashing, folks!
- 1 Gallon (3.8 Liters) Filtered Water: Use filtered water or boil and cool tap water to remove chlorine.
- 3 lbs (1.4 kg) Light Liquid Malt Extract (LME): Your main sugar source. Keep it light for a crisp, quick beer.
- ½ oz Hop Pellets (Citra, Cascade, or Centennial): A simple late-boil addition for aroma and bitterness.
- 1 teaspoon Yeast Nutrient: Optional but highly recommended. Gives the Kveik yeast a rocket boost.
- 1 packet Kveik Yeast (e.g., Voss or Lutra strain): The absolute key ingredient! This yeast is the hero of the quick ferment.
- ½ cup Dextrose (Corn Sugar): For bottling and carbonation (priming sugar).

Key Substitutions:
- Liquid Malt Extract (LME): Use 2.5 lbs of Dry Malt Extract (DME) instead, but be prepared for a slightly different texture.
- Hops: Use any clean, citrusy aroma hop you like! Hops are mainly for aroma in this quick recipe.
- Kveik Yeast: Do not substitute with standard ale yeast unless you enjoy drinking banana-flavored hot garbage after three days. Kveik is the secret weapon.
Tools & Kitchen Gadgets Used: Sanitation Station Activated
Sanitation is the single most important step in brewing. Seriously.
- 8 Quart (or larger) Stainless Steel Stock Pot: For boiling the wort.
- Digital Scale: For accurately measuring hops and priming sugar.
- Hydrometer or Refractometer: CRITICAL. For measuring the Original and Final Gravity (SG/FG). You can’t calculate ABV or confirm fermentation without it.
- Thermometer (Accurate to 1°F): For ensuring the wort is cooled to the correct pitching temperature.
- 5-gallon Fermentation Bucket with a Lid and Airlock: The yeast’s temporary, sacred home.
- No-Rinse Sanitizer (Star San or similar): Absolutely essential. Everything that touches the beer after the boil must be sanitized.
- Long-Handled Stirring Spoon (Plastic or Stainless Steel): For mixing and stirring.
- Bottling Wand, Bottle Capper, and Beer Bottles (Brown Glass): For the final, glorious packaging.
Step-by-Step Instructions: The High-Temp Fermentation Flight
Get ready for a fast, furious, and fun brew day!
Step 1: The Mini-Boil (15 Minutes)
- Sanitize Everything: Clean and sanitize all equipment that will touch the cooled wort (fermenter, spoon, airlock, etc.). No slacking!
- Boil the Wort: In your pot, heat 1 gallon of filtered water. Turn off the heat. Stir in the Liquid Malt Extract until fully dissolved (the “wort”).
- Bring the wort back to a boil. Add the Yeast Nutrient and hop pellets. Boil for only 5 minutes. This is just enough to sanitize the hops and flavor the wort.
Step 2: Chill and Oxygenate (15 Minutes)
- Cool Quickly: Immediately place the pot in an ice bath (sink full of ice and water). Cool the wort rapidly down to 75–95°F (24–35°C). Kveik yeast loves this high-temp range. Don’t go below 70°F—it slows Kveik down too much.
- Pitching Gravity: Take a sample and measure your Original Gravity (OG). Note the reading!
- Aerate: Pour the cooled wort into the sanitized fermentation bucket. Shake or stir vigorously for 2 minutes. The yeast need oxygen to reproduce!
Step 3: Pitch the Kveik (3 Minutes)
- Sprinkle the Kveik yeast directly onto the surface of the wort. Don’t stir it in. Just let it float.
- Seal the lid tightly and insert the airlock (filled halfway with sanitized water or vodka).
- Place the fermenter in a spot where the temperature stays consistently high, ideally 80–90°F (26–32°C). The yeast will start going nuts within 24 hours.
Step 4: The 3-7 Day Dash (Monitoring)
- Fermentation with Kveik will be very vigorous and fast. You’ll see airlock activity quickly.
- After 3 days, start checking the Specific Gravity (SG) with your hydrometer. Take a reading every 24 hours.
- The beer is finished fermenting when the gravity reading is stable for 3 consecutive days (usually around 1.010 or lower). This is your Final Gravity (FG).
Step 5: Bottle and Condition (7-10 Days)
- Sanitize everything again (bottles, caps, bottling wand, sugar mixer).
- Dissolve the ½ cup of dextrose (corn sugar) in 1 cup of hot water and stir it gently into the beer in the bottling bucket. This sugar is food for the yeast to create carbonation in the bottle.
- Fill your bottles, cap them, and store them in a dark, room-temperature (70°F) spot for 7-10 days. The yeast eat the sugar and create fizz!
Calories & Nutritional Info: The Liquid Diet Facts (Estimated)

These are rough estimates for a standard 12oz serving of a light ale (Approx. 5.5% ABV).
- Calories per serving (12 oz): ~150-180 calories
- Carbohydrates: ~12-18g (Mostly consumed by the yeast during fermentation)
- Protein: ~1-2g
- ABV: ~5.0–6.0% (Calculated via OG and FG readings)
- Note: Homebrew beer contains trace amounts of B vitamins and yeast nutrients. However, let’s be real, you’re drinking it for fun, not the vitamins.
Common Mistakes to Avoid: The Rush to Ruin
Speed is fine, but shortcuts on sanitation are not. Be smart!
- Skipping Sanitation: Contamination by wild yeast or bacteria is the main reason beer tastes like vinegar or rotten fruit. Sanitize absolutely everything that touches the wort after the boil.
- Temperature Abuse (The Wrong Way): While Kveik likes high heat, standard ale yeast will produce terrible off-flavors (like fusel alcohol and excessive banana esters) if fermented this hot. Only use Kveik for quick, hot ferments.
- Bottling Before Final Gravity: The most common beginner mistake! If the fermentation isn’t complete (FG is still dropping), the yeast will over-carbonate the bottles, leading to exploding beer bottles (bottle bombs). Wait for 3 stable SG readings!
- No Aeration: Yeast needs oxygen to reproduce healthily before the fermentation starts. Shake that bucket vigorously after chilling the wort!
- Too Much Priming Sugar: This also leads to bottle bombs. Use a reliable scale and a priming sugar calculator. Trust the science!
Variations & Customizations: Your Yeast Playground
Kveik is versatile. Start here, then tweak your flavor profile!
- Citra Burst Dry Hop: After the primary fermentation is complete (FG is stable), add an extra ¼ oz of Citra hop pellets directly into the fermenter for 3 days. This adds an intense, fresh citrus aroma without adding bitterness.
- Spicy Ginger Brew: Add 1 tablespoon of thinly sliced, fresh ginger to the pot during the last 5 minutes of the wort boil. This infuses a subtle, warming heat into the finished beer.
- Fruity Mango Ale: Add 1 cup of sanitized mango purée to the beer just before bottling. The yeast will consume the mango sugars, adding a slight mango flavor and increasing the final carbonation slightly.
FAQ Section: All Your Bubbly Questions Answered
You’re a beginner speed brewer. Naturally, you have questions about the process.
Q1: How does Kveik yeast ferment so fast?
A: Kveik is a super-yeast native to Norway. It is highly heat-tolerant, flocculates (clears) quickly, and works rapidly without producing the harsh off-flavors common to other yeasts at high temperatures.
Q2: What should my specific gravity (SG) reading be?
A: For this recipe, expect the Original Gravity (OG) to be around 1.050–1.055. The Final Gravity (FG) should be around 1.008–1.012. You use these numbers to calculate your final ABV!
Q3: How do I calculate the final ABV (Alcohol by Volume)?
A: The simple formula is: (OG – FG) x 131.25 = ABV%. For example, (1.050 – 1.010) x 131.25 = 5.25% ABV.
Q4: Why is my airlock not bubbling? Did my fermentation fail?
A: Not necessarily! The airlock stops bubbling if the fermenter lid is not sealed tightly. Check for leaks around the lid. If the gravity reading (SG) is lower than the OG, fermentation is happening, just silently.
Q5: Is it safe to drink cloudy homebrew?
A: Yes, it is safe. Cloudy beer just contains suspended yeast and proteins, which is fine to consume. The flavor might improve if you give it more time to clear (or “condition”).
Q6: How long do I have to wait after bottling to drink the beer?
A: You must wait at least 7 days for the carbonation process (bottle conditioning) to complete. Most beers taste significantly better if you wait 2 weeks to allow the flavors to fully mature.
Q7: Can I use regular bread yeast for quick-ferment beer?
A: Do not use bread yeast! It creates off-flavors (like a harsh, yeasty taste) and often over-ferments or under-ferments the beer, resulting in a poor-tasting or unsafe product. Use dedicated brewing yeast.
Final Thoughts: The Weekend Brewer Wins
You just took on one of the most time-consuming hobbies and bent it to your will. You mastered Quick-ferment beer, proving that you don’t need a four-week timeline to enjoy a satisfying, homemade brew. Go ahead and throw a bottle in the fridge. That refreshing sip is your hard-earned reward!