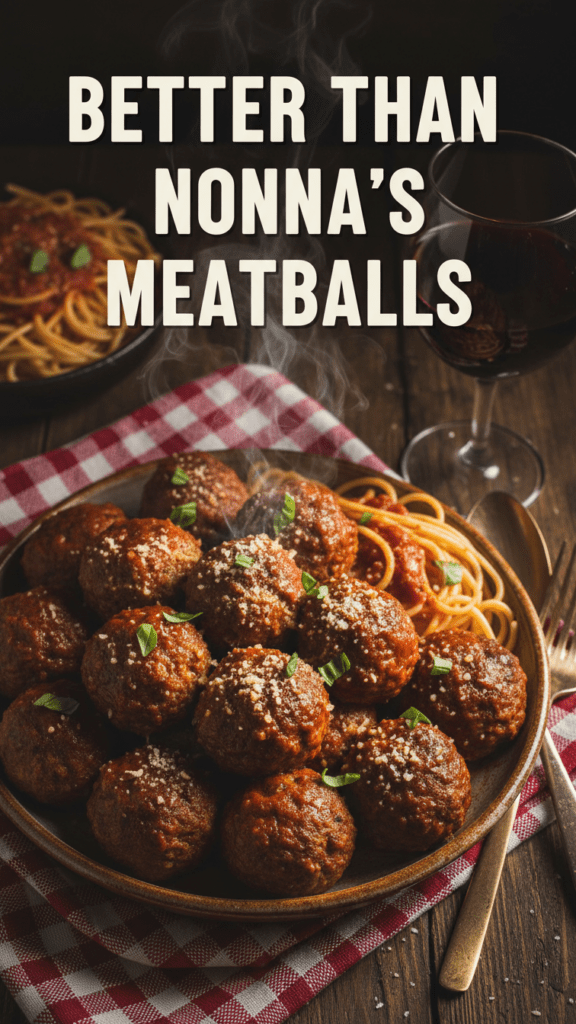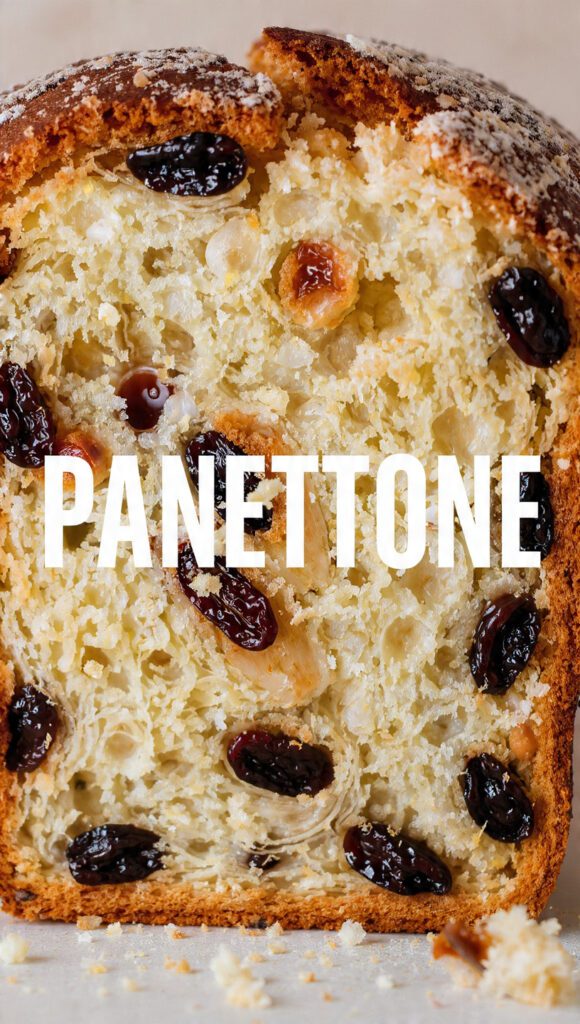
The Ultimate Homemade Panettone Recipe: Better Than a Fancy Italian Box
We have all seen them. Those towering, colorful boxes of panettone that suddenly appear in every grocery store entrance the second the temperature drops below fifty degrees. You buy one, thinking you are getting a gourmet Italian experience, only to find a dry, citrus-scented sponge that could double as a doorstop. Why do we keep doing this to ourselves?

I once served a store-bought version at a holiday party, and my Italian nonna actually sighed so loudly the ornaments shook. That was the day I swore off the box. If you want a bread so light it practically floats off the plate, you have to make it yourself. Are you ready to tackle the Mt. Everest of holiday baking and emerge victorious?
Why This Recipe Is the Ultimate Holiday Flex
Why should you bother spending two days making a single loaf of bread? Because this recipe produces a result so buttery, airy, and fragrant that your neighbors will actually start liking you. Most people fear this bread because it has a reputation for being difficult, but I have simplified the process for mere mortals.
This version skips the three-year-old sourdough starter drama and uses a reliable poolish method instead. You get that complex, fermented flavor without the existential dread of keeping a starter alive. Plus, hanging a bread upside down with skewers is a great conversation starter, right? Ready to ruin store-bought bread for your entire family forever?
The Goods: What You Need
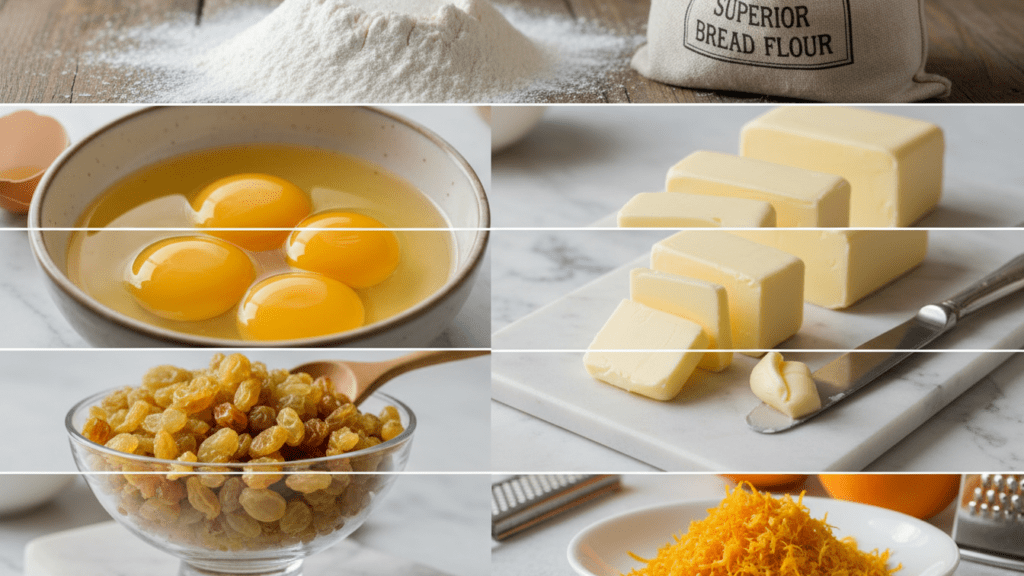
Do not try to substitute the flour here. This bread requires more structural integrity than a suspension bridge.
The Starter (Poolish)
- 1/2 cup Bread Flour: Use a high-protein flour, preferably 12.5% or higher.
- 1/2 cup Warm Water: Think bathwater, not a volcano.
- 1/4 tsp Active Dry Yeast: Just a tiny pinch to get things moving.
The Main Dough
- 3 cups Bread Flour (High Protein): Again, do not use all-purpose flour unless you want a flat pancake.
- 1/2 cup Granulated Sugar: Just enough sweetness to be festive.
- 1/2 tsp Salt: To balance all that buttery goodness.
- 2 tsp Active Dry Yeast: The heavy lifters.
- 1/2 cup Whole Milk: Lukewarm is the goal here.
- 3 Large Egg Yolks: Save the whites for a healthy omelet you’ll never eat.
- 1 stick Unsalted Butter: Make sure it is softened to room temperature.
- 1 tbsp Vanilla Paste: Extract is fine, but paste adds those gorgeous flecks.
- Zest of 1 Orange and 1 Lemon: This is where the magic happens.
The Mix-ins
- 1 cup Golden Raisins: Soak these in rum or warm water first.
- 1/2 cup Candied Orange Peel: Buy the good stuff, not the neon green mystery cubes.
- 2 tbsp Melted Butter: For brushing the top at the end.
The Arsenal: Tools & Kitchen Gadgets
You cannot bake this in a standard cake pan. Well, you can, but it will look like a sad muffin. Here is what you need for that iconic skyscraper look.
- Paper Panettone Molds (6-inch): These provide the height and the “look.”
- Stand Mixer with Dough Hook: Do not try to knead this by hand unless you want forearms like Popeye.
- Long Metal Skewers or Knitting Needles: For the mandatory upside-down cooling ritual.
- Digital Kitchen Scale: Baking is science; stop “eyeballing” the flour.
- Instant-Read Thermometer: To ensure the center isn’t raw dough.
Step-by-Step Instructions: The Long Game
Step 1: The Poolish (The Night Before)
Mix your starter ingredients in a small bowl until smooth. Cover it with plastic wrap and let it sit on your counter for 8 to 12 hours. It should look bubbly, fermented, and slightly boozy by morning. If it doesn’t look alive, your yeast is probably dead, and you should start over.
Step 2: The First Mix
Add your poolish, milk, yeast, egg yolks, vanilla, and citrus zest to the bowl of your stand mixer. Turn it on low to combine. Gradually add the sugar and salt, then start adding the bread flour one cup at a time. FYI, this dough is sticky, so don’t be tempted to dump in more flour!
Step 3: The Butter Incorporation
Once the dough clears the sides of the bowl, start adding your softened butter one tablespoon at a time. Wait for each piece to fully disappear before adding the next. This takes about ten minutes of mixing. By the end, the dough should be shiny, elastic, and so soft it feels like a dream.
Step 4: The Add-ins and First Rise
Drain your raisins and pat them dry. Fold in the raisins and candied peel until evenly distributed. Move the dough to a greased bowl, cover it, and let it rise in a warm spot until doubled in size. This usually takes about 2 to 3 hours, depending on how cold your house is.
Step 5: Shaping and Second Rise
Gently deflate the dough and form it into a smooth ball. Place it into your paper mold. Cover it loosely and let it rise again until the dough reaches the top of the mold. IMO, patience is the secret ingredient here; don’t rush this rise or your bread will be dense.
Step 6: The Bake and The Flip
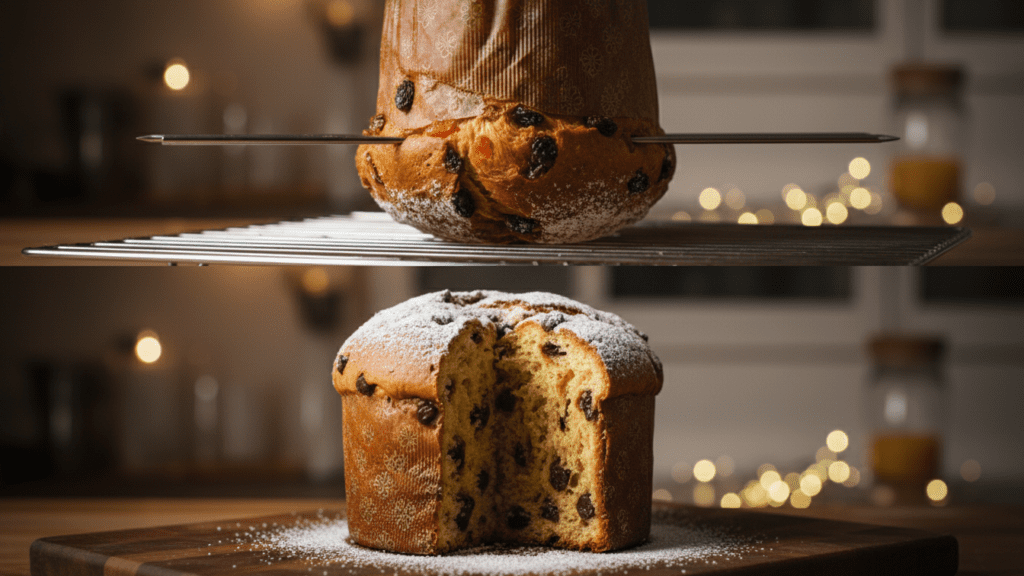
Preheat your oven to 350°F. Cut a shallow “X” in the top with a sharp blade and drop a tiny knob of butter in the center. Bake for 40 to 45 minutes or until the internal temp hits 190°F. Immediately after taking it out, pierce the bottom with skewers and hang it upside down between two stacks of books. Let it cool completely for at least 4 hours.
Calories & Nutritional Info
It is a holiday bread made of butter and eggs. Let’s not pretend it’s a superfood, but here is the damage per slice:
- Calories: ~320 kcal
- Carbohydrates: 45g
- Fats: 14g (The good, buttery kind).
- Protein: 6g
- Vitamins: A decent hit of Vitamin A and iron from the yolks and fruit.
Common Mistakes to Avoid
- Using Cold Butter: If the butter is cold, it won’t emulsify. You’ll end up with greasy pockets instead of a silky crumb.
- Skipping the Upside-Down Flip: If you cool it right-side up, the heavy, buttery structure will collapse under its own weight. Flip the bread or suffer the consequences.
- Adding Too Much Flour: The dough should be tacky. If you add enough flour to make it “easy to handle,” you are making a rock, not a cloud.
- Rushing the Rise: Yeast works on its own schedule. If your kitchen is cold, put the dough in the oven with the light turned on.
Variations & Customizations
Want to branch out from the traditional fruit? Try these:
- The Chocoholic Version: Swap the raisins and peel for 1.5 cups of dark chocolate chips. It is basically a giant, fancy muffin, and I am not mad about it.
- The Nutty Italian: Add 1/2 cup of toasted hazelnuts and a splash of Frangelico liqueur to the dough for an earthy, sophisticated vibe.
- The Savory Twist: Skip the fruit and add 1 cup of aged provolone cubes and black pepper. Serve it with prosciutto and realize you have reached peak adulthood.
FAQ: Everything You’re Dying to Know
Why is my panettone dry?
You likely overbaked it. Even five extra minutes can turn this delicate bread into a desert. Use a thermometer to pull it at exactly 190°F.
Can I make this without a stand mixer?
You can, but I hope you have the endurance of a marathon runner. Incorporating that much butter by hand is an Olympic-level feat.
Why do I have to hang it upside down?
The bread is so airy and rich that it lacks the structure to support its own weight while warm. Hanging it keeps the air pockets open so it stays fluffy.
Can I use all-purpose flour?
No. AP flour lacks the gluten strength to hold up the heavy butter and fruit. Your bread will collapse into a sad, dense mess.
How long does it last?
Homemade bread lacks the preservatives of the boxed stuff. Wrap it tightly in plastic; it stays fresh for about 3-4 days. TBH, it makes the best French toast ever on day five.
Can I freeze the dough?
I wouldn’t recommend it for this specific recipe. The high fat content makes the yeast behave strangely after freezing. Bake it first, then freeze the finished loaf!
Why didn’t my dough rise?
Your yeast might be expired, or your milk was too hot and killed it. Always test your yeast in the poolish stage first!
Final Thoughts
There you have it—the only panettone recipe you will ever need. It takes time, a bit of technique, and a willingness to hang your food from the ceiling, but the reward is a holiday masterpiece.
Once you pull that golden, fragrant loaf out of the oven, you will realize that those grocery store boxes never stood a chance. Don’t forget to take a photo of your upside-down bread—it’s the ultimate baker’s badge of honor! Happy baking! 🙂