
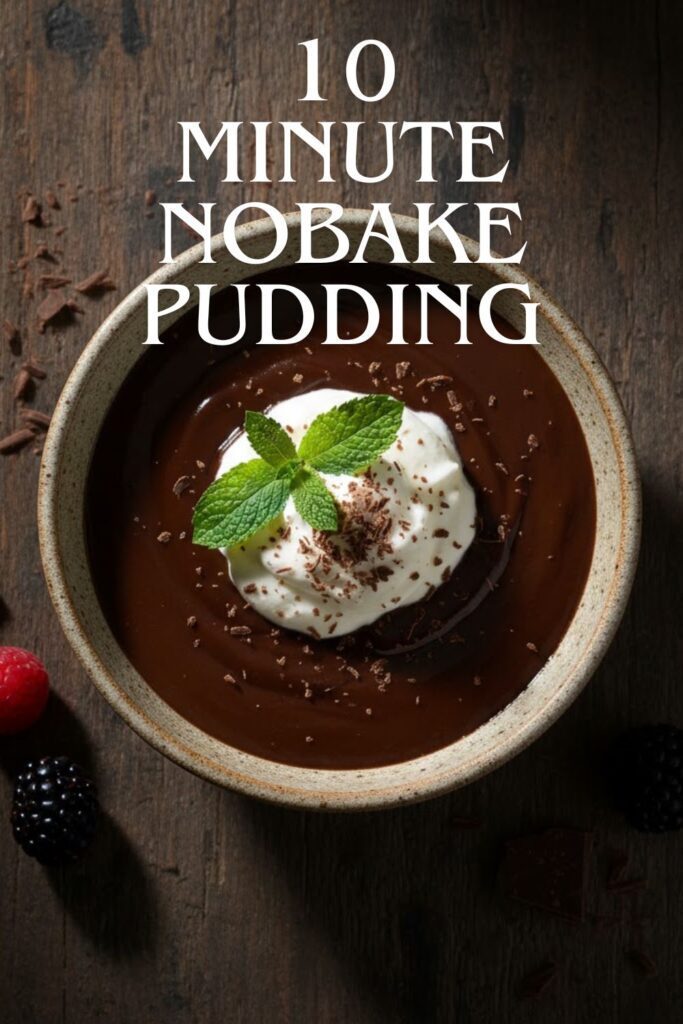
This 10-Minute No-Bake Pudding Will Ruin Box Mixes For You (Sorry, Not Sorry)
Remember those instant pudding packets from childhood? You’d add cold milk, whisk for two minutes like your life depended on it, and BAM—instant dessert. It was magic. Well, what if I told you that you, a capable adult, could recreate that magic from scratch in about 10 minutes, and it would taste a million times better? This is the ultimate creamy, dreamy, homemade no-bake pudding, and it’s here to gently ruin all other puddings for you. It’s the perfect answer to “I need something comforting and sweet, and I need it five minutes ago.”
Why This Recipe Is A Certified Banger

Let’s get one thing straight: this isn’t your grandma’s fussy, double-boiler, egg-tempering pudding. This is the cool, laid-back cousin of classic pudding. It’s the epitome of low-effort, high-reward. Why is it so awesome? For starters, it’s insanely fast. From saucepan to chilling in the fridge takes less time than it takes to find your car keys.
It’s also incredibly versatile and tastes like pure, unadulterated comfort in a bowl. It’s smooth, rich, and has a deep, authentic flavor that you just can’t get from a box. Serve this to literally anyone, and watch their eyes light up. They’ll think you’re a culinary wizard, and you don’t have to tell them your secret weapon was cornstarch.
Ingredients


This recipe uses basic pantry staples, so there’s a solid chance you have everything you need to make this right now. Go ahead, check. I’ll wait.
- ⅔ cup granulated sugar: For sweetness, obviously.
- ¼ cup unsweetened cocoa powder: This is where the rich, chocolatey flavor comes from. Use the good stuff if you have it!
- 3 tablespoons cornstarch: Our magical thickening agent. Don’t skip this!
- ¼ teaspoon salt: An absolute must-have to balance the sweetness and deepen the chocolate flavor.
- 2 ¾ cups whole milk: For the creamiest, dreamiest texture, whole milk is your best friend.
- 2 tablespoons unsalted butter: This adds a little extra richness and a silky mouthfeel at the end.
- 1 teaspoon vanilla extract: The final flourish that ties all the flavors together.
Substitutions
- Milk: You can use 2% milk, but the pudding will be slightly less rich. For a dairy-free version, full-fat oat milk or canned coconut milk are great alternatives.
- Sugar: Feel free to adjust the sugar to your liking. If you prefer a darker, less sweet pudding, you can reduce it a bit.
Tools & Kitchen Gadgets Used
You don’t need a kitchen full of high-tech gadgets for this. Just a few simple tools will do the trick.
- Medium Saucepan: Heavy-bottomed is best to prevent scorching, but any medium pot will work.
- Whisk: A good whisk is your most important tool. It’s the key to a smooth, lump-free pudding.
- Measuring Cups and Spoons: For accuracy, because baking (even no-baking) is a science.
- Silicone Spatula: For scraping the pan and not wasting a single drop.
- Serving Bowls or Ramekins: To portion out your delicious creation.
Step-by-Step Instructions
Ready for the easiest dessert of your life? Follow these simple steps and you can’t go wrong.
Step 1: Whisk the Dry Stuff
In your medium saucepan (off the heat!), add the sugar, cocoa powder, cornstarch, and salt. Whisk them together thoroughly. Seriously, get them well-acquainted. This simple step is the secret to preventing lumps later on.
Step 2: Slowly Add the Milk
Now, while still off the heat, slowly pour in about half a cup of the milk. Whisk it into the dry ingredients until you have a smooth, thick paste. Once the paste is lump-free, gradually whisk in the rest of the milk until everything is smooth and combined.
Step 3: Cook and Thicken (Don’t Walk Away!)
Place the saucepan over medium heat. This is where you need to commit. Bring the mixture to a simmer, whisking constantly. Yes, constantly. Don’t check your phone, don’t pet the dog. Just whisk. As it heats up, it will start to thicken. Once it reaches a gentle boil, keep it bubbling for one full minute while continuing to whisk. This minute of boiling is crucial for the cornstarch to fully activate.
Step 4: Add the Finishing Touches
Remove the saucepan from the heat immediately after that minute is up. Add the butter and vanilla extract, and stir until the butter is completely melted and everything is silky smooth. The pudding will be glossy and beautiful. Try not to just eat it straight from the pot. Or do. I’m not your boss.
Step 5: Pour and Chill
Carefully pour the hot pudding into your serving dishes. To prevent a “skin” from forming on top, you can press a piece of plastic wrap directly onto the surface of the pudding. Let it chill in the refrigerator for at least 3 hours, or until it’s completely cold and set. Patience is a virtue, especially when delicious pudding is the reward.
Calories & Nutritional Info

Here’s a ballpark nutritional estimate, because knowledge is power. This is per serving, assuming the recipe makes about 4-6 servings.
- Calories: Approximately 250-300 kcal
- Fat: Around 10g
- Carbohydrates: Roughly 40g
- Sugar: About 30g
- Protein: A solid 6g
Nutritional Note: This is a classic comfort dessert made with sugar and whole milk. It’s meant to be a treat that nourishes the soul. Enjoy it!
Common Mistakes to Avoid
Pudding is simple, but a few things can go wrong. Here’s how to dodge those rookie errors.
- Lumpy Pudding: This is the #1 pudding problem. The fix is easy: whisk your dry ingredients together before adding any liquid. This ensures the cornstarch and cocoa powder distribute evenly instead of forming little cement-like clumps.
- A Scorched Bottom: Did you walk away? Did you use super high heat? Tsk, tsk. The key is medium heat and constant whisking. Scrape the bottom of the pan as you whisk to prevent the milk solids from burning.
- That Weird Pudding Skin: Some people like it (who are you?), but most don’t. To avoid it, just press plastic wrap directly onto the surface of the pudding before you chill it. No air, no skin.
- Runny, Sad Pudding: If your pudding didn’t set, you probably didn’t cook it long enough. You must let it come to a full, gentle boil and cook for one continuous minute to activate the cornstarch’s thickening power.
Variations & Customizations
Once you master the basic recipe, it’s time to get creative. The possibilities are endless, but here are a few ideas to get you started.
- Peanut Butter Cup Pudding: After removing the pudding from the heat, stir in ⅓ cup of creamy peanut butter along with the butter and vanilla. Garnish with chopped peanut butter cups. You’re welcome.
- Pudding Parfaits: This one’s a visual stunner. Layer the chocolate pudding in clear glasses with crushed cookies (Oreos, Biscoff, or shortbread are amazing) and dollops of whipped cream. Repeat until the glass is full.
- Mexican Chocolate Pudding: Add ½ teaspoon of cinnamon and a pinch of cayenne pepper to the dry ingredients. It adds a wonderful warmth and a tiny kick that will have people asking for your secret ingredient.
FAQ Section
You’ve got questions, I’ve got a whisk and some answers.
Why is my homemade pudding grainy?
Graininess is usually caused by scorching. The milk solids at the bottom of the pan burned and broke up into little bits. To prevent this, use a heavy-bottomed pan, stick to medium heat, and never, ever stop whisking.
Can I use a sugar substitute?
You can experiment with sugar substitutes like erythritol or stevia, but it may affect the final texture and taste. Start with a smaller amount and adjust to your liking.
How long does homemade pudding last in the fridge?
Stored properly (covered), homemade pudding will last for about 4-5 days in the refrigerator. IMO, it rarely lasts that long before being devoured.
Is this pudding recipe gluten-free?
Yes! Since it uses cornstarch as a thickener instead of flour, this recipe is naturally gluten-free. Just double-check that your cocoa powder and vanilla extract are certified GF if you have a serious allergy.
Why did my pudding get watery after a day?
Sometimes cornstarch-thickened puddings can “weep” or release a bit of water after a day or two. It’s a natural process called syneresis. It’s still perfectly fine to eat; just give it a little stir.
Can I make this with a different flavor?
Absolutely! For a vanilla pudding, simply omit the cocoa powder and maybe add an extra splash of vanilla or even a scraped vanilla bean for a fancier version.
Can I double the recipe?
Yes, you can easily double this recipe. Just use a larger saucepan and be prepared to whisk for a slightly longer time to bring the larger volume to a simmer.
Final Thoughts
So there you have it. You are now armed with a recipe so simple and so delicious that those little boxes of instant pudding mix will start gathering dust in your pantry. This homemade no-bake pudding is your new secret weapon for weeknight dessert emergencies, impressive-but-easy dinner party treats, or just for treating yourself. Go on, make a batch. You’ve earned it.

