
The Easiest No-Bake Peanut Butter Cups (That Ruin Store-Bought Forever)
Let’s be real for a second. The combination of chocolate and peanut butter is proof that the universe loves us and wants us to be happy. It’s a perfect, unassailable pairing, and the peanut butter cup is its highest form. But what if I told you that you could make a version at home that’s richer, creamier, and infinitely more satisfying than the ones in the crinkly orange wrapper? And what if I told you it requires zero baking and about 15 minutes of your time? You are about to unlock a new level of dessert mastery with these life-changing No-bake peanut butter cups.

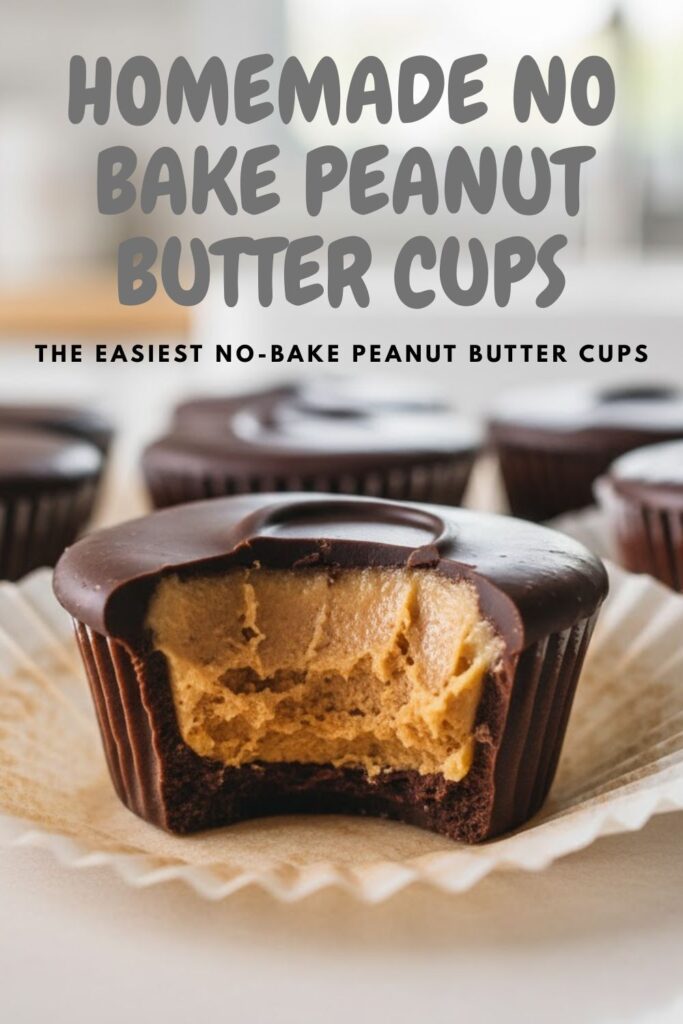
This isn’t just a recipe; it’s a public service. We’re talking about a thick, decadent chocolate shell encasing a soft, sweet, and slightly salty peanut butter filling that melts in your mouth. Prepare to look at your candy aisle with a newfound sense of superiority. You’re better than that now.
Why This Recipe is Your New Obsession
Still reaching for that bag of store-bought cups? Allow me to enlighten you.

First, the quality is off the charts. You control the ingredients, my friend. That means you can use that fancy dark chocolate you love, your favorite creamy peanut butter, and none of the weird preservatives or stabilizers you can’t pronounce. The taste is pure, intense, and utterly divine.
Second, it is laughably easy. Can you melt chocolate? Can you stir things in a bowl? If you answered “yes” to both, congratulations, you are overqualified to make these. There is no oven, no mixer, and a cleanup so simple you’ll wonder if it was all just a beautiful dream.
Finally, they are wildly impressive. Show up to any party, potluck, or Tuesday night with a plate of these homemade beauties, and people will think you’re a professional chocolatier. They look elegant, taste incredible, and make for the perfect homemade gift. Just smile and accept the compliments; no one needs to know how easy it was.
The Simple Ingredient Lineup

You’re going to love how short this list is. This is minimalist dessert-making at its finest.
- Good Quality Chocolate Chips: 2 cups (about 12 ounces). Semi-sweet or milk chocolate works great. I’m a dark chocolate devotee, myself.
- Creamy Peanut Butter: 1 cup. Use a standard commercial brand like Jif or Skippy for the best texture. The natural, oily kind can be a bit tricky (more on that later).
- Powdered Sugar: 1/2 cup, sifted. This sweetens the filling and gives it that perfect, smooth consistency.
- Unsalted Butter: 4 tablespoons, melted. This adds richness and helps the filling set up beautifully.
- A Pinch of Salt: About 1/4 teaspoon. Essential for balancing the sweetness and enhancing the peanut butter flavor.
The Tools of the Confectionery Trade
No fancy equipment needed. Your kitchen is already prepared for this glorious mission.
- Standard Muffin Tin: This is the perfect mold to shape your cups.
- Paper or Foil Cupcake Liners: This is non-negotiable. They create the iconic fluted edges and make removal a breeze.
- Two Microwave-Safe Bowls: One for melting chocolate, one for mixing the filling.
- Rubber Spatula: For scraping every last drop of chocolatey and peanut buttery goodness.
- Spoon or Small Cookie Scoop: For neatly placing the filling.
- Microwave: Or a double boiler if you’re feeling old-school.
Step-by-Step Guide to Peanut Butter Perfection
Ready for the easiest candy-making experience of your life? Let’s go.
Step 1: Prep Your Station
Place 12 paper or foil liners into the cups of your muffin tin. This simple first step is the key to a stress-free experience.
Step 2: Make the Heavenly Filling
In a medium bowl, combine the peanut butter, powdered sugar, melted butter, and salt. Stir everything together with a spatula or spoon until it’s completely smooth and well combined. It should be a thick, luscious, and dangerously edible paste. Try to resist eating it all with a spoon. Or don’t. I’m not your supervisor.
Step 3: Melt the Chocolate
Place your chocolate chips in a microwave-safe bowl. Microwave on 50% power for 1-minute intervals, stirring well after each interval. Continue until the chocolate is almost completely melted, with just a few small lumps remaining. Then, just stir until the residual heat melts the rest. This gentle heating method prevents the chocolate from seizing or burning.
Step 4: Create the Bottom Layer
Spoon about 1 tablespoon of the melted chocolate into the bottom of each cupcake liner. Use the back of the spoon to gently spread the chocolate up the sides of the liner a little bit. You don’t have to be perfect. Pop the muffin tin into the freezer for 5-10 minutes to let this bottom layer set quickly.
Step 5: Add the Filling
Remove the tin from the freezer. Using a small cookie scoop or two spoons, place about 1 to 1.5 tablespoons of the peanut butter filling into the center of each chocolate-coated cup. Gently press it down to form a flat disc, leaving a small border around the edge for the top chocolate layer to seal it in.
Step 6: The Grand Finale – The Top Layer
Spoon the remaining melted chocolate over the top of the peanut butter filling, making sure to cover it completely and seal the edges. Gently tap the muffin tin on the counter a few times to smooth out the tops.
Step 7: The Final Chill
Place the muffin tin in the refrigerator for at least 1 hour (or the freezer for 30 minutes) until the peanut butter cups are completely firm. Once set, you can peel off the liners and admire your handiwork.
Calories & Nutritional Info (A Delicious Reality)

It’s chocolate and peanut butter. Let’s not kid ourselves; this is a treat.
- Calories: Approximately 250-300 kcal per cup.
- Fat: Around 18-22g.
- Sugar: A delightful 15-20g.
- Joy Factor: Immeasurable.
- Disclaimer: This is soul food. Enjoy it in all its glory.
Common Mistakes to Avoid (Peanut Butter Pitfalls)
It’s nearly impossible to mess these up, but here’s how to ensure perfection.
- The Seized Chocolate Tragedy: This happens when even a tiny drop of water gets into your melting chocolate, turning it into a grainy, stiff mess. Make sure your bowl and spatula are bone dry.
- Using Oily Natural Peanut Butter: While delicious, the oil in natural peanut butter can separate and make your filling greasy or prevent it from setting up properly. If you must use it, make sure it’s extremely well-stirred and consider adding an extra tablespoon or two of powdered sugar to help it bind.
- The Leaky Cup: If you don’t properly seal the edges of the peanut butter filling with the top layer of chocolate, the filling can peek out. Make sure the top chocolate layer connects with the bottom layer all the way around.
- Impatience: Trying to peel the liner off a peanut butter cup that isn’t fully set will result in a sad, melty mess. Give them the full chill time. It’s worth the wait, I promise.
Variations & Customizations (Unleash Your Inner Chocolatier)
The classic is a legend, but the possibilities are endless.
- Keto-Friendly Peanut Butter Cups: This is an easy swap! Use a high-quality sugar-free chocolate (like Lily’s), a powdered keto-friendly sweetener (like erythritol) instead of powdered sugar, and a no-sugar-added peanut butter.
- The Crunchy Explosion: Add 1/4 cup of crispy rice cereal (like Rice Krispies) or finely crushed pretzels to your peanut butter filling. The crunchy-creamy texture is absolutely divine.
- Dark Chocolate & Flaky Sea Salt: This is my personal favorite. Use a good quality dark chocolate (70% cacao or higher) for the shell. Right after you pour the final top layer of chocolate, sprinkle each cup with a tiny pinch of flaky sea salt. The salt makes the flavors explode.
FAQ: Your Peanut Butter Cup Predicaments, Solved
Let’s address some of the most common questions from the candy-making world.
1. How do you store homemade peanut butter cups?
Store them in an airtight container in the refrigerator. They will stay fresh and delicious for up to 2 weeks (though I highly doubt they’ll last that long).
2. Can you freeze homemade peanut butter cups?
Yes! They freeze beautifully. Place them in a freezer-safe bag or container, and they’ll last for up to 3 months. They’re actually delicious straight from the freezer on a hot day.
3. What is the best chocolate to use for peanut butter cups?
High-quality chocolate chips (like Ghirardelli or Guittard) work great because they melt smoothly. You can also use chocolate melting wafers for an extra glossy finish.
4. Why did my chocolate get white spots after chilling?
This is called “chocolate bloom.” It can happen when the chocolate is exposed to temperature fluctuations. It’s perfectly safe to eat, just not as pretty. Melting your chocolate gently (at 50% power) can help prevent this.
5. Can I make these without cupcake liners?
You could use a silicone muffin pan, which would allow you to pop them out easily. However, you won’t get those iconic fluted edges. I don’t recommend using a bare metal pan, as they will be impossible to remove.
6. Can I use a different nut butter?
Absolutely! This recipe would be fantastic with almond butter, cashew butter, or even sunflower seed butter for a nut-free option.
7. How do I get the tops perfectly smooth?
After you add the final layer of chocolate, gently but firmly tap the entire muffin tin on your countertop a few times. This will bring any air bubbles to the surface and help the chocolate settle into a smooth, even layer.
Final Thoughts
You are now in possession of a powerful secret: the ability to create perfect, gourmet-quality peanut butter cups at a moment’s notice. This recipe is your new go-to for satisfying cravings, impressing guests, and reminding yourself that sometimes, the best things in life are also the easiest.
So go on, give them a try. You’ll never look at that bright orange package in the candy aisle the same way again. You’re a homemade peanut butter cup connoisseur now. Act like it.

