
The Easiest No-Bake Mousse That’s Dangerously Good
Let’s be honest. You’ve had one of those days. The kind of day where the only logical solution is a dessert that requires minimal effort but delivers maximum satisfaction. You want something luxurious, creamy, and decadent, but the thought of preheating your oven feels like running a marathon. Well, my friend, I’m here to introduce you to the life-changing magic of this no-bake mousse, the dessert hero you didn’t know you needed. It’s so simple, you’ll wonder why you ever bothered with those complicated recipes that use half your kitchen and all your patience. Ready to have your mind blown?
Why This Recipe Is Basically Perfect
So, why should you drop everything and make this mousse right now? Besides the obvious reason that you deserve it, this recipe has a truly unbeatable effort-to-impressiveness ratio. It’s the culinary equivalent of showing up to a party in sweatpants but still being the best-dressed person there.

It’s ridiculously easy, requires only a handful of ingredients, and comes together faster than you can decide what to watch on Netflix. Plus, it looks incredibly fancy. Serve this to guests, and they’ll think you secretly attended a French pastry school over the weekend. They don’t need to know it took you less than 15 minutes. It’ll be our little secret.
Ingredients

Here’s the ridiculously short shopping list for your new favorite dessert. No weird, hard-to-find ingredients here, I promise.
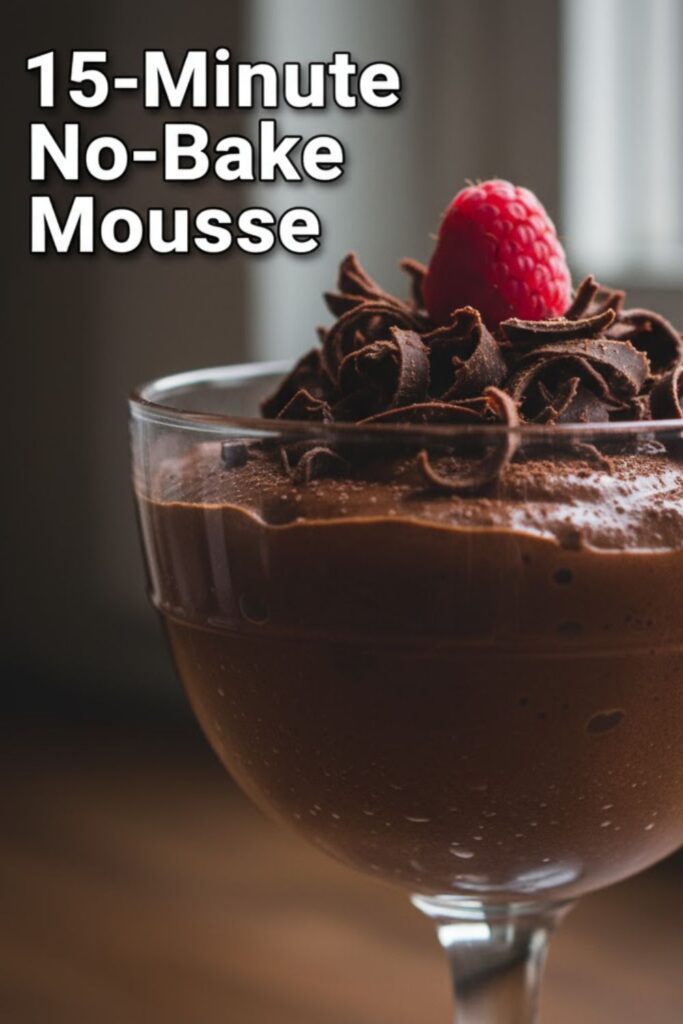
- 1 cup (about 6 oz or 170g) good-quality semi-sweet chocolate chips or a chopped chocolate bar: Please, for the love of all that is holy, use good chocolate. This is the star of the show, not the time to use those waxy, questionable chips from the back of your pantry.
- 1 ½ cups (360 ml) heavy whipping cream, cold: And I mean cold. Don’t even look at it if it’s been sitting on the counter.
- 2 tablespoons granulated sugar (optional): If you’re using a darker, more bitter chocolate, you might want this. If you’re using semi-sweet, you can often skip it. You do you.
- 1 teaspoon vanilla extract: The wingman to our chocolate hero.
- A pinch of salt: This isn’t a suggestion; it’s a requirement. Salt makes chocolate more chocolatey. It’s science.
Substitutions
- Chocolate: You can swap semi-sweet for dark chocolate (70% cacao is divine) or even milk chocolate, though you’ll definitely want to skip the extra sugar if you do.
- Dairy-Free: You can try this with a high-fat coconut cream (the solid part from a chilled can), but the texture will be slightly different. Still delicious, though!
Tools & Kitchen Gadgets Used

To whip this masterpiece into existence, you’ll need a few trusty sidekicks. No fancy, single-use gadgets required.
- Electric Hand Mixer or Stand Mixer: Unless you have the arm strength of a superhero and a personal vendetta against yourself, do not try to whip cream by hand.
- Microwave-Safe Bowl: For melting that glorious chocolate.
- Large Mixing Bowl: Preferably chilled, to give your cream the best chance at becoming fluffy clouds of deliciousness.
- Silicone Spatula: Essential for gently folding and making sure you scrape every last bit of chocolatey goodness out of the bowl.
- Serving Glasses or Ramekins: To make your mousse look as fancy as it tastes.
Step-by-Step Instructions
Alright, let’s do this. It’s so easy, you could probably do it with your eyes closed (but please don’t, that sounds messy).
Step 1: Melt the Chocolate
Place your good-quality chocolate chips in a microwave-safe bowl. Microwave in 30-second bursts, stirring in between each one. Stop when the chocolate is about 90% melted. The residual heat will take care of the rest as you stir it into a smooth, glossy puddle. Set it aside to cool slightly. We want it cool enough not to melt the whipped cream on contact. Patience, grasshopper.
Step 2: Whip the Cream
While the chocolate is cooling, pour your very cold heavy whipping cream into a large (preferably chilled) mixing bowl. Add the sugar (if using), vanilla extract, and the pinch of salt. Start mixing on low speed with your electric mixer, gradually increasing to high. Whip until stiff peaks form. What does that mean? When you lift the beaters out of the cream, the peak that forms should stand up straight and proud, not flop over sadly. Don’t go too far, or you’ll accidentally make butter!
Step 3: Combine and Conquer
Now for the most critical part: folding. Take about one-third of your beautifully whipped cream and stir it into the cooled, melted chocolate. This is called “sacrificing” the cream—it lightens the chocolate and makes it easier to fold in the rest without deflating everything. Be a little rough with this part; it can take it.
Next, gently add the remaining whipped cream to the chocolate mixture. Using your spatula, fold it in. This means scraping down the side of the bowl and bringing the spatula up through the middle. Turn the bowl a quarter turn and repeat. Continue just until no white streaks remain. Do not stir vigorously! We’re trying to keep all that lovely air you just whipped into the cream.
Step 4: Chill Out
Carefully spoon or pipe the mousse into your serving glasses or ramekins. Cover them with plastic wrap and let them chill in the refrigerator for at least 2 hours. This allows the mousse to set and the flavors to meld into something truly magical. TBH, the waiting is the hardest part.
Calories & Nutritional Info

Let’s talk numbers. Disclaimer: I’m a food enthusiast, not a certified nutritionist. This is a rough estimate per serving (assuming the recipe makes 4 servings).
- Calories: Approximately 350-400 kcal
- Fat: Around 30g (It’s mostly cream and chocolate, what did you expect?)
- Carbohydrates: Roughly 20g
- Sugar: About 15-18g (less if you skip the added sugar)
- Protein: A respectable 4g
Nutritional Note: This is dessert. It’s meant to be an indulgence. Enjoy it, savor it, and don’t you dare feel guilty about it.
Common Mistakes to Avoid
We’ve all been there. Here’s how to sidestep the most common mousse-related catastrophes.
- Using Hot Chocolate: If you add screaming hot melted chocolate to your cold whipped cream, you’ll end up with a sad, soupy mess with weird chocolate bits. Let the chocolate cool to lukewarm before you even think about combining them.
- Over-whipping the Cream: There’s a fine line between stiff peaks and sweet, vanilla-flavored butter. Keep a close eye on your cream. The second it holds a stiff peak, stop mixing.
- Aggressive Folding: You worked so hard to get air into that cream! Don’t beat it out now. Fold gently until just combined. If you stir it like you’re mad at it, you’ll have a dense, sad pudding instead of a light, airy mousse.
- Skipping the Salt: I said it once, and I’ll say it again. That tiny pinch of salt elevates the chocolate flavor from “good” to “oh my god, what is in this?” Don’t skip it.
Variations & Customizations
Feeling adventurous? Good. Here are a few ways to jazz up your no-bake mousse.
- Mocha Mousse: Dissolve 1-2 teaspoons of instant espresso powder in the vanilla extract before adding it to the cream. Chocolate and coffee are a match made in heaven.
- Spicy Chocolate Mousse: Add a small pinch (like, 1/8 of a teaspoon) of cayenne pepper or chili powder to the chocolate when you melt it. It adds a subtle, smoky warmth that is absolutely addictive.
- Boozy Mousse: Add a tablespoon of your favorite liqueur to the melted chocolate. Grand Marnier (orange), Baileys Irish Cream, or Kahlúa (coffee) are all fantastic choices.
FAQ Section
Got questions? I’ve got answers. Here are some things people often wonder about.
What is the secret to a light and airy mousse?
The secret is twofold: perfectly whipped cream (stiff peaks, not butter!) and gentle folding. You want to preserve as much of that trapped air as possible.
Why is my mousse runny?
A few culprits could be to blame. Your cream might not have been cold enough, you didn’t whip it to stiff peaks, or you didn’t chill the finished mousse for long enough. Make sure it gets at least 2 hours in the fridge to set properly.
Can I make no-bake mousse ahead of time?
Absolutely! In fact, it’s better if you do. You can make it up to 2 days in advance. Just keep it covered in the refrigerator. The flavors will have even more time to get to know each other.
What kind of chocolate is best for mousse?
A high-quality chocolate bar (around 60-70% cacao) will give you the best flavor and texture. Chocolate chips work in a pinch, but they often contain stabilizers that can affect the final meltiness.
Can I use milk chocolate instead of dark or semi-sweet?
You can, but the mousse will be much sweeter and a little softer since milk chocolate has a lower cacao content. If you use it, definitely omit the extra sugar.
How do I fix seized chocolate?
If your chocolate becomes a grainy, stiff mess, you’ve seized it! This usually happens if a drop of water gets in. You can sometimes save it for other uses (not this mousse, sadly) by stirring in a spoonful of boiling water or oil until it’s smooth again.
Can I freeze chocolate mousse?
Yes, you can! It will have a texture similar to a frozen pudding pop or a fudgesicle. Just be sure to store it in an airtight container. Let it sit at room temp for a few minutes before eating.
Final Thoughts
And there you have it—a dessert that’s elegant enough for a dinner party but easy enough for a random Tuesday night craving. Once you realize you’re only 15 minutes and a few hours of chilling away from this velvety, cloud-like perfection, you’ll never look at a store-bought dessert cup the same way again. So go on, give it a try. What’s the worst that could happen? You “accidentally” eat the entire batch with a spoon while standing in front of the fridge? IMO, that’s a risk worth taking.

