
The Easiest 10-Minute No-Bake Coconut Balls (You’re Welcome)
You’ve been there. It’s 8 PM on a Wednesday, you’ve just remembered you promised to bring a dessert to a thing tomorrow, and your motivation to turn on the oven is hovering somewhere around zero. Or maybe you’ve just been hit by a sudden, violent craving for something sweet, chewy, and tropical. Do you give up and grab a sad, pre-packaged dessert from the grocery store? Absolutely not. You are a resourceful kitchen genius, and you are about to make the easiest, most impressive dessert of your life: these ridiculously simple No-bake coconut balls.
This isn’t just a recipe; it’s a get-out-of-jail-free card for all future dessert-related emergencies. We’re talking about 3 ingredients, 10 minutes, and zero baking. These little bites of heaven taste like a fancy macaroon and a Mounds bar had a beautiful, delicious baby. Prepare to become a legend.
Why This Recipe is Your New Secret Weapon

Still thinking about that sad grocery store cookie platter? Let me show you a better way.
First, they are impossibly easy and fast. Seriously. If you can open a can and stir things in a bowl, you have all the required skills. From start to finish, you are looking at about 10 minutes of active work before they go into the fridge to chill. It’s faster than deciding what to watch on TV.

Second, the flavor and texture are pure bliss. These little snowballs are chewy, moist, and packed with sweet coconut flavor. They are incredibly satisfying and taste like you spent hours toasting coconut and whipping up some complicated confection. The sheer deception of it all is glorious.
Finally, they are wildly versatile and impressive. Roll them in sprinkles, dip them in chocolate, stick an almond in the middle—they are a perfect blank canvas. They look adorable on a dessert platter, make a fantastic homemade gift, and are the perfect little bite-sized treat to have stashed in your fridge.
The (Laughably Short) Ingredient List

Here is your hilariously short shopping list. You’re going to love this.
- Shredded Sweetened Coconut: About 3 cups, plus more for rolling. This is the star of the show. Make sure it’s the sweetened kind for the classic flavor and texture.
- Sweetened Condensed Milk: One 14-ounce can. This is the magical, gooey glue that holds our dreams together. Do not accidentally buy evaporated milk. That would be a tragedy.
- Vanilla Extract: 1 teaspoon. It adds a lovely warmth and depth of flavor.
- A Pinch of Salt: Optional, but it really helps balance the sweetness.
The Tools of This No-Bake Operation
You won’t need to break out any heavy machinery for this one.
- Large Mixing Bowl: The arena where the magic happens.
- Rubber Spatula or a Sturdy Spoon: For mixing our delicious coconut concoction.
- Measuring Cups and Spoons: For a tiny bit of precision.
- Small Cookie Scoop (Optional but Recommended): This is the secret to getting perfectly uniform, bite-sized balls without getting your hands completely covered in sticky goodness. A 1-tablespoon scoop is perfect.
- Baking Sheet Lined with Parchment Paper: To place your finished masterpieces on while they chill.
Step-by-Step to Coconut Bliss in Minutes
Ready for instructions so simple you’ll wonder if you missed a step? (You didn’t.)
Step 1: The Great Mix-Up
In your large mixing bowl, combine the shredded coconut, sweetened condensed milk, vanilla extract, and a pinch of salt (if using). Stir everything together with your spatula until it’s thoroughly combined. The mixture will be thick and sticky. This is a good sign.
Step 2: Chill Out (This is Important!)
Cover the bowl with plastic wrap and place it in the refrigerator for at least 30 minutes. This step is non-negotiable. Chilling the mixture makes it much less sticky and a thousand times easier to roll into balls. Trust me. Don’t skip this.
Step 3: The Rolling Process
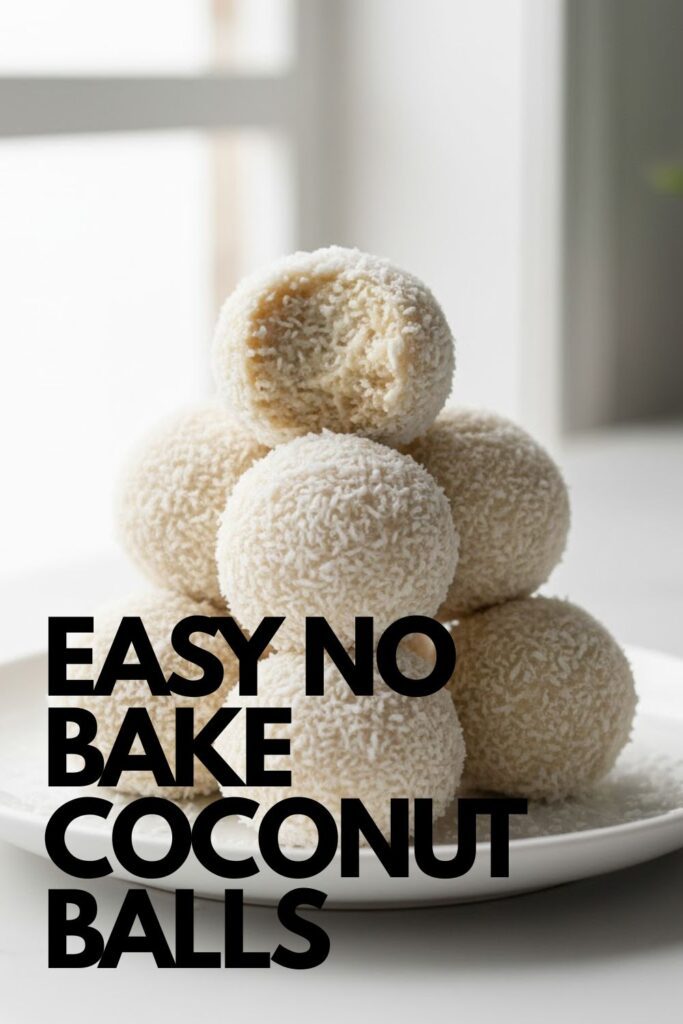
Once the mixture is chilled and firm, it’s time to roll. Place some extra shredded coconut in a shallow dish. Using a small cookie scoop or a tablespoon, scoop out portions of the chilled mixture. Roll the mixture between your palms to form a tight, 1-inch ball.
Step 4: The Coconut Coat
Roll each ball in the shallow dish of extra shredded coconut until it’s evenly coated on all sides. This not only looks pretty but also helps to make them less sticky to the touch.
Step 5: The Final Chill and Serve
Place your finished coconut balls on your parchment-lined baking sheet. Once all the balls are rolled and coated, you can either serve them immediately, or for the best texture, let them chill in the refrigerator for another 30 minutes to firm up completely.
Calories & Nutritional Info (A Sweet Guesstimate)

It’s condensed milk and coconut. Let’s not pretend we’re making a salad here.
- Calories: Approximately 80-120 kcal per ball (depending on size).
- Fat: Around 5-8g.
- Sugar: A delightful 10-15g.
- Happiness Level: Off the charts.
- In Summary: These are a sweet, decadent treat. Enjoy them accordingly!
Common Mistakes to Avoid (Coconut Calamities)
It’s hard to mess up, but here are a few ways to avoid a sticky situation.
- The Sticky Hand Disaster: You didn’t chill the mixture before trying to roll it, did you? The mixture is a sticky nightmare at room temperature. That 30 minutes in the fridge is the most important step for your sanity.
- Using the Wrong Milk: You grabbed evaporated milk instead of sweetened condensed milk. Evaporated milk is thin and unsweetened and will result in a soupy, sad mess. Double-check that can!
- Dry, Crumbly Balls: You might have used unsweetened, desiccated coconut without adjusting the recipe. Sweetened shredded coconut has more moisture and is key for the classic texture. If your mixture seems too dry, you can add a tiny bit more condensed milk.
- Uneven Sizes: This is purely aesthetic, but if you want your coconut balls to look uniform and professional, use a small cookie scoop. It makes the process faster and less messy, too.
Variations & Customizations (Your Balls, Your Rules)
The classic is a dream, but feel free to get creative.
- Chocolate-Dipped Coconut Balls: This is a no-brainer. After the balls have chilled and firmed up, dip them halfway (or fully) in melted dark, milk, or white chocolate. Let the chocolate set on parchment paper.
- “Almond Joy” Coconut Balls: Before you roll the mixture into a ball, press a single whole, toasted almond into the center. Then roll and coat as usual. Dip in chocolate for the full candy bar experience.
- Keto/Low-Carb Coconut Balls: This is totally doable! Use unsweetened shredded coconut, a sugar-free sweetened condensed milk alternative (you can find recipes online or buy it), and a keto-friendly sweetener to taste. You can also add a tablespoon of coconut flour to help bind it.
FAQ: Your No-Bake Coconut Ball Questions, Answered
Let’s clear up some common questions about these little bites of paradise.
1. How long do no-bake coconut balls last?
You should store them in an airtight container in the refrigerator. They will stay fresh and delicious for up to one week.
2. Can you freeze no-bake coconut balls?
Yes! They freeze beautifully. Place them in a single layer on a baking sheet to freeze solid, then transfer them to a freezer-safe bag. They’ll last for up to 3 months. They’re actually quite delicious straight from the freezer!
3. What kind of coconut is best for this recipe?
Sweetened, shredded coconut (often called angel flake) gives the best results for that classic sweet, moist, and chewy texture. You can use unsweetened, but you may need to add a bit more condensed milk or some powdered sugar to compensate.
4. Why are my coconut balls too sticky to roll?
You need to chill the mixture for at least 30 minutes before rolling. This firms up the condensed milk and makes the dough much easier to handle. You can also lightly dampen your hands with water to help prevent sticking.
5. Can I make this recipe vegan?
Yes! Just substitute the regular sweetened condensed milk with a can of sweetened condensed coconut milk. The flavor will be even more intensely coconutty and absolutely delicious.
6. Can I add other flavors to the mixture?
Definitely! A teaspoon of lemon or lime zest can add a beautiful, bright citrus note. A little bit of almond extract instead of vanilla is also a classic pairing with coconut.
7. What else can I roll them in besides more coconut?
Get creative! You can roll them in finely chopped nuts (like pistachios or almonds), rainbow or chocolate sprinkles, or even cocoa powder for a chocolate-dusted version.
Final Thoughts
You are now a master of the no-bake coconut ball. You have the power to conjure up a delicious, impressive dessert with almost no effort, saving yourself from any last-minute party panic or late-night sweet craving. This recipe is your new best friend, your secret weapon, your ticket to dessert hero status.
So go on, give it a try. Ditch the oven, grab a can of condensed milk, and prepare to enter a world of chewy, coconutty bliss. Just be prepared to make a double batch next time, because they will disappear.

