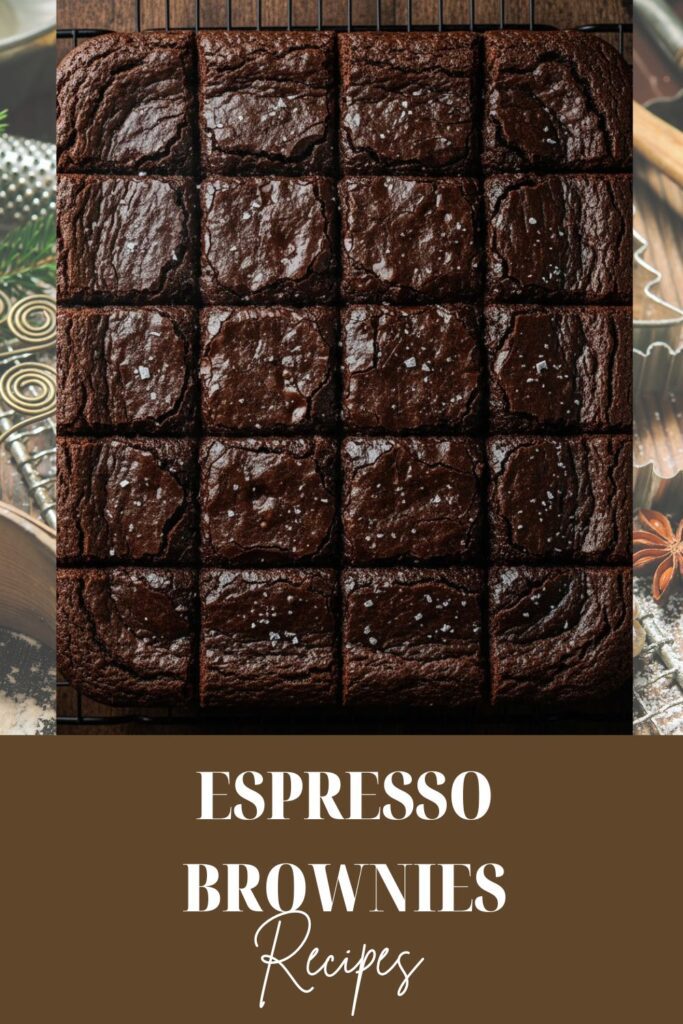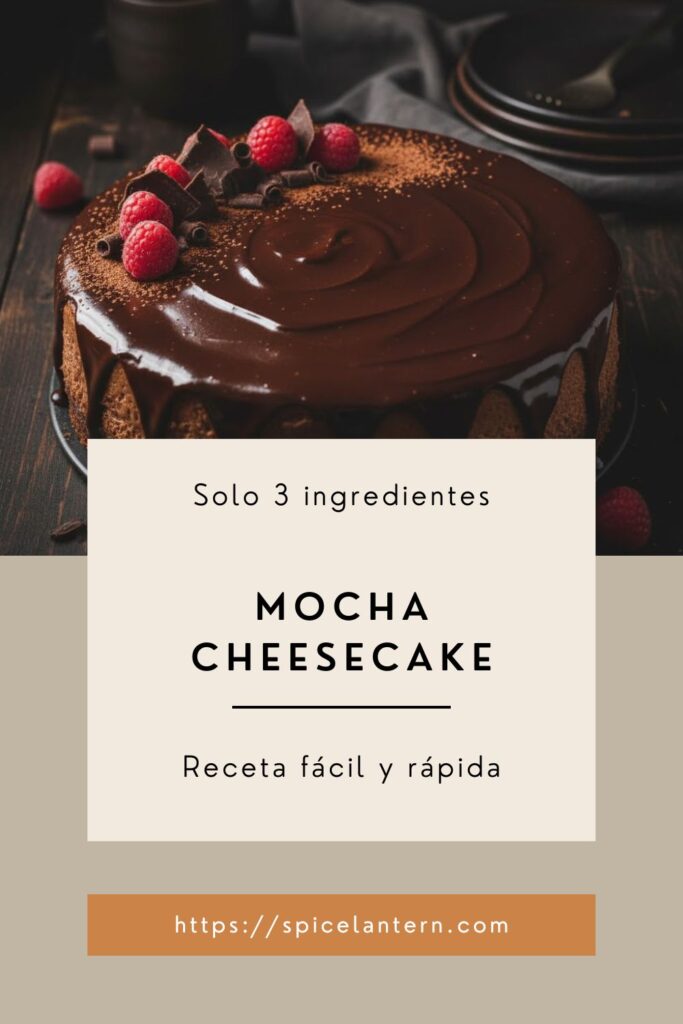
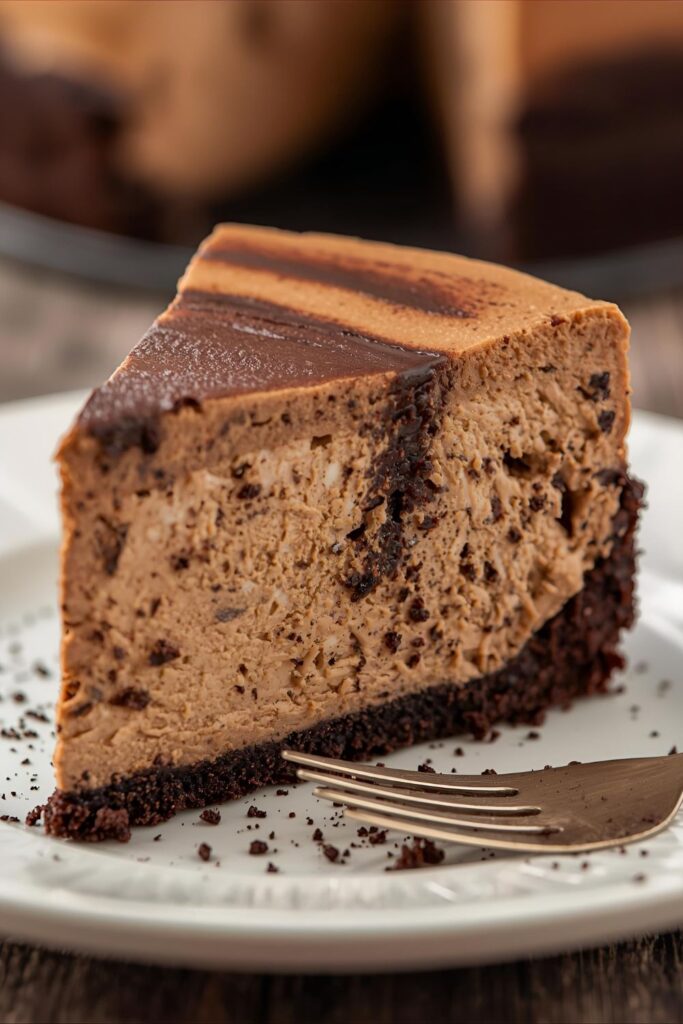
This Sinfully Good Mocha Cheesecake Will Ruin You (In the Best Way)
Let’s be real for a second. It’s 3 PM. You need coffee. You also desperately want dessert. Why are these two glorious, life-affirming things always separate? What if you could have your caffeine and eat it, too, in the most decadent way possible?

That, my friend, is where this life-changing Mocha Cheesecake comes in. This isn’t just a dessert; it’s a solution to at least two of life’s major problems.
This is the sophisticated, grown-up dessert that satisfies your inner child and your caffeine addiction simultaneously. Forget your sad, watery latte or that boring slice of plain cheesecake. We’re about to make a rich, creamy, chocolate-and-coffee-infused masterpiece that will make you question all your life choices up to this point. (Mainly, why didn’t you make this sooner?!)
Why This Recipe Is Your New Best Friend

Still not convinced you need to drop everything and make this?
First, it’s the perfect flavor combination. We’re talking rich, dark chocolate balanced by bold, robust coffee. It’s not too sweet, and it has a depth of flavor that will make your eyes roll back.
Second, it’s a showstopper. You bring this to a dinner party, and you’ve instantly won. People will think you’re a professional pastry chef. They’ll be talking about it for weeks. Just accept the compliments; you’ve earned them.
And finally, while cheesecake has a reputation for being fussy, I’m going to walk you through the foolproof method to avoid all the drama. No cracks, no watery messes, just pure, creamy perfection. TBH, the hardest part is just waiting for it to chill.
The Ingredient Lineup (AKA The Dream Team)
No weird, hard-to-find ingredients here. Just pure, unadulterated goodness. We’re breaking it down by component.
For the Chocolate Crust:
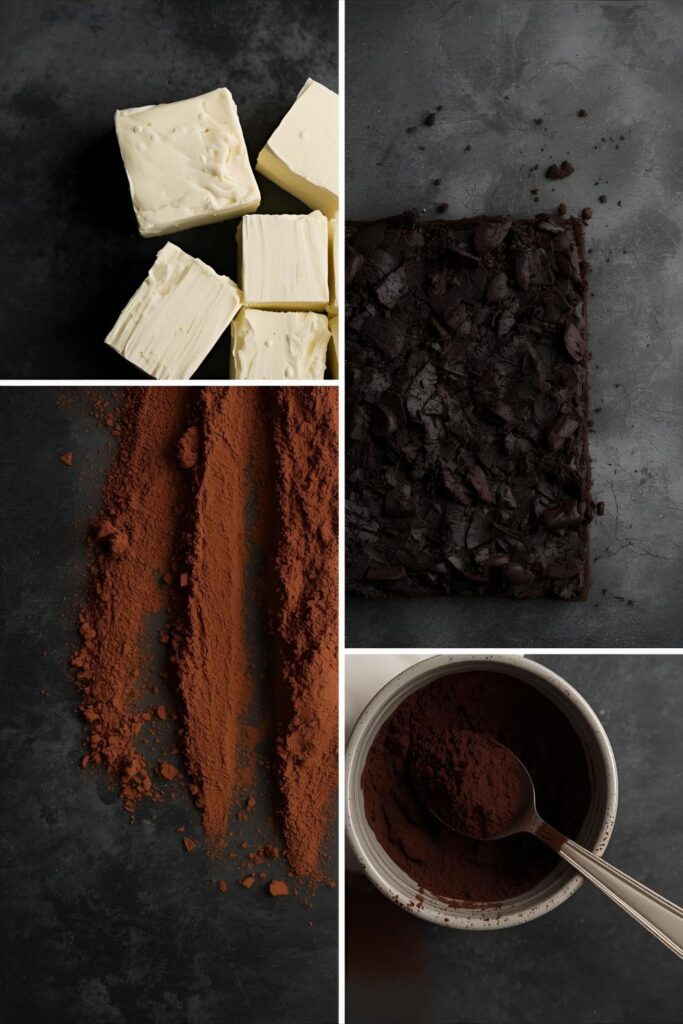
- 2 cups chocolate cookie crumbs: This is about 24-25 Oreo cookies. Yes, you can (and should) use the whole cookie, filling and all. Just blitz them in a food processor.
- 6 tablespoons unsalted butter, melted: This is the glue that holds our perfect crust together.
For the Mocha Filling:
- 32 oz (four 8-oz blocks) full-fat cream cheese: This is the most important ingredient. It MUST be room temperature. Do not, under any circumstances, try to use cold cream cheese. Set it on your counter for at least 2 hours.
- 1 1/2 cups granulated sugar
- 4 large eggs: Also MUST be room temperature. This is not a suggestion; it’s a rule for creamy, crack-free cheesecake.
- 1 cup full-fat sour cream: Guess what? Room temperature. See a pattern here?
- 1/3 cup unsweetened cocoa powder: Use a good quality one if you can!
- 2 tablespoons espresso powder: This is the key. Espresso powder dissolves easily and gives you a powerful coffee kick without adding a bunch of liquid.
- 1 tablespoon hot water or hot coffee
- 1 teaspoon vanilla extract
- 1/4 teaspoon salt: Don’t skip it! Salt balances the sweet and makes the chocolate and coffee flavors pop.
Potential Substitutions:
- No Oreos? You can use chocolate graham cracker crumbs.
- No espresso powder? You can use 1/4 cup of very, very strong brewed coffee, but you must let it cool completely before adding it. Espresso powder is still better, IMO.
- Sour Cream Substitute: Full-fat Greek yogurt can work in a pinch.
Tools & Kitchen Gadgets (Your Baking Arsenal)
To make this a flawless victory, you’ll want a few key pieces of gear.
- A 9-inch Springform Pan: This is non-negotiable for a cheesecake. You need those removable sides to get the “ta-da!” reveal.
- A Food Processor: The easiest and fastest way to get super-fine cookie crumbs for your crust.
- A Stand Mixer (or a good Hand Mixer): You can do this by hand, but your arm will hate you. A mixer is key for getting that ultra-smooth filling.
- Heavy-Duty Aluminum Foil: You’ll need this to wrap your pan for the water bath. Don’t use the cheap, thin stuff.
- A Large Roasting Pan: This needs to be big enough to hold your 9-inch springform pan.
- A Kettle or Pot: For boiling the water for the water bath.
- Rubber Spatula: For the all-important task of scraping the bowl. Scrape. The. Bowl.
- Mixing Bowls
- Measuring Cups and Spoons
Step-by-Step to Mocha Perfection
Okay, deep breath. You can do this. It’s all about the process.
Step 1: Prep Your Station
Preheat your oven to 325°F (165°C). Get a kettle or pot of water boiling. Find that 9-inch springform pan.
Step 2: Make the Crust
In your food processor, blitz the Oreo cookies (the whole things!) until they are fine crumbs. If you don’t have a food processor, put them in a Ziploc bag and smash them with a rolling pin (great for stress relief).
Pour the crumbs into a bowl and stir in the melted butter until the mixture looks like wet sand.
Press this mixture firmly into the bottom and slightly up the sides of your springform pan. Use the bottom of a measuring cup to get it really packed down and even.
Bake the crust for 10 minutes. This pre-bake is the secret to a crust that doesn’t get soggy. Set it aside to cool while you make the filling.
Step 3: The “Don’t-Leak” Pan Wrap (Crucial!)
This is for the water bath. Take two large, overlapping pieces of heavy-duty aluminum foil and wrap the outside of your cooled springform pan. You want to create a waterproof boat. Make sure there are no tears or holes. I often use three layers, just to be safe.
Seriously, if you skip this or do a lazy job, water will leak into your pan, and you’ll end up with a tragic cheesecake-pudding hybrid.
Step 4: Make the Mocha Magic
In a small bowl, whisk together the espresso powder, cocoa powder, and the 1 tablespoon of hot water until it forms a smooth, thick paste or “slurry.” This ensures you don’t have lumps of cocoa or coffee in your final product. Set it aside.
Step 5: Start the Filling (Low and Slow)
In the bowl of your stand mixer (or a large bowl with a hand mixer), place your room-temperature cream cheese and sugar.
Mix on LOW speed until the cream cheese is smooth and the sugar is incorporated. Stop and scrape down the bottom and sides of the bowl with your rubber spatula. This is so important.
Step 6: Add the Eggs (Gently!)
With the mixer still on low, add your room-temperature eggs, one at a time. Wait until the first egg is just incorporated before adding the next one.
Why all the “low speed” and “one at a time” drama? Because beating too much air into your cheesecake is the #1 cause of cracks. We are not making a fluffy soufflé; we are making a dense, creamy cheesecake.
Step 7: Finish the Filling
Add the room-temperature sour cream, vanilla extract, salt, and your mocha slurry.
Mix on low speed until everything is just combined. The batter should be thick, smooth, and uniform. Scrape the bowl one last time. Do not overmix!
Step 8: The Water Bath
Pour your beautiful mocha filling into the prepared crust. Smooth the top.
Place the foil-wrapped pan into your large roasting pan. Carefully pour the boiling water into the roasting pan, around the outside of the cheesecake pan. You want the water to come about halfway up the sides of your springform pan.
Step 9: The Bake
Carefully transfer the whole operation to the preheated oven.
Bake at 325°F (165°C) for 75 to 90 minutes.
How do you know it’s done? The edges of the cheesecake will be set and slightly puffed, but the center (about a 3-inch circle) will still have a slight, firm jiggle. It should look like Jell-O, not a watery wave. Do not overbake it.
Step 10: The Slow Cooldown (The Secret to No Cracks)
This is the most important part of the entire recipe. Do not mess this up.
- Turn the oven OFF.
- Crack the oven door open just a few inches. A wooden spoon is great for propping it open.
- Leave the cheesecake in the cooling oven for 1 hour. Yes, a full hour. This gradual cooldown is what prevents a giant, ugly crack from forming.
- After 1 hour, carefully remove the cheesecake from the water bath (the water is still hot!) and remove the foil.
- Let it cool on a wire rack on your counter until it reaches room temperature (another 1-2 hours).
- Once at room temp, cover it loosely with plastic wrap and move it to the refrigerator to chill for at least 6 hours, but preferably overnight.
Do not, I repeat, do not try to slice this thing early. It needs that cold chill time to fully set up into the dense, creamy dessert of your dreams.
The Nutritional “Fine Print”
FYI: This is a rich dessert, not a salad. These are estimates for 1/12th of the cheesecake.
- Calories: Approximately 480 kcal
- Fat: 38g (It’s cream cheese, what did you expect?)
- Carbohydrates: 30g
- Sugar: 25g
- Protein: 7g
- Note: This is a celebration dessert. Enjoy the slice. Don’t think about the numbers.
Common Mistakes to Avoid (So You Don’t Cry Later)
- Using Cold Ingredients: You will get a lumpy cheesecake, and it’s more likely to crack. I’m not yelling, I’m just passionate. Let your cream cheese, eggs, and sour cream sit out for at least 2 hours.
- Overmixing the Batter: Stop! Put the mixer on low speed. Beating in too much air causes the cheesecake to puff up like a soufflé in the oven and then tragically collapse and crack as it cools.
- Skipping the Water Bath: Do you want a dry, rubbery, cracked cheesecake? No? Then use the water bath. It’s not optional. It creates a steamy, humid environment, which is what cheesecake loves.
- The Sudden Temperature Shock: Yanking your cheesecake from a 325°F oven into your 70°F kitchen is a recipe for disaster. Follow the slow cooldown steps precisely.
- Slicing It Too Soon: I know, the patience is torture. But a warm cheesecake is a sloppy, goopy cheesecake. It needs to chill overnight (or at least 6 hours) to set into that perfect, sliceable, creamy texture.
Variations & Customizations (Get Creative)
You mastered the classic? Now let’s play.
- The Peppermint Mocha: Perfect for the holidays. Add 1/2 teaspoon of peppermint extract to the filling along with the vanilla. Top with chocolate ganache and some crushed candy canes.
- The White Chocolate Mocha: Fold 1 cup of white chocolate chips into the batter after it’s all mixed. Top with a white chocolate ganache or whipped cream.
- Keto-Friendly Mocha Cheesecake: This is totally doable. Use an almond flour/cocoa/butter crust, swap the sugar for a granulated monk fruit/erythritol sweetener, and make sure your cocoa powder is unsweetened. The rest of the ingredients are already keto-friendly!
- Extra-Crunchy Toffee Mocha: Fold 1/2 cup of crushed toffee bits (like Heath bits) into the batter. This adds a sweet, buttery crunch.
Your Burning Mocha Questions, Answered
Q: Why did my cheesecake crack even though I did everything?!
A: First, a small crack is not the end of the world. It still tastes amazing (and you can cover it with ganache or whipped cream). But the most likely culprits are: 1) Overmixing, 2) Ingredients were still a little too cold, or 3) Your oven temperature is off (it might run hotter than it says).
Q: Can I make this without a springform pan?
A: …You can, but you’ll have to serve it scooped out of the pan like a dessert dip. You can’t get those clean, beautiful slices. A 9-inch deep-dish pie plate is your next best bet, but I highly recommend just getting a springform pan.
Q: How do I really know when my cheesecake is done baking?
A: The jiggle test is king. Gently nudge the side of the pan. The outer 2-3 inches should be set, but the very center should wobble like a set Jell-O mold. If it sloshes around like liquid, it needs more time. If it’s totally firm, you’ve overbaked it.
Q: Can I use regular brewed coffee instead of espresso powder?
A: You can, but you risk adding too much liquid, which can mess up the texture. If you must, brew coffee at 2-3 times its normal strength (make it strong) and only use 1/4 cup, making sure it’s completely cooled first. Espresso powder is just much easier and gives a more intense flavor.
Q: How should I store this mocha cheesecake?
A: In the refrigerator, covered loosely with plastic wrap (or in an airtight container). It will last for up to 5 days, though I doubt it will be around that long.
Q: Can I freeze this cheesecake?
A: YES! Cheesecake freezes beautifully. You can freeze it whole or in individual slices. Wrap it tightly in plastic wrap, then a layer of aluminum foil. It lasts for up to 3 months. To thaw, just place it in the refrigerator overnight.
Q: What’s the best way to get clean slices?
A: Ah, the pro-move. Get a tall glass of very hot water and a long, sharp knife. Dip the knife in the hot water, wipe it clean with a paper towel, and make one slice. Repeat for every single cut. Dip, wipe, cut. It’s fussy, but it gives you those perfect, bakery-clean slices.
Final Thoughts: You’re a Cheesecake Master Now
That’s it. You did it. You’ve officially created a bakery-level dessert that basically screams, “I am a sophisticated adult who has their life together” (even if we’re both wearing pajama pants at 2 PM).
You’ve faced the water bath and won. You’ve practiced the art of patience (the cooldown, the chilling… so much waiting). And now you have the ultimate reward: a slice of rich, creamy, coffee-and-chocolate heaven.
Go make it. Send me pictures. Brag to your friends. You’ve earned this.