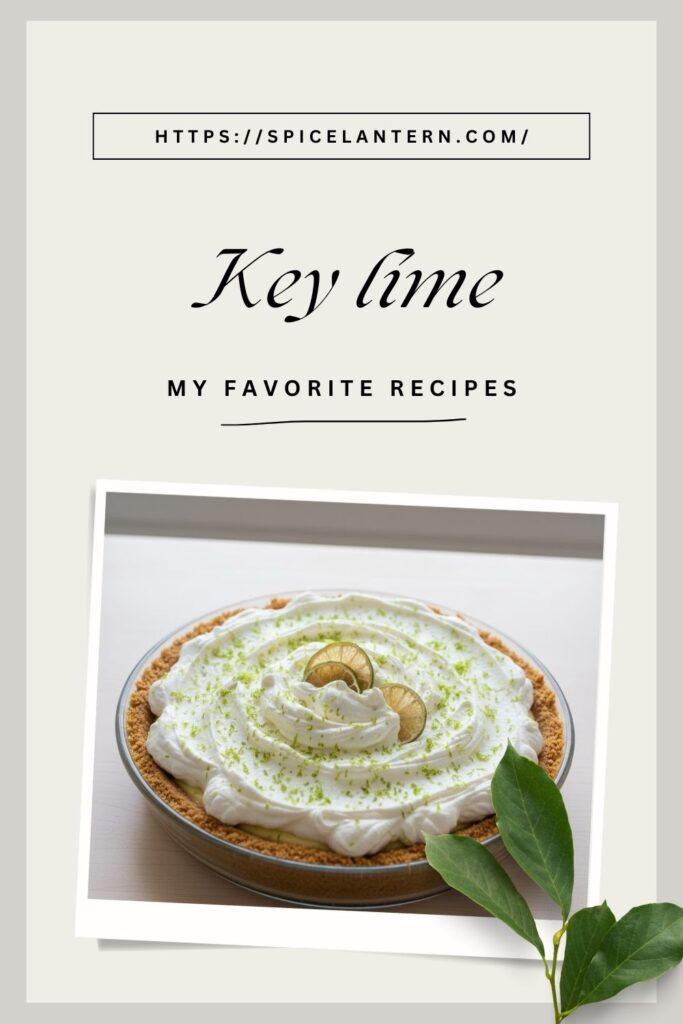
Seriously The Best: The Ultimate Key Lime Pie Recipe (Tangy, Creamy Perfection!)
Let’s just be real. When you crave a dessert that is simultaneously creamy, intensely tangy, and utterly refreshing, only one thing truly satisfies: authentic Key lime pie. It’s the taste of the tropics, a perfect balance of sweet and sour that cuts through the heat like a dream. You could buy a store-bought version with that weird green filling and artificial flavor, but why would you? I’m here to hand you the keys to making the ultimate, no-fail, perfectly zesty Key lime pie. Get ready to transport yourself straight to the Florida Keys with just one slice.
Why This Key Lime Pie Recipe is Your New Favorite Obsession

Why endure a summer day without the perfect tart dessert? Because this recipe is awesome, that’s why. It delivers that signature silky-smooth, vibrant filling and a crisp, buttery graham cracker crust that makes the original so iconic.
First, the flavor is intense and authentic. We use real key lime juice and zest—no regular limes allowed! Second, it’s ridiculously easy with minimal baking time, meaning less time sweating over a hot oven. Third, it impresses guests every single time. That vibrant color and perfect balance of tartness and sweetness scream “gourmet dessert.” Plus, it’s the perfect light finish to any heavy meal. Who needs a plane ticket when you have this slice of sunshine?
Ingredients: The Sweet, Tart, and Crunchy Crew

The magic of Key lime pie lies in three simple ingredients for the filling. Quality matters here!
H3: For the Crisp Graham Cracker Crust
- 1 ½ cups Graham Cracker Crumbs: You can crush your own or buy them ready-made.
- ¼ cup Granulated Sugar: Just enough sweetness.
- 6 tablespoons Unsalted Butter: Melted, for binding.
H3: For the Silky Key Lime Filling
- 1 (14 oz) can Sweetened Condensed Milk (SCM): Crucial! This thickens the filling without eggs and provides the sweetness.
- ½ cup Fresh Key Lime Juice: Non-negotiable! Squeeze your own for the best flavor. About 10-15 Key limes.
- 1 tablespoon Key Lime Zest: Essential for intense flavor! Make sure to only zest the green part.
- 1 teaspoon Vanilla Extract: Rounds out the flavors.
H3: For the Cloud Topping (Optional, but elegant!)
- 1 cup Heavy Whipping Cream (Cold): Chilled cream whips best.
- 2 tablespoons Powdered Sugar: For sweetening the cream.
- Lime Zest or Thin Lime Slices: For garnish.
Key Substitutions:
- Crust Swap: Use vanilla wafer crumbs, ginger snap crumbs, or shortbread cookie crumbs for a slightly different, delicious base.
- Key Lime Juice: If Key limes are impossible to find, use a good quality bottled Key lime juice (like Nellie & Joe’s). Regular limes are too acidic and lack the unique aroma.
- Dairy Swap: Use sweetened condensed coconut milk for a dairy-free version, though the flavor will be subtly coconut-y.
Tools & Kitchen Gadgets Used: Your Tropical Toolkit
A few simple tools will ensure your crust is crisp and your filling is silky smooth.
- 9-inch Pie Plate (Glass or Ceramic): Standard size.
- Hand Mixer or Whisk: For blending the filling and whipping the cream.
- Citrus Zester (Microplane): Essential for fine zest.
- Small Citrus Juicer: For extracting maximum juice from those tiny Key limes.
- Measuring Cups and Spoons: For crucial accuracy in baking.
- Rubber Spatula: For scraping down bowls.
Step-by-Step Instructions: Sunshine in a Pie Plate
Minimal baking, maximum chilling. The waiting is the hardest part, IMO.
H3: Step 1: Prep the Crust (The Crunch Foundation)
Preheat your oven to $350^{\circ}\text{F}$ ($175^{\circ}\text{C}$). In a medium bowl, combine the graham cracker crumbs, granulated sugar, and melted butter. Mix until the crumbs are evenly moistened. Press the mixture firmly and evenly into the bottom and up the sides of your pie plate. Bake for 8-10 minutes until lightly golden. Let the crust cool completely.
H3: Step 2: Zest and Juice (The Flavor Bomb)
Zest your Key limes first, making sure to avoid the white pith (which is bitter). Juice the limes—you need exactly ½ cup of fresh juice. Strain the juice to remove any pulp or seeds.
H3: Step 3: Mix the Silky Filling
In a large mixing bowl, pour in the sweetened condensed milk. Add the Key lime juice, Key lime zest, and vanilla extract. Whisk thoroughly for about 3 minutes until the mixture thickens slightly. The acid from the lime juice naturally “cooks” and thickens the milk. Don’t overmix!
H3: Step 4: Pour & Bake (The Quick Set)
Pour the Key lime filling into the cooled crust. Bake for 10-15 minutes. The filling should be set around the edges but still have a slight jiggle in the center. Do not overbake! Overbaking makes the filling rubbery.
H3: Step 5: The Grand Chill (The Hardest Wait)
Remove the pie from the oven and let it cool completely on a wire rack. Once cool, cover the pie and refrigerate for at least 6 hours, or preferably overnight. The long chill time is non-negotiable for the perfect firm, creamy texture.
H3: Step 6: Whip the Cloud Topping
Just before serving, beat the cold heavy cream, powdered sugar, and vanilla with a whisk or electric mixer until firm, fluffy peaks form. Spread or pipe the whipped cream over the chilled pie. Garnish with a little lime zest or thin lime slices. Slice, serve, and enjoy your piece of Florida!
Calories & Nutritional Info: The Tropical Truth

This is a rich, creamy dessert. These estimates are approximate per 1/8th slice.
- Estimated Calories per serving (1/8th slice): 300-400 calories
- Fat: 18-25g (from SCM, butter, and cream)
- Carbohydrates: 30-45g (from SCM and crust)
- Sugar: High (it’s condensed milk!)
- Calcium and Vitamin C: You’re getting some!
- The Bottom Line: A satisfying, decadent slice of tropical joy.
Common Mistakes to Avoid: Stop Ruining the Tartness!
The balance of sweet and tart is everything here. Avoid these common slip-ups.
- Using Regular Limes: Regular limes are more acidic and less aromatic than Key limes. They will make the filling too sour and lack the authentic flavor. Splurge on the Key limes!
- Not Chilling Long Enough: The filling continues to set in the fridge. Cutting the pie too early results in a runny, messy slice. Chill for the full 6+ hours!
- Overbaking: This is a custard-style filling. Overbaking ruins the silky texture, making it dense and tough. Pull it out when the center still slightly jiggles.
- Adding Zest to the Blender: Blending zest can release its bitter oils. Only use the zest gently whisked into the final mixture.
- Using a Dull Zester: A dull zester will scrape the bitter white pith. Use a microplane to only remove the fragrant green outer layer.
Variations & Customizations: Your Key West Fantasy
The classic is flawless, but here are some fun twists!
- Toasted Coconut Key Lime: Replace half the graham cracker crumbs with toasted coconut flakes in the crust. The coconut pairs perfectly with the lime.
- Spicy Ginger Key Lime: Use crushed ginger snap cookies for the crust. Add a pinch of cayenne pepper to the filling for a surprising, subtle heat that cuts the richness.
- Mini Key Lime Tarts: Use the same recipe, but press the crust into mini muffin tins. Reduce the baking time to about 5-7 minutes. Perfect for easy serving!
FAQ Section: Answering Your Citrus Conundrums
You’ve got questions about this tropical legend. I’ve got answers.
H3: Q1: Do you have to bake Key lime pie?
A1: Traditional Key lime pie recipes (using Key lime juice and SCM) require a short bake (10-15 minutes) to fully set the proteins and ensure food safety, though some no-bake recipes exist using gelatin or eggs.
H3: Q2: Can I use bottled Key lime juice?
A2: If you cannot find fresh Key limes, the only acceptable bottled substitute is Nellie & Joe’s Key West Lime Juice. It is made from authentic Key limes and is the next best thing.
H3: Q3: Why did my Key lime pie turn green?
A3: Key lime juice is actually yellow. The vibrant green color of many store-bought pies comes from added food coloring. If your homemade pie is pale yellow, you’re doing it right!
H3: Q4: How do I store Key lime pie?
A4: Always store Key lime pie covered in the refrigerator. It lasts for 5-7 days. Do not leave it at room temperature for more than 2 hours.
H3: Q5: Can I freeze Key lime pie?
A5: Yes! Key lime pie freezes very well. Freeze the pie (without the whipped cream topping) until solid. Wrap it tightly in plastic wrap and then foil. Thaw in the refrigerator overnight, then add fresh whipped cream before serving.
H3: Q6: What’s the best way to squeeze those tiny Key limes?
A6: Use a small, sturdy citrus reamer or juicer. Roll the limes firmly on the counter before cutting them in half. It takes patience, but it’s worth it!
H3: Q7: What is the perfect topping for Key lime pie?
A7: The two classic toppings are freshly whipped cream (our choice!) or a light meringue topping, which is made from whipped egg whites and sugar.
Final Thoughts: Welcome to the Keys!
You did it! You created a flawless, perfectly tangy, and incredibly smooth Key lime pie. Go ahead, take a proud slice. Doesn’t that taste exactly like a beach vacation you didn’t have to pay for? I knew it would. You are now the undisputed monarch of tropical baking. Are you ever going back to those weirdly green, artificial pies again? I highly doubt it. Enjoy your slice of sunshine!