
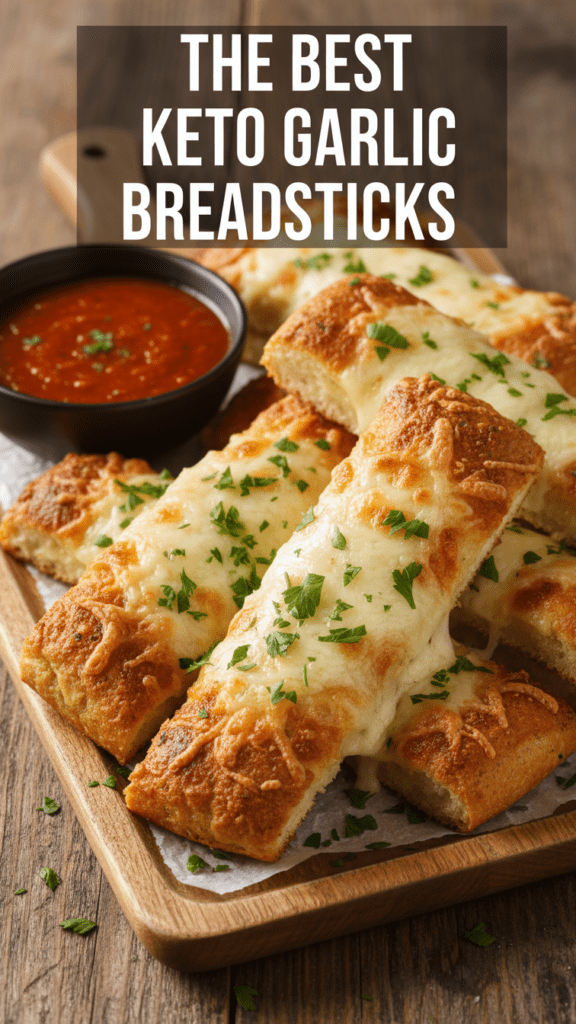
The Ultimate Keto Garlic Breadsticks: Say Goodbye to Sad, Carb-Free Dinners
Let’s be brutally honest for a second: we’ve all been there. You’re trying to enjoy a delicious keto pasta dish, but the carb-free bread on the side tastes like cardboard, if cardboard were somehow less appetizing. You stare longingly at pictures of fluffy, garlicky breadsticks, contemplating if one tiny cheat day is worth a week of bloating and regret. It’s a culinary tragedy, really. But what if I told you that keto garlic breadsticks exist that are so cheesy, so garlicky, and so utterly satisfying, you’ll actually forget they’re low-carb?
I first mastered this recipe after a disastrous attempt at “cloud bread” that possessed the structural integrity of a deflated balloon and the flavor profile of a… well, nothing. After a few tears and a lot of cheese-smeared research, I cracked the code. This isn’t just a “good for being healthy” breadstick; it is objectively elite. Ready to reclaim your dinner glory without the carb coma? Let’s get into the mix.
Why This Recipe Is the G.O.A.T. of Keto Sides
Why should you bother baking your own cheesy delights when you could just eat your low-carb pasta with a spoon like a savage? Because your taste buds deserve a party, not a punishment. First off, this recipe achieves the “holy grail” of texture: a slightly chewy, golden crust with an unbelievably soft, cheesy interior. We aren’t making dry crackers here; we’re making architectural marvels of flavor.
Secondly, it is ridiculously easy. You don’t need a PhD in advanced baking or a 48-hour fermentation window. It’s a straightforward “mix, spread, and bake” situation that makes you look like a Michelin-star Italian chef while your kitchen stays relatively intact. Plus, it impresses guests every single time—especially when they realize there isn’t a single grain of wheat in the building. IMO, it’s the most empowering tool in any low-carb arsenal.
The Grocery List: Clean, Simple, and Cheesy
Don’t overcomplicate your life by searching for exotic flours harvested under a blue moon. We are using powerhouse pantry staples that actually work together to create magic.
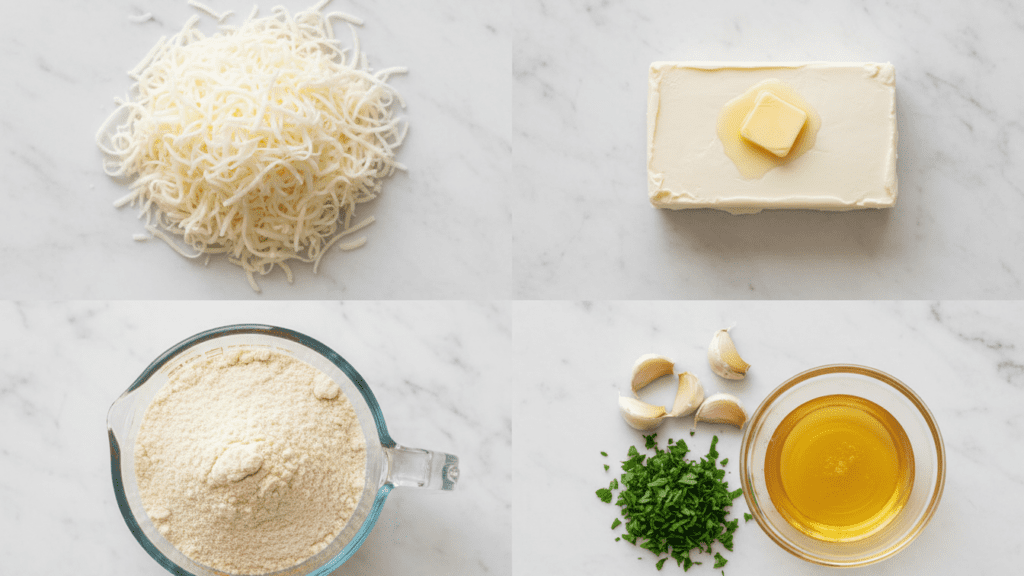
- Shredded Mozzarella Cheese: 2 cups, low-moisture, part-skim. This is the base of our “fathead” dough.
- Cream Cheese: 2 tablespoons, softened. The secret to a tender crumb.
- Almond Flour: 3/4 cup, super-fine blanched. This provides the structure without the carbs.
- Garlic Powder: 1 tablespoon. Because “subtle” isn’t in our vocabulary.
- Italian Seasoning: 1 teaspoon. For that authentic pizza parlor aroma.
- Egg: 1 large egg. The binder that holds it all together.
- Parmesan Cheese: 1/4 cup, grated, plus more for sprinkling. Because more cheese is always the answer.
- Melted Butter: 2 tablespoons, for brushing that golden top.
- Fresh Parsley: 1 tablespoon, chopped (optional, but it makes them look fancy).
Tools & Kitchen Gadgets You’ll Actually Use
To make this the smoothest process of your life, snag these basics. I’ve linked my favorites so you can treat your kitchen to some upgrades!
- Parchment Paper: The absolute non-negotiable hero for fathead dough. Check out this heavy-duty roll on Amazon.
- Large Baking Sheet: Because no one wants a crowded breadstick party. Grab a professional-grade sheet here.
- Large Microwave-Safe Bowl: For melting cheese like a wizard. This Pyrex set is a kitchen staple.
- Silicone Spatula: Essential for mixing that gooey fathead dough. Get a high-heat one.
- Pizza Cutter: For quick, clean slices that look professional. This OXO pizza cutter is elite.
- Pastry Brush: For evenly distributing that garlicky butter. Grab a silicone one here.
Step-by-Step Instructions: The Path to Garlicky Glory
Follow these steps precisely. TBH, the speed at which you work the dough matters almost as much as the ingredients.
1. The Cheesy Meltdown
In your large microwave-safe bowl, combine the shredded mozzarella and cream cheese. Microwave them in 30-second bursts, stirring well after each interval, until the cheeses are fully melted and completely smooth. It should look like a giant, gooey marshmallow.
2. The Dough Assembly
Add the almond flour, garlic powder, Italian seasoning, and egg to the melted cheese mixture. Using your silicone spatula, mix everything together until it forms a cohesive dough. This takes a bit of elbow grease, so don’t give up. If it’s too sticky, let it cool for 2 minutes.
3. The Pressing Engagement
Lay a sheet of parchment paper on your large baking sheet. Transfer the dough onto the parchment. Place another sheet of parchment paper on top and use your hands (or a rolling pin) to press the dough into a 9×13 inch rectangle. Remove the top parchment.
4. The Parmesan Power-Up
Sprinkle the 1/4 cup of grated Parmesan cheese evenly over the dough. This creates an extra layer of savory crunch.
5. The Bake-Off
Bake the dough in a preheated oven at 375°F (190°C) for 12-15 minutes, or until the edges are golden brown and the cheese is bubbly. Keep an eye on it—almond flour can brown quickly.
6. The Garlic Butter Bath
While the dough bakes, melt the 2 tablespoons of butter. Stir in an additional 1 teaspoon of garlic powder (because why not?) and the optional fresh parsley.
7. The Slicing & Brushing Ritual
Once the breadsticks come out of the oven, immediately slice them into 1-inch wide strips using your pizza cutter. Brush the warm garlic butter mixture generously over each breadstick. Serve them warm with your favorite low-carb marinara sauce.
Calories & Nutritional Info

For those of you who track your macros like a part-time job, here is the lowdown per breadstick (serves 12):
- Calories: ~160 kcal
- Net Carbs: ~2g (The holy grail of keto!)
- Protein: ~8g
- Fat: ~13g (Mostly from the glorious cheese and butter)
- Fiber: ~1g
Common Mistakes to Avoid: Don’t Be That Person
Even a recipe this simple can go sideways if you get cocky. Avoid these blunders to keep your dignity.
- Using Cold Cream Cheese: If you try to melt cold cream cheese with mozzarella, you’ll end up with lumps. Soften it first.
- Forgetting the Parchment Paper: If you try to press fathead dough directly onto a baking sheet, you’ll have a permanent cheese layer. Parchment is your BFF.
- Overbaking: Almond flour can go from golden to burnt in seconds. Watch it closely after the 10-minute mark.
- Not Mixing Enough: The dough needs to be uniform. If you see streaks of white almond flour, keep mixing. Patience, grasshopper.
- Skipping the Butter Brush: This isn’t just for flavor; it helps brown the top and keeps the breadsticks from drying out. Don’t skimp on the butter.
Variations & Customizations
Feeling adventurous? Here are three ways to flip the script on these keto garlic breadsticks:
The Spicy Inferno
Add 1/2 teaspoon of red pepper flakes to the dough mixture for a subtle kick. For true fire-breathers, add more to the garlic butter.
The Herb Garden Goddess
Instead of just Italian seasoning, mix in a teaspoon of fresh rosemary, thyme, and oregano (finely chopped) into the dough. It smells like a fancy Italian restaurant. 🙂
The Cheesy Bacon Bliss
Fold in 1/4 cup of cooked, crumbled bacon bits into the dough before pressing. Top with an extra sprinkle of cheddar cheese for ultimate decadence. Because bacon.
FAQ Section: You Asked, I Answered
Can I make these dairy-free? TBH, it’s a big ask for this recipe. The cheese is the literal foundation. You could experiment with dairy-free mozzarella alternatives, but the texture will likely be different.
How do I store keto garlic breadsticks? Keep them in an airtight container in the fridge for up to 3-4 days. Reheat them in a toaster oven or air fryer for best results to restore their crispness.
Can I freeze them? Yes! Once cooled, freeze them in a single layer, then transfer to a freezer bag for up to 2 months. Reheat from frozen in a toaster oven or air fryer.
Why are my breadsticks greasy? This usually happens if your mozzarella or cream cheese has a higher moisture content. Make sure to use low-moisture, part-skim mozzarella for best results. Also, blot any excess oil after baking.
Can I use coconut flour instead of almond flour? No, absolutely not for this recipe. Coconut flour absorbs liquids very differently and this dough would turn into a dry, crumbly mess. Stick to almond flour.
Do I need to use parchment paper? YES. Non-negotiable. Fathead dough sticks to everything like a clingy ex. Save yourself the headache and use parchment.
Can I add other toppings? Of course! Before baking, you can add a thin layer of sugar-free pizza sauce, more cheese, or even some keto-friendly pepperoni. Get creative!
Final Thoughts
There you have it. A keto garlic breadsticks recipe that actually respects your time and your taste buds. They’re cheesy, they’re garlicky, and they’re the only reason I’m willing to stick to my low-carb dinner plans. Once you master this recipe, you’ll realize that the store-bought “keto” bread options are just sad, overpriced disappointments. Go forth, melt some cheese, and enjoy the savory. Just don’t be surprised when your friends start asking for your secret Italian nonna’s recipe. 🙂