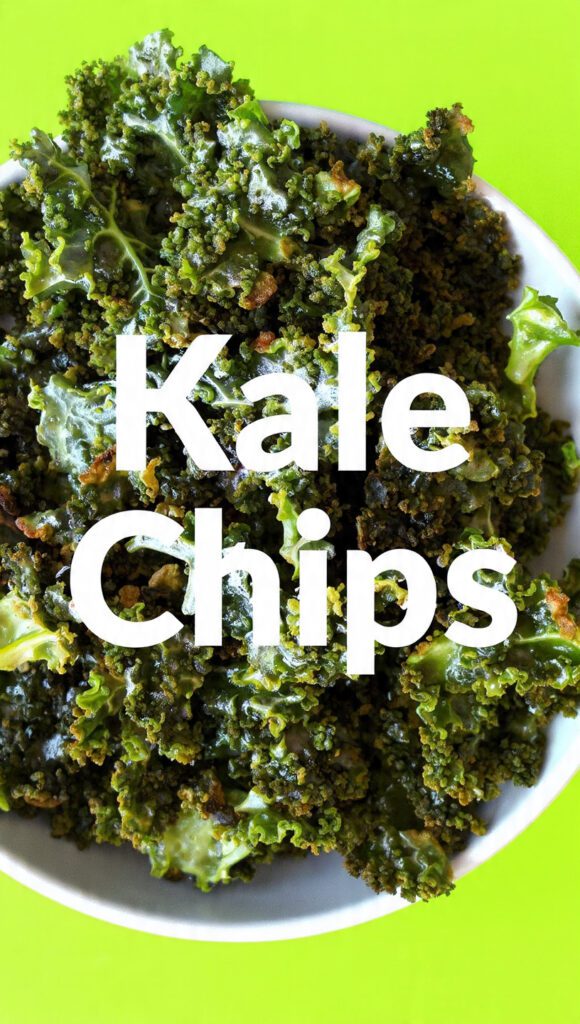
The Green & Crunchy Glow-Up: How to Master the Perfect Kale Chips
We have all been there. You buy a giant bag of kale with the best intentions, only to have it slowly wilt into a sad, suspicious mess in the back of your fridge. You know it’s good for you, but the thought of chewing raw, fibrous leaves makes your jaw ache just contemplating it. Why settle for sad, forgotten greens when a perfectly seasoned, shatter-crisp batch of kale chips is basically a culinary magic trick you can perform in your own kitchen?
Honestly, if you aren’t currently turning humble leafy greens into crunchy, salty explosions of flavor, are you even living your best foodie life? It is the ultimate kitchen flex. I once served a batch of these to a friend who swore they were “gourmet seaweed snacks” from an artisanal market. In reality, I just spent two dollars on a bunch of kale and ignored it in the oven for fifteen minutes. Ready to stop fearing the bitter bite and start winning at healthy snacking? Let’s get crunching. 🙂
Why This Recipe is Actually Awesome
Why should you bother roasting your own leaves when a bag of potato chips is just a grab away? First off, the flavor profile is a tactical strike on your taste buds. Unlike greasy, empty-calorie snacks, you control the seasoning. You can go cheesy (nutritional yeast, hello!), spicy, smoky, or just classic salt and pepper. It’s the culinary equivalent of turning a dull spreadsheet into a vibrant infographic.
TBH, the ease of cooking is the real hero here. You don’t need a culinary degree or a fancy deep fryer. You basically wash, tear, toss, and bake. It impresses guests like crazy because people assume making something this delicate and crunchy requires some kind of secret ancient knowledge. Plus, it is a “guilt-free” snack, meaning you can eat the entire batch without feeling like you need to run a marathon afterward.
Our Top Pick

Papier Herb Garden Recipe Journal - Hardback Design
Capture your culinary ideas and favorite memories with this beautifully designed recipe journal. Organized sections for breakfast, lunch, dinner, and treats make it easy to record recipes, ratings, dietary notes, and cooking tips, along with measurement and conversion guides. Extra pages let you list favorite restaurants, shops, and places to try. Crafted with a premium hardback cover, luxurious 100gsm paper, and a gold foil accent, it’s both durable and stylish. Thoughtfully designed to suit any kitchen, it makes a practical, timeless gift for family, friends, or yourself.
Finally, let’s talk about the health benefits. These aren’t just crunchy; they are little nutrient grenades. Packed with vitamins K, A, and C, kale chips make you feel like a functional adult who actually cares about their insides. What more could you want from a leafy green?
The “Crunch Creator” Ingredient List
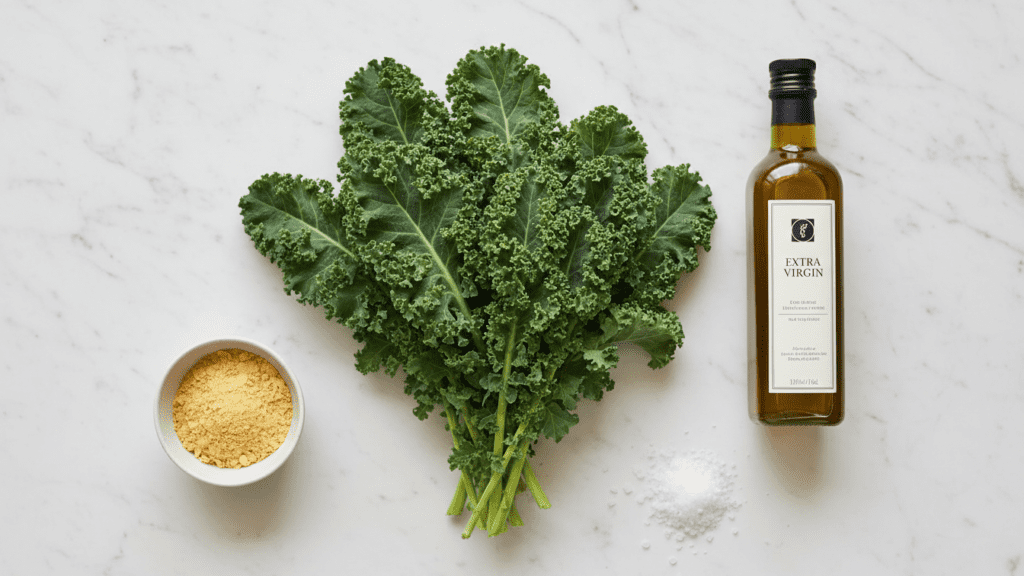
Don’t go hunting for rare organic dust in the deep woods. You just need the essentials, but for the love of all things holy, make sure your kale is dry!
- One Large Bunch of Kale: Curly kale works best for maximum crisp surface area.
- Extra Virgin Olive Oil: One tablespoon. It’s the glue for our spices and the key to the crunch.
- Sea Salt: A generous pinch.
- Nutritional Yeast (Optional but Recommended): Two tablespoons. This is your secret weapon for that cheesy, umami flavor without the dairy.
- Garlic Powder: Half a teaspoon. Because we measure garlic with our hearts, not spoons.
- Key Substitution: If you’re out of olive oil, avocado oil works beautifully for high-heat roasting and a neutral flavor.
Tools & Kitchen Gadgets You’ll Need
To dominate the kale chips game, you need gear that handles high heat and promotes maximum airflow.
- Large Rimmed Baking Sheet: To give the kale room to breathe. Crowded kale is soggy kale.
- Salad Spinner: For the most thorough wash and dry of your life. This is non-negotiable for crispy kale.
- Clean Kitchen Towel or Paper Towels: Absolute requirement. Moisture is the enemy of the crunch.
- Large Mixing Bowl: For the “seasoning massage.”
- Parchment Paper: Or a silicone baking mat for easy cleanup and to prevent sticking.
- Oven Mitts: Because even health food can burn you.
Step-by-Step Instructions
Step 1: The Great Wash and Dry
First, give your kale a good rinse. Then, tear the leaves off the tough stems into bite-sized pieces. Now, for the most critical step: dry that kale like your life depends on it! Use a salad spinner until no water drips out, then lay the pieces on a clean kitchen towel and pat them absolutely, positively bone dry. IMO, any moisture at all will result in sad, chewy kale, not crispy chips.
Step 2: The Oil Massage
Transfer the bone-dry kale pieces to your large mixing bowl. Drizzle with olive oil. Now, use your clean hands to massage the oil into every single cranny of the kale leaves. You want every piece lightly coated, but not drenched. This ensures even seasoning and crisping.
Step 3: The Seasoning Sprinkle

Sprinkle your kale with sea salt, garlic powder, and if you’re feeling fancy, that nutritional yeast. Give it another gentle toss and massage to distribute the spices evenly. This is where the magic really starts to happen, transforming plain greens into flavor bombs.
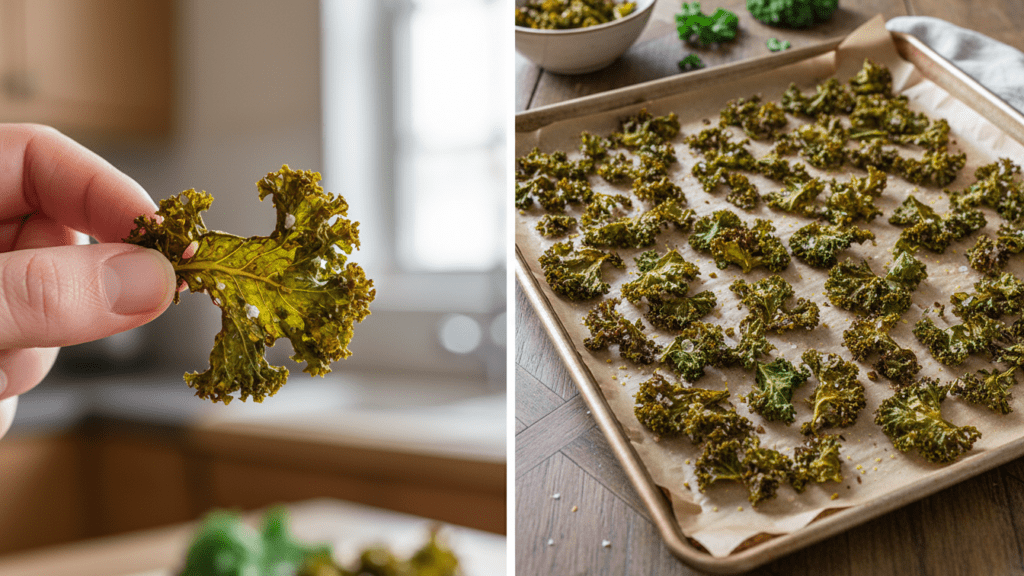
Step 4: The Single Layer Spread
Line your baking sheet with parchment paper. Arrange the seasoned kale in a single layer, making sure no pieces are overlapping. This is crucial for crispiness. If you have too much kale, use two trays or roast in batches. Crowded kale will steam instead of crisp. :/
Step 5: The Low-and-Slow Roast
Preheat your oven to 300°F (150°C). Place the baking sheet in the oven and roast for 15-20 minutes. Keep a close eye on it after 10 minutes. You want the edges to curl and the leaves to feel brittle. If they still feel soft or chewy, they need more time. Every oven is different, so watch it!
Our Top Pick

LuBudingJoy Blank Recipe Book
B5 Blank Recipe Book – Create and organize your favorite recipes in one beautiful place. This hardcover recipe book (10" × 7.3") features 150 blank pages and includes DIY category stickers. Designed with conversion charts, content tables, and a back pocket for loose notes.
Step 6: The Cool Down
Once the kale chips are crispy and slightly golden (but not burnt!), remove them from the oven. Let them cool completely on the baking sheet for a few minutes. This is where they get their final, glorious crunch. Then, try not to inhale the entire batch in one sitting. I believe in you, but I also understand the struggle. 🙂
Calories & Nutritional Info
You are eating a snack that actually loves you back. Here is the breakdown per generous serving (half a bunch of kale):
- Calories: Approximately 80-100 kcal.
- Protein: A respectable 3g of plant power.
- Fiber: 3g (your digestive system is thanking you).
- Vitamin K: Off the charts! You’re basically a super-healer.
- Vitamin A & C: Enough to make an orange feel insecure.
Common Mistakes to Avoid
- Wet Kale Woes: This is the #1 killer of crispy kale chips. Dry your kale meticulously—like you’re preparing it for a beauty pageant.
- Over-Oiling: Too much oil makes the kale soggy and greasy. Use just enough to coat, not drown.
- Crowding the Pan: Overlapping kale pieces steam instead of crisp. Give them personal space. FYI, it’s just like a crowded party—nobody thrives.
- Too High Heat: A super-hot oven burns the kale before it crisps. Stick to 300°F (150°C) for that perfect, slow dehydration.
- Forgetting to Massage: Don’t just toss the oil; massage it in! This helps the oil and spices adhere evenly. TBH, it’s the difference between “okay” and “extraordinary.”
Variations & Customizations
Feeling like a snack scientist? Try these three spins:
The “Spicy Cheesy Fiesta”
After seasoning with olive oil, add a dash of chili powder, cumin, and a pinch of cayenne pepper along with the nutritional yeast. It adds a smoky, spicy kick that will make your taste buds dance.
The Sweet & Savory “Maple Balsamic”
Drizzle with balsamic vinegar (just a tiny bit!) and a touch of maple syrup along with the olive oil and salt. The sweet and tangy combination is surprisingly delicious and addictive.
The “Everything Bagel” Crunch (Vegan Friendly)
Skip the nutritional yeast. After oiling, sprinkle generously with everything bagel seasoning. You get all the oniony, garlicky, sesame seed goodness in a healthy, crunchy chip. IMO, this is the “final boss” of kale chip variations.
FAQ Section
Why are my kale chips chewy/soggy? This almost always comes down to moisture. Either the kale wasn’t dry enough before baking, or you crowded the pan. Re-read step 1 and 4!

How long do kale chips stay crispy? They are best eaten immediately. If stored in an airtight container, they can last a day or two, but they will slowly lose their crispness due to residual moisture.
Can I make kale chips in an air fryer? Yes! Air fry at 350°F (175°C) for 5-7 minutes, shaking the basket halfway through. Air fryers are great for smaller batches and an even crisper result!
What kind of kale is best for kale chips?Curly kale is generally preferred because its crinkly texture holds seasoning better and gets super crispy. Lacinato (dinosaur) kale also works well.
How do I prevent my kale chips from burning? Use a lower oven temperature (300°F) and keep a close eye on them, especially during the last few minutes. Burnt kale is very bitter!
Can I add other vegetables to make chips? Sure! Thinly sliced beetroot, sweet potato, or even zucchini can make great chips, but they will require different cooking times and techniques.
Is nutritional yeast necessary for kale chips? No, but it really adds a delicious cheesy, umami flavor that makes them incredibly addictive and satisfying. It’s highly recommended!
Final Thoughts
There you have it—a guide to the only kale chips that won’t leave you disappointed and chewing endlessly. It’s salty, it’s crunchy, and it’s a heck of a lot better for you than anything you’ll find in a foil bag.
Go ahead, give it a shot this weekend. And hey, if you end up converting a kale-hater, you’re basically a culinary superhero. Tag me in your “crunch-test” videos, or just sit in your vitamin-rich bliss. Happy crunching!