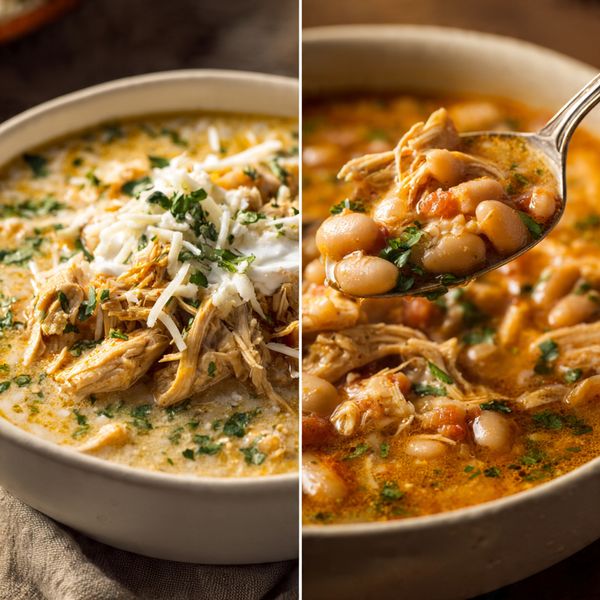
🤍 The Creamy King: Easy Instant Pot White Chicken Chili Recipe
Let’s address the elephant in the pot: regular chili is great, but it’s everywhere. Sometimes you crave that deep, smoky comfort without being assaulted by bright red tomato sauce and kidney beans. That’s when you turn to the refined, subtly spicy queen of the stew world: white chicken chili. And because we aren’t spending all day stirring a pot, we use our favorite kitchen superhero. This instant pot white chicken chili recipe gives you slow-cooked depth of flavor in lightning speed. It’s creamy, zesty, hearty, and uses one pot. Prepare to fall deeply, madly in love.
Why This Chili is Your Weeknight Winner

This chili is the definition of sophisticated comfort. We blend tender chicken, creamy white beans, bright green chiles, and a killer spice blend into a luxurious, thick broth. You achieve that complex, simmered-all-day taste because the Instant Pot forces the flavors into the chicken and beans under high pressure.
You need this recipe because it’s a dump-and-go masterpiece. You add the raw chicken, beans, broth, and spices, press a button, and walk away. That’s it! It’s minimal hands-on time for maximum flavor, making it perfect for game days, cold nights, or those evenings when you forgot to defrost anything until 5:30 PM.

Plus, unlike watery stovetop versions, this chili gets naturally thick and creamy thanks to the beans and the pressure-cooked chicken. It’s high in protein, budget-friendly, and freezes like a dream. Are you ready to upgrade your comfort food game? This is how you do it.
Essential Ingredients for Creamy Comfort
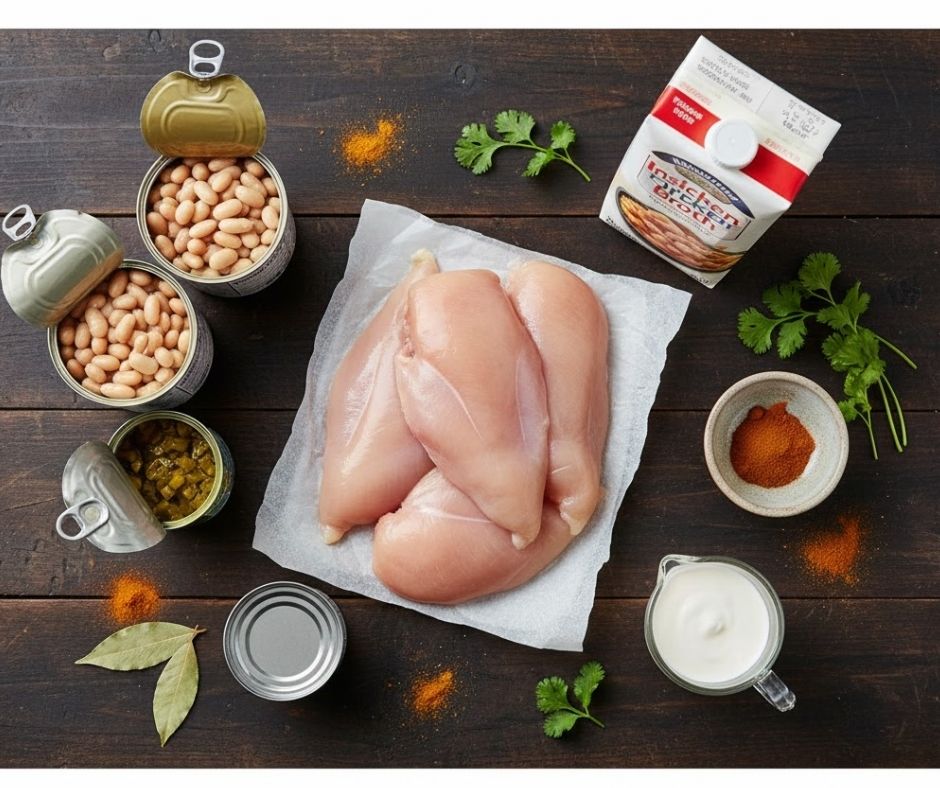
We rely on beans, broth, and spices to carry the flavor load here. Don’t skimp on the seasonings!
- 1.5 lbs Boneless, Skinless Chicken Breast or Thighs: Thighs are superior for flavor and moisture, but breast works well too.
- 4 cups Chicken Broth (Low Sodium): The liquid base.
- 1 (15 oz) Can Great Northern Beans: Rinsed and drained.
- 1 (15 oz) Can Cannellini Beans: Rinsed and drained.
- 1 (4 oz) Can Diced Green Chiles: Mild or medium, depending on preference. Don’t drain!
- 1 cup Chopped Yellow Onion: The essential aromatic base.
- 2 cloves Garlic: Minced.
- 1 tbsp Olive Oil: For the sauté step (optional, but highly recommended).
- 1 tbsp Ground Cumin: The star of chili spice!
- 1 tsp Chili Powder (White/Green Chili Powder preferred): Or regular chili powder.
- 1/2 tsp Dried Oregano: Adds authentic depth.
- 1/4 tsp Cayenne Pepper (optional): For a noticeable kick.
- 1/2 cup Heavy Cream or Cream Cheese: Added at the end for the signature “white” creaminess.
Key Substitutions:
- Beans: Use all navy beans or all cannellini beans if you can’t find both. Black beans work, but they change the “white” aesthetic!
- Chicken: Use pork tenderloin cut into cubes for a richer flavor.
- Heavy Cream: Use a can of evaporated milk or full-fat coconut milk for creaminess.
- Green Chiles: Use fresh minced jalapeño (seeds removed) for a brighter heat.
Tools & Kitchen Gadgets Used
This is an Instant Pot showcase. We keep the other tools minimal.
- Instant Pot (6-quart or larger): The mandatory tool!
- Cutting Board and Sharp Knife: For chopping the onion and garlic.
- Can Opener: For the beans and chiles.
- Measuring Cups and Spoons: For accurate spice ratios.
- Tongs: For removing the chicken after cooking.
- Potato Masher or Immersion Blender (Optional): For thickening the chili.
Step-by-Step Instructions: Chili in Hyper-Speed
Follow these steps exactly to build deep flavor without getting the “Burn” warning.
H3 Sauté and Load the Pot
- Sauté the Aromatics: Select the Sauté function on your Instant Pot. Add the 1 tbsp of olive oil. Add the chopped onion and sauté for 3–5 minutes until soft. Add the garlic and sauté for 1 minute until fragrant. Hit Cancel.
- Add Spices and Liquid: Add the cumin, chili powder, oregano, and cayenne to the pot. Stir for 30 seconds to toast the spices (this boosts flavor!). Pour in the chicken broth and scrape the bottom of the pot with a wooden spoon to dislodge any stuck bits (this prevents the “Burn” warning!).
- The Dump-and-Go: Add the rinsed beans and the diced green chiles (undrained). Place the raw chicken breasts/thighs right on top. Do not stir the pot after this step! Leave the chicken sitting on top of the other ingredients.
H3 Pressure Cook and Creamy Finish
- Seal and Cook: Secure the lid, ensure the vent is set to Sealing. Select Manual/Pressure Cook and set the time for 10 minutes on High Pressure.
- Release and Remove: Once the cooking cycle is complete, carefully do a Quick Release (QR) by turning the vent knob to Venting. When the pin drops, open the lid. Remove the chicken using tongs and place it in a separate bowl.
- Thicken and Cream: Use a potato masher or an immersion blender to mash about one-third of the beans directly in the pot. This creates a natural, starchy thickness. Select the Sauté function (Low).
- Shred and Combine: Shred the chicken using two forks (or the electric mixer hack!). Return the shredded chicken to the pot. Stir in the heavy cream or cream cheese until it melts and the chili becomes uniformly creamy. Taste and adjust salt/pepper. Cancel the Sauté function and serve hot!
Calories & Nutritional Info (The Healthier Chili)
This chili is surprisingly lean, high-protein, and super filling. Estimates are per one serving (1/6th of the batch, without toppings).
- Estimated Calories Per Serving: Approximately 300–400 calories. (Varies heavily based on cream choice).
- Protein: High! Around 30–35g per serving from the lean chicken and beans.
- Carbohydrates: Moderate, mostly from the high fiber beans. Around 30–40g per serving.
- Fat: Low to Moderate. Controlled by the amount of cream/cream cheese added.
- Key Nutritional Note: Excellent source of fiber (beans) and lean protein. FYI, you’re eating chili, but it’s basically a protein shake.
Common Mistakes to Avoid (Chili Chaos Prevention)
Master the Instant Pot rules, and you’ll master this chili.
- Not Deglazing: After the Sauté step, always pour the broth in and scrape the bottom of the pot. Any stuck-on spice or onion will trigger the “Burn” warning under pressure.
- Stirring the Chicken: Do not stir the chicken into the beans/spices before pressure cooking. Place the liquid first, then the chicken on top. Stirring can cause thicker ingredients to fall to the bottom and trigger the Burn error.
- No Quick Release (QR): The chicken and beans cook very quickly. Use the Quick Release to stop the cooking immediately, preventing overcooked, tough chicken and mushy beans.
- Using Raw Flour/Cornstarch: Don’t add any powdered thickening agent before pressure cooking. It will clump, stick, and trigger the “Burn” warning. Thicken naturally with mashed beans or add a slurry after the pressure cook.
Variations & Customizations
Bored of the basic? Impossible! But here are ways to tweak this glorious pot.
H3 Spicy Jalapeño Popper Chili
For serious heat seekers! Add 1/2 cup of diced pickled jalapeños (and a tablespoon of the brine!) along with the green chiles. Stir in 1/4 cup of cream cheese and 1/2 cup of shredded Monterey Jack cheese at the end for an extra creamy, cheesy kick.
H3 Hearty Hominy & Corn
Add texture and sweetness! Mix in 1 cup of drained hominy and 1 cup of frozen corn (no need to thaw) after the pressure cooking is complete and the chili is simmering on the Sauté function.
H3 Vegetarian Creamy White Bean Chili
Make it meatless! Replace the chicken with 2 cans of drained and rinsed chickpeas and 1 cup of diced, firm potatoes (cut small). Use vegetable broth. The rest of the process remains the same. You still get the creamy, savory base!
FAQ Section: White Chili Whispers Answered
The questions everyone asks about this creamy delight.
1. Can I use dried beans instead of canned?
Yes, but you need to pre-soak them overnight and significantly increase the pressure cook time (about 30 minutes) to ensure they are fully tender. Canned beans are much faster and more reliable here.
2. How do I make the chili thicker?
You have two great options: 1) Mash about 1/3 of the beans against the side of the pot using a potato masher, or 2) create a slurry of 1 tbsp cornstarch mixed with 2 tbsp cold water and stir it in on the Sauté function at the end.
3. Why is my chicken tough?
You overcooked it! 10 minutes on high pressure is plenty for fresh chicken. Make sure you use the Quick Release immediately after the 10 minutes is up to halt the cooking process.
4. What are the best toppings for white chicken chili?
Toppings are mandatory! Use shredded Monterey Jack cheese, sour cream or Greek yogurt, fresh cilantro, sliced jalapeños, and crushed tortilla chips for crunch.
5. How long does the chili last as leftovers?
Store leftovers in an airtight container in the fridge for up to 4 days, or freeze it for up to 3 months. It reheats beautifully, though it might thicken further overnight.
6. Can I use frozen chicken breasts?
Yes, you can. Use the same 10-minute cook time, but allow the pot to Natural Pressure Release (NPR) for 5 minutes before switching to the Quick Release (QR). This ensures the center cooks fully.
7. Does the heavy cream curdle in the Instant Pot?
Heavy cream should always be added at the end, after the pressure cooking is finished and the heat is reduced (or off). Stirring it into the hot chili off-heat or on low Sauté ensures a creamy, stable finish.
Final Thoughts
You just pulled off an elegant, deeply flavored, instant pot white chicken chili. You tamed the pressure cooker, you created a creamy broth with zero flour, and you made a meal worthy of the coziest Sunday. Go ahead and load that bowl up with toppings; you earned it. Now, seriously, try to convince yourself you ever liked that red canned stuff. You’re better than that!