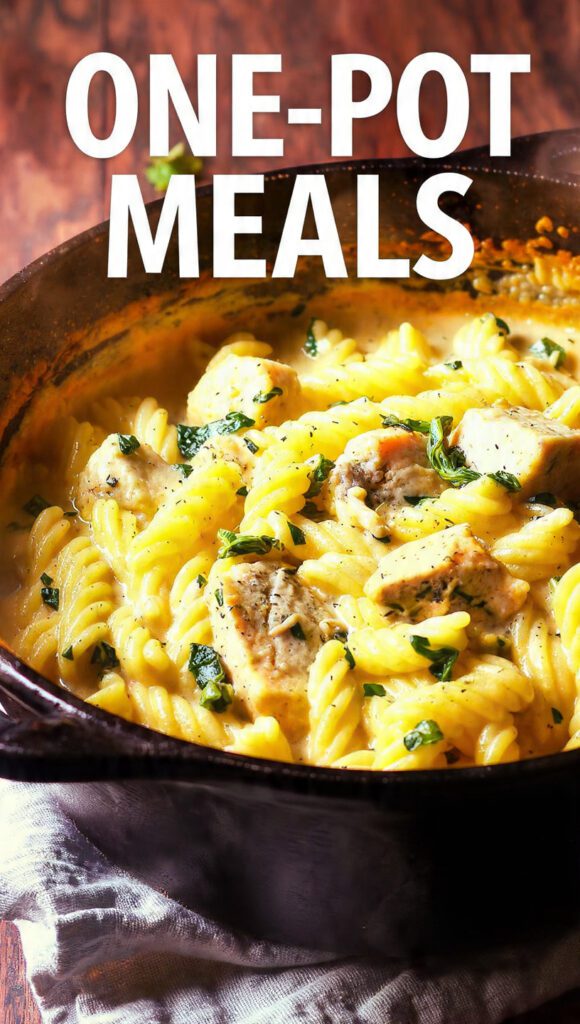
Instant Pot Dinners: Master the Dump-and-Go Recipe for Weeknight Glory
Let’s be honest, your Instant Pot has been sitting on the counter, judging your takeout habits. You bought it for convenience, but you only use it for rice, right? It’s time to unleash its true power and make incredible, hearty Instant Pot dinners that practically cook themselves.
This isn’t just about speed; it’s about flavor development under pressure. We’re taking simple, wholesome ingredients and forcing them to mingle aggressively, resulting in deeply infused flavor that tastes like it simmered all day. You dump, you seal, you press a button, and you walk away. Get ready to kiss endless stirring and messy stovetops goodbye.
Why Instant Pot Dinners Are Awesome (Flavor Under Pressure)
The Instant Pot isn’t a replacement for the oven; it’s a cheat code for rich, slow-cooked flavor in minutes.

First, Unbeatable Hands-Off Time. Your job is the initial 10 minutes of chopping and dumping. The machine handles the high-pressure cooking, which means you have 20 minutes of complete freedom to actually relax. Why stand over a simmering pot when the pot can handle the simmering?
Second, Depth of Flavor. Pressure cooking forces liquid into the ingredients faster and at a higher temperature, intensifying the flavor of the spices and broth. A pot roast flavor in 45 minutes? Yes, please. IMO, the Instant Pot is a flavor time machine.
Third, The One-Pot Cleanup Victory. Because the Instant Pot is designed to handle liquid and starch together, it’s the ultimate one-pot solution. Serve dinner directly from the inner pot. TBH, the less time I spend scrubbing, the more time I have for dessert.
The Goods: Ingredients (The Dump-and-Go Staples)
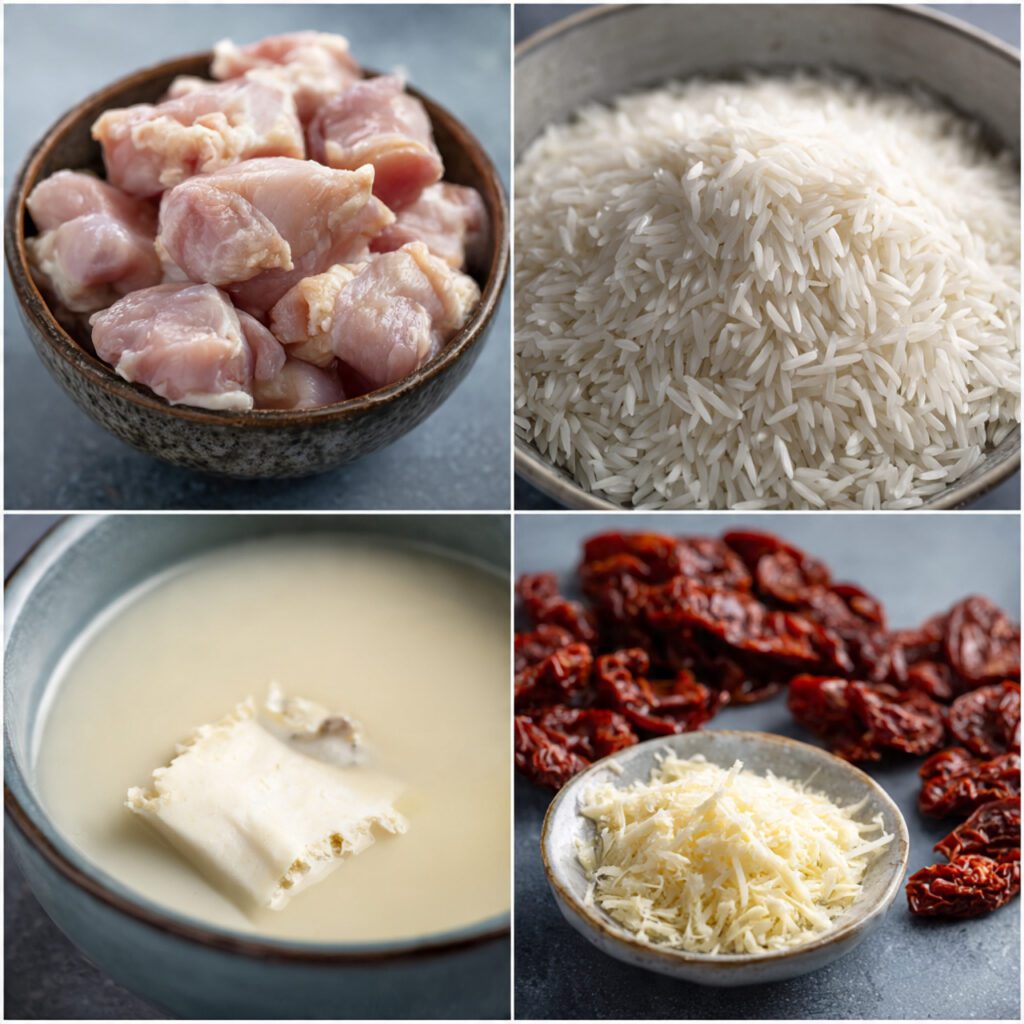
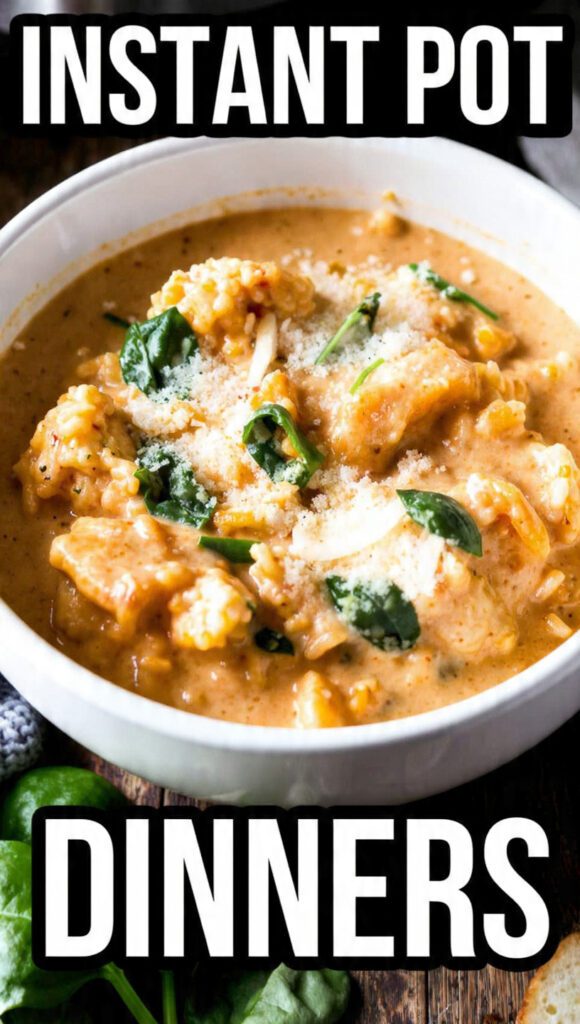
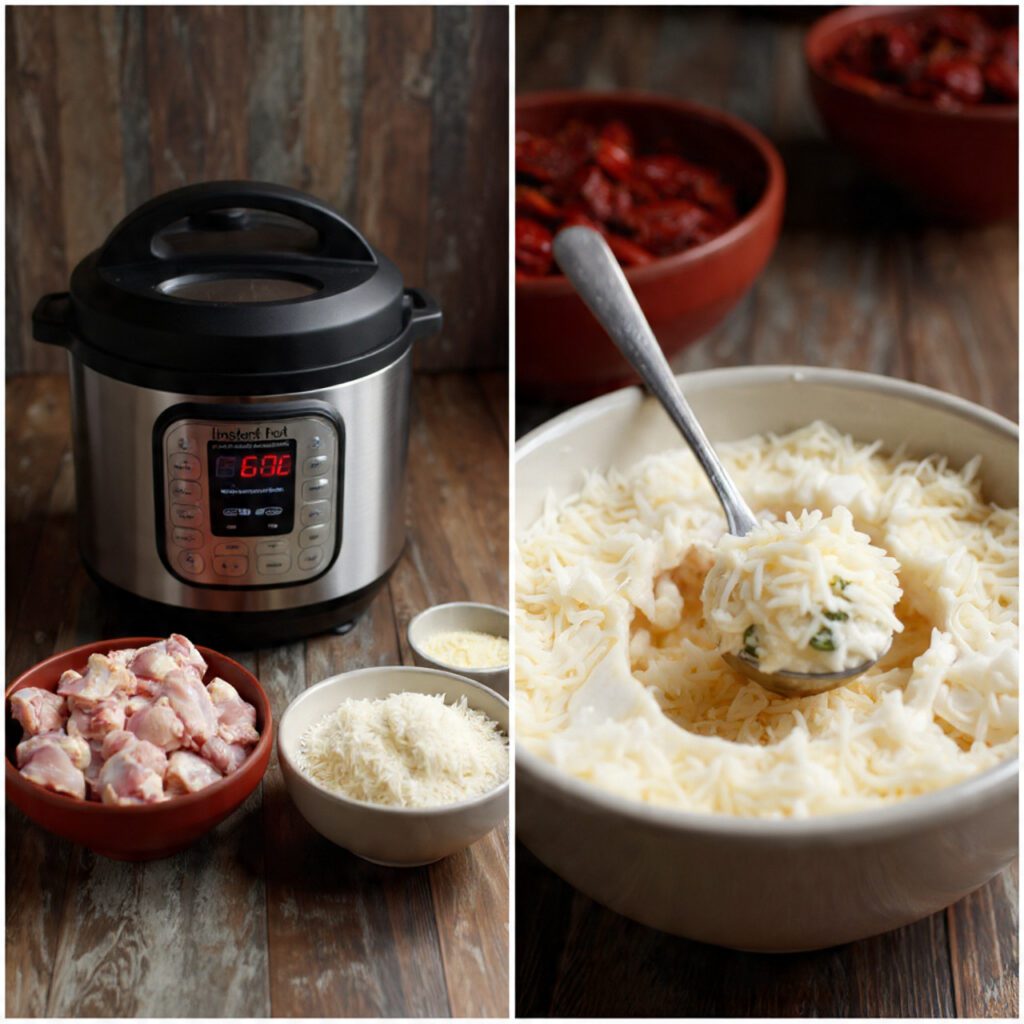
A successful Instant Pot dinner relies on non-reactive liquids (broth/water) and hearty ingredients that can withstand the pressure. We’ll use a Creamy Tuscan Chicken & Rice as our example.
- The Protein & Fat:
- 1.5 pounds Boneless, Skinless Chicken Thighs (cut into 1-inch cubes).
- 2 tablespoons Olive Oil.
- The Flavor Base (Sauté First!):
- 1 medium Yellow Onion, diced.
- 4 cloves Garlic, minced.
- 1 cup Sun-Dried Tomatoes (oil-packed, drained and sliced).
- 1 teaspoon Dried Italian Seasoning.
- The Starch & Liquid (The Pressure Items):
- 1 cup Long-Grain White Rice (rinsed!).
- 2 cups Chicken Broth (low sodium).
- The Finishing Cream (Added After Pressure):
- 1/2 cup Heavy Cream.
- 2 cups Baby Spinach (for color!).
- 1/4 cup Grated Parmesan Cheese.
H3 Key Substitutions (The Pressure Cooker Swap Guide)
- Chicken Thighs Swap: Use Pork Tenderloin (cubed) or 1 pound of pre-cooked sausage (add sausage after Step 1 to prevent mushiness).
- Rice Substitute: Use quinoa (cook time reduces to 1 minute, plus 10 min NPR). Do not use pasta unless using a specialized Instant Pot pasta recipe.
- Dairy-Free/Vegan Swap: Substitute heavy cream with full-fat canned coconut milk. Swap chicken thighs for cubed firm tofu or white beans (add beans after pressure release).
Tools & Kitchen Gadgets Used (The Minimalist Approach)
You only need the Instant Pot and the basics for chopping and stirring.
- Instant Pot (or other Electric Pressure Cooker): The indispensable main appliance.
- Sharp Chef’s Knife and Cutting Board: For the quick prep.
- Wooden Spoon or Rubber Spatula: For scraping the bottom during the crucial Sauté step.
- Measuring Cups and Spoons: Essential for accurate liquid-to-starch ratios.
- Tongs: For easy removal of the chicken.
- Trivet/Steamer Rack (Optional): Needed for the Pot-in-Pot method if cooking sensitive items.
Step-by-Step Instructions (Sauté, Seal, Serve)
We use the built-in Sauté function first to build a deep flavor base, then hit it with pressure.
H3 Step 1: Sear and Build the Base (The Sauté Power) (10 mins)
- Press the Sauté button on your Instant Pot. Wait until it says ‘Hot.’
- Add the olive oil and cubed chicken thighs. Season with salt and pepper. Sear for 5-7 minutes until browned. Remove the chicken and set aside.
- Add the diced onion and sun-dried tomatoes to the pot. Sauté for 3 minutes until softened. Add the minced garlic and Italian seasoning. Cook for 1 minute until fragrant.
H3 Step 2: Liquid, Starch, and Pressure (The Dump and Go) (1 min)
- Press the Cancel button to turn off Sauté. Crucially, pour in 1/2 cup of broth and use your wooden spoon to scrape up every single browned bit from the bottom of the pot. This prevents the burn notice!
- Add the rinsed rice and the rest of the chicken broth. Stir gently to distribute the rice evenly. Place the seared chicken on top (do not push it under the liquid!).
H3 Step 3: Seal and Cook (The Set-It-and-Forget-It) (12 mins)
- Secure the lid on the Instant Pot. Turn the valve to the Sealing position.
- Press the Manual/Pressure Cook button and set the time to 6 minutes on High Pressure.
- Once the 6 minutes are up, allow the pressure to Natural Pressure Release (NPR) for 5 minutes. Then manually release the remaining pressure (Quick Release/QR). Be cautious of steam!
H3 Step 4: Finish and Serve (The Creamy Finale) (5 mins)
- Open the lid. Stir in the heavy cream and baby spinach. Stir for 1 minute until the spinach wilts and the liquid thickens into a creamy sauce.
- Stir in the Parmesan cheese. Taste and adjust seasoning.
- Serve immediately, directly from the Instant Pot liner. Minimal cleanup accomplished!
Calories & Nutritional Info (Fast, Full, and Filling)
This meal is a hearty, balanced one-pot dinner that hits all the macronutrients efficiently.
- Estimated Calories Per Serving (1/4 of recipe): ~580–680 calories. It is a complete, dense main meal.
- High in Protein: Chicken thighs provide excellent protein and flavor.
- Complex Carbohydrates: Rice provides the main energy source.
- Healthy Fats: Olive oil and cream provide essential fats.
- Vitamins and Minerals: Spinach and tomatoes contribute fiber, Vitamin A, and Vitamin C.
Common Mistakes to Avoid (The Instant Pot No-Nos)
The Instant Pot is fantastic, but it requires adherence to certain rules to prevent the dreaded ‘Burn’ notice.
- Forgetting to Deglaze: After searing, you must scrape up the browned bits (“fond”) with liquid. If these bits remain on the bottom, the pot will assume the food is burning and throw up the ‘Burn’ warning.
- Cooking Dairy Under Pressure: Dairy (milk, cream, cheese) scorches easily. Never add heavy cream or cheese until after the pressure release—stir them in at the end!
- Wrong Liquid Ratio: Pressure cooking uses very little liquid, but too little results in a burned bottom. Stick to the exact liquid ratio (2 cups liquid for 1 cup long-grain rice).
- Not Rinsing Rice/Grains: Rinsing removes excess starch, which can cause the mixture to thicken too quickly and trigger the ‘Burn’ notice while under pressure.
Variations & Customizations (Pressure Cooker Pioneers)
The Instant Pot is perfect for flavor customization. Use this technique for these amazing swaps.
- Spicy Chili & Lime Pork Bowl: Swap chicken for cubed pork shoulder. Use vegetable broth. Add 1 tablespoon chili powder and cumin before sealing. Serve over rice and top with lime and black beans (added after pressure release).
- Lentil & Coconut Curry (Vegetarian Swap): Skip the meat. Use red lentils (1 cup) instead of rice. Use coconut milk (2 cups) and vegetable broth. Add curry paste during the Sauté step. Cook for 4 minutes (NPR for 10 mins).
- Keto Chicken Faux-Risotto: Skip the rice. Sauté chicken and veggies. Use cauliflower rice (add after pressure release) and heavy cream/broth (1:1 ratio) for the liquid. Cook for 1 minute (QR immediately).
FAQ Section (Your Instant Pot Inquiries)
Become an Instant Pot expert by learning these essential pressure cooking rules.
- Q: Why do I need to rinse the rice?
- A: Rinsing removes surface starch. Excess starch thickens the liquid too quickly, which can lead to the ‘Burn’ error on the bottom of the pot.
- Q: What is the “Burn” notice and how do I avoid it?
- A: It means the pot detected high heat at the base. Avoid it by always deglazing (scraping the bottom) in Step 2 and never adding thickeners/dairy before sealing the lid.
- Q: Is it safe to cook chicken and rice together?
- A: Yes, the high pressure guarantees the chicken cooks thoroughly and safely (above 165°F / 74°C) by the time the rice is done.
- Q: Should I use Quick Release (QR) or Natural Release (NPR)?
- A: Use Natural Pressure Release (NPR) for starch (rice, beans) to prevent foaming and ensure proper texture. Use Quick Release (QR) for delicate items (fish, thin veggies).
- Q: How long does it take for the Instant Pot to pressurize?
- A: It takes about 10–15 minutes for the pot to come up to pressure, which is in addition to the cooking time. Factor this into your dinner plan!
- Q: Why is my rice mushy?
- A: You used too much liquid (the ratio should be 1:2 rice to liquid, not 1:3 like stovetop), or you didn’t Quick Release the pressure after the NPR time, letting it steam too long.
- Q: How should I store the leftovers?
- A: Store leftovers in an airtight container for 3-4 days. When reheating, add a splash of water or broth to restore the moisture absorbed by the rice.
Final Thoughts (The Pressure Cooker Pro)
You conquered the ‘Burn’ notice, mastered the deglaze, and served a deep, rich, flavorful meal using a single pot. That creamy bowl of Tuscan Chicken & Rice is proof that Instant Pot dinners are the ultimate weeknight hack. You are officially a pressure cooker pro.
Go ahead, scrape out that last spoonful of creamy rice. Did you realize flavor could be this complex with this little effort? I bet you’ll be using the Instant Pot every night this week. Now, what tough meat are you tenderizing next?