
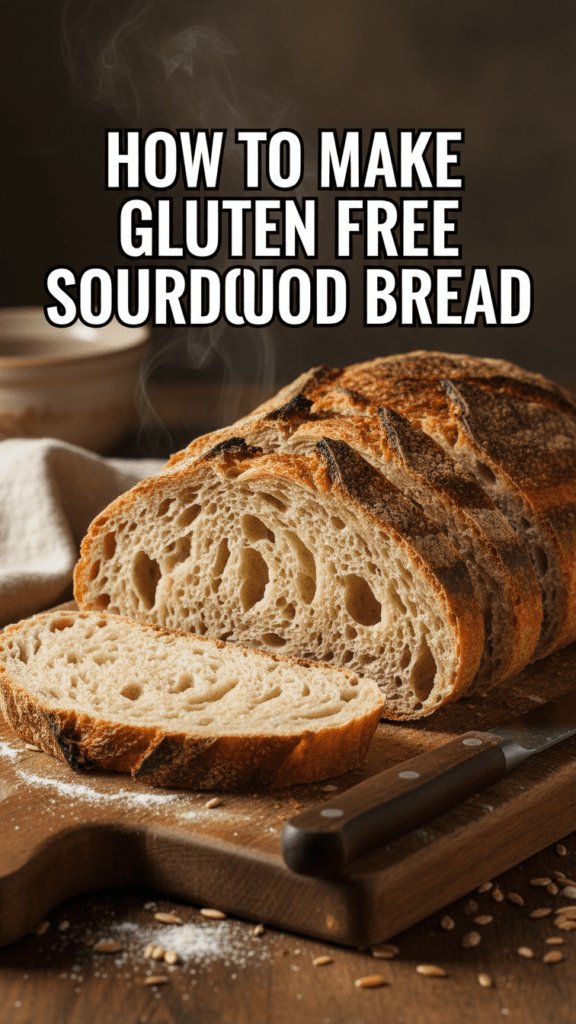
🥖 The “Holy Grail” of Baking: Mastering How to Make Gluten Free Sourdough Bread
Let’s be brutally honest: most gluten-free bread has the structural integrity of a sandcastle in a monsoon and the flavor profile of a dusty attic. It’s a culinary tragedy! If you’ve spent years chewing on “bread” that tastes like toasted cardboard, I hear your silent screams. But then, the universe gave us the fermented miracle. Learning how to make gluten free sourdough bread isn’t just a kitchen project; it’s a personal rescue mission for your taste buds.
I once served a loaf of this to a “gluten-enthusiast” friend who thinks celiac disease is a government conspiracy. He inhaled three slices with salted butter and then asked me for the brand of wheat flour I used. The look of pure betrayal on his face when I showed him the brown rice flour bag was better than any Michelin star. Are you ready to stop settling for gritty, store-bought “health” bricks and start baking a legendary masterpiece?
🏆 Why This Fermented Miracle is the Actual GOAT

Why should you bother babysitting a jar of bubbling flour for a week? Because gluten-free sourdough is the ultimate “science-meets-magic” flex. Unlike regular GF bread that relies on massive amounts of sugar and yeast to look alive, sourdough uses wild fermentation to build a complex, tangy flavor and a crumb that actually bends without shattering.
This recipe is awesome because it finally gives you that elusive “shatter-crisp” crust and those beautiful airy holes (the “crumb,” for those of us who watch too many baking shows). It impresses guests because it looks incredibly technical, even though the bacteria are doing 90% of the heavy lifting. Plus, it’s much easier on the gut than standard commercial bread. It’s basically a high-five for your digestive system, IMO.
🧂 The “Grit-Free” Ingredient List
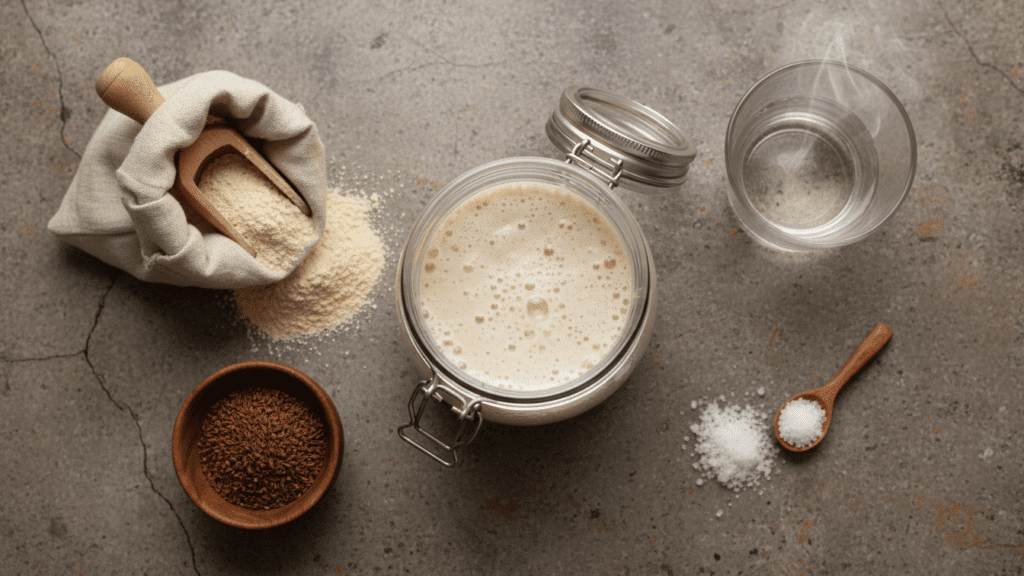

Success depends entirely on your flour blend. If you use a cheap mix with too much cornstarch, you’re baking a giant eraser.
- The Starter: 1/2 Cup Active Gluten-Free Sourdough Starter (Fed with brown rice or sorghum flour).
- The Flour Power: 350g high-quality GF flour blend (Choose one with brown rice, millet, and sorghum).
- Psyllium Husk (The Secret “Glue”): 25g whole psyllium husk. MANDATORY. This is the “fake gluten” that provides the stretch.
- Warm Water: 400g (Filtered, because your wild yeast doesn’t like chlorine).
- Maple Syrup or Honey: 15g to give the bacteria a little sugar rush.
- Fine Sea Salt: 10g to keep the flavors from being boring.
- Olive Oil: 10g for a softer crust and better mouthfeel.
Key Substitutions
- Flour Swap: If you hate brown rice flour, sorghum flour is an elite alternative that tastes remarkably like wheat.
- Liquid Swap: You can use light beer (GF, obviously) for 50g of the water to add an extra malty depth.
- Psyllium Swap: There isn’t one. Don’t use Xanthan gum here; it’ll turn your bread into a gummy nightmare.
🔪 Tools & Kitchen Gadgets Used
You don’t need a professional bakery, but a few specific gadgets will prevent your kitchen from looking like a flour-coated crime scene.
- Digital Kitchen Scale: NON-NEGOTIABLE. Volume measurements are for people who like to fail. Check out accurate scales here!
- Dutch Oven (Enameled or Cast Iron): To trap the steam and create that viral crust. Grab a heavy-duty one here!
- Banneton (Proofing Basket): To give your loaf those sexy professional flour lines. Check out rattan baskets!
- Bread Lame (or a very sharp razor): For the essential “scoring” ritual. Get a precision blade here!
- Large Glass Mixing Bowl: For the ultimate dough-watching experience.
👩🍳 Step-by-Step Instructions: The Path to Fluffy Glory
Follow these steps precisely. Sourdough is about the “vibe,” but it’s mostly about the chemistry. Patience is your most important ingredient.
1. The “Psyllium Gel” Setup
In a small bowl, whisk your warm water, maple syrup, and psyllium husk. Let it sit for 10 minutes until it turns into a thick, weird-looking jelly. TBH, it looks gross, but this gel is what keeps your bread from crumbling into dust.
2. The Great Integration
In your large bowl, whisk the GF flour and salt. Add the active sourdough starter and the psyllium gel. Mix with a wooden spoon until a shaggy dough forms. Add the olive oil and get in there with your hands! Squeeze the dough until everything is smooth and no dry flour remains.
3. The Bulk Fermentation
Cover the bowl with a damp cloth. Let it sit in a warm spot for 4 to 6 hours. Unlike wheat dough, GF sourdough won’t double in size; it’ll just look slightly more “puffed” and smell like a dream.
4. The Architecture Phase
Gently turn the dough onto a lightly floured surface. Shape it into a smooth ball (boule). Place it seam-side UP into your floured banneton. Cover and pop it in the fridge for 12–24 hours. FYI, the cold ferment is where the tang lives.
5. The Preheat Ritual
Preheat your oven to 450°F (230°C) with the Dutch oven inside for 45 minutes. We want that pot screaming hot.
6. The “Scoring” Performance
Gently flip the cold dough onto parchment paper. Use your bread lame to slash a deep “X” or a fancy leaf pattern on top. This isn’t just for Instagram; it controls where the bread expands so it doesn’t explode sideways.
7. The Big Bake
Slide the dough (on the parchment) into the hot Dutch oven. Cover with the lid and bake for 40 minutes. Remove the lid and bake for another 20–30 minutes until the crust is deep mahogany brown. STOP! Do not cut it yet. Let it cool for at least 3 hours. If you cut it hot, the inside will turn to gummy paste. I know it’s hard. Be brave. 🙂
📊 Calories & Nutritional Info (The Health Flex)
Since it’s fermented and full of fiber, we can legally pretend this is a superfood. Right?
- Estimated Calories Per Slice: $\approx$ 140–160 kcal.
- Fiber King: Psyllium husk and whole GF grains provide a massive digestive boost.
- Probiotic-ish: The fermentation breaks down antinutrients, making minerals easier to absorb.1
- Low Glycemic: Sourdough fermentation helps stabilize blood sugar levels.
- Mood: 1,000% improved after the first buttery bite.
🚨 Common Mistakes to Avoid (The Bread Fails)
Avoid these if you want people to actually finish their sandwich.
- Using a Weak Starter: If your starter isn’t bubbling and doubling, your bread will be a hockey puck. Feed your starter!
- Cutting While Warm: This is the #1 GF baking sin. The structure “sets” as it cools. LET IT COOL.
- Skipping the Scale: Volume cups are liars. Use the digital scale.
- Using Tap Water: Chlorine kills wild yeast. Use filtered or spring water. 🙂
✨ Variations & Customizations
Make it yours, you kitchen rebel.
1. The “Everything Bagel” Loaf
Fold in 2 tablespoons of “Everything” seasoning during the mixing phase. It adds a salty, garlicky crunch that makes the best avocado toast on the planet.
2. The Sweet Cinnamon Swirl
Swirl in a mixture of cinnamon and coconut sugar before shaping. It turns your sourdough into a sophisticated breakfast treat.
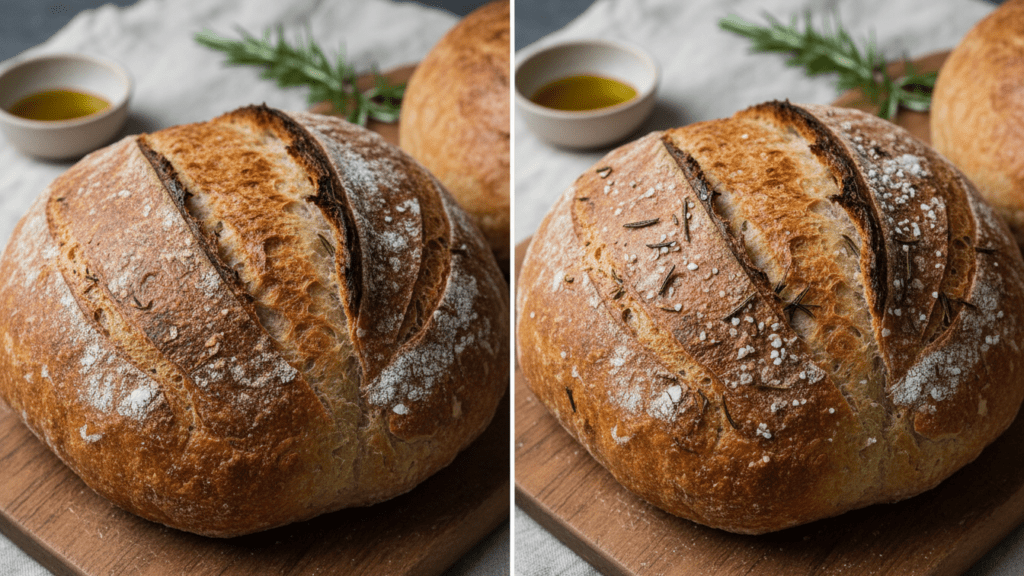
3. The Rosemary & Sea Salt Swap
Add finely chopped fresh rosemary to the dry flour. Top the loaf with flaky Maldon sea salt right before it hits the Dutch oven.
❓ FAQ Section: Your Sourdough Queries Answered
Why is my gluten free sourdough gummy?
You likely cut it while it was still warm! The internal steam needs hours to evaporate to finish the “setting” process. Or, your flour blend has too much starch.
Do I have to use a Dutch oven?
Technically no, but IMO, it’s the only way to get a truly professional crust. If you don’t have one, use a baking stone and a tray of water on the bottom rack for steam.
How long does the starter take to make?
Expect about 7 to 10 days of daily feeding before your GF starter is strong enough to lift a loaf of bread.
Can I freeze this bread?
Absolutely! Slice it first, then freeze. Toasting a frozen slice of sourdough brings it right back to life.
Why didn’t my bread rise?
Your kitchen might be too cold, or your starter was hungry. Try proofing it in the oven with the light turned on (but the oven OFF!).
Is it really “sourdough” if it’s gluten-free?
Yes! Sourdough refers to the fermentation process, not the grain. You’re using the same wild yeast and lactobacillus magic as any bakery in San Francisco.
What is the best GF flour for sourdough?
Brown rice flour and Sorghum flour are the champions. Avoid “all-purpose” blends that are mostly potato starch.
🥂 Final Thoughts: Go Forth and Score!
You’ve done it. You’ve successfully navigated the world of wild fermentation without having a public breakdown. You are now a titan of the Dutch oven and a hero of the wheat-free world. Go ahead, have that second slice—it’s mostly probiotics and dreams, right? Just don’t tell me if you used a bread machine; I have a reputation to maintain. 🙂

