We have all been there. You walk into a high-end grocery store, feeling like a responsible adult, and you spot a carton of “artisanal” broth for ten dollars. Ten dollars! For salty water and the ghost of a chicken! You want that glowing skin, that healthy gut, and the smug satisfaction of sipping a hot mug of nutrients, but your bank account is currently staging a violent protest. What if I told you that learning how to make chicken bone broth is essentially a magic trick that turns trash into treasure?
Honestly, if you aren’t currently simmering a pot of scraps on your stove, are you even living your best foodie life? It is the ultimate kitchen flex. I once convinced a friend that my homemade batch was a secret family heirloom recipe passed down from a 19th-century French chef. In reality, I just stopped throwing away my Sunday roast remains. Ready to stop overpaying for “live cultures” and start your own liquid gold empire? Let’s get bubbling. 🙂
Why This Recipe is Actually Awesome
Why should you bother simmering bones for 24 hours when you can just open a can? First off, the flavor profile is incomparable. Store-bought broth usually tastes like a sodium-heavy chemistry project. Your homemade version? It is rich, savory, and has a silky mouthfeel that only real collagen can provide. It is the culinary equivalent of a warm weighted blanket for your soul.
TBH, the ease of cooking—or rather, “non-cooking”—is the real hero here. You basically dump a bunch of leftovers into a pot and walk away. It impresses guests like crazy, too. Pulling a jar of glistening, gelatinous broth out of the fridge makes you look like a domestic deity who has mastered the ancient arts of zero-waste living.
Our Top Pick

Papier Herb Garden Recipe Journal - Hardback Design
Capture your culinary ideas and favorite memories with this beautifully designed recipe journal. Organized sections for breakfast, lunch, dinner, and treats make it easy to record recipes, ratings, dietary notes, and cooking tips, along with measurement and conversion guides. Extra pages let you list favorite restaurants, shops, and places to try. Crafted with a premium hardback cover, luxurious 100gsm paper, and a gold foil accent, it’s both durable and stylish. Thoughtfully designed to suit any kitchen, it makes a practical, timeless gift for family, friends, or yourself.
Finally, let’s talk about the health perks. We are talking about a tactical strike of amino acids and minerals. It’s high-protein, low-calorie, and makes your digestive system feel like it just went to a five-star spa. Plus, it’s virtually free. You are literally making food out of things you were going to throw in the bin. What else do you want from a carcass?
The “Trash to Treasure” Ingredient List
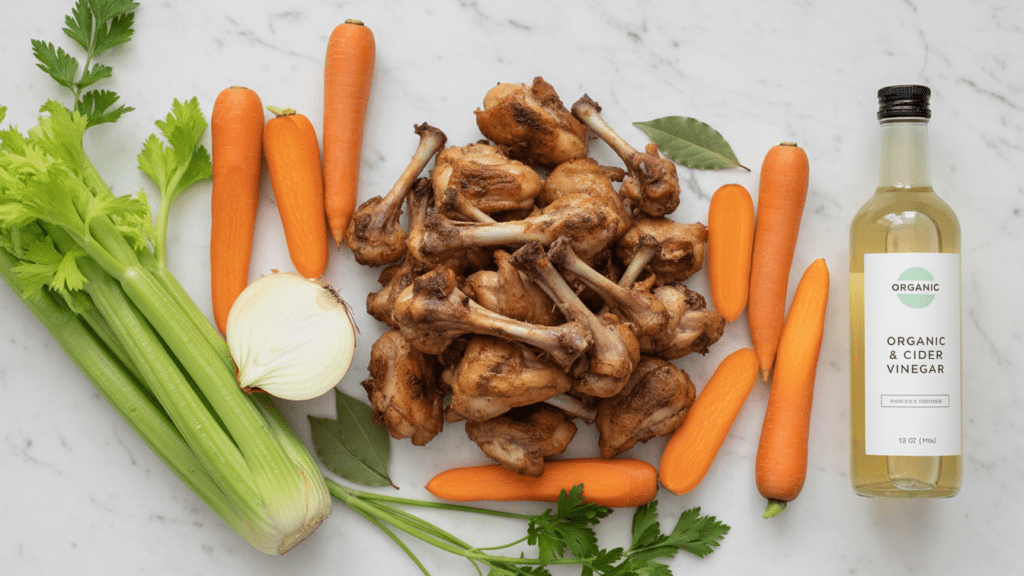
Don’t go hunting for rare herbs in the Himalayan mountains. You just need the basics and a little bit of patience.
- Chicken Bones: Grab 2-3 lbs of bones. Use a leftover rotisserie carcass, wings, or feet (if you aren’t squeamish—they have the most collagen!).
- Apple Cider Vinegar: The “secret” key. It pulls the minerals out of the bones.
- The Trinity: Carrots, celery, and onions. Don’t even peel them! Just wash them and toss them in.
- Garlic: A whole head, halved. We measure garlic with our hearts here.
- Peppercorns: Whole black ones for that subtle, woody heat.
- Fresh Herbs: Parsley stems, thyme, or rosemary.
- Filtered Water: Because your broth shouldn’t taste like the local swimming pool.
Tools & Kitchen Gadgets You’ll Need
Our Top Pick

Ciwete Stock Pot 20 Quart, 3 Ply Stainless Steel Stock Pot with Lid, 20 Quart Soup Pot with Copper Handle
Ciwete 20-quart stainless steel stock pot designed for large-batch cooking like bone broth, soups, and stocks. Features tri-ply 18/10 stainless steel construction with an aluminum core for fast, even heat distribution. Compatible with all stovetops, including induction, and oven-safe up to 500°F. Includes riveted stainless steel handles and a tight-fitting, durable glass lid to lock in flavor. Dishwasher-safe, gift-ready, and built for long-lasting performance.
To master how to make chicken bone broth, you need gear that can handle a “low and slow” marathon.
- Large Stock Pot or Dutch Oven: The bigger, the better. You want enough room for all that liquid gold.
- Slow Cooker or Instant Pot: The “set it and forget it” MVPs. They keep a steady temp without you hovering.
- Fine Mesh Strainer: Essential for getting that crystal-clear liquid without the bone fragments.
- Cheesecloth: For the perfectionists who want zero sediment.
- Large Mason Jars: For storage and looking very aesthetic in your fridge.
- Tongs: To fish out the big bits without splashing hot lava on your face.
Step-by-Step Instructions
Step 1: The Bone Collection

Gather your bones. If you are using raw bones, roast them at 400°F (200°C) for 20 minutes first. This step is the difference between a rich, mahogany broth and a pale, sad soup. If you’re using a leftover rotisserie carcass, you can skip the roast—it’s already been through the fire.
Step 2: The Pot Dump
Place your bones, veggies, garlic, and peppercorns into your pot. Add 2 tablespoons of apple cider vinegar. Cover everything with filtered water until the water level is about two inches above the solids. FYI, don’t fill it to the very brim or it will boil over and ruin your evening.
Step 3: The Long Simmer
Bring the mixture to a low boil, then immediately turn the heat down to the lowest possible setting. You want “lazy bubbles,” not a volcanic eruption. If you’re using a slow cooker, set it to low for 18–24 hours. If using an Instant Pot, use the “Soup” setting for 120 minutes. IMO, the longer it simmers, the better it gets. 🙂
Our Top Pick

LuBudingJoy Blank Recipe Book
B5 Blank Recipe Book – Create and organize your favorite recipes in one beautiful place. This hardcover recipe book (10" × 7.3") features 150 blank pages and includes DIY category stickers. Designed with conversion charts, content tables, and a back pocket for loose notes.
Step 4: The Scum Patrol
For the first hour, you might see some grey foam rising to the top. This is totally normal! Just scoop it off with a spoon and discard it. It’s just impurities, but removing it ensures your broth stays clear instead of cloudy.
Step 5: The Great Strain
Once your time is up, turn off the heat. Use tongs to remove the big bones and veggies. Pour the remaining liquid through your fine mesh strainer into a large bowl. If you want that “Instagram-perfect” clarity, line the strainer with cheesecloth.
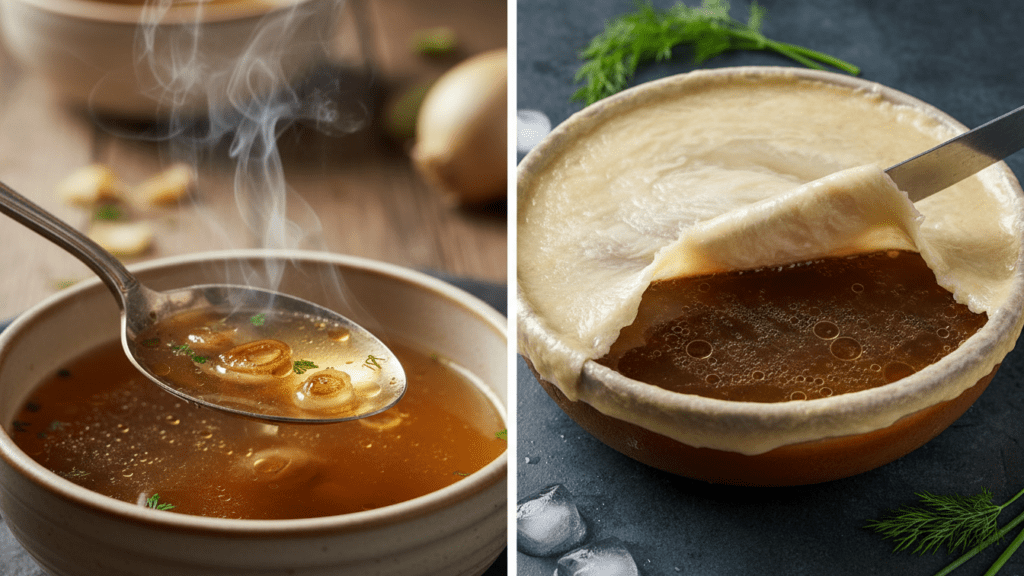
Step 6: The Big Chill
Let the broth cool to room temperature, then move it to the fridge. Overnight, the fat will rise to the top and form a hard white seal. Keep the fat layer on until you’re ready to use the broth—it acts as a natural preservative! When you’re ready to sip, just crack it off and reveal the “jell-o” underneath. That wiggle means you’ve succeeded!
Calories & Nutritional Info
You are drinking a nutrient-dense elixir that makes water look boring.
- Calories: Approximately 35-50 kcal per cup.
- Protein: A solid 6g-10g of collagen-rich protein.
- Healthy Fats: Minimal (once you skim the top layer).
- Electrolytes: Packed with potassium, magnesium, and calcium.
- Carbs: Zero. Keto and Paleo fans, rejoice!
Common Mistakes to Avoid
- Boiling Too Hard: High heat breaks down the fat into the water, making it greasy and cloudy. Keep it low.
- Skipping the Vinegar: Without the acid, the minerals stay locked in the bone. Use the ACV.
- Adding Salt Too Early: Broth reduces as it cooks. If you salt at the start, you’ll end up with a salt-lick. Season at the end.
- Using Too Much Water: If the bones are swimming in an ocean, the broth will be weak. Cover by only 2 inches.
- Ignoring the “Wiggle”: If your broth doesn’t turn into jelly in the fridge, you either used too much water or didn’t simmer long enough. TBH, it’s still edible, but the goal is the jiggle. 🙂
Variations & Customizations
Feeling adventurous? Try these three spins on the classic:
The Spicy Thai Kick
Add fresh ginger, lemongrass stalks, and a pinch of red chili flakes to the pot. It results in a vibrant, sinus-clearing broth that is the perfect base for a homemade ramen.
The Keto Turmeric Glow
Stir in fresh turmeric and a pinch of black pepper during the last hour of simmering. The pepper activates the turmeric, making this a massive anti-inflammatory powerhouse.
The Mushroom Umami (Vegetarian Swap)
Obviously, we aren’t using bones here. Use dried shiitake mushrooms, kombu (seaweed), and soy sauce. Simmer for only 2 hours. It’s a deep, savory alternative for the veggie crowd.
FAQ Section
Is it safe to simmer broth on the stove overnight? If you have a modern stove and feel comfortable, many do. However, for peace of mind, use a slow cooker. It’s designed for the long haul and won’t keep you awake with anxiety.
Why did my bone broth turn into jelly? Congratulations! That is gelatin. It means you successfully extracted the collagen from the bones. Once you heat it up, it will turn back into a delicious liquid.
Can I reuse the bones for a second batch? You can! This is called a remouillage. The second batch won’t be as thick, but it still contains plenty of nutrients. Waste not, want not.
How long does chicken bone broth last? It stays fresh in the fridge for 4 to 5 days. If you can’t finish it by then, freeze it in silicone molds or jars (leave room for expansion!) for up to 6 months.
Do I have to use organic bones? It’s better if you can, as toxins are often stored in the marrow. However, any bones are better than no bones. Work with what your budget allows!
Can I make this with just a rotisserie chicken? Absolutely. In fact, that is the most popular way to do it. Just strip the meat off for sandwiches and toss the rest (skin and all) into the pot.
Why does my broth smell a bit funky? Apple cider vinegar can have a strong scent initially, but it disappears during the simmer. If it smells like “rotten” eggs, your bones might have been past their prime. Trust your nose.
Final Thoughts
There you have it—your roadmap to the clearest, wiggliest, most flavorful chicken bone broth you’ve ever tasted. You now have the power to turn kitchen scraps into a health tonic that people pay luxury prices for.
Go ahead, start a “bone bag” in your freezer today. And hey, if you find yourself talking to your simmering pot like it’s a member of the family, don’t worry—it’s a perfectly normal side effect of becoming a “broth person.” Tag me in your “jiggle shots,” or just sit in your nutrient-dense bliss. Happy simmering!