
Easy Holiday Cookie Bars: All the Fun, None of the Fuss
Every year, it starts the same way. You see those glossy magazine photos of a dozen different, perfectly decorated Christmas cookies, and a little voice whispers, “You can do that.” Fast forward three days, your kitchen is a disaster zone, you’ve got royal icing in your hair, and you’ve produced exactly seven slightly lopsided snowman cookies. It’s time to stop the madness. Let’s talk about the genius invention that is Holiday cookie bars. This is the ultimate holiday baking hack. It’s for those of us who love the taste of homemade cookies but lack the patience (or time) to scoop, roll, and decorate dozens of individual treats. We’re talking one pan, one bake, and a whole lot of festive cheer. Prepare to win the holiday cookie exchange with minimal effort.
Why These Holiday Cookie Bars Are Your New Best Friend

Still not convinced to ditch the cookie cutters? Let me lay out the case for why bar cookies are superior in every way during the hectic holiday season.
The Lazy Baker’s Dream
Seriously, this is the easiest way to make “cookies” for a crowd. You make one batch of dough, press it into a pan, and bake. That’s it. No chilling the dough, no rolling it out, no scooping 47 individual cookies. It’s maximum deliciousness for minimum effort.
One Pan to Feed Them All

A single 9×13 inch pan of these bars can be cut into 24 generous squares. That’s enough for a party, a potluck, or a whole lot of festive gift bags. It’s efficient, it’s effective, and it saves you from having to wash a million different baking sheets.
A Blank Canvas for Holiday Cheer
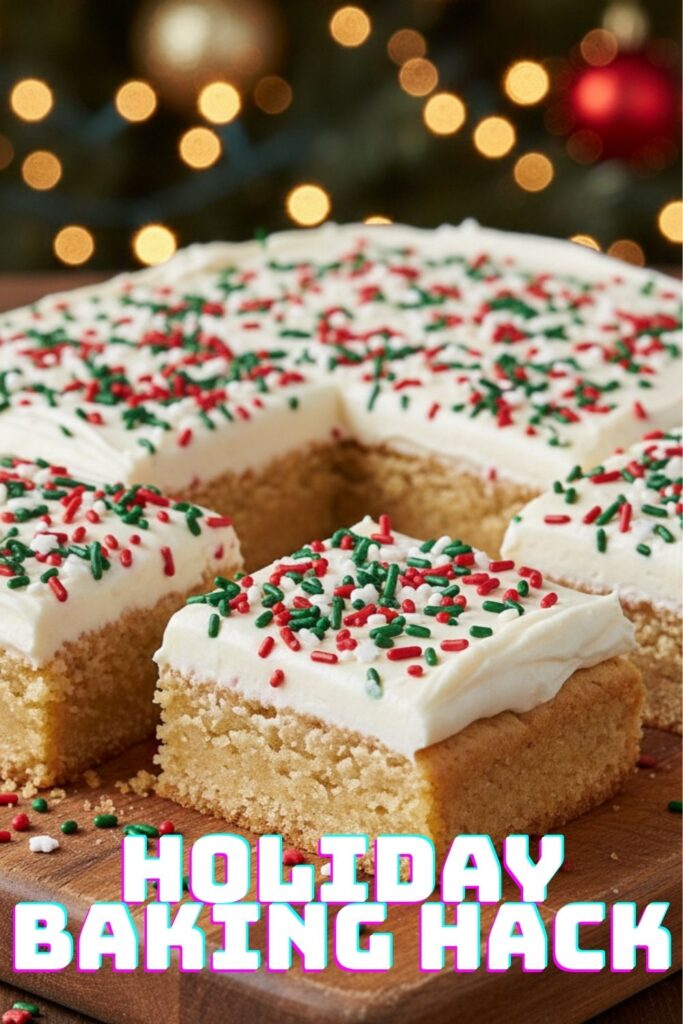
We’re starting with a simple, buttery, chewy sugar cookie base, which is basically the perfect canvas for whatever festive decorations you can dream up. Frosting, sprinkles, M&Ms—you can go as simple or as extra as you want.
The Simple Ingredients You’ll Need

This is all about classic, no-fuss ingredients you probably already have.
For the Chewy Cookie Bars
- Unsalted Butter: 1 cup (2 sticks), softened to room temperature.
- Granulated Sugar: 1 ½ cups.
- Large Egg: 1.
- Vanilla Extract: 2 teaspoons. Use the good stuff!
- All-Purpose Flour: 2 ½ cups.
- Baking Powder: ¾ teaspoon.
- Salt: ½ teaspoon.
For the Easy Buttercream Frosting
- Unsalted Butter: ½ cup (1 stick), softened to room temperature.
- Powdered Sugar: 2 cups, sifted.
- Milk or Heavy Cream: 2-3 tablespoons.
- Vanilla Extract: 1 teaspoon.
- Holiday Sprinkles: An obscene amount. This is not the time for subtlety.
The Essential Tools & Kitchen Gadgets
No fancy equipment is required to enter the glorious world of bar cookies.
- 9×13 inch Baking Pan: The official pan of bar cookies everywhere.
- Parchment Paper: Your #1 tool for easy removal and clean cuts. Do not skip this.
- Electric Mixer: A stand mixer or a hand mixer will make creaming the butter and sugar a breeze.
- Mixing Bowls and Spatulas: For mixing and scraping.
- Offset Spatula: Not essential, but it makes spreading frosting so much easier and more professional-looking.
Step-by-Step Instructions: Let’s Get Baking!
Ready for the easiest “cookie” recipe of your life? Let’s go.
Step 1: Prep the Oven and Pan
Preheat your oven to 375°F (190°C). Line a 9×13 inch baking pan with parchment paper, leaving a couple of inches of overhang on the two long sides. This will act as a sling to lift the bars out later.
Step 2: Make the Cookie Dough
In a large bowl, using your electric mixer, cream together the softened butter and granulated sugar on medium-high speed until it’s light and fluffy. This usually takes about 2-3 minutes. Scrape down the sides of the bowl. Beat in the egg and vanilla extract until just combined. In a separate bowl, whisk together the flour, baking powder, and salt. With the mixer on low speed, gradually add the dry ingredients to the wet ingredients, mixing until just combined. Do not overmix! Overmixing develops the gluten and makes the bars tough instead of chewy.
Step 3: Press and Bake
Plop the dough into your prepared pan. Use your hands, a spatula, or the bottom of a measuring cup to press the dough into an even layer. It might be a little sticky, so lightly flouring your hands can help. Bake for 20-25 minutes, or until the edges are lightly golden brown and a toothpick inserted in the center comes out with moist crumbs attached.
Step 4: Cool It Down (Completely!)
This is the hardest part of the whole recipe: waiting. You must let the bars cool completely in the pan on a wire rack before you even think about frosting them. If you try to frost warm bars, you’ll have a sad, melted, soupy mess. Patience, my friend.
Step 5: Whip Up the Frosting
While the bars are cooling, make the frosting. In a large bowl, beat the softened butter until it’s smooth and creamy. Gradually add the sifted powdered sugar, alternating with the milk or cream, until you reach a smooth, spreadable consistency. Beat in the vanilla extract.
Step 6: Frost, Decorate, and Cut
Once the bars are completely cool, spread the frosting evenly over the top with your offset spatula. Now, go absolutely bonkers with the holiday sprinkles. Let the frosting set for about 30 minutes before cutting. Use the parchment paper overhangs to lift the entire block of cookie bars out of the pan and onto a cutting board. Use a sharp knife to cut into squares.
Calories & Nutritional Info

Let’s just agree that holiday calories don’t count and move on with our lives.
- Serving Size: 1 bar (if cut into 24)
- Calories: Approximately 250-280 kcal
- Fat: ~12g
- Carbohydrates: ~35g
- Sugar: ~25g
- Protein: ~2g (Disclaimer: This is an estimate. The actual nutritional value is directly proportional to the amount of sprinkles you use. Science.)
Common Mistakes to Avoid (Don’t Sabotage Your Bars!)
This recipe is easy, but here are a few ways to ensure perfection.
- A Hard, Crumbly Bar: This is a classic sign of overbaking. The bars will continue to bake a little from the residual heat of the pan, so pull them out when the edges are just golden and the center looks slightly underdone.
- Melty Frosting Disaster: I’m saying it again because it’s that important. Do not frost warm bars. Let them cool completely. No exceptions.
- The Bars Are Stuck in the Pan: You skipped the parchment paper sling, didn’t you? Tsk tsk. The parchment paper overhang is the secret to getting the bars out easily for clean, perfect cuts.
- A Gummy Texture: You probably overmixed the dough after adding the flour. Mix the dry ingredients in on low speed and stop as soon as you no longer see streaks of flour.
Variations & Customizations (The Fun Part!)
This simple sugar cookie bar is a blank canvas. Let’s get creative.
1. Loaded Christmas M&M Bars
The easiest variation! Stir 1 cup of red and green M&Ms and 1 cup of white chocolate chips into the cookie dough before pressing it into the pan. You can skip the frosting or add it for an extra-decadent treat.
2. Gingerbread Bars with Cream Cheese Frosting
Transform the dough by adding ¼ cup of molasses, 1 teaspoon of ground ginger, 1 teaspoon of cinnamon, and ¼ teaspoon of cloves. Swap the buttercream for a simple cream cheese frosting (8 oz cream cheese, ½ cup butter, 2 cups powdered sugar, 1 tsp vanilla).
3. Peppermint Crunch Bars
Add ½ teaspoon of peppermint extract to the frosting. After frosting the bars, sprinkle the top with crushed candy canes. The combination of chewy sugar cookie, creamy peppermint frosting, and crunchy candy is incredible.
FAQ Section: Your Cookie Bar Questions, Answered
How do I get nice, clean cuts on my cookie bars?
First, make sure they are completely cool (chilling them in the fridge for 30 minutes before cutting helps). Second, use a large, sharp chef’s knife. For ultra-clean cuts, run the knife under hot water and wipe it dry between each cut.
Can I use a different size pan?
You can, but you’ll need to adjust the baking time. An 8×8 or 9×9 inch pan will result in much thicker bars and will need a longer baking time (start checking around 25-30 minutes). A larger pan will create thinner bars that bake faster.
How do I store holiday cookie bars?
Store them in an airtight container at room temperature for up to 3-4 days. If you’re using a cream cheese frosting, they should be stored in the refrigerator.
Can you freeze cookie bars?
Yes! They freeze beautifully. You can freeze the entire unfrosted slab, or freeze individual bars. For frosted bars, “flash freeze” them on a baking sheet for an hour until the frosting is hard, then wrap them individually in plastic wrap and store them in a freezer bag. They’ll last for up to 3 months.
How do I know when the bars are done baking?
The edges will be firm and lightly golden brown. The center should look set and not jiggly or wet. A toothpick inserted in the center should come out with a few moist crumbs, but no wet batter.
My dough is really sticky. What can I do?
This dough is naturally soft. To make it easier to press into the pan, you can lightly grease your hands with butter or cooking spray, or dust them with a little flour.
Can I add mix-ins to the dough?
Absolutely! This recipe is a great base for chocolate chips, chopped nuts, toffee bits, or festive candies. Just stir them in at the end.
Final Thoughts
And there you have it. The ultimate holiday baking shortcut that doesn’t taste like a shortcut. You’ve successfully made a huge batch of festive, delicious, and crowd-pleasing treats without losing your mind or covering your entire house in flour. Now go forth and be the hero of the holiday potluck. Take all the credit. You’ve earned it. And when people ask how you had time to make such amazing cookies, just tell them you’re a holiday wizard. It’s not even a lie. 😉

