
🧈 The “Buttery Bliss” Miracle: Mastering the Ultimate Gluten-Free Shortbread
Let’s be brutally honest: most gluten-free cookies have the structural integrity of a sandcastle in a monsoon and the flavor profile of a dusty attic. It’s a culinary tragedy! You take one bite and suddenly you’re picking grit out of your teeth for three to five business days. But then, you stumble upon a gluten-free shortbread recipe that actually works—a biscuit so buttery, so melt-in-your-mouth, and so robust that you’ll want to write a formal apology to every wheat field you’ve ever loved.
I once served a batch of these to my most “anti-wellness” friend who thinks “gluten-free” is just a fancy way of saying “tastes like sadness.” He inhaled six of them before I told him there wasn’t a single grain of wheat in the building. The look of pure betrayal on his face—followed by him reaching for a seventh cookie—was the highest form of praise I’ve ever received. Are you ready to stop settling for gritty, sad discs and start baking a legendary masterpiece?
🏆 Why This Recipe is the Actual GOAT

Why should you bother whisking butter and folding flour when you could just buy a pre-made bag of “cardboard” at the health food store? Because this gluten-free shortbread offers a depth of flavor that a factory simply cannot compute. We are talking about that specific high-fat, low-moisture crumb that defines a true Scottish shortbread, but tailored for the wheat-sensitive soul.
This recipe is awesome because it requires exactly three main ingredients. It’s the ultimate “I’m a fancy pastry chef” flex for people who actually just have a stick of butter and a dream. It impresses guests because it looks incredibly sophisticated, yet most of the work is just meditative dough-pressing. Plus, it’s the best excuse to buy the “expensive” butter for once. It’s basically a hug in biscuit form, IMO.
🧂 The “No-Grit-Allowed” Ingredient List

Success depends entirely on the quality of your fat and the fineness of your flour. Don’t go cheap here, or your cookies will taste like regret and industrial filler.
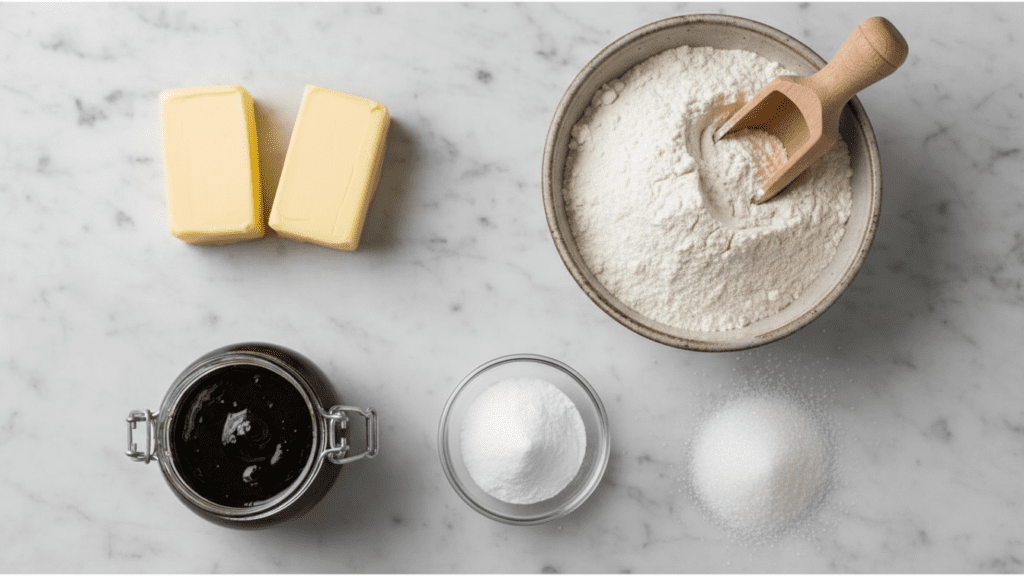
- 1 Cup (2 sticks) High-Quality Unsalted Butter: Softened, but not oily. TBH, use European-style butter if you want to reach nirvana.
- ½ Cup Superfine Granulated Sugar: (Or caster sugar) to ensure it dissolves perfectly into the fat.
- 2 Cups Gluten-Free 1-to-1 Flour Blend: Look for one with Xanthan Gum included. It’s the “glue” that wheat usually provides.
- ½ Cup Cornstarch or Arrowroot Powder: The secret weapon for that signature “snap” and melt-away texture.
- ½ Teaspoon Sea Salt: To make the butter flavor actually wake up.
- 1 Teaspoon Vanilla Bean Paste: Because we are sophisticated adults (or we like the little black specks).
Key Substitutions
- Butter Swap: Use vegan butter sticks (not the tub stuff!) for a dairy-free miracle.
- Sugar Swap: Powdered sugar works for an even more delicate “meltaway” texture, but reduce to ¾ cup.
- Flavor Swap: Replace vanilla with almond extract or lemon zest for a zesty twist.
🔪 Tools & Kitchen Gadgets Used
You don’t need a professional laboratory, but a few basics will keep you from having a flour-coated breakdown.
- Electric Hand Mixer: Unless you want a forearm workout from the 1800s. Grab a reliable one here!
- 9×9 Inch Square Baking Pan: For those iconic, thick shortbread fingers. Check out non-stick pans!
- Silicone Spatula: For scraping every last drop of buttery goodness. Heat-resistant ones are best!
- Parchment Paper: To prevent “stuck biscuit syndrome.” Get pre-cut sheets here!
- Standard Fork: For the essential “docking” ritual (the little holes on top).
👩🍳 Step-by-Step Instructions: The Path to Buttery Glory
Follow these steps precisely. Shortbread is about the “chill,” not the rush. Patience is your most important ingredient.
1. The Creaming Ritual
In your large bowl, beat the softened butter and sugar together for at least 3 minutes. You want it pale and fluffy, like a sugary cloud. If your arm doesn’t get a little tired, you haven’t beaten it long enough. Stir in the vanilla bean paste at the end.
2. The Dry Drop
Sift in the gluten-free flour, cornstarch, and salt. Mix on low speed until the dough just starts to come together. FYI, over-mixing gluten-free flour won’t make it tough (no gluten, remember?), but it can make the butter too warm. Stop when it looks like damp sand.
3. The Architecture Phase
Line your baking pan with parchment paper. Dump the crumbly dough into the pan and use your hands (or the back of a measuring cup) to press it into an even, flat layer. Make sure the corners are filled!
4. The Docking Ritual
Use a fork to prick holes all over the surface of the dough. This isn’t just for looks; it allows steam to escape so your gluten-free shortbread doesn’t bubble up like a topographical map.
5. The Zen Chill (Crucial!)
Cover the pan and put it in the fridge for at least 30–60 minutes. Cold dough equals a sharp snap. If you skip this, your shortbread will be greasy and sad. Use this time to contemplate your life choices or drink a cup of tea. 🙂
6. The Big Bake
Preheat your oven to 325°F (160°C). Bake for 35–45 minutes. You aren’t looking for dark brown; you want a pale, sophisticated gold. The edges should just barely begin to tan.
7. The Final Cut
Remove from the oven and let it sit for 5 minutes. While it’s still warm, use a sharp knife to cut the shortbread into fingers or squares. IMPORTANT: If you wait until it’s cold, it will shatter into a million delicious pieces. Let it cool completely in the pan before removing.
📊 Calories & Nutritional Info (The Justification)
Since we skipped the wheat, we can legally pretend these are health-conscious. Right?
- Estimated Calories Per Serving (1 finger): $\approx$ 120–140 kcal.
- Fat Content: Significant, but it’s the “happy” kind that makes you smile.
- Carbohydrates: Pure energy for your next Netflix marathon.
- Sodium: Minimal, just enough to make the butter pop.
- Mood: Scientifically proven to improve by 1,000% after the first bite.
🚨 Common Mistakes to Avoid (The Hall of Shame)
Avoid these if you want people to actually keep talking to you at the party.
- Using Oily “Tub” Margarine: This results in a greasy puddle. Stick to real butter sticks.
- Skipping the Cornstarch: Without it, the texture is just “okay.” With it, it’s world-class.
- Cutting When Cold: You will end up with a bowl of expensive crumbs. Cut while warm!
- Using Grainy Flour: If your GF blend feels like sand, your cookies will too. Use a superfine blend. 🙂
✨ Variations & Customizations
Make it yours, you kitchen rebel.
1. The Keto-Friendly Swap
Replace the GF flour with Almond Flour, the cornstarch with extra almond flour, and the sugar with Erythritol. It’s a low-carb miracle that still tastes like a treat.
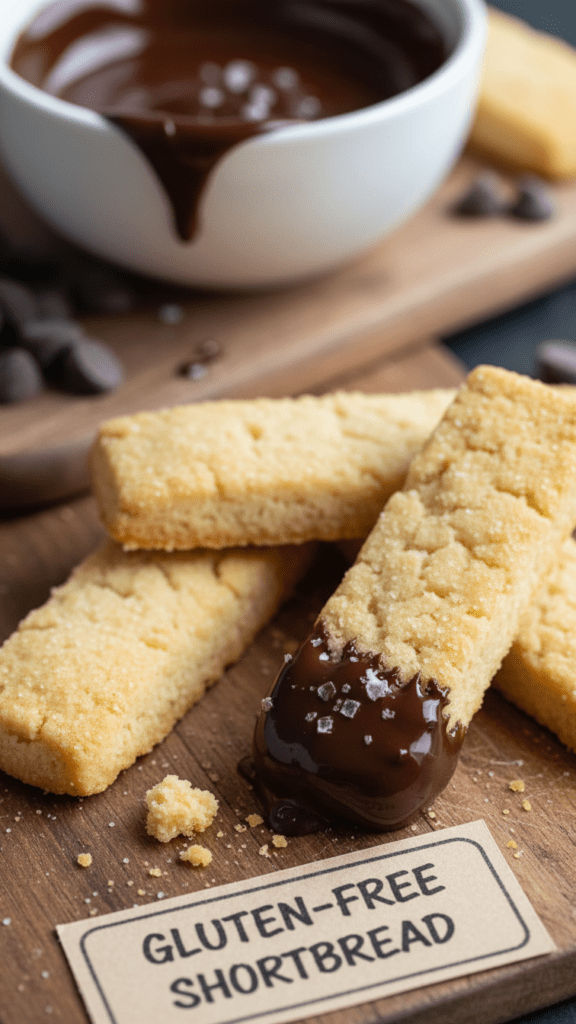
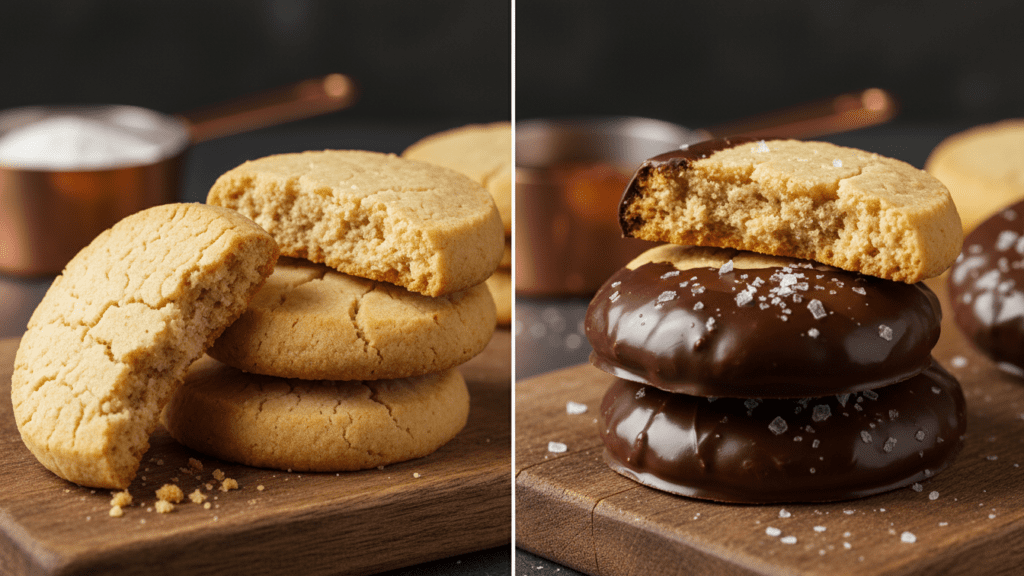
2. The “Chocolate Dip” Luxury
Melt some dark chocolate and dip half of each cooled shortbread finger into it. Sprinkle with a little flaky sea salt. It’s a sophisticated “adult” upgrade that looks very expensive.
3. The Lavender-Lemon Twist
Add 1 teaspoon of dried culinary lavender and the zest of one lemon to the sugar before creaming. It turns your biscuit into a springtime garden party.
❓ FAQ Section: Your Shortbread Queries Answered
Why is my gluten-free shortbread crumbly?
You likely didn’t press the dough firmly enough into the pan or your flour blend lacks a binder. Ensure you’re using a 1-to-1 blend with Xanthan Gum!
Can I freeze shortbread?
Absolutely. It freezes beautifully for up to 3 months. You can even freeze the raw dough in the pan and bake it directly from the freezer—just add 5 minutes to the timer.
What is the best gluten-free flour for shortbread?
IMO, King Arthur Measure for Measure or Cup4Cup are the gold standards. They provide the closest texture to traditional wheat flour.
Why do I need to prick holes in the dough?
This is called “docking.” It prevents air bubbles from forming and ensures the shortbread cooks evenly and stays flat.1
Is shortbread suppose to be soft?
No. Real shortbread should have a firm snap initially but then dissolve quickly on the tongue. If it’s soft like a cake, it was likely underbaked.
Do I have to use unsalted butter?
Yes. Different brands of salted butter have different salt levels. Using unsalted allows you to control the flavor perfectly with your own sea salt.
How do I store these?
Keep them in an airtight container at room temperature for up to 7 days. They actually taste even better on day two!
🥂 Final Thoughts: Go Forth and Slay!
You’ve done it. You’ve successfully navigated the world of gluten-free baking without ending up with a tray of sweet sand. You are now a titan of the baking sheet and a hero of the butter world. Go ahead, have that fourth cookie—it’s basically just a cloud, right? Just don’t tell me if you used a microwave to “bake” them; I have a reputation to maintain. 🙂

