
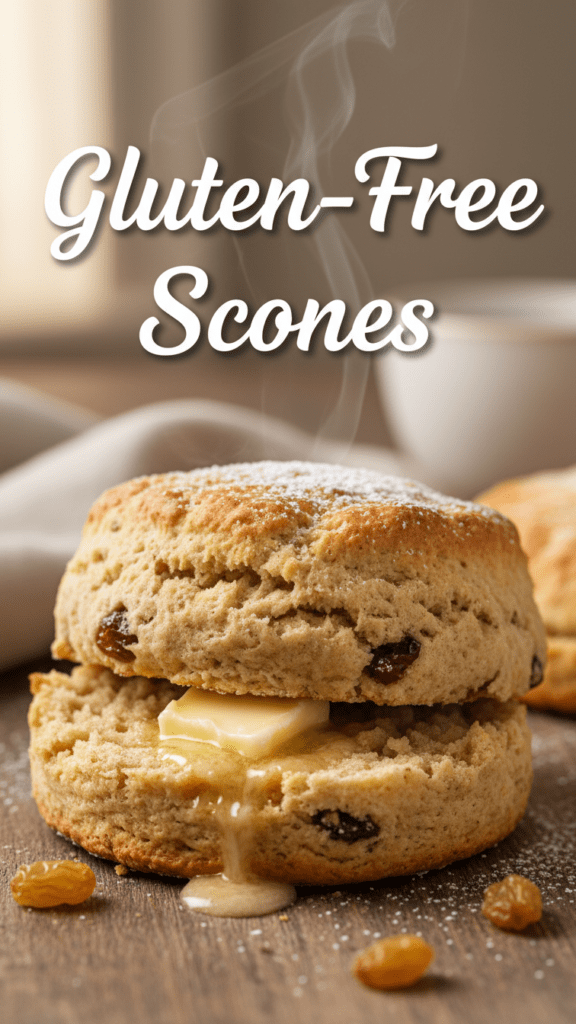
Fluffy Gluten-Free Scones: The Secret to High Tea Without the High Drama
Imagine this: You’re hosting a fancy brunch, the tea is steeping, and you proudly present a tray of what you call “scones.” Your guests take a bite, and suddenly the room goes silent. Instead of buttery heaven, they’re chewing on something with the texture of a sun-baked roof shingle. We’ve all been there, haven’t we? The gluten-free struggle usually involves choosing between a crumbly mess and a literal rock. But what if I told you that a perfect, pillowy gluten-free scones recipe actually exists?
Why These Scones Are Basically Magic

Most people think gluten-free baking requires a background in nuclear physics and a pantry full of expensive dust. This recipe proves them wrong. We are going for that iconic “shaggy dough” that transforms into a golden, tender masterpiece. Why settle for those dry, pre-packaged hockey pucks from the grocery store when you can have fresh-out-of-the-oven glory?
These scones boast a crisp outer shell and a soft, steaming center that practically begs for clotted cream. They’re easy enough for a Tuesday morning but classy enough to make your mother-in-law think you’ve actually got your life together. TBH, once you smell these baking, you’ll realize that “regular” bread was just a toxic ex you’re finally over.
The Ingredient List: Keep It Simple, Keep It Cold


Gather your supplies, but leave the stress at the door. We need quality here, not quantity. If you want a scone that doesn’t disintegrate, pay attention to these items.
- 2 cups High-Quality Gluten-Free All-Purpose Flour (Ensure it contains Xanthan Gum, otherwise, add 1 tsp).
- 1/2 cup Granulated Sugar (Because we aren’t making biscuits, Karen).
- 1 tbsp Baking Powder (Yes, a whole tablespoon. We need some serious lift).
- 1/2 tsp Salt (To balance the sweetness and keep things interesting).
- 1/2 cup Unsalted Butter (Must be COLD. If it’s soft, you’ve already lost).
- 1/2 cup Heavy Cream (Plus a little extra for brushing the tops).
- 1 Large Egg (Provides the structure that gluten used to handle).
- 1 tsp Vanilla Extract (For that “I’m a professional baker” aroma).
- 1/2 cup Mix-ins (Blueberries, chocolate chips, or dried cranberries—pick your poison).
Tools of the Trade: Your Scone-Making Arsenal
Don’t try to wing it with a fork and a prayer. Having the right gadgets makes the difference between a pastry chef and a disaster chef.
- Large Stainless Steel Mixing Bowl (Chilled in the fridge if you’re a perfectionist).
- Pastry Cutter or Dough Blender (To keep that butter cold while you work).
- Bench Scraper (Perfect for shaping the dough without your hot hands touching it).
- Baking Sheet with Silpat or Parchment Paper (Sticky dough is a nightmare).
- Measuring Cups and Spoons (Precision is a virtue).
- Cooling Rack (Essential for air circulation).
- Pastry Brush (For that final cream-wash glow).
Step-by-Step: The Path to Scone Enlightenment
Ready to bake? Follow these steps exactly. Do not pass go, do not melt the butter. Let’s get to work.
Step 1: The Cold Front
Preheat your oven to 400°F. Take your butter out of the fridge and grate it using a box grater. Put those butter shreds into the freezer for 5 minutes. Cold butter creates steam pockets, and steam pockets create fluffiness. Do you want flat scones? No? Then freeze the butter.
Step 2: The Dry Mix
Whisk your gluten-free flour, sugar, baking powder, and salt in your chilled bowl. Ensure there are no lumps of flour lurking in the corners. If you’re feeling extra, sift it. If you’re lazy (like me), just whisk it really well.
Step 3: Cutting In
Add your frozen butter bits to the flour. Use your pastry cutter to blend them until the mixture looks like coarse crumbs with some pea-sized chunks. Avoid using your hands; your body heat is the enemy of a flaky scone.
Step 4: The Liquid Gold
Whisk the heavy cream, egg, and vanilla in a separate jar. Make a well in the center of your dry ingredients and pour it in. Toss in your mix-ins now. Stir with a spoon until a shaggy, slightly sticky dough forms.
Step 5: Shape and Slice
Turn the dough onto a floured surface. Pat it into a 7-inch disc about an inch thick. Use your bench scraper to cut it into 8 equal wedges (like a pizza). Place them on your baking sheet, leaving space for them to breathe.
Step 6: The Final Polish
Brush the tops with a little extra heavy cream and sprinkle with a bit of coarse sugar if you’re feeling fancy. Bake for 18-22 minutes until the edges are golden brown. Let them cool slightly before eating, unless you enjoy burning the roof of your mouth.
Calories & Nutritional Info (Per Scone)

Let’s look at the damage. Keep in mind, these are estimates based on a standard 8-wedge yield.
- Calories: 310 kcal
- Total Fat: 18g
- Carbohydrates: 34g
- Fiber: 1.5g
- Protein: 4g
- Sodium: 210mg
Common Mistakes to Avoid (The Scone-Slayer List)
Don’t let your hard work go to waste. Watch out for these common pitfalls that ruin perfectly good dough.
- Warm Butter: I’ve said it three times, and I’ll say it again. Keep the butter cold. Warm butter leads to greasy, flat puddles.
- Over-mixing: Treat the dough like a fragile secret. Mix it until it just comes together. If you beat it like it owes you money, it will get tough.
- Old Baking Powder: If your baking powder is two years old, your scones will be about as high as a pancake. Test it in water first!
- Too Much Liquid: Gluten-free flour takes a minute to absorb moisture. If it looks a little wet, wait 60 seconds before adding more flour.
Variations & Customizations
Once you master the base, you can get weird with it. Here are three ways to shake things up.
- The Savory Swap: Skip the vanilla and sugar. Add shredded cheddar and chives. Serve it with soup and feel like a genius.
- The Keto-ish Adjustment: Use almond flour and a sugar substitute like Erythritol. Note: the texture will be denser, but hey, carbs are hard.
- The Lemon Blueberry: Add fresh lemon zest to the dough and use blueberries as your mix-in. It’s a classic for a reason.
FAQ: Your Scone Questions Answered
Why are my gluten-free scones so crumbly? You likely missed the Xanthan Gum. That stuff is the glue that replaces gluten. Without it, you’re just baking sand.
Can I use a different flour? Stick to a 1-to-1 baking blend. Swapping for straight coconut flour or almond flour will result in a culinary disaster that even the dog won’t eat.
How do I store these? Keep them in an airtight container for 2 days. For long-term storage, wrap them in foil and freeze them. They toast up perfectly from frozen.
Can I make them dairy-free? Yes! Use vegan butter sticks (not the tub kind) and full-fat canned coconut milk instead of heavy cream. It works surprisingly well.
Why didn’t my scones rise? Either your baking powder is dead, or your oven wasn’t hot enough. Always preheat for at least 20 minutes before baking.
Can I use frozen berries? Yes, but don’t thaw them! Toss them in frozen so they don’t bleed purple juice all over your beautiful dough.
Why is the dough so sticky? GF flour is fickle. If it’s too sticky to handle, chill the dough in the fridge for 20 minutes before shaping. It makes a world of difference.
Final Thoughts
Look at you, a regular Martha Stewart (minus the insider trading). You just made gluten-free scones that actually look and taste like food! Whether you eat them all yourself or share them with people you tolerate, you should be proud. Next time you see those sad, dry scones at the store, give them a wink—you know better now. Happy baking, and may your butter always stay frozen!
160 characters length seo optimized meta description: Ditch the dry bricks! Learn how to make the best gluten-free scones that are actually fluffy, buttery, and easy to bake. Perfect for brunch or a quick sweet treat.

