

The Ultimate Gluten-Free Pizza Dough: No More Sad, Cardboard Crusts!
Have you ever sat in a trendy pizzeria, watching your friends inhale a glorious, bubbly Margherita while you nibble on a sad, cracker-thin “alternative” that tastes like an old Amazon box? It’s a tragic scene, really. We’ve all been there, clutching our stomachs and wondering why the gluten-free gods have forsaken us. Usually, making gluten-free pizza dough at home results in a sticky mess that refuses to rise or a disc so hard you could use it as a frisbee. But today, we end the cycle of disappointment. I’m giving you a recipe for a dough that actually stretches, bubbles, and—shocker—tastes like real pizza.
Why This Gluten-Free Pizza Dough Is the Actual G.O.A.T.

Most GF pizza recipes treat “flavor” like an optional DLC. This recipe changes the game because we focus on hydration and high-quality binders to mimic that elusive gluten stretch. Why settle for a dense puck when you can have a crust with a crispy exterior and a soft, airy crumb?
You’ll love this because it’s surprisingly low-maintenance. You don’t need a PhD in chemistry or a professional wood-fired oven to get a golden, charred crust. Plus, the smell of fresh yeast blooming in your kitchen is basically free aromatherapy. Who doesn’t want their house to smell like a cozy Italian bistro instead of a science experiment? TBH, once you master this, you’ll become the official “pizza person” of your social circle. 🙂
The Grocery List: Everything You Need
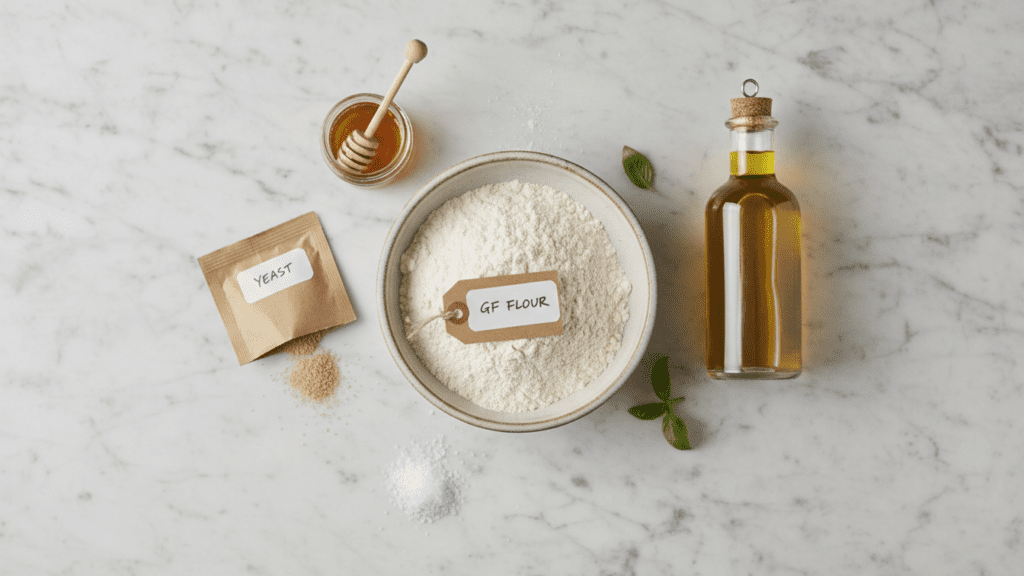

Grab your shopping bags, because we aren’t messing around with subpar ingredients. You probably have half of this in your pantry already, but double-check so you don’t have to run to the store in your pajamas later.
- 2 ½ cups High-Quality Gluten-Free All-Purpose Flour (Ensure it contains Xanthan gum; King Arthur or Cup4Cup are MVPs here).
- 1 packet (2 1/4 tsp) Instant Yeast (Check the expiration date; dead yeast is a mood killer).
- 1 tsp Sugar or Honey (The yeast needs a snack to get bubbly).
- 1 cup Warm Water (Aim for 110°F; if it’s too hot, you’ll commit yeast homicide).
- 2 tbsp Olive Oil (For that rich flavor and crispy finish).
- 1 tsp Apple Cider Vinegar (The secret weapon for a better rise and texture).
- 1 tsp Salt (Because bland dough is a crime against humanity).
- 1 tsp Garlic Powder (Optional, but highly recommended for an “artisan” vibe).
Tools & Kitchen Gadgets: Your Pizza-Making Arsenal
You can’t build a masterpiece with a plastic spoon. Gather these tools to ensure your kitchen doesn’t turn into a sticky disaster zone.
- Stand Mixer with Paddle Attachment (Saves your arms from a workout you didn’t ask for).
- Pizza Stone or Steel (Essential for that crispy, professional bottom).
- Parchment Paper (The only way to move sticky GF dough without a meltdown).
- Digital Instant-Read Thermometer (For checking water and oven temp).
- Silicone Spatula (To scrape every last bit of that precious dough).
- Pizza Peel (To slide your creation into the oven like a pro).
Step-By-Step: Let’s Get This Bread (Disc)
Follow these steps closely, and I promise you’ll be holding a beautiful slice in no time. If you get stuck, just remember: it’s just flour and water; you’ve got this!
Step 1: The Yeast Party
In your stand mixer bowl, combine the warm water, sugar, and yeast. Give it a little stir and let it sit for about 5-10 minutes. If it doesn’t get foamy and smell like a brewery, your yeast is dead. Throw it out and start over—don’t waste your expensive flour on lazy yeast.
Step 2: Mix the Wet Stuff
Once the yeast is bubbly, add the olive oil and apple cider vinegar. Whisk them together until they’re well acquainted. This is the easy part, so enjoy the calm before the flour storm.
Step 3: Bring in the Dry Ingredients
Dump in your gluten-free flour blend, salt, and garlic powder. Turn the mixer on low unless you want a face full of flour dust. Once it’s mostly incorporated, crank it up to medium for about 3-5 minutes. Gluten-free dough is more like a thick cake batter than traditional dough, so don’t freak out when it looks sticky.
Step 4: The First Rise
Gather the dough into a ball with a wet spatula. Cover the bowl with plastic wrap and let it sit in a warm, draft-free spot for about 45-60 minutes. You want it to look puffy and slightly larger. Do not over-proof, or it will collapse like my motivation on a Monday morning.
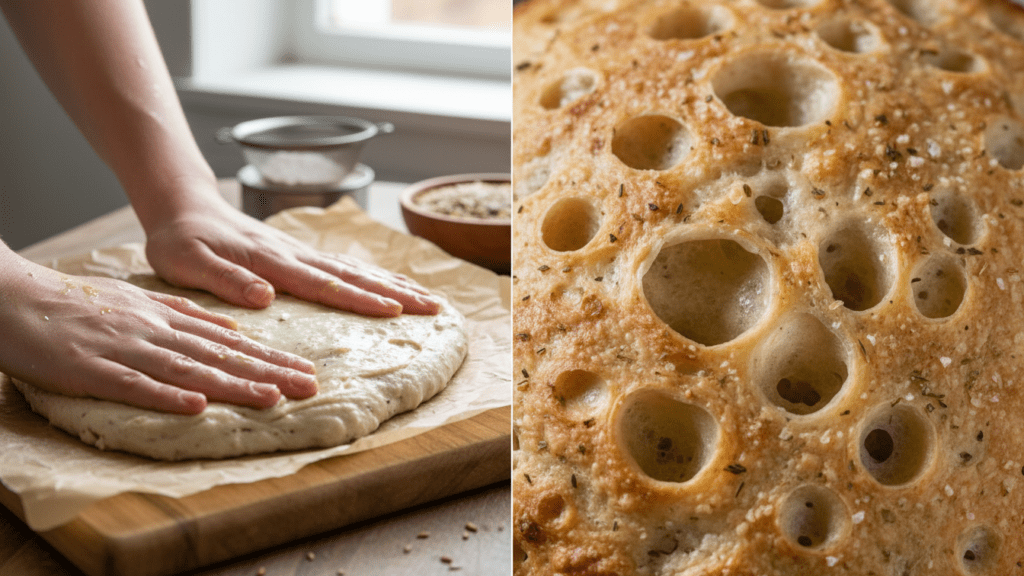
Step 5: Shape the Masterpiece
Preheat your oven (and your pizza stone) to 450°F. Place a piece of parchment paper on your counter. Lightly oil your hands (trust me on this) and pat the dough out onto the paper into a 12-inch circle. Keep the edges a little thicker for that iconic “cornicione” crust.
Step 6: The Par-Bake and Finish
Slide the dough (still on the parchment) onto the hot stone and bake for 8-10 minutes. Take it out, add your favorite toppings, and bake for another 10-12 minutes until the cheese is bubbling and the crust is golden brown.
Calories & Nutritional Info (Per Slice)
Let’s look at the numbers so you can plan your toppings accordingly. Keep in mind, these are estimates based on a standard 8-slice pizza.
- Calories: 185 kcal
- Total Fat: 4g
- Carbohydrates: 34g
- Fiber: 2g
- Protein: 3g
- Sodium: 290mg
Common Mistakes to Avoid (Don’t Be That Person)
We’ve all made mistakes, but your pizza doesn’t have to suffer for them. Here is how to keep your crust on the straight and narrow.
- Using Cold Water: Yeast is like a toddler; it needs warmth to wake up. Use a thermometer to hit that 110°F sweet spot.
- Skipping the Par-Bake: If you put raw toppings on raw GF dough, you’re making a soggy mess. Bake the crust alone first.
- Over-Kneading: Since there is no gluten to develop, you can’t “over-knead” in the traditional sense, but you can beat all the air out of it. Keep it brief.
- Ignoring the Altitude: If you live in the mountains, your dough might rise faster and dry out. Adjust your liquid levels slightly if you’re a mile high.
Variations & Customizations
Once you master the basic disc, the world is your gluten-free oyster. Try these tweaks to keep things interesting.
- The Herb-Crusted Delight: Mix in a tablespoon of dried oregano and basil directly into the dry flour for a fragrant, Italian-style crust.
- The Spicy Kick: Add a teaspoon of red pepper flakes to the dough. It’s a slow burn that pairs perfectly with honey-drizzled pepperoni.
- The Dairy-Free Swap: This dough is already vegan! Pair it with vegan mozzarella and a cashew-based pesto for a totally plant-based feast. IMO, it tastes better than the dairy version anyway.
FAQ: Everything You’re Too Afraid to Ask
Why is my gluten-free pizza dough so sticky? GF flour relies on starches that love water. It’s supposed to be sticky! Oil your hands or use wet fingers to shape it rather than adding more flour.
Can I make this dough ahead of time? Absolutely. You can store the raw dough in the fridge for up to 24 hours. Just let it come to room temperature for 30 minutes before shaping.
Do I really need a pizza stone? Technically no, but if you want that “restaurant crunch,” it’s a game-changer. An upside-down baking sheet works in a pinch.
Why didn’t my dough rise? Your water was likely too hot (murdering the yeast) or too cold (leaving it dormant). Also, check if your flour has Xanthan gum—it’s the “glue” that holds the bubbles in!
Can I use almond flour instead? Not for this recipe. Almond flour behaves differently. If you want a keto/almond crust, you’ll need a recipe specifically for that.
How do I get a brown crust? Brush the edges with a little olive oil or honey-water before the final bake. It encourages the Maillard reaction for that golden glow.
Can I freeze this dough? Yes! I recommend par-baking the crust for 8 minutes, letting it cool, and then freezing it. It’s like having a high-end “frozen pizza” ready to go.
Final Thoughts
There you have it! You are now the proud owner of a recipe for gluten-free pizza dough that won’t make you cry. Whether you’re a classic pepperoni fan or a pineapple-on-pizza rebel, this crust is ready for the job. Go ahead, show off your creation on the ‘gram and make all your gluten-eating friends jealous. Just remember: if you eat the whole pizza in one sitting, I didn’t see anything. Happy baking!

