
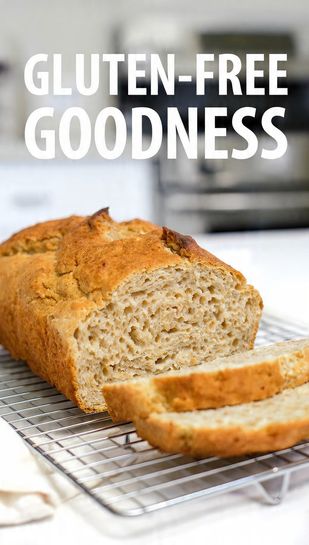
🍞 No Sad Textures: The Ultimate Gluten-Free Goodness (Fluffy All-Purpose Bread)
Let’s just acknowledge the truth: the phrase “gluten-free baking” often strikes fear into the hearts of bakers. You’ve been promised fluffy textures only to end up with something dense, crumbly, or tasting vaguely of cardboard. We’ve all tossed those failed experiments! But this guide to achieving true gluten-free goodness is here to redeem the genre. We’re focusing on the foundational recipe—a simple, fluffy all-purpose bread—that tastes so good, your gluten-eating friends will never guess the secret. Ready to conquer gluten-free baking and prove the haters wrong?
✨ Why This Gluten-Free Recipe is a Game-Changer
Why should you bother with this specific flour blend? Because it solves the biggest problem in gluten-free baking: structure and moisture. This recipe is awesome because:
- Incredible Texture: By using a quality measure-for-measure gluten-free blend and the necessary binder (xanthan gum), we achieve a light, airy crumb—not a brick.
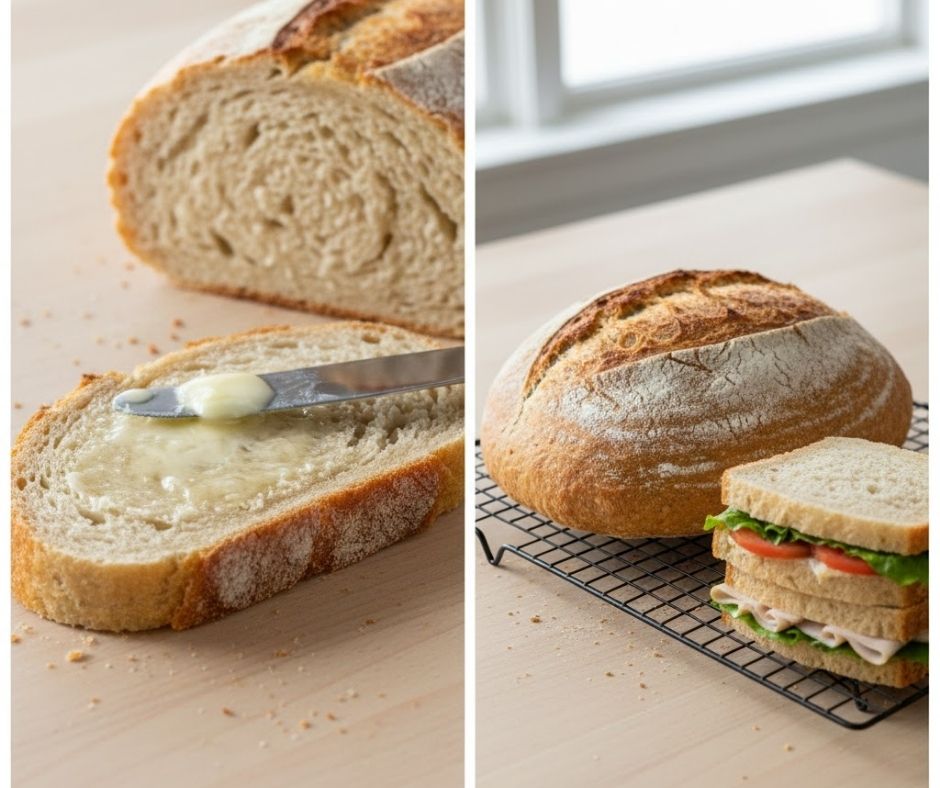
- Versatile Foundation: This simple bread recipe can be sliced for toast, used for sandwiches, or even turned into croutons. It’s the versatile base you need in your life.
- Easy Mixing: Quick breads, muffins, and loaves are surprisingly easy to convert. You just mix wet into dry and avoid overmixing—a rule that applies to all baking, TBH.
Who needs gluten when you have a perfectly fluffy, sliceable loaf? It’s truly a culinary triumph that requires zero fuss.
🌾 The All-Star Ingredients Lineup
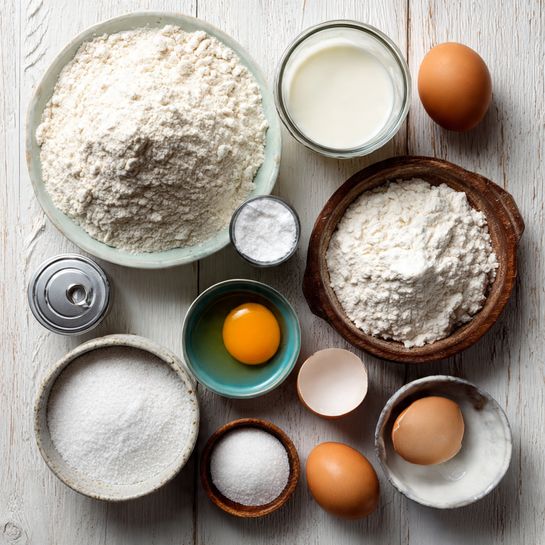
For this foundational bread, we are using a high-quality, measure-for-measure gluten-free blend. This is not the time to be mixing multiple flours!
H3 The Dry Essentials (The Structure)
- 2 cups Gluten-Free All-Purpose Flour Blend: Must contain xanthan gum! (Brands like Bob’s Red Mill 1:1 or King Arthur Measure for Measure are excellent.)
- 1/2 teaspoon Xanthan Gum: Crucial, even if your blend has it! Add an extra half teaspoon for insurance against crumbling.
- 1 tablespoon Baking Powder: For a good lift.
- 1 teaspoon Salt: Essential for flavor balance.
H3 The Wet Mix (The Moisture Lock)
- 1 cup Milk (Dairy or Non-Dairy): Almond milk or oat milk work beautifully.
- 1/4 cup Vegetable Oil or Melted Butter: Oil provides a more tender, moist crumb.
- 1 large Egg: Lightly beaten, for binding and moisture.
- 2 tablespoons Granulated Sugar: Just enough for flavor and browning (optional, but recommended).
🛠️ Tools & Kitchen Gadgets Used
Keep your tools clean and separate from any gluten-containing items to avoid cross-contamination.
- 9×5 Inch Loaf Pan: The essential vessel.
- Two Medium Mixing Bowls: One for wet, one for dry.
- Whisk: For dry ingredients.
- Rubber Spatula: For gentle mixing. Do not use an electric mixer on GF dough!
- Measuring Cups and Spoons: Essential for accurate results.
- Parchment Paper Slings: Highly recommended for easy loaf removal.
- Wire Cooling Rack: For preventing a soggy bottom crust.
🚀 Step-by-Step Instructions: Mix, Bake, and Behold the Fluff
Follow these simple steps. The biggest secret is the gentle mixing and the extra xanthan gum!
H3 Prep and Whisk
- Preheat and Prep: Preheat your oven to 350°F (175°C). Grease and flour your loaf pan, or line it with a parchment paper sling.
- Whisk the Dry Stuff: In your first bowl, whisk together the GF flour blend, the extra xanthan gum, baking powder, salt, and sugar (if using). Whisk thoroughly to distribute the xanthan gum evenly.
- Combine the Wet Mix: In your second bowl, whisk together the milk, oil/melted butter, and lightly beaten egg until uniform.
H3 The Gentle Fold
- Combine Wet and Dry: Pour the wet ingredients into the dry ingredients. Use a rubber spatula to gently fold and stir the mixture together. Mix only until just combined. Stop as soon as you see no dry flour streaks.
- Do Not Overmix! Unlike traditional baking, you do not need to “develop the gluten” (because there is none!). Overmixing only makes the starches release, leading to a denser, tougher loaf. Lumps are fine!
- Pour and Bake: Pour the batter into your prepared loaf pan. Smooth the top with the spatula. Bake for 45-55 minutes.
H3 The Critical Cool-Down
- Test for Doneness: Start checking at 45 minutes. Insert a long wooden skewer or toothpick into the center. It should come out clean.
- Cool in Pan: Let the loaf cool in the pan for 10 minutes.
- Cool Completely: Lift the loaf out using the parchment sling and transfer it to a wire cooling rack. Let it cool completely before slicing. This is non-negotiable—slicing while warm causes the bread to crumble and taste gummy. You’ve waited this long; you can wait 45 minutes more!
📊 Calories & Nutritional Info
Since gluten-free flours vary wildly, this is a general estimate per slice (assuming 12 slices).
- Estimated Calories Per Slice: ~150-200 kcal (Low end for dry, high end for oil-based).
- Macronutrient Notes:
- Carbohydrates: Primarily complex carbohydrates from the starches in the GF blend (rice flour, tapioca, etc.).
- Fats: Oil/butter contributes necessary fats for moisture, as GF flours often dry out easily.
- Fiber (Variable): If you use a blend containing whole grains like brown rice flour, the fiber content will be higher.
- Note: This bread is best consumed within 2-3 days, as GF baked goods tend to dry out faster than wheat-based bread.
🛑 Common Mistakes to Avoid (The Crumbly Collapse)
Achieving true gluten-free goodness means avoiding these critical texture errors.
- Not Using Enough Binder (Xanthan Gum): Gluten provides structure and elasticity. Xanthan gum is the replacement glue. If you skip it or don’t use enough, your bread will be dry and collapse into a pile of crumbs.
- Measuring GF Flour Incorrectly: You cannot pack GF flour! Spoon the flour into the measuring cup and level it off with a knife. Too much flour makes the bread dense and dry.
- Overmixing the Batter: This is key! While wheat needs kneading, GF dough only needs to be barely mixed. Overmixing releases starches and creates a rubbery, dense texture. Stop mixing immediately when the flour disappears.
- Slicing While Warm: Slicing a warm GF loaf is the fastest way to get a gummy, crumbly mess. Let it cool completely for the internal starches to set up their structure.
- Not Weighing Flours (IMO): While a measure-for-measure blend is convenient, weighing the flour (around 240-260 grams for 2 cups) guarantees the most accurate, perfect result.
🌶️ Variations & Customizations: Your Flavor Journey
The simple GF loaf is just the beginning! Try these flavor boosts.
H3 Cinnamon Swirl Breakfast Bread
Add a sweet ribbon. Before baking, set aside 1/4 of the batter. Pour half the remaining batter into the pan. Spread a mix of 3 tablespoons cinnamon and 2 tablespoons brown sugar over the batter. Top with the reserved batter and swirl gently with a knife.
H3 Cheesy Garlic Herb Bread
Go savory! Omit the sugar. Add 1/2 cup grated sharp cheddar cheese and 1/4 cup finely chopped fresh parsley/chives to the dry ingredients. Brush the top with melted butter mixed with garlic powder halfway through baking.
H3 Apple Walnut Spice Muffins
Turn it into muffins. Add 1/2 teaspoon cinnamon to the dry ingredients. Fold in 1/2 cup diced apple and 1/4 cup chopped walnuts into the batter. Bake in lined muffin tins at 375°F (190°C) for 20-25 minutes.
❓ FAQ Section: Your Gluten-Free Queries Solved
We know you have specific questions about conquering the world without gluten.
H3 What is xanthan gum and why do I need it?
Xanthan gum is a plant-derived carbohydrate gum. It acts as a substitute for gluten, providing the necessary elasticity and stickiness to hold the batter together, preventing your baked goods from crumbling.
H3 Can I substitute almond flour for the GF blend?
No, not directly! Almond flour is much heavier and absorbs less liquid than a GF blend. You would need to use less liquid and significantly more binders (like eggs or psyllium husk) to prevent the bread from collapsing.
H3 How do I prevent my gluten-free bread from getting gummy?
Avoid overmixing the batter, ensure your recipe has a good amount of xanthan gum/binder, and always let the bread cool completely before slicing. Gummy texture is caused by unset starches.
H3 How long will this GF bread stay fresh?
GF baked goods dry out faster. Store the cooled loaf, wrapped tightly in plastic wrap or foil, at room temperature for 2-3 days. You can toast older slices to refresh them.
H3 Can I freeze gluten-free bread?
Yes! Slice the completely cooled loaf, wrap the slices tightly in plastic wrap, and place them in a freezer bag. Freeze for up to 3 months. Thaw slices overnight or toast them directly from frozen.
H3 Why does my loaf sink in the middle?
The most common reasons are not enough binder (xanthan gum), too much liquid (did you substitute a wet ingredient?), or opening the oven door too soon (before the structure sets).
H3 Is baking powder always gluten-free?
Most major brands of baking powder are now certified gluten-free, but some older or generic brands may use wheat starch. Always check the label for a certified gluten-free symbol, especially if you have Celiac disease.
🎉 Final Thoughts: Welcome to the Fluff Zone!
You’ve done it. You navigated the world of binders and starches and created a flawless, fluffy loaf of gluten-free goodness. You’ve conquered the crumble and proven that baking without gluten can be genuinely delicious. You are officially a baking wizard!
Go ahead, toast that slice and slather it with butter. You’ll never have to buy that sad, pre-sliced stuff again, will you? Now, are you making French toast or sandwiches with this beautiful bread? 😉