
The Ultimate Baked Gluten-Free Donuts: Soft, Sweet, and Seriously Addictive
Let’s be brutally honest for a second: most store-bought gluten-free donuts have the structural integrity of a hockey puck and the flavor profile of a dusty attic. You pay six dollars for a single, lonely ring of disappointment that’s been sitting under a heat lamp since the late 90s. You take a bite, hoping for a gourmet breakfast experience, and instead, you’re left questioning your entire existence while picking grit out of your molars. It’s a culinary tragedy, really.

I first whipped these up for a brunch where the host “forgot” that wheat makes my digestive system stage a violent protest. I had ten minutes and a bag of gluten-free flour that had been judging me from the pantry for months. Three batches later, even the die-hard sourdough lovers were asking for the recipe. This isn’t just a “safe option” for the Celiac crowd; it is objectively elite morning food. Ready to ruin standard bakery runs for yourself forever? Let’s get to the glaze.
Why This Recipe is the Absolute GOAT of Breakfast
Why should you bother whisking your own batter when you could just eat rice cakes and call it a day? Because your taste buds actually have standards, and “dry sponge” isn’t a flavor profile. First off, this recipe achieves the “holy grail” of texture: a light, airy crumb that actually springs back when you touch it. We aren’t making lead weights here; we’re making tiny clouds of joy.

Secondly, it is ridiculously easy. You don’t need a PhD in chemistry or a deep fryer that will make your entire house smell like a carnival for a week. It’s a straightforward “one-bowl” baked situation that makes you look like a Michelin-star pastry chef while you’re still in your pajamas. Plus, it impresses guests every single time—especially when they realize there isn’t a single grain of wheat in the building. IMO, it’s the most empowering tool in any low-carb or allergy-friendly arsenal.
The Grocery List: No Science Lab Required
Don’t overcomplicate your life by searching for rare starches harvested under a blue moon. We are using powerhouse pantry staples that actually work together to create magic.
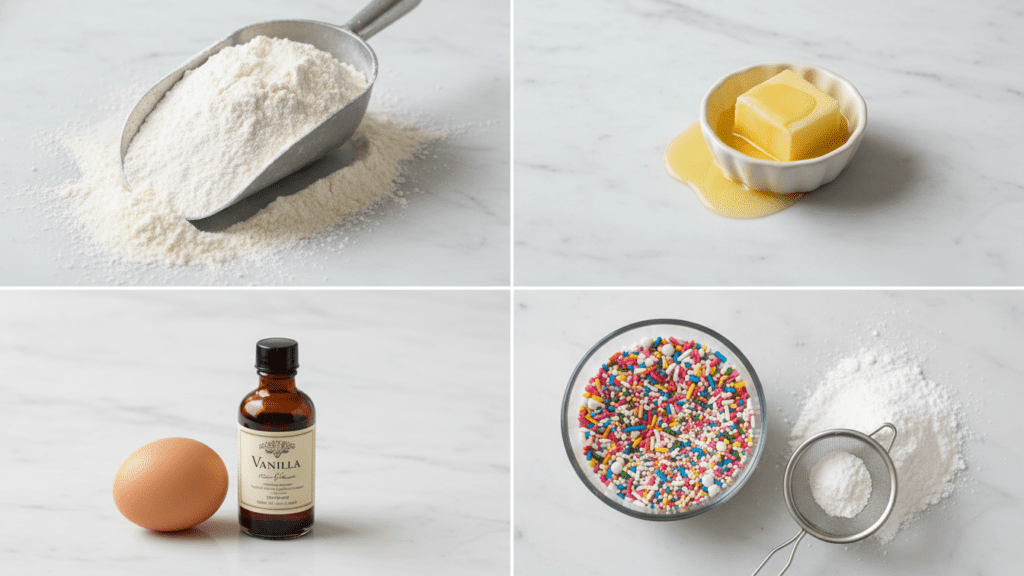
- Gluten-Free All-Purpose Flour: 1.5 cups. Ensure it contains Xanthan Gum, or add 1/2 teaspoon if it doesn’t.
- Granulated Sugar: 1/2 cup. (Sugar is sugar, let’s not pretend we’re eating a salad).
- Baking Powder: 1.5 teaspoons. This is our heavy lifter for that “fluff” factor.
- Warm Milk: 1/2 cup. (Dairy-free works perfectly too, FYI).
- Melted Butter: 3 tablespoons. Fat is flavor, don’t be shy.
- Large Egg: 1, at room temperature so it doesn’t seize the butter.
- Vanilla Extract: 1 tablespoon. Yes, a whole tablespoon. We want it fragrant!
- The Glaze: Powdered sugar, a splash of milk, and whatever food coloring or sprinkles satisfy your inner child.
Tools & Kitchen Gadgets You Need
To make this the smoothest process of your life, snag these basics. I’ve linked my favorites so you can treat your kitchen to some upgrades!
- Non-Stick Donut Pan: Essential for that classic shape and zero sticking. Check out this professional-grade pan on Amazon.
- Large Glass Mixing Bowl: Because you need room to stir with enthusiasm. Grab a sturdy set here.
- Silicone Whisk: Perfect for getting that batter perfectly smooth. Try this ergonomic whisk.
- Disposable Piping Bags: The secret to getting the batter into the pan without a floor-to-ceiling mess. Get a 100-pack here.
- Wire Cooling Rack: Crucial for preventing soggy bottoms. Get a sturdy one here.
Step-by-Step Instructions: How to Win at Brunch
Follow these steps precisely. TBH, the order of operations is the difference between a donut and a starchy brick!
1. Prep the Stage
Preheat your oven to 350°F (175°C). Grease your donut pan with a little butter or non-stick spray. Even if it says “non-stick,” don’t trust it. Trust is earned, and donut pans are notoriously manipulative.
2. The Dry Marriage
In your mixing bowl, whisk together the gluten-free flour, sugar, and baking powder. Ensure there are zero clumps. We want a smooth transition into the wet ingredients. If you see a giant lump of flour, crush it with the back of a spoon. We have no room for negativity here.
3. The Liquid Gold
Make a well in the center and add the warm milk, melted butter, egg, and vanilla. Whisk until the batter is smooth and glistening like it’s about to go on a first date. Gluten-free batter should look thicker than pancake mix but thinner than bread dough.
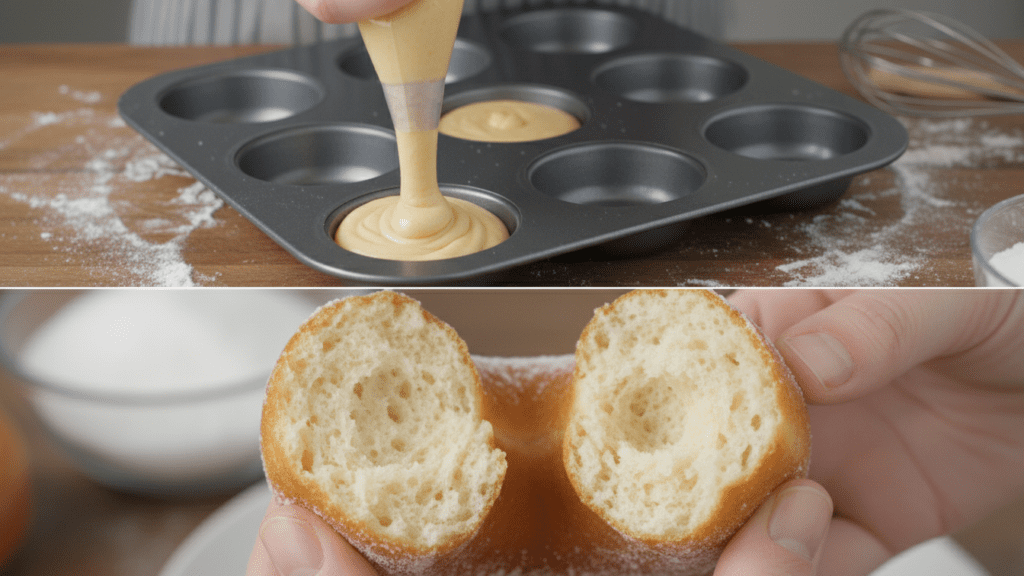
4. The Piping Ritual
Snip the end off your piping bag and fill it with the batter. Pipe the mixture into the donut cavities until they are about 3/4 full. If you overfill them, they will look like mushroom caps rather than donuts. It’s a vibe, sure, but not the one we’re going for today.
5. The Golden Window
Slide the pan into the oven and bake for 10-12 minutes. You are looking for a light golden edge and a surface that springs back when poked. Do not overbake them! If they turn brown-brown, you’ve made very circular crackers.
6. The Cooling Test
Remove from the oven and let them sit in the pan for exactly 5 minutes. Then, flip them onto your wire cooling rack. Let them cool completely before glazing. If you glaze a hot donut, the sugar will vanish into the abyss, leaving you with a sticky, invisible mess. 🙂
Calories & Nutritional Info
For those of you who track your stats like a part-time job, here is the lowdown per donut (makes 6):
- Calories: ~210 kcal
- Net Carbs: ~32g (The fuel for your morning).
- Protein: ~3g (Basically a rounding error).
- Fat: ~8g (Mostly the “good” kind from the butter).
- Fiber: ~1g (Depending on your flour blend).
Common Mistakes to Avoid: Don’t Be That Person
Even a recipe this simple can go sideways if you get cocky. Avoid these blunders to keep your kitchen dignity.
- Using Cold Eggs: Cold eggs will shock the melted butter and turn your batter into a lumpy, curdled disaster. Room temp only.
- Slicing Before Cooling: Gluten-free treats need to “set” their structure. Be patient.
- Over-mixing: Even though there’s no gluten to toughen up, you can still beat out the air bubbles. Whisk until just smooth.
- Skipping the Xanthan Gum: If your flour doesn’t have it, your donuts will crumble into a pile of sad dust. Check the bag.
- Measuring Flour by Volume: Scooping flour packs it down. Use a kitchen scale if you want precision.
Variations & Customizations
Feeling adventurous? Here are three ways to flip the script on these gluten-free donuts:
The Keto-Friendly Hack
Swap the flour for almond flour (use 1/4 cup less milk) and the sugar for Monk Fruit. It’s a low-carb fat bomb that tastes like heaven.
The Spicy Autumn Siren
Add 1 teaspoon of cinnamon and a pinch of nutmeg to the dry mix. Toss the warm donuts in cinnamon sugar instead of glaze for a “cider mill” vibe. 🙂
The Vegan Warrior Swap
Swap the egg for a flax egg and the butter for melted coconut oil. Use oat milk for the liquid. It’s so rich, you won’t believe no cows were harmed in the making of this breakfast.
FAQ Section: You Asked, I Answered
Are these donuts healthy? Compared to a deep-fried lard-soaked commercial donut? Absolutely! They are baked, not fried, and use real vanilla. Just don’t eat all six in one sitting (or do, I’m not your boss).
Can I make these ahead of time? Yes! You can bake them the night before, but do not glaze them until you’re ready to serve. Gluten-free donuts are best within 24 hours.
How do I store gluten-free donuts? Keep them in an airtight container at room temperature. If they get a little firm the next day, a 5-second zap in the microwave brings back the “just baked” fluff.
What is the best gluten-free flour to use? Look for a high-quality “1-to-1” or “Measure for Measure” blend. King Arthur and Bob’s Red Mill are the gold standards in my kitchen.
Why are my donuts sticking to the pan? You probably didn’t use enough grease or didn’t let them sit for 5 minutes after baking. Don’t rush the flip!
Can I make these without a donut pan? You can use a muffin tin, but they’ll be “donuffins.” They taste the same, but the Instagram aesthetic will take a serious hit.
Why is my glaze so watery? You added too much milk. Add more powdered sugar one tablespoon at a time until it coats the back of a spoon. TBH, it’s an easy fix.
Final Thoughts
There you have it. A gluten-free donuts recipe that actually respects your time and your taste buds. They’re sweet, they’re soft, and they’re the only reason I’m willing to attend a social gathering before 11:00 AM. Once you make these, you’ll realize that store-bought “health donuts” in the plastic wrappers are just a sad, overpriced lie. Go forth, pipe some batter, and enjoy the sugar rush. Just don’t be surprised when your “gluten-eating” friends start raiding your plate. 🙂

