

The Ultimate Fudgy Masterpiece: A Gluten-Free Brownies Recipe That Actually Slaps
Let’s be brutally honest for a second: most gluten-free baked goods have the structural integrity of a wet paper towel and the flavor profile of a dusty attic. We’ve all been there, staring down a “health food” brownie that shatters into a million sandy pieces the moment it hits your teeth. It’s a culinary betrayal, really. But what if I told you that these gluten-free brownies actually bend, chew, and—dare I say—taste significantly better than the wheat-filled originals?

I first mastered this recipe after a disastrous office potluck where my “experimental” wheat-free treats were used as emergency doorstops. After a few tears and a lot of flour-dusted research, I cracked the code. This isn’t just “good for being gluten-free”; it is objectively elite. If you’re ready to reclaim your dessert glory without the bloating or the heartbreak, you’re in the right place. Ready to bake a brownie that actually has a soul? Let’s get into the batter.
Why This Brownie Is the G.O.A.T. of Your Kitchen
Why should you bother whisking your own batter when the frozen aisle sells “brownie-flavored” shingles? Because your taste buds have standards, that’s why. First off, this recipe achieves the “holy grail” of baking: the shiny, crackly top combined with a center so fudgy it borders on illegal. We aren’t making a dry chocolate cake here; we’re making a rich, decadent experience.

Secondly, it is ridiculously easy. You don’t need a PhD in chemistry or a 48-hour refrigeration window. It’s a straightforward one-bowl situation that makes you look like a Michelin-star pastry chef while your kitchen stays relatively intact. Plus, it impresses guests every single time—especially when they realize they can’t tell the difference. FYI, it’s the most empowering recipe in any allergy-friendly arsenal.
The Grocery List: No Weird Lab Chemicals Allowed
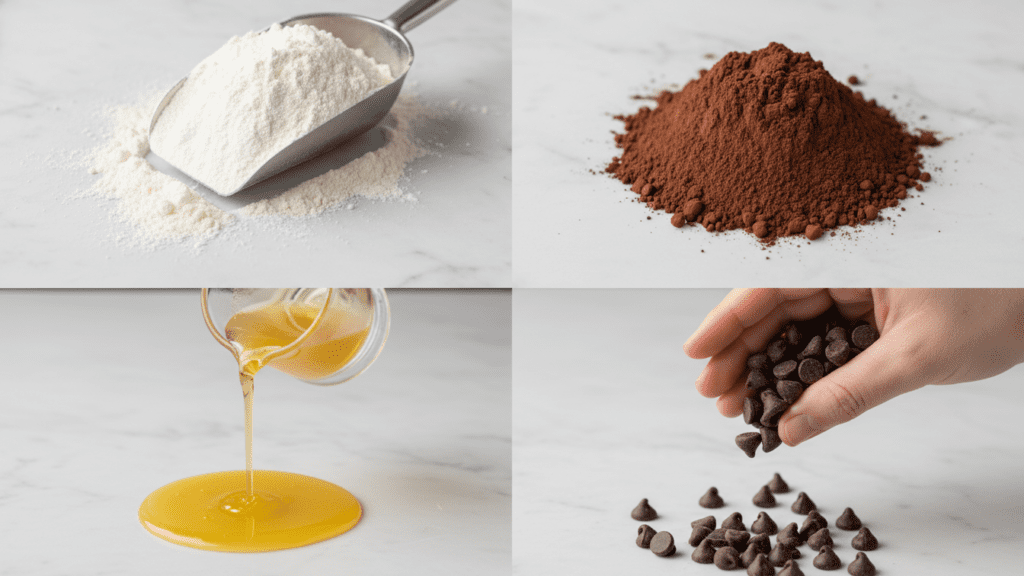
Don’t overcomplicate your life by searching for rare starches harvested under a blue moon. We are using powerhouse pantry staples that actually work together to create magic.
- Gluten-Free All-Purpose Flour Blend: Look for a high-quality blend that includes Xanthan Gum. (Substitute: If yours doesn’t have it, add 1/2 teaspoon to the mix).
- Butter: One cup of unsalted butter, melted. This provides that rich, professional mouthfeel.
- Sugar: A mix of Granulated White Sugar and Light Brown Sugar. The brown sugar adds that essential chewy moisture.
- Eggs: Three large, room-temperature eggs. These provide the structure that gluten usually handles.
- Cocoa Powder: Use high-quality Unsweetened Dutch-Processed Cocoa. It’s the difference between “meh” and “OMG.”
- Vanilla Extract: Use the real stuff. We don’t do “imitation” sadness in this house.
- Sea Salt: To make the chocolate flavors actually stand up and be counted.
- Chocolate Chips: Semi-sweet or dark. Go heavy on these; life is short.
Tools & Kitchen Gadgets Used
To make this the smoothest process of your life, snag these basics. I’ve linked my favorites so you can treat your kitchen to the upgrades it deserves!
- 8×8 Inch Square Baking Pan: The perfect size for thick, fudgy squares. Check out this non-stick pan on Amazon.
- Parchment Paper: Your best friend for lifting the brownies out cleanly. Grab a roll of precut sheets.
- Large Glass Mixing Bowl: You need room to whisk with enthusiasm. This set is a kitchen staple.
- A Solid Silicon Spatula: Essential for scraping every last drop of chocolate gold. Try this heat-resistant one.
- Wire Cooling Rack: Crucial for preventing soggy bottoms as they cool. Get a sturdy one here.
Step-by-Step Instructions: The Path to Glory
Follow these steps precisely. TBH, the order matters more than you think when you’re working without wheat.
1. The Butter and Sugar Marriage
Preheat your oven to 350°F (175°C). Line your pan with parchment paper, leaving an overhang on the sides. In your large bowl, combine the melted butter and both sugars. Whisk them vigorously for about two minutes. FYI: this aeration is what helps create that coveted shiny, crackly top.
2. The Liquid Integration
Add the eggs one at a time, followed by the vanilla extract. Mix until the batter looks uniform and silky. If it looks like it’s curdling, don’t panic—it’ll come back together once we add the dry goods. Just keep whisking like you’ve got something to prove.
3. The Dry Drop
Slowly fold in your gluten-free flour blend, cocoa powder, and salt. Use your spatula to mix until just combined. Do not overmix! Over-working GF dough can lead to a gummy, weird texture, and nobody wants that. Stop as soon as the white streaks vanish.
4. The Chocolate Avalanche
Fold in your chocolate chips. Be generous. If you think you’ve added enough, add another handful. That’s just science. Pour the batter into your prepared pan and smooth the top.
5. The Big Bake
Slide the pan into the oven and bake for 25–30 minutes. You want the edges to be set, but the center should still have a very slight jiggle. At the 25-minute mark, poke the center with a toothpick. If it comes out with a few moist crumbs, it’s go-time. If it’s liquid, give it three more minutes.
6. The Hardest Step: The Cooling Rest
Let the brownies cool in the pan for at least 30 minutes before lifting them out. Gluten-free brownies are fragile until they “set” their structure. If you cut them hot, you will end up with a delicious pile of mush rather than a square. Patience is a flavor, my friend.
Calories & Nutritional Info

For those of you who track your stats like a part-time job, here is the lowdown per brownie (based on 16 squares):
- Calories: ~240 kcal
- Carbs: ~28g (pure joy, baby!)
- Protein: ~3g (thanks, eggs!)
- Fat: ~14g (the price of being fudgy)
- Fiber: ~2g (cocoa has more fiber than you think!)
Common Mistakes to Avoid: Don’t Be That Person
Even a recipe this simple can go sideways if you get cocky. Avoid these blunders to keep your dignity and your brownies intact.
- Using Cold Eggs: Cold eggs can seize up your melted butter, creating weird little yellow clumps. Warm them to room temp first.
- Substituting the Flour Blend: Not all GF flours are created equal. Use a 1-to-1 baking blend. If you use straight coconut flour, you will be eating a bowl of sand.
- Over-baking: A GF brownie goes from “perfect” to “hockey puck” in about 60 seconds. Trust the jiggle in the middle.
- Forgetting the Parchment: GF treats are notoriously clingy. Line your pan or prepare to eat your dessert with a spoon directly out of the corners.
- Cutting Too Soon: I know you’re hungry, but waiting 30 minutes is mandatory for the perfect chew.
Variations & Customizations
Feeling adventurous? Here are three ways to flip the script on this classic bake.
The Keto-Ish Swap
Swap the sugar for granulated monk fruit sweetener and use a GF flour blend that is heavy on almond flour. You’ll get a denser, nuttier brownie that keeps the carbs low.
The Spicy Mexican Twist
Add 1 teaspoon of cinnamon and a tiny pinch of cayenne pepper to the dry mix. It adds a sophisticated heat that pairs beautifully with dark chocolate.
The Vegetarian “Peanut Butter Swirl”
Drop dollops of creamy peanut butter on top of the batter before baking. Use a knife to swirl it through. It turns your brownies into a high-protein (ish) masterpiece. 🙂
FAQ Section: You Asked, I Answered
Why are my gluten-free brownies so crumbly? Usually, this means you lacked a binder or over-baked them. Ensure your flour blend has Xanthan Gum. If it doesn’t, the brownies won’t have the “glue” they need to stay together.
Can I make these dairy-free? Absolutely. Swap the butter for refined coconut oil or vegan butter sticks (not the tub kind). They still turn out incredibly rich.
Which GF flour blend is the best for brownies? I swear by King Arthur Measure for Measure or Bob’s Red Mill 1-to-1. They are engineered to behave like wheat flour so you don’t have to think too hard.
How do I store them so they stay fudgy? Store them in an airtight container at room temp. To keep them extra soft, put a slice of bread (even a GF slice!) in the container. They’ll absorb the moisture from the bread.
Can I freeze gluten-free brownies? Heck yes. Wrap individual squares in plastic wrap and freeze. Pop one out whenever the midnight cravings hit—they actually taste great half-frozen.
Why is the texture of my brownies grainy? Some GF flours have large rice particles. Let the batter sit in the pan for 10 minutes before putting it in the oven; this allows the flour to hydrate and eliminates that “sandy” mouthfeel.
Can I use flax eggs instead of real eggs? You can, but the brownies will be flatter and more fragile. Real eggs provide the best lift and “chew” for this specific fudgy style.
Final Thoughts
There you have it. A gluten-free brownies recipe that actually respects your time and your taste buds. They’re dark, they’re fudgy, and they’re the only reason I’m willing to share my kitchen with people on a Sunday afternoon. Once you master this bake, you’ll realize that the store-bought versions have been lying to you for years. Go forth, whisk some chocolate, and enjoy the gooeyness. Just don’t be surprised when your “wheat-eating” friends start raiding your stash. 🙂

