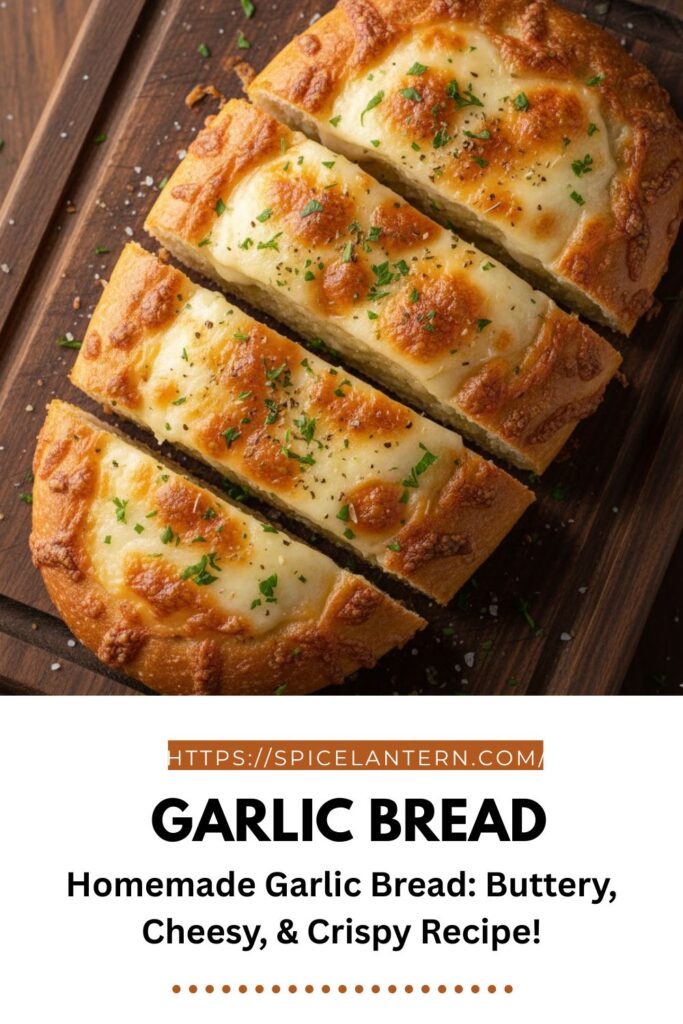
Stop Buying Frozen: The Ultimate Homemade Garlic Bread Recipe (Buttery, Crispy Perfection!)
Let’s just be honest. Garlic bread isn’t just a side dish; it’s a personality test. Are you the person who snags the crispy end piece? Are you the one who judges a restaurant solely on the butter-to-garlic ratio? Yeah, me too. But buying those sad, frozen loaves that taste vaguely of freezer burn and artificial flavor? That’s a crime against carbs. I’m here to tell you that you can achieve a glorious, warm, buttery, crispy, and intensely garlicky homemade loaf in about 15 minutes. Get ready to ditch the aluminum foil package forever. This is the Garlic bread recipe that proves simple food is the best food.
Why This Homemade Garlic Bread Recipe is Pure Genius
Why bother making it yourself when you can just pop a pre-made stick in the oven? Because this recipe is awesome, that’s why. It delivers a perfect golden-brown crunch, a super-soft interior, and a potent, fresh garlic punch that store-bought versions only dream of.
First, the flavor is superior. We use fresh garlic and real butter—the difference is night and day. Second, it’s ridiculously easy and fast, pairing perfectly with any pasta night, soup, or weeknight dinner. Third, the aroma alone will make your entire house smell like the best Italian restaurant on earth. Plus, you get to control the amount of cheese and herbs! Who needs complicated baking when you can master this simple, buttery perfection?
Ingredients: The Buttery, Bold Essentials
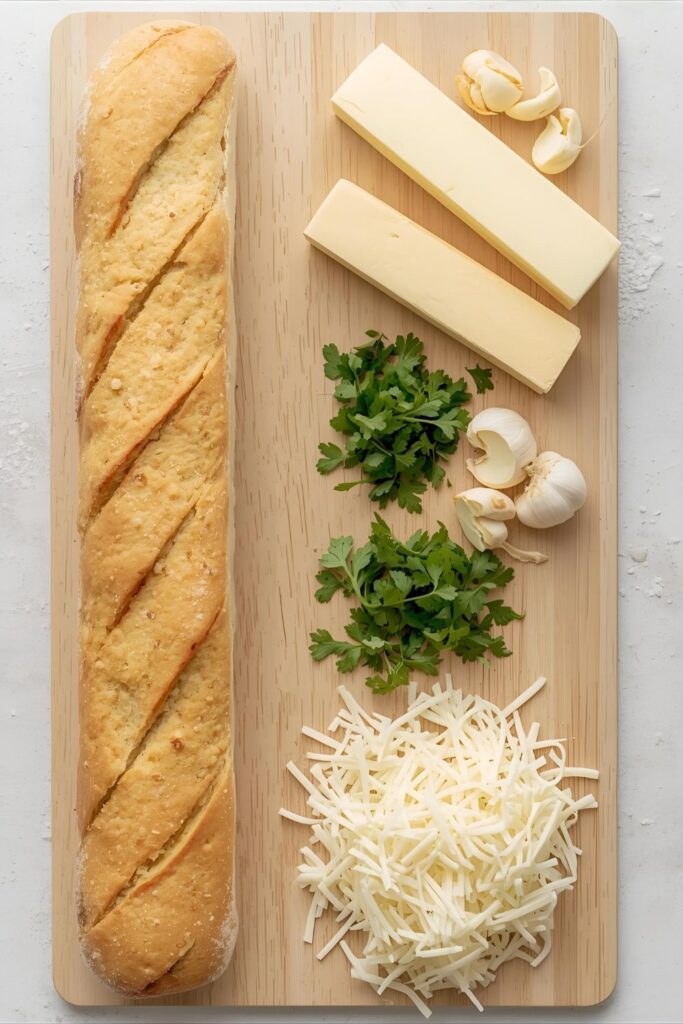

The secret is using a combination of fresh and powdered garlic for maximum depth of flavor.
H3: For the Best Garlic Butter Spread
- ½ cup Unsalted Butter (1 stick): Softened to room temperature. Crucial for smooth blending!
- 4-6 cloves Fresh Garlic: Minced very finely. Use 6 if you’re serious about garlic flavor, IMO.
- 1 teaspoon Garlic Powder: Adds a subtle, cooked depth that fresh garlic alone misses.
- 1 tablespoon Fresh Parsley: Finely chopped. Adds color and a fresh, herbaceous note.
- ½ teaspoon Dried Oregano: Optional, but adds a nice Italian flavor.
- ½ teaspoon Salt and ¼ teaspoon Black Pepper: For seasoning.
H3: The Bread & Cheese
- 1 loaf Italian or French Bread: Choose a long, soft loaf with a medium crust. A sturdy baguette works well, too.
- 1 cup Shredded Mozzarella Cheese (Optional): For cheesy garlic bread bliss.
- ¼ cup Grated Parmesan Cheese (Optional): For a salty, crispy crust.
Key Substitutions:
- Bread Swap: Sourdough works for a tangy, chewy result, but a softer Italian loaf is more classic. Texas Toast is great for individual slices.
- Butter Swap: Use a high-quality vegan butter stick for a dairy-free spread.
- Garlic Prep: If you hate chopping, use a garlic press to mince the fresh cloves quickly!
- Herb Swap: Basil or chives work well in place of oregano or parsley.
Tools & Kitchen Gadgets Used: Your Baking Command
You need almost nothing, which is the beauty of this recipe!
- Small Mixing Bowl: For combining the garlic butter.
- Fork or Rubber Spatula: For mixing and mashing the butter mixture.
- Sharp Serrated Knife: Essential for slicing the bread cleanly without squishing it.
- Baking Sheet: Mandatory! Line it with foil or parchment paper.
- Measuring Cups and Spoons: For perfect seasoning ratios.
- Basting Brush (Optional): For getting butter into all the nooks and crannies.
Step-by-Step Instructions: Conquering the Crust
The key to preventing soggy garlic bread is splitting the bake time. Ready, set, bake!
H3: Step 1: Prep the Oven and Bread
Preheat your oven to $400^{\circ}\text{F}$ ($200^{\circ}\text{C}$). Line a baking sheet with aluminum foil or parchment paper. Using your serrated knife, slice the bread loaf lengthwise down the middle.
H3: Step 2: Make the Garlic Butter Blend
In your small mixing bowl, combine the softened butter, minced fresh garlic, garlic powder, parsley, oregano (if using), salt, and pepper. Use a fork or rubber spatula to mash and mix vigorously until the spread is perfectly smooth and uniform. You want all that garlic distributed evenly.
H3: Step 3: Spread and Bake (The First Toast)
Generously spread the entire garlic butter mixture evenly over the cut surfaces of both bread halves. Don’t be shy; use it all! Place the bread halves cut-side up on the prepared baking sheet. Bake for 8 minutes. This step crisps the surface and cooks the garlic slightly.
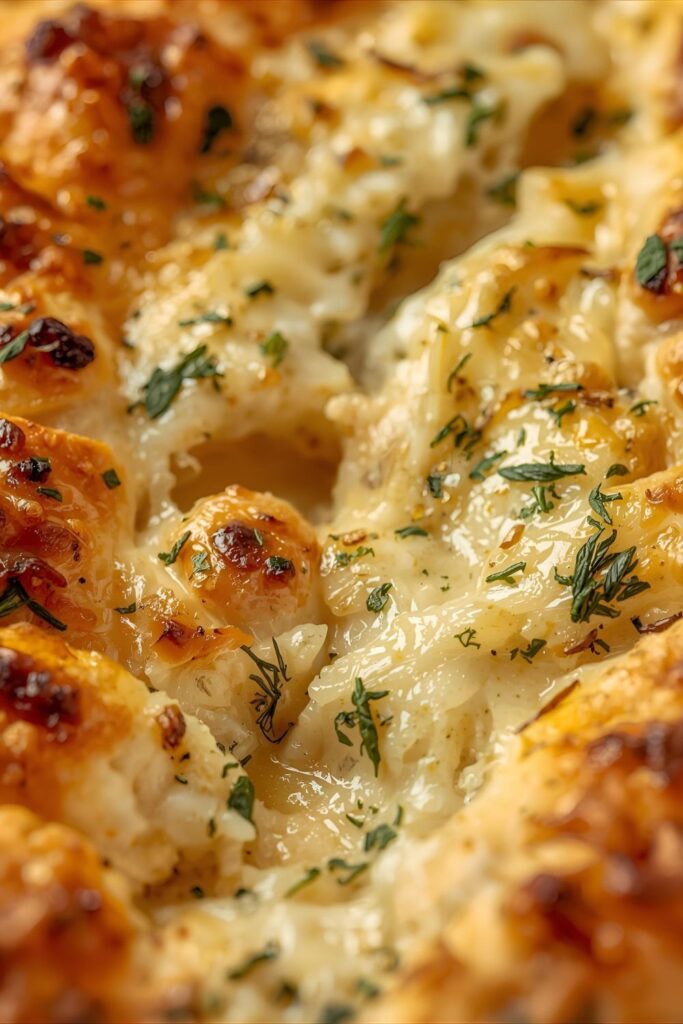
H3: Step 4: Add the Cheese (Optional Upgrade)
Remove the bread from the oven. If you want cheesy garlic bread, evenly sprinkle the shredded mozzarella over both halves, followed by the grated Parmesan cheese.
H3: Step 5: Finish the Golden Bake
Return the bread to the oven and bake for another 5-7 minutes, or until the edges are beautifully golden-brown and crispy, and the cheese is melted, bubbly, and slightly caramelized. Watch carefully!
H3: Step 6: Slice and Serve!
Remove the bread from the oven. Let it cool for 2 minutes (the melted butter is lava!). Using your serrated knife, slice the halves diagonally into individual pieces. Serve immediately while still hot and dipped in your favorite sauce. You just won dinner!
Calories & Nutritional Info: The Delicious Details
These are rich pieces of bread, perfect for soaking up pasta sauce. These estimates are approximate per slice (assuming 8 slices per loaf).
- Estimated Calories per slice (1/8th of loaf): 180-250 calories
- Fat: 12-18g (mostly from butter and cheese)
- Carbohydrates: 15-20g (from bread)
- Protein: 5-8g (from cheese and bread)
- The Bottom Line: A satisfying comfort food side dish best enjoyed with friends and a big bowl of spaghetti.
Common Mistakes to Avoid: Stop Making Soggy Bread!
Perfect garlic bread is crispy and soft, not wet. Avoid these simple errors.
- Using Cold Butter: Cold butter won’t blend correctly and won’t seep into the bread. Ensure your butter is completely room temperature and easily spreadable.
- Skipping the First Bake: Baking the buttered bread naked first helps dry out the surface and crisps the edges before the cheese goes on. Skipping this step leads to soggy cheese bread.
- Mincing Garlic Too Coarsely: Big chunks of garlic don’t cook evenly and can taste harsh or bitter. Mince the fresh garlic finely so it infuses the butter perfectly.
- Wrapping in Foil While Baking: Baking in foil traps steam, which prevents the crust from crisping up. Bake it open-face until the very end for crunch!
Variations & Customizations: Your Bread, Your Way!
The garlic butter base is fantastic for layering on extra flavor!
- Cheesy Pesto Garlic Bread: Before adding the mozzarella, spread a thin layer of pesto over the garlic butter. Top with cheese and bake as directed.
- Spicy Red Pepper Flake Zing: Add ½ teaspoon of crushed red pepper flakes and a tiny pinch of black pepper to the garlic butter blend for a subtle, satisfying heat.
- Bruschetta Style: Omit the cheese. After baking the bread for 8 minutes, top the hot surface with a mix of diced tomatoes, fresh basil, and a drizzle of balsamic glaze. Serve immediately.
FAQ Section: Answering Your Buttery Queries
You’ve got questions about this comforting carb. I’ve got answers.
H3: Q1: What is the best bread for homemade garlic bread?
A1: A soft, oblong loaf of Italian or French bread works best. It absorbs the butter well and stays soft on the inside while crisping up nicely on the outside.
H3: Q2: Can I prepare garlic bread ahead of time?
A2: Yes! Prepare the garlic butter, spread it on the bread, wrap the halves tightly in plastic wrap, then foil, and freeze for up to 3 months. Bake directly from frozen, adding about 10-15 minutes to the initial bake time.
H3: Q3: What is the secret to getting a crispy crust?
A3: Baking the bread open-face (not wrapped in foil) at a high temperature ($400^{\circ}\text{F}$ / $200^{\circ}\text{C}$) and allowing the melted butter to fully absorb and toast the bread.
H3: Q4: Why did my garlic turn green/blue?
A4: The sulfur compounds in garlic react with copper (often found in small amounts in tap water or stainless steel knives) at certain temperatures, causing a harmless color change.1 Don’t worry; it’s safe to eat!
H3: Q5: What is the best dipping sauce for garlic bread?
A5: Marinara sauce (classic!) or ranch dressing. A creamy pesto or a spicy red pepper sauce also complements the flavors well.
H3: Q6: Can I use olive oil instead of butter?
A6: You can, but it will result in a less rich and less authentic flavor. Olive oil will make the bread crispier but lack the creamy mouthfeel of butter. Try a mix of butter and olive oil for the best of both worlds.
H3: Q7: How do I store and reheat leftover garlic bread?
A7: Store leftovers in an airtight container at room temperature for up to 2 days. Reheat in the oven or air fryer for a few minutes to regain the crispy crust. Never microwave!
Final Thoughts: The Carb Victory Is Yours!
You did it! You created a flawless, buttery, cheesy, and incredibly satisfying loaf of Garlic bread. Go ahead, take a proud bite. Doesn’t that taste exactly like the comfort and culinary genius you deserve? I knew it would. You are now the undisputed master of this simple side. Are you ever going back to those pale, frozen rectangles again? I highly doubt it. Enjoy your warm, garlicky victory!