
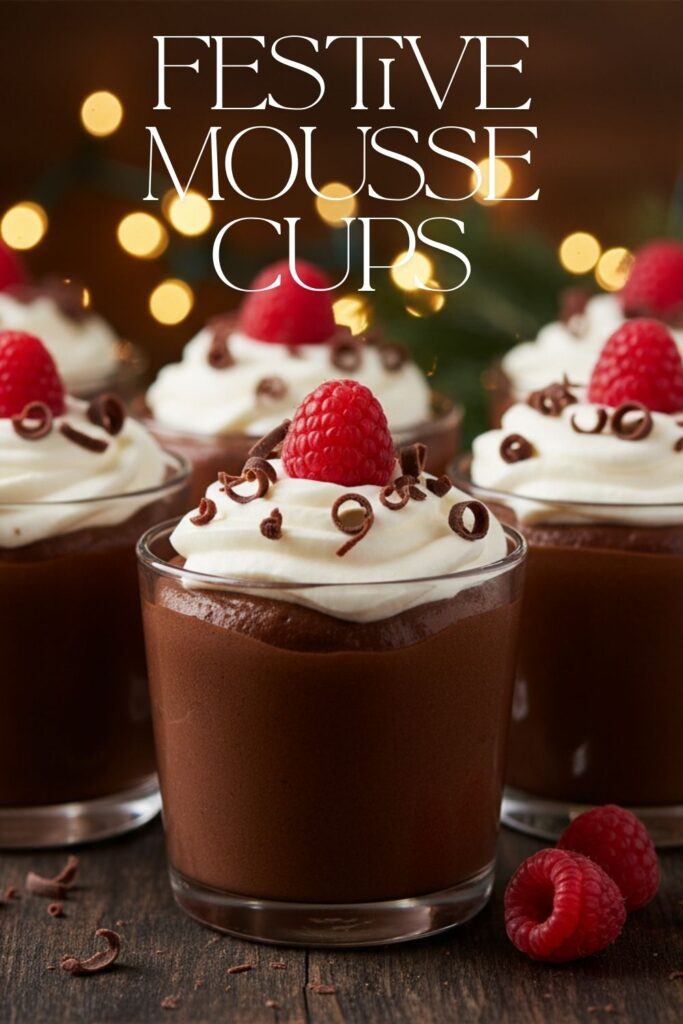
You’ve just survived a massive holiday feast. You’re stuffed, you’re sleepy, and someone asks, “What’s for dessert?” The thought of a heavy slice of pie or a dense cake is, frankly, a little terrifying. What you need is something elegant, something light, something decadent but not debilitating. What you need, my friend, are these incredibly chic and ridiculously easy Festive mousse cups. This is the dessert you whip out when you want to look effortlessly sophisticated. It’s a no-bake, make-ahead miracle that tastes like a rich, airy chocolate cloud. Forget fighting for oven space—your new secret weapon is waiting in the fridge, ready to steal the show.
Why These Festive Mousse Cups Are a Holiday Lifesaver

Still thinking of making that complicated layer cake? Let me talk you out of it. Here’s why these mousse cups are the smartest, most delicious choice for your holiday spread.
Zero Oven Space Required
Let’s be real, the oven is prime real estate during the holidays. This recipe is 100% no-bake, freeing up your oven for the main event. It’s a simple melt, whip, and chill situation that saves you a world of stress.
They Look Incredibly Fancy

There’s something about an individual dessert in a cute little cup that just screams “gourmet.” No one needs to know that it took you less than 30 minutes of active time to create these beautiful, single-serving masterpieces. They look like they came from a fancy French patisserie.
The Perfect Light-but-Rich Finish
After a heavy meal, the last thing anyone wants is a dessert that feels like a brick. Mousse is the perfect solution. It has an intense, deep chocolate flavor but a texture that’s as light and airy as a snowflake. It’s the satisfying, decadent finish your meal deserves.
The Simple Ingredients for Your Elegant Dessert

You only need a handful of high-quality ingredients to create this magic.
- Good Quality Semi-Sweet or Bittersweet Chocolate: 6 ounces, finely chopped. The better the chocolate, the better the mousse. This is where you should splurge a little.
- Heavy Whipping Cream: 1 ½ cups, kept very cold.
- Large Eggs: 3, separated. For those concerned, you can use pasteurized eggs.
- Granulated Sugar: ¼ cup.
- Vanilla Extract: 1 teaspoon.
- Salt: Just a tiny pinch.
- Festive Toppings: Whipped cream, chocolate shavings, crushed peppermint candies, fresh raspberries, holiday sprinkles—you name it!
The Tools & Kitchen Gadgets You’ll Need
No complicated gear required to look this good.
- Small Dessert Cups, Glasses, or Ramekins: About 6-8 of them. Little glass yogurt jars, small wine glasses, or classic ramekins all work beautifully.
- Electric Mixer: A stand mixer or a hand mixer is pretty much essential for whipping the egg whites and cream to perfection.
- Double Boiler (or a Heatproof Bowl and a Small Saucepan): For gently melting the chocolate without scorching it.
- Several Mixing Bowls: You’ll need a few for the different components.
- Silicone Spatula: A flexible spatula is key for folding.
- Piping Bag with a Star Tip (Optional): If you want to get fancy with your whipped cream topping.
Step-by-Step Instructions: Let’s Get Whipping!
Follow these steps, and you’ll have perfect, airy mousse every time.
Step 1: Melt the Chocolate
Set up your double boiler or place a heatproof bowl over a saucepan with an inch of simmering (not boiling) water. Add your finely chopped chocolate to the bowl and let it melt slowly, stirring occasionally until it’s completely smooth. Once melted, remove it from the heat and let it cool for about 10 minutes. You want it cool enough that it won’t scramble your eggs.
Step 2: Whip the Egg Whites
In a clean, dry bowl, use your electric mixer to beat the egg whites on medium speed until they become frothy. Gradually add the granulated sugar and increase the speed to high. Beat until stiff, glossy peaks form. This means when you lift the beaters, the peak holds its shape and doesn’t flop over.
Step 3: Whip the Cream
In another large bowl (I know, the dishes are piling up, but it’s worth it!), whip the cold heavy cream and vanilla extract on high speed until soft peaks form. Don’t overbeat it into butter! Set aside.
Step 4: Combine Chocolate and Yolks
Once your melted chocolate has cooled a bit, whisk in the egg yolks and the pinch of salt until the mixture is smooth and glossy.
Step 5: The Art of Folding (Be Gentle!)
Now for the most important part. Take about one-quarter of your whipped egg whites and stir them into the chocolate mixture to lighten it up. Then, gently fold in the remaining egg whites in two batches, using a spatula to scrape from the bottom and fold it over the top. Do not stir! You want to keep all that air. Once the egg whites are mostly incorporated, gently fold in the whipped cream in the same manner until the mousse is uniform in color and no streaks remain.
Step 6: Pipe and Chill
Divide the mousse evenly among your dessert cups. You can spoon it in or, for a cleaner look, transfer the mousse to a piping bag and pipe it into the glasses. Cover the cups with plastic wrap and chill in the refrigerator for at least 4 hours, or preferably overnight, to allow the mousse to set completely.
Calories & Nutritional Info

It’s basically just chocolate-flavored air, right? Right?
- Serving Size: 1 mousse cup (assuming 6 servings)
- Calories: Approximately 350-400 kcal
- Fat: ~30g
- Carbohydrates: ~20g
- Sugar: ~18g
- Protein: ~6g (Disclaimer: This is a rough estimate. The actual value is none of your business during the holidays. Enjoy the mousse.)
Common Mistakes to Avoid (Don’t Ruin the Mousse Mood)
Keep these tips in mind for flawless, cloud-like mousse.
- Making Chocolate Scrambled Eggs: If you add the egg yolks to chocolate that is piping hot, they will cook and scramble. Let your melted chocolate cool down for at least 10 minutes before you proceed.
- Deflating Your Mousse: Stirring is the enemy of mousse. You must gently fold the whipped egg whites and cream into the chocolate base. This maintains the airy texture. Be patient and use a light hand.
- A Watery Mess: Did you get even a tiny drop of water in your chocolate while melting it? It will seize up and become a grainy, unusable paste. Keep your double boiler setup completely dry.
- Not Chilling It Long Enough: Mousse needs time to firm up and for the flavors to meld. If you serve it too early, it will be sad and soupy. Four hours is the absolute minimum.
Variations & Customizations (Jazz Up Your Cups!)
The classic chocolate mousse is divine, but here’s how to make it extra festive.
1. White Chocolate Peppermint Mousse
Use 6 ounces of good-quality white chocolate instead of dark. Add ½ teaspoon of peppermint extract to the whipped cream. Garnish the finished cups with finely crushed candy canes and white chocolate shavings.
2. Spiced Eggnog Mousse
Make the white chocolate version above, but gently fold in ¼ cup of very thick, good-quality eggnog at the very end. Garnish with a fresh dusting of nutmeg just before serving. It’s holiday cheer in a cup.
3. Decadent Mocha Mousse
Dissolve 2 teaspoons of instant espresso powder in 1 tablespoon of hot water. Let it cool, then whisk it into the melted dark chocolate and egg yolk mixture. The coffee flavor deepens the chocolate for an incredibly rich dessert.
FAQ Section: Your Mousse Mysteries, Solved
Is it safe to eat raw eggs in mousse?
There is a small risk associated with consuming raw eggs. To eliminate this risk, use pasteurized eggs, which are available in the dairy section of most grocery stores. They have been gently heated to kill any potential bacteria.
How far in advance can I make these mousse cups?
You can make them up to 2 days in advance. Keep them covered in the refrigerator. Just be sure to add any crunchy toppings or fresh whipped cream right before serving to keep them at their best.
Why is my mousse runny or watery?
There are a few culprits: the mousse wasn’t chilled long enough, you didn’t whip your egg whites or cream to stiff/soft peaks, or you over-mixed and deflated all the air when folding.
Can I make this recipe without eggs?
Yes, you can make a simpler, eggless mousse. Just melt 8 ounces of chocolate and let it cool slightly. Whip 2 cups of heavy cream to stiff peaks. Gently fold the melted chocolate into the whipped cream until combined. It will be denser but still delicious.
How do I get that super light and airy texture?
The secret is in the folding! Properly whipped egg whites create the main structure and airiness. Folding them in gently, without stirring, is the key to preserving that cloud-like texture.
What are the best toppings for festive mousse cups?
The sky’s the limit! A dollop of whipped cream, chocolate shavings, fresh raspberries or pomegranate seeds for a pop of color, crushed peppermints, a dusting of cocoa powder, or festive holiday sprinkles.
Can you freeze mousse?
Yes, mousse freezes surprisingly well. Place the cups in the freezer for a few hours until solid, then wrap them tightly. It will last for up to a month. Thaw in the refrigerator for a few hours before serving.
Final Thoughts
And there you have it. A dessert that is the very definition of elegance and ease. You’ve created a sophisticated, delicious, and perfectly portioned treat that will have all your guests swooning. No one will ever guess it was your no-stress, no-bake secret weapon. So go on, add these festive mousse cups to your holiday menu. Take a moment to enjoy the rich, airy, chocolatey perfection. You’ve just proven that the most impressive desserts aren’t always the most complicated.

