The Easy Festive Drip Cake That Makes You a Cake Boss
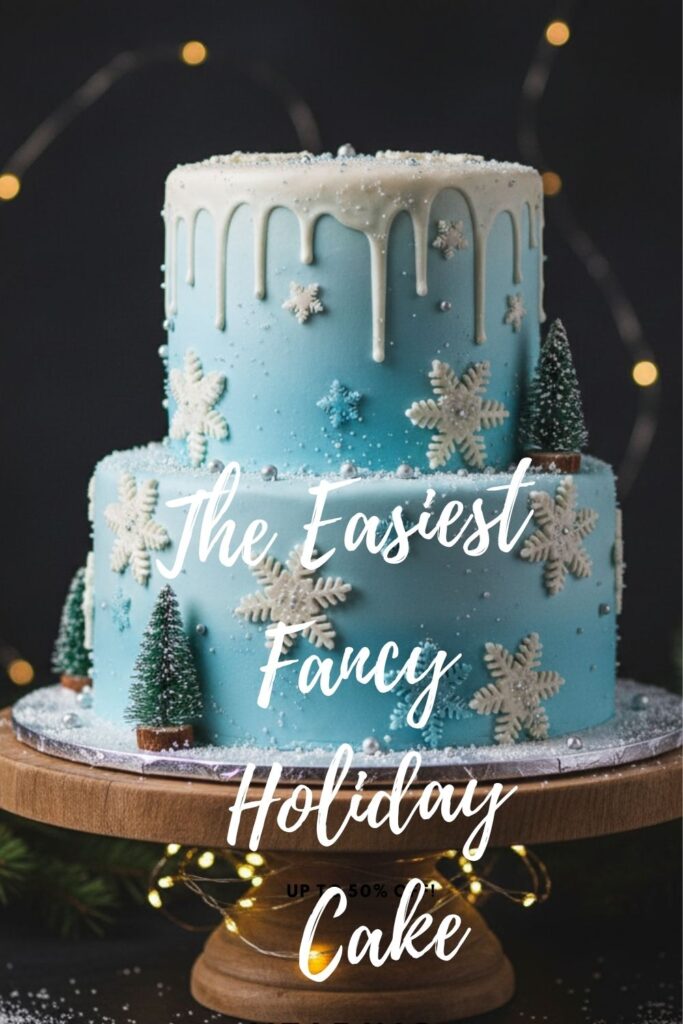
You’ve scrolled through Instagram, haven’t you? You’ve seen those impossibly perfect cakes with chocolate dripping artfully down the sides, adorned with sprinkles and macarons and miniature forests of edible greenery. And then you thought, “There’s no way I could make that.” Well, buckle up, buttercup, because I’m here to tell you that you absolutely can. If you’re hunting for showstopping festive drip cake ideas that are actually achievable for mere mortals, then you’ve hit the jackpot.

This isn’t just a cake; it’s a statement. It’s the kind of cake that makes Aunt Carol whisper, “Did you buy this?” with a hint of suspicion. Our recipe combines a deliciously moist vanilla cake, silky smooth buttercream, and a foolproof chocolate ganache drip. The best part? It looks incredibly impressive, but the “drip” is actually one of the easiest decorating techniques out there. Seriously.
Why This Drip Cake is Your Holiday Hero
The number one reason to make this cake? The instant “wow” factor. The beautiful drips instantly elevate a simple frosted cake into a masterpiece. It looks fancy, intricate, and utterly professional, making it the perfect centerpiece for any holiday gathering. And it’s so much fun to customize!

Beyond its stunning looks, this cake tastes incredible. We’re talking a tender, flavorful vanilla cake that serves as a perfect canvas for our rich, creamy buttercream and decadent chocolate drip. It’s not just a pretty face; it’s a delicious experience. Plus, mastering the drip technique opens up a whole new world of cake decorating possibilities.
The Simple, Decadent Ingredient Lineup

You’ll need a few basics for a truly epic drip cake.
For the Super Moist Vanilla Cake (makes two 8-inch or three 6-inch layers):
- 2 ¾ cups (330g) All-Purpose Flour:
- 1 tbsp Baking Powder:
- ½ tsp Salt:
- 1 cup (226g) Unsalted Butter: Softened to room temperature.
- 2 cups (400g) Granulated Sugar:
- 4 Large Eggs: At room temperature.
- 1 tbsp Vanilla Extract: Good quality, please!
- 1 cup (240ml) Whole Milk: At room temperature.
For the Silky Smooth Vanilla Buttercream:
- 1 cup (226g) Unsalted Butter: Softened.
- 4 cups (480g) Powdered Sugar: Sifted.
- 2-3 tbsp Whole Milk or Heavy Cream:
- 1 tsp Vanilla Extract:
- Pinch of Salt:
For the Foolproof Chocolate Ganache Drip:
- ½ cup (90g) Semi-Sweet or Dark Chocolate Chips:
- ¼ cup (60ml) Heavy Cream:
For Festive Decorations (Choose your favorites!):
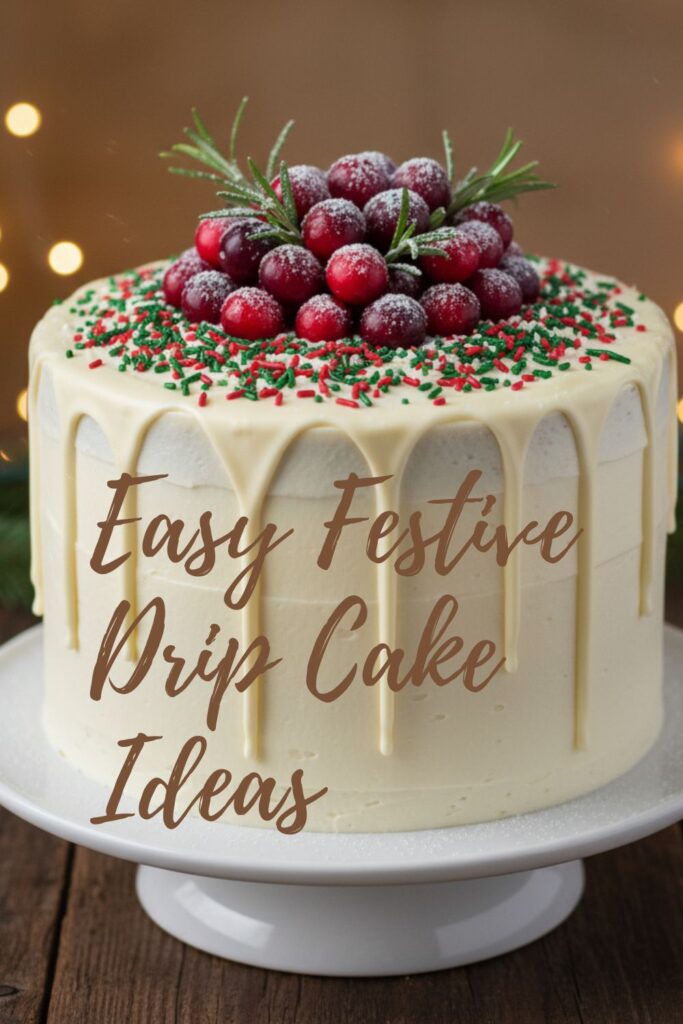
- Fresh Cranberries & Rosemary Sprigs: For a natural, festive look.
- Holiday Sprinkles: Gold, silver, red, green – go wild!
- Miniature Meringues or Macarons: For extra pizzazz.
- White Chocolate Shavings:
- Candy Canes: Crushed or whole mini ones.
Tools & Kitchen Gadgets Used
Having the right tools makes cake decorating a joy, not a nightmare.
- Two 8-inch Round Cake Pans or Three 6-inch Round Cake Pans:
- Parchment Paper Circles: For lining the bottoms of your pans.
- Stand Mixer or Electric Hand Mixer: Essential for light, fluffy cake and buttercream.
- Large Mixing Bowls:
- Offset Spatula (Small and Large): Your best friend for frosting.
- Cake Turntable (optional, but highly recommended): Makes frosting so much easier.
- Bench Scraper or Cake Smoother: For perfectly smooth sides.
- Piping Bag and Round Piping Tip (e.g., Wilton 1A or 2A): For piping buttercream borders.
- Small Squeeze Bottle or Piping Bag (with a tiny snipped corner): For the drip.
- Wire Rack: For cooling cakes.
Step-by-Step Guide to Your Drip Cake Debut
We’re going to break this down into manageable phases: cake, buttercream, crumb coat, final coat, and then the glorious drip!
H3: Bake Your Glorious Cake Layers
- Prep & Preheat: Preheat your oven to 350°F (175°C). Grease and flour your cake pans, then line the bottoms with parchment paper circles.
- Whisk Dry: In a medium bowl, whisk together the flour, baking powder, and salt.
- Cream Wet: In the bowl of your stand mixer, cream the softened butter and granulated sugar on medium-high speed until light and fluffy, about 3-5 minutes. Beat in the eggs, one at a time, followed by the vanilla extract.
- Alternate & Combine: With the mixer on low speed, add about one-third of the dry ingredients, followed by half of the milk. Repeat, ending with the last of the dry ingredients. Mix until just combined. Do not overmix!
- Bake: Divide the batter evenly among your prepared pans. Bake for 25-30 minutes (for 8-inch) or 20-25 minutes (for 6-inch), until a toothpick inserted into the center comes out clean.
- Cool: Let the cakes cool in the pans for 10-15 minutes, then invert them onto a wire rack to cool completely. This is crucial before frosting!
H3: Master the Silky Buttercream
- Beat Butter: In your stand mixer, beat the softened butter on medium-high speed for 3-5 minutes until it’s very light and fluffy. This adds air and makes it smooth.
- Add Powdered Sugar: Gradually add the sifted powdered sugar, one cup at a time, beating well after each addition.
- Finish: Beat in the milk/cream, vanilla extract, and salt. Increase the speed to high and beat for another 2-3 minutes until the buttercream is super light, fluffy, and smooth. If it’s too thick, add more milk a teaspoon at a time. If it’s too thin, add more powdered sugar.
H3: The Art of Frosting (Don’t Panic!)
- Level Your Cakes: Use a serrated knife to carefully level the tops of your cooled cake layers if they have domes. This creates a flat surface for stacking.
- Stack & Fill: Place one cake layer on your serving plate or cake stand. Spread a generous layer of buttercream on top. Place the next layer on, and repeat.
- The Crumb Coat (Your Best Friend): Apply a thin layer of buttercream all over the entire cake. This traps any loose crumbs. Chill the cake in the refrigerator for 15-20 minutes until the crumb coat is firm.
- The Final Coat: Apply a thicker, even layer of buttercream to the top and sides of the cake. Use your offset spatula to smooth the top, then use a bench scraper to get those super smooth sides. Chill the cake again for at least 30 minutes (or longer) until the buttercream is firm and cold. This is critical for a good drip!
H3: The Glorious Ganache Drip
- Make the Ganache: Place the chocolate chips in a heatproof bowl. Heat the heavy cream in a small saucepan or microwave until it just simmers. Pour the hot cream over the chocolate chips. Let it sit for 5 minutes without stirring.
- Stir and Cool: After 5 minutes, gently whisk the mixture from the center outwards until it’s smooth and glossy. Let the ganache cool for 10-15 minutes, stirring occasionally. You want it to be warm but not hot, and thick enough to cling to a spoon, but still pourable. This is the most crucial step for good drips!
- The Drip! Transfer the ganache to a small squeeze bottle or a piping bag with a tiny corner snipped off. Working with your cold cake, start by gently squeezing the ganache around the top edge, letting it slowly cascade down the sides in beautiful drips. Vary the pressure to create longer and shorter drips.
- Fill the Top: Once you’ve created your drips, pour the remaining ganache on top of the cake and spread it evenly with a small offset spatula.
H3: Decorate and Amaze
- Piped Border: If you like, pipe a decorative border around the top edge of the cake using a piping bag and a round tip.
- Add Your Flair: Now for the fun! Arrange your fresh cranberries, rosemary, sprinkles, meringues, or crushed candy canes on top of the cake while the ganache is still slightly wet (or gently press them into the firm buttercream).
Calories & Nutritional Info

Here’s an estimate per slice, assuming 12-14 generous slices from an 8-inch cake.
- Calories: Approximately 550-650 kcal
- Fat: 35g
- Carbohydrates: 70g
- Sugar: 50g
- Protein: 6g
(Disclaimer: This is a celebration cake. Calories don’t count during the holidays, right? IMO.)
Common Mistakes to Avoid (For a Drip Cake Victory)
Avoid these pitfalls to ensure your cake looks Instagram-perfect.
- Not Cooling the Cake Layers Completely: Trying to frost warm cake layers is like trying to build a sandcastle in a hurricane. They will crumble, tear, and melt your buttercream. Cool them completely!
- Skipping the Crumb Coat: This is your armor against crumb-riddled frosting. It seals in all the loose bits, giving you a smooth, clean canvas for your final coat. Don’t skip it!
- Not Chilling the Final Frosted Cake: This is the MOST IMPORTANT STEP for a good drip. If your buttercream isn’t firm and cold, your warm ganache will melt it, and the drips will slide right off in a sugary avalanche. Chill that cake!
- Ganache is Too Hot or Too Cold: If the ganache is too hot, the drips will be thin, runny, and potentially melt your buttercream. If it’s too cold, it will be too thick to drip smoothly. Aim for a warm, but not hot, consistency that coats the back of a spoon. Test a drip on the back of a chilled glass first.
- Over-Decorating: Sometimes less is more. While it’s fun to add all the things, a chaotic cake is less impressive. Choose 2-3 main decorative elements and arrange them artfully.
Variations & Customizations
This drip cake concept is endlessly adaptable!
- Red Velvet Drip Cake: Use your favorite red velvet cake recipe, fill with cream cheese frosting, and use a white chocolate ganache drip (tinted red or green for extra festivity!)
- Peppermint Chocolate Drip Cake: Use chocolate cake layers, peppermint buttercream (add peppermint extract to your vanilla buttercream), and a dark chocolate ganache drip, topped with crushed candy canes. This is a personal favorite!
- Gingerbread Caramel Drip Cake: Try a spiced gingerbread cake, filled with cream cheese or cinnamon buttercream, and topped with a luscious salted caramel drip (thicken store-bought caramel sauce or make your own). Garnish with candied ginger.
FAQ: Your Drip Cake Dilemmas, Solved
Let’s tackle those nagging questions about making a perfect drip cake.
1. How far in advance can I make this drip cake?
You can bake the cake layers up to 2-3 days in advance (wrap well and store at room temp or freeze). You can make the buttercream 3-4 days in advance (store in the fridge, then re-whip). Assemble and decorate the cake no more than 1-2 days before serving for the freshest taste.
2. Can I use store-bought cake mix or frosting?
Absolutely! This recipe focuses on the drip technique. You can totally use a good quality store-bought cake mix and canned frosting (just make sure your canned frosting is chilled and firm for the drip).
3. My drips are too short/too long. How do I fix them?
Too short? Your ganache is likely too thick or too cold. Warm it gently (a few seconds in the microwave) and stir. Too long? Your ganache is too thin or too hot. Let it cool a bit more. It takes a little practice to find the perfect consistency!
4. What kind of chocolate is best for ganache?
Good quality semi-sweet or dark chocolate chips or finely chopped baking chocolate (like Ghirardelli or Guittard baking bars) work best. Chocolate chips meant for cookies often have stabilizers that prevent smooth melting.
5. How do I get those super smooth cake sides?
After applying your final coat of buttercream, use a bench scraper (a flat, rigid piece of metal or plastic) held perpendicular to the cake and parallel to your turntable. Spin the cake while holding the scraper steady to smooth the sides.
6. Do I need a cake turntable?
While not strictly necessary, a cake turntable makes frosting a cake (and getting those smooth sides!) so much easier. IMO, if you plan to decorate cakes often, it’s a worthwhile investment.
7. How do I store a drip cake?
Store the finished cake, covered loosely, in the refrigerator if it contains dairy-based frosting or fresh fruit. Let it come to room temperature for about 30 minutes before serving for the best flavor and texture.
Final Thoughts
You are now equipped with the knowledge and confidence to conquer the world of drip cakes. This Festive Drip Cake will not only be a showstopper at your holiday table, but it will also give you bragging rights for years to come. So go ahead, unleash your inner cake artist. Your guests (and your Instagram feed) will thank you. TBH, you might never buy a bakery cake again. 😉