The Showstopping Star Bread That’s Secretly Easy to Make
The holiday season arrives, and with it, the primal urge to bake something spectacular. You scroll through social media, eyeing up impossibly intricate gingerbread houses and perfectly piped cookies, and a little voice whispers, “You could do that.” Then, a louder, more realistic voice screams, “You have neither the time nor the patience for that!” If you’re looking for some festive baking ideas that deliver a major “wow” factor without requiring a degree in structural engineering, then you have come to the right place.
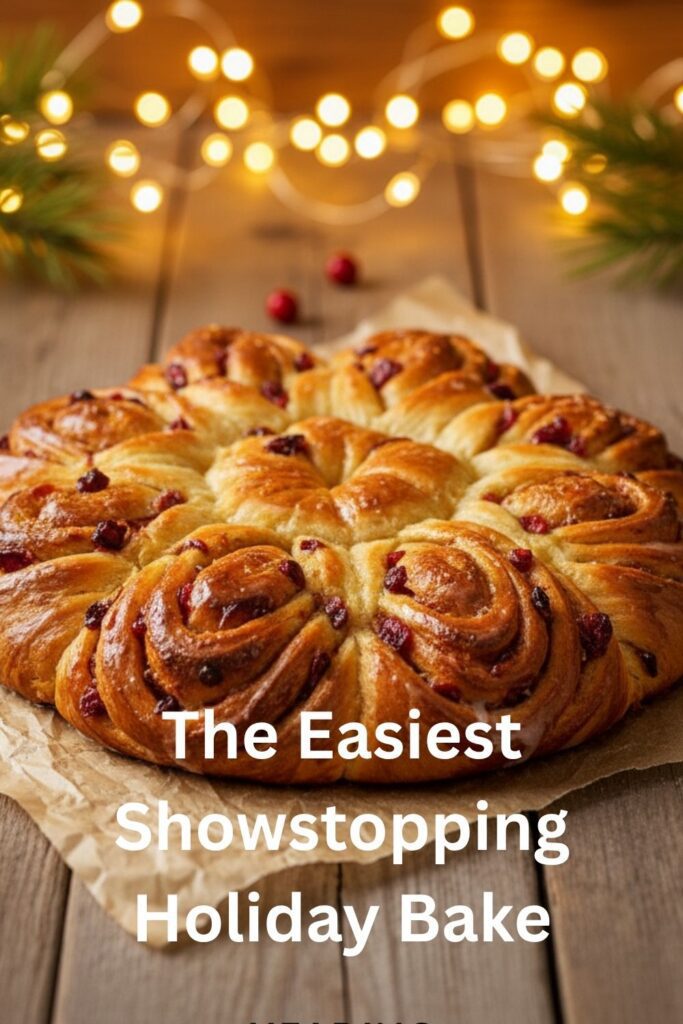
Meet the Cranberry Orange Star Bread. It’s a stunning, pull-apart bread that looks like it belongs in a high-end bakery window, but it’s secretly a simple, forgiving yeast bread that anyone can make. This is your ticket to becoming a holiday baking legend, and no one needs to know how easy it actually was.
Why This Recipe is Your Holiday Showstopper

The number one reason this bread is a must-bake is its jaw-dropping appearance. Seriously. You bring this to a holiday brunch or dinner, and people will gasp. It’s a beautiful, edible centerpiece that’s incredibly fun to pull apart and eat. It’s the definition of a showstopper.
But here’s the secret: it’s way easier than it looks. If you can roll out a circle of dough, you can make this bread. The intricate star pattern is created with a few simple cuts and twists—no special skills or equipment required. It’s a soft, fluffy, enriched dough filled with a bright, festive combination of cranberry and orange. It’s the perfect project for a cozy winter afternoon.
The Simple, Festive Ingredient Lineup


This recipe uses basic pantry staples to create something truly magical.
For the Soft, Enriched Dough:
- ¾ cup (180ml) Whole Milk: Warmed to about 110°F (43°C).
- 2 ¼ tsp (1 packet) Active Dry Yeast:
- ¼ cup (50g) Granulated Sugar:
- 1 Large Egg: At room temperature.
- ¼ cup (56g) Unsalted Butter: Melted and slightly cooled.
- 3 cups (360g) All-Purpose Flour: Plus more for dusting.
- 1 tsp Salt:
- Zest of 1 Orange:
For the Cranberry Orange Filling:
- ¼ cup (56g) Unsalted Butter: Very soft, at room temperature.
- ⅓ cup (65g) Packed Brown Sugar:
- Zest of 1 Orange:
- 1 cup (about 100g) Dried Cranberries: Finely chopped.
For the Simple Orange Glaze:
- ½ cup (60g) Powdered Sugar:
- 1-2 tbsp Fresh Orange Juice:
Tools & Kitchen Gadgets Used
A stand mixer is helpful, but this is totally achievable with a little elbow grease.
- Stand Mixer with a Dough Hook: Makes the kneading process a breeze.
- Large Mixing Bowl: If you’re kneading by hand.
- Rolling Pin:
- Large Baking Sheet: Lined with parchment paper.
- A 9-inch Plate or Cake Pan: To use as a template for cutting perfect circles.
- A Small Glass or Biscuit Cutter (about 3 inches): To mark the center of the star.
- Pizza Cutter or Sharp Knife: For cutting the “arms” of the star.
Step-by-Step Guide to Your Edible Masterpiece
Don’t be intimidated by the yeast or the shape. We’re going to break this down into super simple steps.
H3: First, Let’s Make Some Dough
- Activate the Yeast: In the bowl of your stand mixer, gently stir together the warm milk, yeast, and 1 tablespoon of the granulated sugar. Let it sit for 5-10 minutes until it’s foamy. This proves your yeast is alive and ready to party.
- Mix the Dough: To the foamy yeast, add the remaining sugar, the egg, melted butter, and orange zest. With the dough hook attachment on low, gradually add the flour and salt. Mix until a cohesive dough forms.
- Knead It: Increase the speed to medium and let the mixer knead for 5-7 minutes, until the dough is smooth and elastic. If kneading by hand, do so on a lightly floured surface for 8-10 minutes.
- First Rise: Form the dough into a ball, place it in a lightly greased bowl, and cover it with plastic wrap. Let it rise in a warm, draft-free spot for 1 to 1 ½ hours, or until it has doubled in size.
H3: The Assembly, The Twist, and The Magic
- Prep & Divide: Punch down the risen dough and turn it out onto a lightly floured surface. Divide the dough into four equal pieces.
- Roll and Layer: Roll one piece of dough into a 10-inch circle. Place it on a piece of parchment paper. Spread it with one-third of the filling (softened butter, brown sugar, orange zest, and chopped cranberries).
- Repeat: Roll out a second circle of dough and place it on top of the first. Spread with another third of the filling. Repeat one more time with the third circle and the last of the filling. Roll out the fourth circle and place it on top. You should have a stack of four layers of dough and three layers of filling.
- Shape the Circles: Place your 9-inch plate or pan on top of the stack and use a knife to trim the edges, creating a perfect circle.
- Mark and Cut: Place your small glass in the very center of the dough stack to make a slight indentation. Using a sharp knife or pizza cutter, cut the dough from the edge of the center circle to the outer edge, making 16 equal strips (cut into quarters, then eighths, then sixteenths).
- The Twist: Now for the fun part! Take two adjacent strips of dough and twist them away from each other two full times. Pinch the ends together firmly to seal. Repeat this process with the remaining strips, working in pairs, all the way around the circle.
- Second Rise: Carefully slide the parchment paper with your beautiful star onto a baking sheet. Cover it loosely with plastic wrap and let it rise in a warm place for 20-30 minutes, until it looks slightly puffy.
H3: Bake and Glaze
- Bake: While it’s rising, preheat your oven to 375°F (190°C). Brush the star bread with a little melted butter or an egg wash if you like. Bake for 20-25 minutes, until it’s a deep golden brown.
- Glaze and Serve: While the bread is still warm, whisk together the powdered sugar and orange juice to make a simple glaze. Drizzle it all over the star bread. This bread is best served warm, ready to be pulled apart.
Calories & Nutritional Info

Here’s an estimate per serving, assuming you get 12 servings from the star.
- Calories: Approximately 250-300 kcal
- Fat: 8g
- Carbohydrates: 40g
- Protein: 5g
(Disclaimer: It’s a festive sweet bread. Let’s not ruin the magic with too much math.)
Common Mistakes to Avoid (For a Perfect Star)
Follow these simple rules for a flawless, showstopping bread.
- Killing Your Yeast: If your milk is hotter than a pleasant bath (over 115°F/46°C), you will commit yeast-murder. Make sure your milk is just warm to the touch.
- A Sticky, Un-rollable Dough: This dough should be soft and easy to work with. If it’s overly sticky, add a tablespoon of flour at a time while kneading. Don’t add too much flour, or your bread will be dry.
- Forgetting to Pinch the Ends: When you twist the two strips of dough together, you must pinch the ends firmly. If you don’t, they’ll unravel during baking, and your star points will look a little sad.
- Overbaking: This bread is best when it’s soft and fluffy. Pull it from the oven when it’s a deep, confident golden brown. If you’re unsure, an instant-read thermometer inserted into the center should read 190°F (88°C).
Variations & Customizations
This star bread technique is a template for all kinds of deliciousness!
- Classic Cinnamon Roll Star Bread: The most popular variation for a reason. Replace the cranberry-orange filling with a classic mix of softened butter, brown sugar, and a generous amount of cinnamon.
- Chocolate Hazelnut Dream: This one’s for the chocolate lovers. Use Nutella or another chocolate-hazelnut spread as your filling. It’s ridiculously indulgent and delicious.
- Savory Pesto Parmesan Star: Not all star breads have to be sweet! For a fantastic appetizer, use a filling of pesto, grated Parmesan cheese, and finely chopped sun-dried tomatoes. Brush with garlic butter before baking.
FAQ: Your Festive Baking Questions, Answered
Let’s clear up some common yeast bread queries.
1. Can I make this dough ahead of time?
Yes! You can make the dough through the first rise, then punch it down, wrap it well, and refrigerate it for up to 24 hours. When you’re ready, let it sit on the counter for 30 minutes before proceeding with the rolling and shaping.
2. My dough didn’t rise. What did I do wrong?
The most likely culprit is your yeast. It was either expired, or your milk was too hot or too cold. Always check the expiration date and make sure your yeast gets foamy in the warm milk and sugar mixture before you proceed.
3. Can I use a different kind of filling?
Absolutely! Jam, cookie butter, apple butter, or any other spreadable filling would work great. Just be careful not to use something too thin or liquidy, as it can leak out during baking.
4. Can I freeze star bread?
Yes! It freezes beautifully. Let the baked, un-glazed bread cool completely. Wrap it tightly in plastic wrap and then foil, and freeze for up to 3 months. Thaw it at room temperature and warm it in a 350°F (175°C) oven for about 10 minutes before glazing.
5. My star looks a little lopsided. Is it ruined?
Not at all! The beauty of star bread is its rustic charm. Even if your cuts aren’t perfectly even or your twists are a little wonky, it will still look and taste amazing. Just call it “artisanal.”
6. Do I have to use a stand mixer?
Nope! You can absolutely knead this dough by hand. It will take about 8-10 minutes of good, old-fashioned elbow grease on a lightly floured surface. It’s a great workout!
7. What if I don’t have a round template for cutting?
Don’t worry about it! You can just eyeball it and trim your stack of dough into a rough circle. A rustic, imperfect circle adds to the homemade charm.
Final Thoughts
You are now in possession of a recipe that is guaranteed to make you the star baker of any holiday gathering. This Cranberry Orange Star Bread is the perfect combination of stunning beauty and surprising simplicity. It’s a joy to make, a joy to look at, and an absolute joy to eat. Go forth and bake something beautiful!