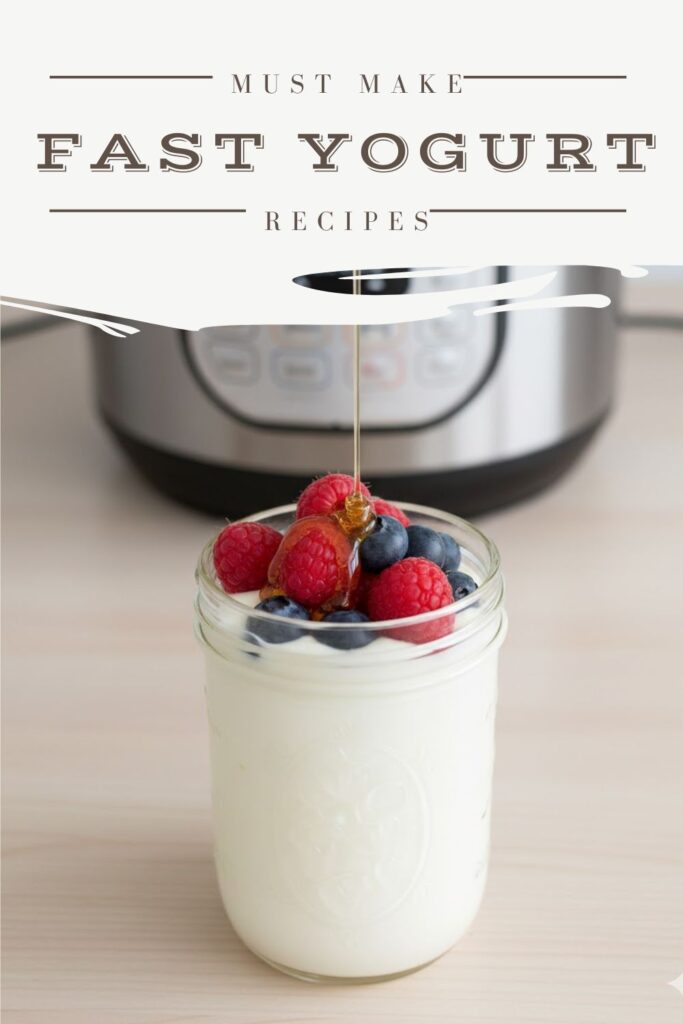
⏰ Skip the Store Run: Your Guide to Fast Yogurt (The 5-Minute Prep Probiotic Hack)
Raise your hand if you’ve ever stood in front of the dairy case, staring at the wall of brightly colored yogurt cups, feeling completely overwhelmed by the sugar content and the ridiculous price tags. Yeah, me too. I used to think making yogurt was a 12-hour commitment reserved for grandmas and people with specialized incubation labs. Wrong! I cracked the code to Fast Yogurt—a method that requires about five minutes of actual work and uses a kitchen appliance you probably already own. Get ready to stop paying extra for probiotics and start making a batch of creamy, tangy deliciousness that’s better than anything you’ll buy. Your gut (and your wallet) will send you a thank you note.
Why This Recipe Is Awesome (It’s Insanely Easy)
This isn’t just about saving money; it’s about gaining total control over your dairy. Why is this recipe a game-changer?
- 5-Minute Hands-On Prep: We seriously minimize the active steps. No fussy boiling, no complex straining (unless you want Greek!). We focus on clean, quick inoculation.
- Probiotic Powerhouse: You choose the starter, meaning you control the culture! You get live, active cultures without the stabilizers, artificial flavors, and massive amounts of sugar found in most commercial options.
- The “Incubator Hack”: The traditional method requires keeping milk at a constant 110°F for hours. We use a simple appliance trick (hello, Instant Pot or slow cooker!) to hold the temperature perfectly. Why buy a new gadget when you can hack an old one?
Ingredients: The Milky Way to Culture
Two ingredients. That’s all you truly need. Don’t let anyone tell you otherwise.
- ½ Gallon (2 Liters) Whole Milk: Use whole milk for the creamiest, thickest results. 2% works fine, but the texture won’t be as luxurious. Avoid ultra-pasteurized (UHT) milk, as it sometimes struggles to culture.
- 2 Tablespoons Plain Yogurt Starter: Must contain “live, active cultures” listed on the label. This is your seed culture! Use plain Greek or regular yogurt. Pick one with a flavor profile you like, as your homemade batch will share its DNA.
Key Substitutions:
- Whole Milk: You can use goat milk or sheep milk for a different flavor profile.
- Dairy Milk (for non-dairy): Use canned full-fat coconut milk or a high-quality soy milk. Note: Non-dairy milk often requires a thickener like gelatin or agar-agar to set properly, so add 1 teaspoon per quart.
- Starter Yogurt: You can use a packet of freeze-dried yogurt culture instead, following package instructions.
Tools & Kitchen Gadgets Used: The Appliance Hack
We are taking the path of least resistance. You likely have one of these “incubators” already!
- Saucepan (Medium to Large): For heating the milk.
- Whisk: For gently stirring the milk while heating and for mixing in the starter.
- Digital Food Thermometer: ABSOLUTELY ESSENTIAL! You must monitor the temperature precisely to avoid disaster.
- Instant Pot or Multi-Cooker (with a “Yogurt” function): The best hack! It perfectly regulates the incubation temperature.
- Slow Cooker (Optional Alternative): Use the “Low” or “Warm” setting, monitoring carefully with a thermometer, to hold the temp.
- Glass Jars or Storage Container: For transferring and incubating the finished mix.
- Fine Mesh Strainer and Cheesecloth (Optional): If you crave Greek yogurt thickness.
Step-by-Step Instructions: Culture Club is Now Open
Read these steps twice. Precision with temperature is the only thing standing between you and creamy glory.
Step 1: Scald the Milk (The Protein Prep) (15 Minutes)
- Pour the milk into your saucepan. Heat it over medium heat, stirring occasionally to prevent the bottom from scorching.
- Bring the milk temperature up to 180°F (82°C). This is the scalding step—it kills unwanted bacteria and denatures the proteins, giving your yogurt that thick, smooth texture. Don’t skip this, or your yogurt will be thin!
Step 2: The Quick Cool (The Crucial Wait) (20 Minutes)
- Immediately remove the milk from the heat. You must now cool it down quickly to the inoculation temperature.
- Place the saucepan in an ice bath (a large bowl filled with ice and water). Stir the milk gently but constantly.
- Cool the milk down to exactly 110°F (43°C). This is the temperature range where the yogurt bacteria are happiest. Crucial warning: Milk above 120°F (49°C) will kill your starter cultures! Use that thermometer!
Step 3: Inoculate the Milk (The 30-Second Mix) (1 Minute)
- In a small bowl, whisk your 2 tablespoons of yogurt starter with a ladleful of the cooled milk until smooth. This tempers the starter.
- Pour this tempered mixture back into the large pot of milk. Whisk gently until everything is evenly combined. Don’t use a blender!
Step 4: Incubation Hack (The Appliance Does the Work) (6-10 Hours)
- Pour the inoculated milk into your clean storage container or straight into the inner pot of your Instant Pot.
- Instant Pot Method: Press the Yogurt function and set the time for 6 to 8 hours. This is the easiest, best way!
- Oven/Slow Cooker Method: Place the container in a turned-off oven with the light on (which usually keeps the temperature around 100°F). Or, use the “Warm” setting on a slow cooker, monitoring the temp to stay between 105-115°F.
- After 6 hours, gently tilt the container. The yogurt should be set and pull away cleanly from the side of the container. If it’s still liquid, keep incubating for another 1-2 hours.
Step 5: The Chill and Enjoy (2 Hours)
- Once set, remove the yogurt and transfer it to the refrigerator. Do not stir it yet!
- Chill the yogurt for at least 2 hours. This stops the fermentation process and lets the yogurt firm up properly.
- Once fully chilled, whisk the yogurt to smooth it out. If you want Greek yogurt, strain it now (see below). Store it tightly covered.
Calories & Nutritional Info: The Clean Facts (Estimated)
Based on 1 cup (8oz) of homemade plain whole milk yogurt.
- Calories per serving (1 cup): ~150-180 calories
- Protein: ~8-10g
- Fat: ~8-10g
- Calcium: High in calcium, essential for bones.
- Probiotics: Contains beneficial live, active cultures (like Lactobacillus bulgaricus and Streptococcus thermophilus).
Nutritional Notes:
- Low Sugar: Unlike most store-bought yogurt, this contains only natural milk sugars (lactose). Fermentation consumes most of that, making the finished product very low in sugar.
- Greek Yogurt Bonus: Straining the yogurt removes whey (water/lactose), concentrating the protein and fat, nearly doubling the protein content per serving.
Common Mistakes to Avoid: From Culture to Curdle
Don’t let science ruin your snack. Be vigilant about temperature!
- The Temperature Takedown: DO NOT add your starter to milk above 120°F (49°C). You’ll murder the bacteria. ALWAYS cool it to 110°F (43°C) first. Use the thermometer!
- Incubation Instability: Letting the temperature drop too low (below 100°F) or spike too high will result in a runny, failed batch. Use an appliance that holds the heat steady.
- Stirring While Setting: Do not stir the yogurt during the incubation or chilling phases. Stirring breaks the delicate protein bonds, resulting in a thin, unset mess.
- Starter Scrimping: Not using enough starter (2 tablespoons per half gallon is a safe minimum) gives the good bacteria a slow start, allowing other microbes to compete. Be generous with the starter!
Variations & Customizations: Your Flavor Factory
Once you master plain yogurt, you can make everything else. Add flavors after the incubation and chilling steps.
- Homemade Greek Yogurt (The Strainer): After chilling, pour the yogurt into a fine-mesh sieve lined with cheesecloth. Place the sieve over a bowl and let the whey drain off in the fridge for 4-8 hours. The longer it drains, the thicker it gets (up to cream cheese consistency!).
- Sweet Vanilla Bean: Mix in 1 teaspoon of vanilla extract and 2 tablespoons of honey or maple syrup after the final chill and whisking.
- Savory Tzatziki Base: Skip the sweetener. Mix the finished yogurt with grated cucumber, minced garlic, lemon juice, salt, and fresh dill for the best homemade Tzatziki dip.
FAQ Section: All Your Cultured Questions Answered
Yogurt making is full of variables. Let’s address the common worries.
Q1: Why is my homemade yogurt runny?
A: The most common reasons are incubation temperature was too low (bacteria went dormant) or you killed the starter (milk was too hot). Also, not scalding the milk high enough (180°F) can result in a thin set.
Q2: Can I use my homemade yogurt to start the next batch?
A: Yes! You can perpetuate your yogurt culture for several generations. However, the culture can weaken or change over time, so if your yogurt starts getting too sour or runny, buy a fresh commercial starter to reset the process.
Q3: Does homemade yogurt have more probiotics than store-bought?
A: Usually, yes. Commercial yogurt is often heat-treated after incubation, which kills some bacteria. Homemade yogurt, when properly incubated, contains a very high number of live, active, beneficial cultures.
Q4: How long can I keep homemade yogurt?
A: Store it in an airtight container in the refrigerator for up to 2-3 weeks. Since it contains no stabilizers, keep it sealed.
Q5: Is it safe to use a starter that’s about to expire?
A: A starter near its expiration date may have weakened cultures. Use the freshest plain yogurt you can find for the best, most reliable results.
Q6: Why did a clear liquid form on top of my finished yogurt?
A: That liquid is whey, and it’s perfectly normal! It’s nutrient-rich. You can pour it off or simply stir it back into the yogurt for a thinner consistency. It often signals that the yogurt has fully set.
Q7: Should I add powdered milk to the recipe?
A: Adding 1/2 cup of dry milk powder along with the liquid milk before scalding will increase the protein content, resulting in a significantly thicker, creamier yogurt without having to strain it.
Final Thoughts: The New Dairy Master
You’ve done the math, dodged the temperature traps, and created a creamy, probiotic masterpiece. You mastered Fast Yogurt. Never again will you be held hostage by the dairy aisle! Go ahead, enjoy that creamy, low-sugar goodness. You can bet your friends are going to start asking you where you buy that amazing yogurt.

