Forget the Week-Long Wait: Your Cheat Sheet to Express Injera
Let’s not dance around the issue: Ethiopian food is a top-tier cuisine, and Injera—that magnificent, tangy, spongy flatbread—is the key. But the traditional process? It involves a multi-day wild fermentation that demands the patience of a saint and a very specific kitchen temperature. Who has three days to wait for a pancake? Not me! I cracked the code to Express Injera, a quick, non-traditional method that uses a little bit of yeast and a common souring agent to achieve that signature spongy texture and pleasant tang in just about an hour. Prepare to impress everyone with your fast, fake fermentation skills.
Why This Recipe Is Awesome (It’s Instant Ethiopian Magic)

You need this recipe because it delivers the flavor and texture of Injera without the crushing time commitment.
- Lightning Fast: We bypass the wild yeast wait (usually 3 days or more) by using instant yeast and apple cider vinegar. This means you’re cooking in about 90 minutes total.
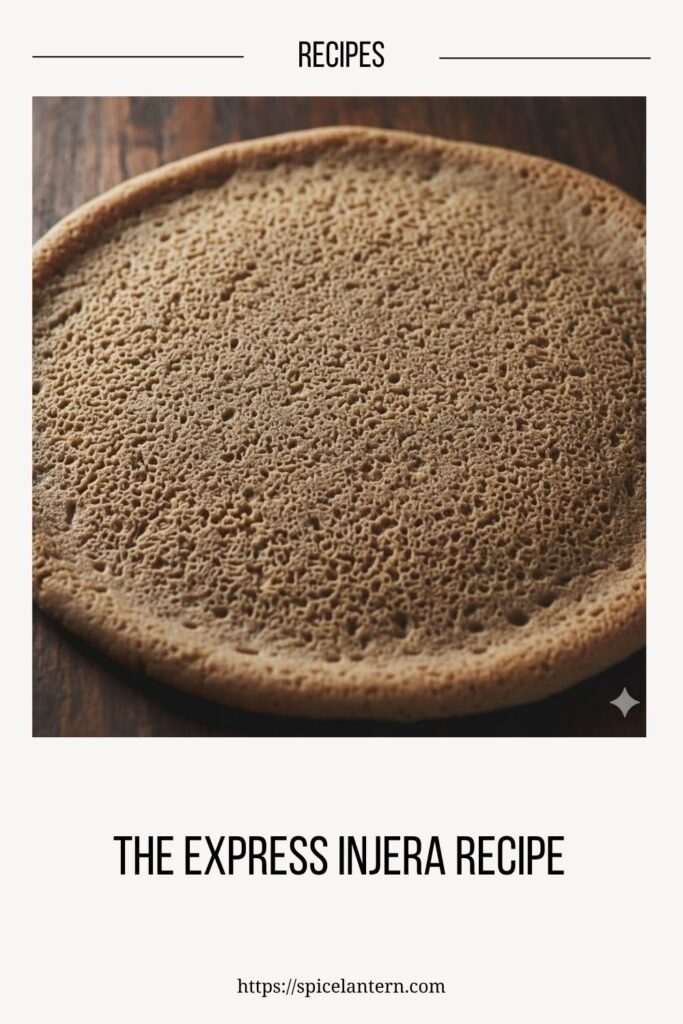
- The Spongy Success: The combination of yeast and baking soda ensures you get those classic little holes—the “eyes” or serata—which are essential for soaking up your magnificent stews. No flimsy flatbread here!
- Naturally Gluten-Free (The Teff Advantage): Traditional Injera uses teff flour, which is naturally gluten-free. This recipe keeps that tradition alive, making it a delicious option for everyone.
Ingredients: The Spongy Secrets

Teff flour is the traditional backbone, but we cheat the flavor with quick-acting acid and yeast.
- 1 cup Teff Flour (Brown or Ivory): The essential grain! Use brown teff for a slightly stronger, earthier flavor, or ivory teff for a milder taste.
- ½ cup All-Purpose Flour (Optional): Untraditional, but highly recommended for Express Injera. Teff lacks strong gluten; mixing in a little AP flour helps the batter hold together and makes flipping easier, especially for beginners. Skip this if you need 100% GF (see substitutions).
- 1 ½ cups Warm Water (105-115°F / 40-46°C): For waking up the yeast.
- 1 teaspoon Instant Yeast: Our fermentation accelerator.
- ½ teaspoon Salt: Flavor balance.
- 1 Tablespoon Apple Cider Vinegar (or White Vinegar): CRITICAL for providing the quick sour flavor and reacting with the baking soda for lift.
- ½ teaspoon Baking Soda: Works with the vinegar to create extra bubbles/eyes when cooking.

Key Substitutions:
- Teff Flour (100% GF Swap): If you need 100% gluten-free, substitute the AP flour with a gluten-free flour blend that contains xanthan gum or use another half cup of teff flour (your Injera will be more fragile).
- Apple Cider Vinegar: Use white vinegar or lemon juice. You need the strong acid for the tang!
- Yeast: You must use Instant Yeast for the speed. Do not substitute for sourdough starter in this rapid method.
Tools & Kitchen Gadgets Used: The Griddle Game
Traditional Injera uses a large, flat clay griddle called a mitad. We’re using the modern equivalent!
- Large Mixing Bowl: For combining the batter and the short rise.
- Whisk: For ensuring a completely smooth, lump-free batter.
- Non-Stick Skillet or Cast Iron Griddle (10-12 inches): MANDATORY. A flat, wide surface is needed. Use a quality non-stick surface, as Injera is prone to sticking.
- Lid for Skillet (Clear glass preferred): CRUCIAL. Needed to steam the top of the Injera and set the batter without flipping.
- ¼ Cup Measuring Cup or Ladle: For evenly pouring the batter onto the griddle.
- Thin Rubber Spatula: For easily removing the thin bread.
Step-by-Step Instructions: The Spongy Shortcut
We are maximizing speed and bubbles. The texture of the final batter should be like thin crepe batter or heavy cream.
Step 1: The Fast Batter Mix (5 Minutes)
- In your large mixing bowl, whisk together the teff flour, optional AP flour, instant yeast, and salt.
- Add the warm water and the apple cider vinegar.
- Whisk vigorously until you have a completely smooth batter. There should be no lumps! Scrape down the sides to ensure all the flour incorporates.
Step 2: The Quick Rise (60 Minutes)
- Cover the bowl loosely with plastic wrap or a kitchen towel.
- Place the batter in a warm place for 60 minutes. A sunny spot or a turned-off oven with the light on works great. The yeast will activate quickly, giving the batter some initial air pockets.
- Check the consistency: The batter should look slightly bubbly and be the consistency of thin pancake batter—easily pourable, but not watery. If it’s too thick, whisk in a tablespoon of water now.
Step 3: The Final Bubble Boost (2 Minutes)
- Uncover the batter. Whisk in the ½ teaspoon of baking soda. The acid from the vinegar will react with the soda, creating a final, quick burst of bubbles. Do this step right before cooking!
- Give the batter one last, gentle whisk and head straight to the stove.
Step 4: The One-Sided Cook (3 Minutes per Injera)
- Preheat your non-stick skillet or griddle over medium-high heat. Test the heat by flicking a drop of water—it should sizzle and evaporate immediately. Do not use oil! Injera is traditionally cooked on a dry surface.
- Use a ¼ cup measuring cup or ladle to pour the batter onto the hot pan, starting at the outside edge and working in a spiral toward the center. Quickly swirl the pan to ensure the batter spreads thinly and evenly.
- Watch the Eyes: Cook uncovered for about 15-30 seconds until small holes (the “eyes”) begin to appear on the surface.
- Cover to Finish: Once the eyes are fully formed, immediately cover the pan with a tight-fitting lid. Cook for another 90 seconds to 2 minutes. Do not flip the injera!
Step 5: Cool and Stack (The Moisture Seal)
- The Injera is done when the top is no longer shiny or wet and the edges are starting to pull away from the pan.
- Use a thin spatula to gently slide the Injera onto a clean kitchen towel or cloth. Immediately cover the Injera with another towel or plastic wrap to keep it moist and pliable.
- Repeat the process until all batter is used. Stack the Injera on top of each other as they cool to keep them soft and spongy.
Calories & Nutritional Info: The Healthy Facts (Estimated)

These are estimates for one large Injera flatbread (approx. 10-12 inches).
- Calories per serving (1 Injera): ~120-150 calories
- Carbohydrates: ~25-30g
- Protein: ~4-5g
- Fiber: High in dietary fiber due to the teff grain.
- Iron: Teff is notoriously rich in Iron, making this a nutritious food staple.
Common Mistakes to Avoid: The Soggy Sponges
You want spongy, flexible Injera, not a raw crepe. Avoid these key mistakes!
- Flipping the Injera: NEVER flip Injera! It is cooked only on one side. The lid traps steam, cooking and setting the top surface. Flipping ruins the texture and the essential “eyes.”
- Too Thick Batter: A thick batter yields a dense, doughy, and sticky Injera that won’t form eyes properly. The consistency must be thin and pourable, like heavy cream.
- Low Heat Limbo: Cooking on low heat results in a limp, pale Injera. Use medium-high heat to ensure the bottom cooks fast and the eyes form quickly.
- Stacking Hot Injera: Stacking hot Injera directly on top of each other traps too much steam, causing them to stick together and become gummy. Let them cool slightly on a cloth before stacking.
- Using Oil: Injera is traditionally cooked on a dry griddle. Using oil makes the bottom crispy, which is incorrect for Injera, and hinders the formation of the eyes.
Variations & Customizations: Your Spongy Canvas
Once you master the base, you can play with the grain and the tang.
- Spiced Cardamom Breakfast: Add ½ teaspoon of ground cardamom and a pinch of cinnamon to the dry ingredients for a warm, fragrant Injera, perfect for pairing with yogurt and fruit.
- Herbal Green: Add 2 tablespoons of finely chopped fresh cilantro and parsley to the batter for a green, herbaceous color and flavor, perfect for wraps.
- Gluten-Boosted (Non-GF option): If gluten is not an issue, use a 1:1 mix of Teff and Bread Flour. The stronger gluten will make the batter easier to handle and the final Injera slightly more pliable.
FAQ Section: The Teff Truth
You’ve got questions about this unique, fermented flatbread. Let’s tackle them.
Q1: What is the purpose of the holes (eyes) in Injera?
A: The small holes, called serata (or “eyes”), are essential for soaking up the Ethiopian stews (wot). They indicate a proper fermentation/leavening process and provide the signature spongy texture.
Q2: Is Teff flour naturally gluten-free?
A: Yes. Teff is an ancient grain that is naturally gluten-free. This makes Injera a safe, traditional bread option for those avoiding gluten.
Q3: How do I get the sour flavor in this express recipe?
A: We use Apple Cider Vinegar to mimic the tang traditionally developed over several days by lactic acid bacteria. The quick acid addition provides the necessary sour notes without the long fermentation wait.
Q4: Why is my Injera sticking to the pan?
A: The pan is likely not hot enough, or it’s not a good quality non-stick surface. Try increasing the heat and ensure you preheat the pan for a full 5 minutes before pouring the batter.
Q5: Can I freeze cooked Injera?
A: Yes! Injera freezes very well. Once cooled completely, stack the Injera (up to 10 at a time) and wrap the stack tightly in plastic wrap, then foil. Thaw overnight in the fridge and warm slightly before serving.
Q6: What should the batter consistency be like?
A: The batter should be the consistency of thin pancake batter or heavy cream—easily pourable but thick enough to hold its shape and bubbles.
Q7: Should I flip the Injera when cooking?
A: No! Injera is cooked only on the bottom. You use a lid to trap steam, which cooks and sets the top surface, creating the spongy texture without flipping.
Final Thoughts: Plate Your Perfection
You just bypassed three days of waiting and created a delicious, spongy, and perfectly tangy Express Injera. Go ahead and use those “eyes” to scoop up your favorite savory dish. You’re too efficient for a multi-day ferment now.