

Ditch the Delivery Fee: The Ultimate Domino’s Garlic Bread Copycat Recipe
Let’s just admit it: sometimes the side dish is the real MVP. You order the pizza, sure, but your eyes are secretly locked on that warm, buttery, perfectly seasoned stick of golden heaven. Yes, I’m talking about Domino’s garlic bread. It’s the comforting, cheesy, herby side that always seems to disappear first. But paying five bucks for six sad sticks? And waiting 45 minutes for delivery? You deserve better. I’m here to tell you that you can capture that elusive, satisfying flavor with the ultimate Domino’s garlic bread copycat recipe, made fresh in your kitchen in minutes. Your pizza night just got a serious, budget-friendly upgrade.
Why This Homemade Garlic Bread Is Your New Obsession
Why bother with a copycat when the delivery guy is just a click away? Because this recipe is awesome, that’s why. It delivers that signature buttery, cheesy, slightly chewy yet crispy crust and that punchy garlic-herb flavor that makes the original so addictive.

First, the flavor is spot-on. We nail that blend of garlic, herbs, and butter. Second, it’s ridiculously fast and easy—especially if you use a little shortcut dough. Third, you control the amount of cheese and garlic. Want it extra cheesy? Go for it! Want double the garlic? You’re the boss! Plus, the joy of pulling a fresh, golden-brown loaf from your own oven is a victory in itself. Seriously, why deal with cold, slightly flattened delivery bread when you can have this fresh perfection?
Ingredients: The Buttery, Garlicky Duo
The key to this copycat is the butter base and the right bread vessel. Keep it simple and focused.
H3: For the Garlic Bread Base
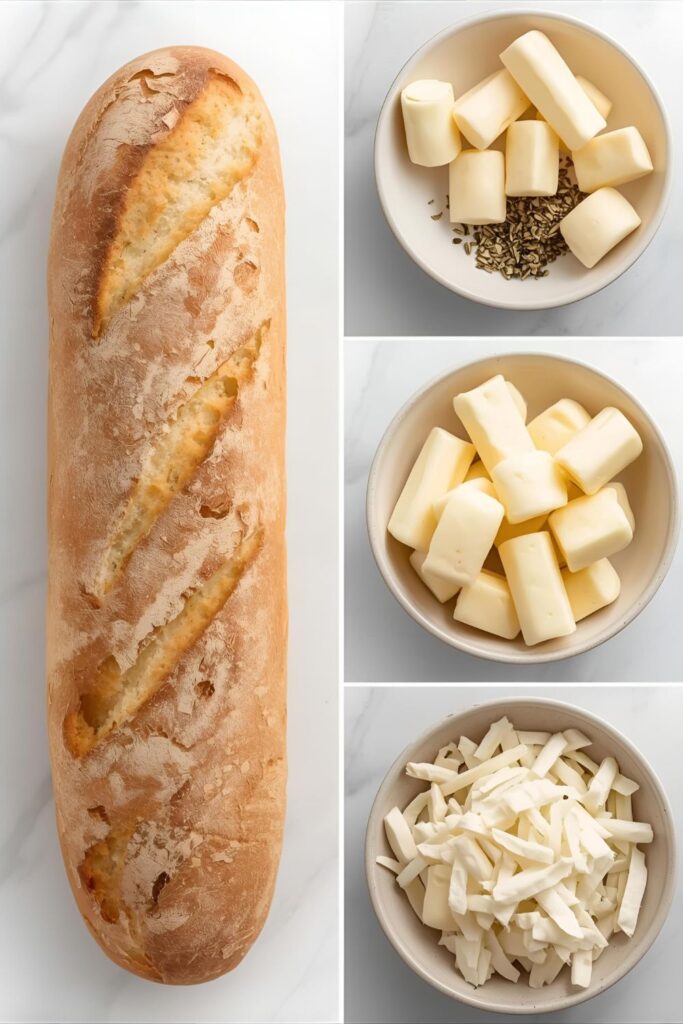
- 1 loaf French Bread or Italian Bread: Choose a soft, oblong loaf.
- 4 tablespoons Unsalted Butter: Softened to room temperature.
- 1 tablespoon Olive Oil: Adds richness and helps the butter spread smoothly.
H3: For the Signature Seasoning
- 2 cloves Fresh Garlic: Minced very finely. Crucial for the flavor!
- 1 teaspoon Garlic Powder: Yes, you need both fresh and powdered garlic for depth!
- 1 teaspoon Dried Oregano: Adds that essential Italian herb profile.
- ½ teaspoon Dried Basil: Rounds out the herbs.
- ¼ teaspoon Salt: Balances the flavors.
- ⅛ teaspoon Black Pepper: Just a tiny dash.
H3: For the Cheesy Top (Optional, but highly recommended!)
- ½ cup Shredded Mozzarella Cheese: For gooey melt.
- ¼ cup Grated Parmesan Cheese: For that sharp, savory crust.

Key Substitutions:
- Bread Swap: Use a Texas Toast-style thick-cut bread for individual slices, or a long, soft baguette. Avoid crusty sourdough here.
- Cheese Swap: A Monterey Jack/Cheddar blend works well for goo, but Mozzarella is closest to the original.
- Herb Swap: If you only have Italian seasoning, use 2 teaspoons of that in place of the oregano and basil.
- Garlic Prep: If you’re out of fresh garlic, use 1 tablespoon of jarred minced garlic and slightly increase the garlic powder, but fresh is superior, IMO.
Tools & Kitchen Gadgets Used: Your Baking Command
No stand mixer needed! Just the basics for spreading and baking.
- Small Mixing Bowl: For combining the garlic butter spread.
- Rubber Spatula or Fork: For mixing the butter spread.
- Sharp Serrated Bread Knife: For slicing the bread without squishing it.
- Baking Sheet: Essential! Line it with foil or parchment paper for easy cleanup.
- Aluminum Foil or Parchment Paper: For lining the sheet pan.
- Measuring Cups and Spoons: For accurate seasoning ratios.
- Basting Brush (optional): For evenly brushing the melted butter on the edges.
Step-by-Step Instructions: The Path to Garlic Greatness
The trick is all in the spread and the bake time. Ready, set, garlic!
H3: Step 1: Prep the Bread
Preheat your oven to $375^{\circ}\text{F}$ ($190^{\circ}\text{C}$). Using a sharp serrated knife, slice your loaf of bread lengthwise. You want two long halves. If your loaf is very thick, you can slice a few shallow diagonal cuts into the bread (don’t cut all the way through!) to help the butter seep in.
H3: Step 2: Whip Up the Garlic Butter
In your small mixing bowl, combine the softened butter and olive oil. Add the minced fresh garlic, garlic powder, dried oregano, dried basil, salt, and black pepper. Use a fork or spatula to mix vigorously until the spread is completely uniform and smooth. You want all those herbs and garlic distributed evenly.
H3: Step 3: Slather Generously
Spread the entire garlic butter mixture generously and evenly over the cut sides of both halves of the bread. Don’t be shy! Get right to the edges. This is not the time for subtlety; this is garlic bread!
H3: Step 4: Toast the Garlic
Place the two buttered halves cut-side up on your foil- or parchment-lined baking sheet. Bake for 5 to 8 minutes until the edges of the bread are slightly crispy and the garlic butter is melted and bubbling. The smell alone is worth the effort!
H3: Step 5: Add the Cheese (The Ultimate Upgrade)
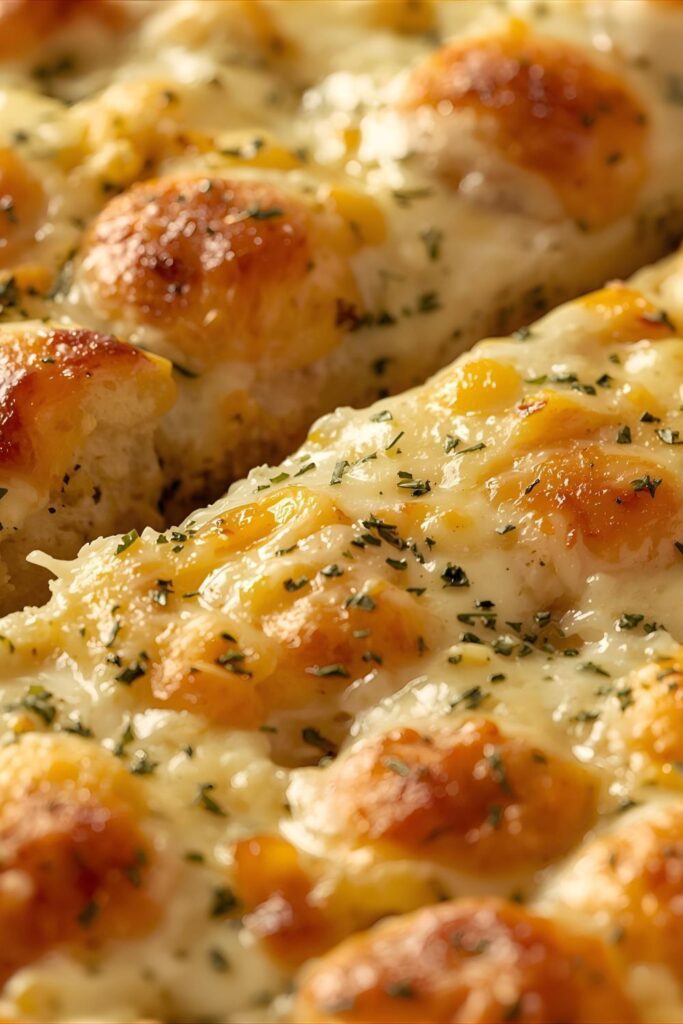
Remove the bread from the oven. Evenly sprinkle the shredded mozzarella cheese over both halves, followed by the grated Parmesan cheese. Place the bread back in the oven.
H3: Step 6: Bake to Golden Perfection
Bake for another 5 to 7 minutes, or until the cheese is completely melted, bubbly, and the Parmesan is starting to turn golden-brown. Watch closely—you want melted cheese, not burnt cheese!
H3: Step 7: Slice and Serve!
Carefully remove the garlic bread from the oven. Slice each half diagonally into your preferred stick size (usually 6-8 pieces). Serve immediately while the cheese is still molten. Dip it in marinara sauce or ranch dressing for the full experience!
Calories & Nutritional Info: The Delicious Truth
Garlic bread is, predictably, high in carbs and fat, but low in regret. These estimates are approximate per stick (assuming 8 sticks per loaf).
- Estimated Calories per stick (1/8th): 150-200 calories
- Fat: 8-12g (from butter, oil, and cheese)
- Carbohydrates: 15-20g (from bread)
- Protein: 5-8g (from cheese)
- Sodium: 200-300mg (varies, but high—it’s fast food style!)
- The Bottom Line: A deliciously comforting side. Enjoy it with your favorite dipping sauce!
Common Mistakes to Avoid: Don’t Ruin the Golden Crust!
Avoid these errors to ensure your garlic bread is crispy, not soggy, and perfect.
- Using Cold Butter: Cold butter won’t blend smoothly with the garlic and herbs. Ensure your butter is fully softened to create that uniform, easy-to-spread base.
- Forgetting the Garlic Powder: Fresh garlic gives aroma, but garlic powder provides that signature processed flavor depth that’s key to the copycat taste. Use both!
- Baking the Cheese Too Long: Adding the cheese too early or baking too long will result in a hard, chewy, or potentially burnt crust. Bake the bread first, then add the cheese for only the last 5-7 minutes.
- Not Slicing the Bread Lengthwise: The classic Domino’s shape is achieved by slicing the soft loaf lengthwise, not by slicing a baguette into circles. Slice it long and grill the entire open surface.
Variations & Customizations: Your Garlic Canvas
The classic is great, but a little creativity never hurt anyone.
- Spicy Chili Flake Kick: Add ½ teaspoon of crushed red pepper flakes to the garlic butter mixture. The heat pairs perfectly with the cheese and herbs.
- Herb Garden Special: Swap the dried herbs for 1 tablespoon of freshly chopped parsley and ½ tablespoon of fresh oregano. The flavor is brighter and more robust!
- Cheddar Bacon Bomb: Replace the mozzarella with shredded sharp cheddar cheese and sprinkle crumbled, cooked bacon over the top before baking. It’s cheesy, savory, and gloriously over-the-top.
FAQ Section: Answering Your Cheesy Questions
You’ve got questions about this iconic side. I’ve got answers.
H3: Q1: What kind of bread is best for this copycat recipe?
A1: A soft Italian or French loaf (not a crusty baguette) is best, as it most closely mimics the soft, slightly chewy texture of the original.
H3: Q2: Can I use this recipe to make frozen garlic bread?
A2: Yes! Prepare the garlic butter, spread it on the bread, wrap the halves tightly in plastic wrap, then foil, and freeze for up to 3 months. To bake, unwrap the foil and bake at $400^{\circ}\text{F}$ ($200^{\circ}\text{C}$) for 15-20 minutes.
H3: Q3: What is the secret to the Domino’s garlic bread flavor?
A3: The secret lies in using both fresh garlic and garlic powder for a layered flavor, combined with dried Italian herbs (oregano/basil) and a generous amount of butter and cheese.
H3: Q4: Why is my garlic bread soggy?
A4: Your garlic bread is likely soggy because you used too much butter/oil or didn’t bake it long enough to crisp the bottom. Bake for 5-8 minutes before adding cheese to drive out moisture.
H3: Q5: What is the best dipping sauce for garlic bread?
A5: The classic choices are marinara sauce or ranch dressing. A creamy pesto or a spicy red pepper sauce also works beautifully.
H3: Q6: Can I use olive oil instead of butter?
A6: You can, but it won’t be as rich or accurate to the copycat flavor. Butter is key for the richness! You can use half butter, half olive oil for a compromise.
H3: Q7: How do I store and reheat leftover garlic bread?
A7: Store leftovers in a paper bag or loose foil at room temperature for up to 2 days. Reheat in the oven or air fryer for a few minutes to regain the crispy crust. Never microwave!
Final Thoughts: The Delivery Guy is Fired!
You did it! You’ve mastered the ultimate, buttery, cheesy Domino’s garlic bread copycat. Go ahead, take a proud bite. Does it taste exactly like the delicious side you deserve? I knew it would. You are now a garlic bread wizard. Are you ever paying for that overpriced delivery bread again? I highly doubt it. Enjoy your incredibly accurate, homemade victory!

