Escape to the Tropics: The Absolute Best Homemade Coconut Cream Pie Recipe
Let’s talk about those days when you desperately need a vacation, but your budget says, “Stay home and stare at the wall.” Instead of booking a flight, book a date with your kitchen! Because nothing transports you to a sandy beach faster than the creamy, dreamy flavor of Coconut. Specifically, we’re making the ultimate Coconut Cream Pie—a dessert so rich, so luscious, and so packed with tropical flavor, you’ll forget about that pile of laundry in the corner. This isn’t just a recipe; it’s a tropical staycation in a single slice.
Why This Coconut Pie Recipe Is Your New Happy Place

Why bother with a homemade pie when you can just buy a pale imitation from the freezer aisle? Because this recipe is awesome, that’s why. It delivers a velvety, thick, and deeply flavored custard that store-bought versions can only dream of achieving.
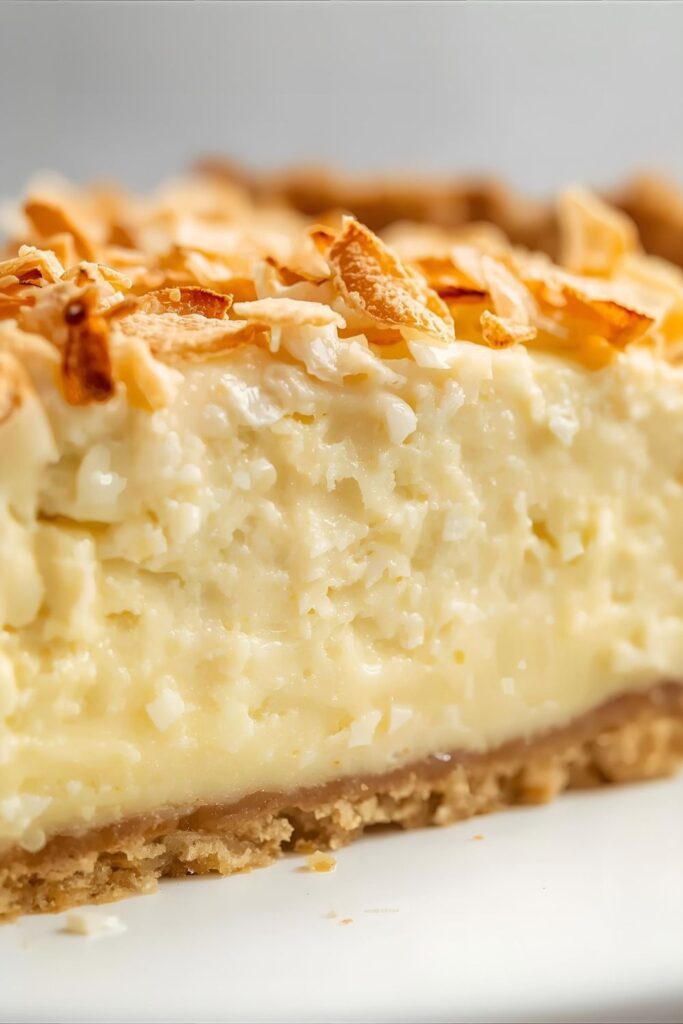
First, the texture is pure perfection. We nail that rich, smooth filling that isn’t too wobbly and holds up beautifully under a cloud of whipped cream. Second, the flavor is intense—we use three different forms of coconut (milk, extract, and toasted flakes) to ensure maximum tropical impact. Third, it impresses absolutely everyone. You set this gorgeous, towering pie down, and suddenly you are the undisputed dessert champion. Seriously, who needs a beach when you have this level of creamy bliss?
Ingredients: The Tropical Holy Trinity
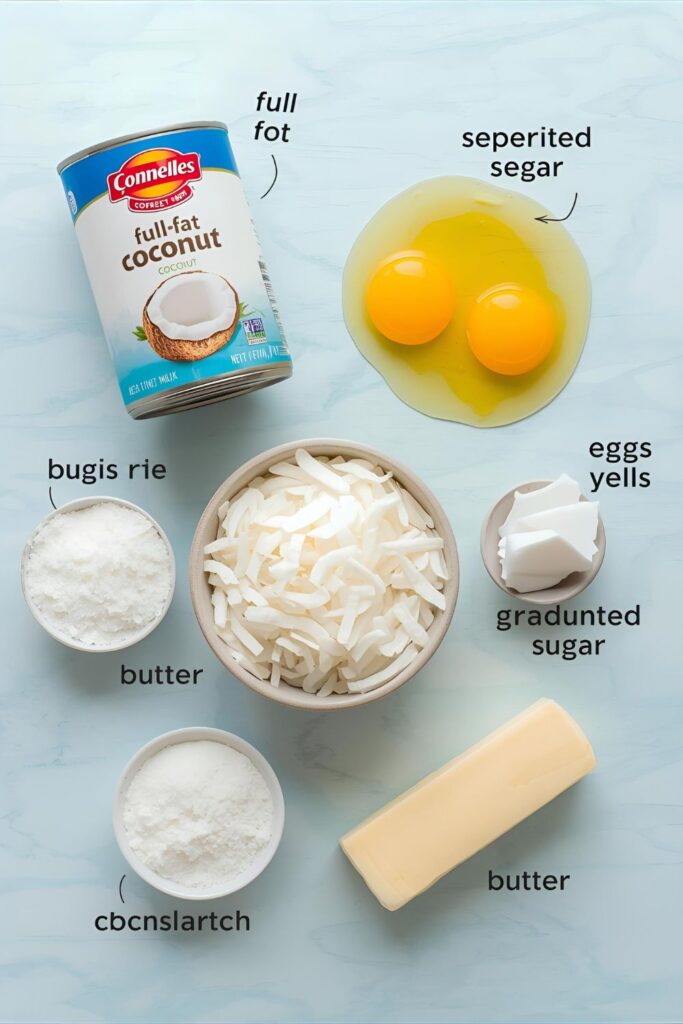
We’re focusing on quality dairy and triple-coconut power to maximize the tropical escape in every bite.
H3: For the Flaky Pie Crust
- 1 pre-made 9-inch Pie Crust: Baked and cooled (deep dish preferred). Seriously, save yourself the stress!
- Optional: Shredded Coconut: 2 tablespoons, mixed into the crust dough before baking for extra flavor.
H3: For the Creamy Coconut Custard Filling
- 1 ½ cups Full-Fat Coconut Milk (Canned): Don’t use the beverage kind! The full-fat cream is essential for richness.
- ½ cup Granulated Sugar: The perfect level of sweetness.
- ½ cup Cornstarch: Our thickening hero—prevents a runny filling.
- 4 large Egg Yolks: Separated. These provide the rich color and silky texture.
- 2 tablespoons Unsalted Butter: Adds gloss and richness.
- 1 teaspoon Pure Coconut Extract: Crucial for that intense, authentic flavor. Don’t skip it, IMO.
- ½ cup Sweetened Flaked Coconut: Toasted (see instructions) and added into the filling.
H3: For the Cloud of Topping
- 1 ½ cups Heavy Whipping Cream: Chilled.
- ¼ cup Powdered Sugar: For sweetening the whipped cream.
- 1 teaspoon Vanilla Extract: For flavor.
- ½ cup Sweetened Flaked Coconut: Toasted, for garnish.
Key Substitutions:
- Dairy Swap: Use full-fat heavy cream instead of coconut milk if you prefer a non-tropical richness, though you lose some coconut flavor.
- Sweetener Swap: Use an equal amount of Swerve or monk fruit sweetener (granulated version) to replace the sugar for a low-carb version.
- Flour/Starch Swap: You can use 1/3 cup of all-purpose flour in place of the cornstarch, but cornstarch gives a silkier mouthfeel.
Tools & Kitchen Gadgets Used: Your Baking Beach Shack
You won’t need a stand mixer, but a sturdy whisk and a good pot are key.
- 9-inch Deep-Dish Pie Plate: For the perfect towering slice.
- Medium Heavy-Bottomed Saucepan: Essential! Prevents scorching the custard.
- Whisk: For making the custard smooth and for whipping the cream.
- Fine-Mesh Sieve/Strainer: For straining the custard (optional, but guarantees silkiness).
- Rubber Spatula: For scraping down bowls and folding.
- Electric Mixer (Handheld or Stand): Highly recommended for whipping the heavy cream into perfect peaks.
- Measuring Cups and Spoons: For crucial accuracy.
- Small Frying Pan: For toasting the coconut flakes.
Step-by-Step Instructions: Creating Tropical Bliss
Custard can be a drama queen, so pay attention to the heat! We want smooth, thick perfection.
H3: Step 1: Toast the Flakes (The Aroma Test)
Preheat your oven to $350^{\circ}\text{F}$ ($175^{\circ}\text{C}$) or use a dry, medium frying pan on the stovetop. Spread all the sweetened flaked coconut (for both filling and topping) on a baking sheet or in the pan. Toast until golden brown and fragrant (about 5-8 minutes in the oven, less on the stove), stirring frequently. Set aside and let cool completely.
H3: Step 2: Build the Custard Base
In your medium saucepan, whisk together the coconut milk, sugar, and cornstarch. Place the saucepan over medium heat, stirring constantly until the mixture comes to a gentle boil and thickens significantly. This should take about 5-8 minutes. It needs to be thick enough to coat the back of a spoon!
H3: Step 3: Temper the Yolks (The Safety Dance)
While the base heats, whisk the 4 egg yolks in a separate bowl. Once the milk mixture is thick, remove it from the heat. Slowly drizzle about 1/2 cup of the hot milk mixture into the egg yolks while vigorously whisking the yolks. This “tempers” the eggs and prevents them from scrambling.
H3: Step 4: Combine & Cook
Pour the tempered egg mixture back into the saucepan with the remaining hot milk mixture. Return the saucepan to low heat and cook for 1-2 minutes, stirring constantly. Do not let it boil! Remove immediately once it thickens slightly more.
H3: Step 5: Finish the Filling
Take the saucepan off the heat. Stir in the butter, coconut extract, and ½ cup of the cooled toasted coconut flakes. Pour the entire filling immediately into your baked and cooled pie crust. Cover the surface of the filling directly with plastic wrap (this prevents a skin from forming).
H3: Step 6: Chill Out
Refrigerate the pie for at least 4-6 hours, or preferably overnight. This long chill time is essential for the custard to set fully and be sliceable. Patience is hard, but it’s crucial here!
H3: Step 7: The Whipped Cloud Topping
Just before serving, beat the chilled heavy whipping cream, powdered sugar, and vanilla with an electric mixer until stiff peaks form. Pile the whipped cream high on top of the chilled pie. Garnish generously with the remaining toasted coconut flakes. Slice and serve!
Calories & Nutritional Info: The Sunny Side
This is a rich dessert, so embrace the deliciousness! These estimates are approximate per 1/8th slice.
- Estimated Calories per serving (1/8th slice): 400-550 calories
- Fat: 28-40g (high-fat, thanks to heavy cream, coconut milk, and yolks)
- Carbohydrates: 30-45g (sugar, crust, cornstarch)
- Protein: 5-8g
- Note on Saturated Fat: Full-fat coconut milk is high in saturated fat. You knew that, right? 😉
- Mood Enhancer: Provides 100% of your daily requirement for tropical happiness.
Common Mistakes to Avoid: Do Not Scramble the Custard!
Custard is finicky. Dodge these errors for a perfect, silky filling.
- Scorching the Milk Base: Always use a heavy-bottomed pot and stir constantly when heating the milk and cornstarch. Scorched milk ruins the entire filling.
- Scrambling the Eggs: Adding the egg yolks directly to the hot base without tempering is a disaster. Always drizzle the hot milk slowly into the yolks while whisking vigorously to equalize the temperature.
- Under-Thickening the Filling: The filling must be very thick before you add the egg yolks back in. If it’s too thin, it won’t set up properly in the fridge. Cook it longer if necessary!
- Not Chilling Long Enough: A pie that hasn’t fully chilled will weep and be runny when sliced. Give the pie a minimum of 4 hours (overnight is best) to set.
- Oiling Out (Weeping): If the custard gets too hot after the eggs are incorporated, it can separate and weep liquid later. Keep the heat low in Step 4 and watch it like a hawk.
Variations & Customizations: Your Tropical Tweak
Once you master the base, the island is yours to explore!
- Chocolate Coconut Dream: Drizzle a layer of melted dark chocolate over the cooled crust before pouring in the filling. The chocolate/coconut pairing is a classic for a reason!
- Lime Coconut Zing: Replace half the coconut extract with lime zest and juice (about 1 tablespoon each). This adds a bright, refreshing tartness that cuts the richness perfectly.
- Toasted Macadamia Nut Crust: Swap the graham cracker crust for a finely crushed vanilla wafer and toasted macadamia nut crust. The buttery crunch of the macadamias elevates the entire pie to a gourmet level.
FAQ Section: Solving Your Tropical Troubles
You’ve got questions about this slice of paradise. I have the answers.
H3: Q1: Why did my coconut cream pie filling not set?
A1: The filling likely didn’t set because it didn’t get thick enough during the cooking process (Step 2 and 4), or you didn’t chill it long enough. The cornstarch needs to cook long enough to activate its thickening power.
H3: Q2: Can I use light coconut milk?
A2: Light coconut milk is not recommended as it lacks the fat and richness needed for a truly thick, luxurious custard. Use full-fat canned coconut milk for the best texture and flavor.
H3: Q3: What is the best way to toast coconut flakes?
A3: The easiest way is to spread them on a baking sheet and bake at $350^{\circ}\text{F}$ ($175^{\circ}\text{C}$) for 5-8 minutes, stirring every few minutes, until golden. Watch them closely—they burn fast!
H3: Q4: Can I freeze coconut cream pie?
A4: Yes! Freeze the pie (without the whipped cream topping) until solid. Wrap it tightly in plastic wrap and then foil. Thaw in the refrigerator overnight, then add fresh whipped cream just before serving.
H3: Q5: Why did the eggs scramble in my custard?
A5: The eggs scrambled because you added them too quickly to the hot milk base without tempering (Step 3). The sudden heat cooked the yolks instantly. Always temper the yolks slowly with hot liquid first!
H3: Q6: Do I need to bake the crust before filling it?
A6: Yes, pre-baking (“blind baking”) the crust is essential for a custard pie. It prevents a soggy bottom and ensures the crust is fully cooked before the heavy, wet filling is added.
H3: Q7: Can I use this filling recipe for tarts or mini pies?
A7: Absolutely! Use this filling recipe for small tart shells or mini pie crusts. Just remember that the chilling time will be shorter for smaller portions, usually 2-3 hours.
Final Thoughts: Welcome to Paradise!
You did it! You created a magnificent, creamy, perfectly set, and intensely tropical Coconut Cream Pie. Go ahead, take a massive, satisfying slice. Does it taste exactly like the vacation you deserve? I knew it would. You’ve officially earned the title of Tropical Dessert Overlord. Are you ever going back to those sad, watery freezer pies again? I highly doubt it. Enjoy your slice of paradise!