
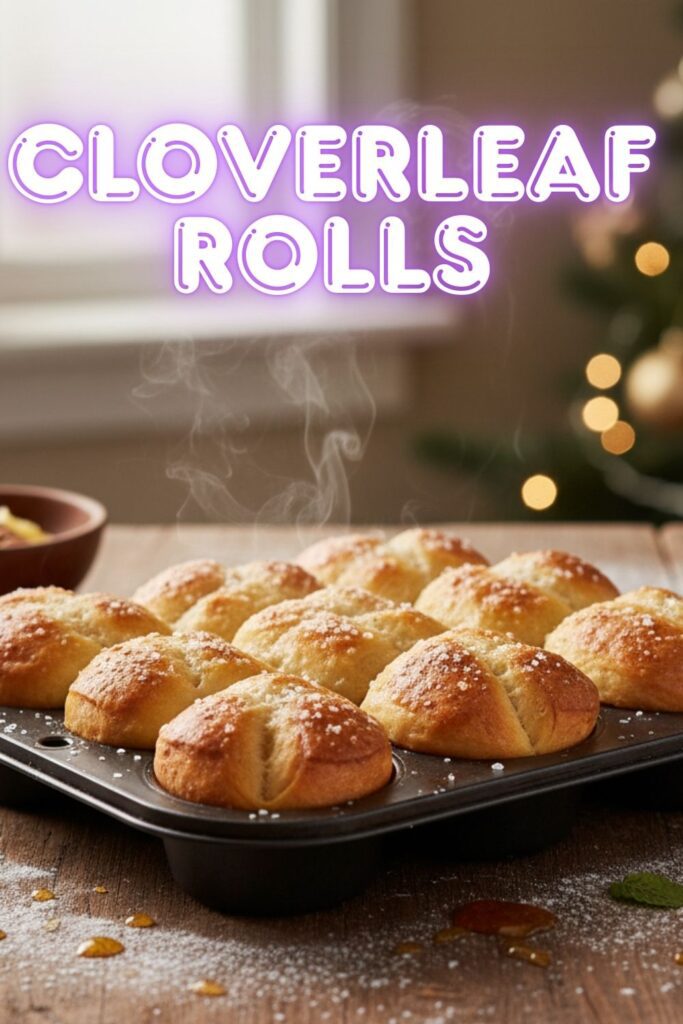
Soft, Buttery, and Totally Adorable: The Ultimate Cloverleaf Rolls Recipe
Let’s be real. There’s nothing more satisfying than pulling apart a warm dinner roll, especially when it’s made from scratch. But what if you could make a roll that’s not only delicious but also ridiculously cute? Enter the cloverleaf rolls. They are soft, fluffy, buttery, and have a beautiful, three-lobed shape that makes them feel extra special. They look like they took you all day, but they are surprisingly simple to make. Get ready to be the hero of every dinner party and family meal from now on.
Why This Recipe Is a Must-Bake

Why should you bother making these? Because they are the perfect combination of form and function. They’re a classic for a reason. The three-ball shape gives you an incredible amount of surface area for that perfect buttery crust, while the inside remains soft and tender. The process of shaping them is surprisingly therapeutic, and the end result is a roll that is almost too pretty to eat. Almost. These rolls are so much better than anything you can buy at the store, and they are a perfect way to add a little extra love to your holiday table.
Ingredients: Your Shopping List for Softness

This recipe uses simple, classic ingredients. Don’t try to get fancy here. The magic is in the method.
- 2 ¼ teaspoons active dry yeast. This is one standard packet. Make sure it’s fresh!
- 1 cup warm milk. It should be about 105-115°F. Too hot, and you’ll kill the yeast. Too cold, and it won’t activate. Use a kitchen thermometer.
- ¼ cup granulated sugar. Feeds the yeast and adds a touch of sweetness.
- 1 large egg, room temperature.
- ¼ cup unsalted butter, melted and cooled.
- 3 to 3 ½ cups all-purpose flour.
- 1 teaspoon salt.
- For the Butter Coating:
- ¼ cup unsalted butter, melted.
Tools & Kitchen Gadgets You’ll Need
- Large mixing bowl.
- Measuring cups and spoons.
- Kitchen thermometer. For checking the milk temperature.
- Large spoon or spatula.
- 12-cup muffin tin. This is essential for the cloverleaf shape!
- A clean kitchen towel or plastic wrap. For covering the dough while it rises.
- Pastry brush. For the buttery coating.
Step-by-Step Instructions: The Path to Baking Bliss

Let’s get down to business. Follow these steps, and you’ll be a cloverleaf roll pro in no time.
- Activate the yeast. In your large mixing bowl, whisk together the warm milk, yeast, and sugar. Let it sit for about 5-10 minutes. You should see a foamy layer form on top. If it doesn’t foam, your yeast might be dead. Time to start over!
- Add the wet ingredients. Once the yeast is foamy, whisk in the egg and the melted butter.
- Mix the dough. Gradually add the flour, about a cup at a time, mixing with a large spoon. Add the salt with the second cup of flour. Once the dough becomes too stiff to stir, turn it out onto a lightly floured surface.
- Knead, knead, knead! Knead the dough for 5-8 minutes. It should be soft, smooth, and elastic. You’ll know it’s ready when you press your finger into it and it springs back. This is the arm workout you’ve been avoiding.
- First rise. Lightly grease your mixing bowl. Place the dough in the bowl, cover it with a clean kitchen towel or plastic wrap, and let it rise in a warm, draft-free place for about 1 hour, or until it has doubled in size.
- Shape the rolls. Once the dough has doubled, punch it down to release the air. Turn it out onto a lightly floured surface. Divide the dough into 12 equal pieces. Divide each piece into three smaller balls (about the size of a large marble).
- Assemble the cloverleafs. Melt the ¼ cup of butter for the coating. Dip each of the small dough balls into the melted butter and place three butter-coated balls into each cup of your greased muffin tin.
- Second rise. Cover the muffin tin with a clean kitchen towel and let the rolls rise for another 30-45 minutes, or until they are puffed up and touching each other.
- Bake to perfection. Preheat your oven to 375°F (190°C). Pop the rolls into the oven and bake for 15-20 minutes. They are ready when they are a beautiful golden brown on top.
- Butter and serve! As soon as the rolls come out of the oven, brush the tops with a little more melted butter. This makes them extra soft and shiny. Serve them warm.
Calories & Nutritional Info

Since these are homemade, the calories are an estimate, but they are a wholesome addition to your holiday meal.
- Estimated Calories per roll: ~150-180 calories (depending on the size)
- Carbs: ~25-30g
- Protein: ~4g
- Dietary Note: While they’re not low-cal, they are a fantastic source of carbohydrates for energy. You know you’re going to eat them, so don’t even worry about it.
Common Mistakes to Avoid (Unless You Enjoy Sad, Dense Rolls)
- Using the wrong water temperature. This is a common rookie mistake. If your water is too hot, you’ll kill the yeast. Too cold, and it won’t activate. Use a thermometer to be precise.
- Not kneading enough. Kneading is what develops the gluten, which gives the rolls their structure and makes them so fluffy. Don’t be afraid to put some muscle into it.
- Not letting the dough rise long enough. Patience is a virtue, especially when it comes to bread. Let the dough double in size for both rises. If you rush it, your rolls will be dense.
- Skipping the melted butter coating. Dipping the small balls of dough in melted butter before placing them in the muffin tin is what keeps them from sticking together and gives you that perfect, easy-to-pull-apart texture.
Variations & Customizations: Be a Baking Innovator
You can easily tweak this recipe to fit your taste. Don’t be afraid to add your own flair!
- Garlic Herb Rolls: Add a teaspoon of garlic powder and a tablespoon of fresh chopped herbs (rosemary, thyme, or parsley) to the dough when you add the flour. Brush with garlic butter after baking.
- Honey Wheat Rolls: Substitute 1 cup of the all-purpose flour with whole wheat flour. Swap the granulated sugar for honey and add an extra tablespoon or two of milk to get the right consistency.
- Cheesy Rolls: Fold ½ cup of shredded cheddar or Parmesan cheese into the dough after kneading. Brush with melted butter and a sprinkle of cheese before baking.
FAQ Section: All Your Dinner Roll Questions Answered
Can I make the dough in a stand mixer? Yes, you can! Use the dough hook and knead on medium-low for about 5-7 minutes, or until the dough is smooth and elastic.
Can I freeze the dough or baked rolls? You can freeze the shaped, unbaked rolls. Place them on a baking sheet and freeze until solid, then transfer to a freezer bag. When you want to bake them, just take them out and let them thaw and rise before baking. You can also freeze baked and cooled rolls.
How do you know when the dough has risen enough? You’ll know it’s ready when it has doubled in size. You can also do the “poke test”: gently poke your finger into the dough. If the indentation remains, it’s ready.
Why is my dough so sticky? This usually means you need to add a little more flour. Add a tablespoon at a time and knead it in until the stickiness is gone and the dough is soft and smooth.
Can I use instant yeast instead of active dry yeast? You can, but the method is slightly different. You don’t need to proof it first. Just add it directly to your flour and other dry ingredients, then add the wet ingredients and mix.
How do I make them extra soft? The key to a soft roll is to make sure you don’t overbake them. Take them out of the oven as soon as they are golden brown. Brushing them with melted butter right after they come out also helps.
What is the best way to store leftover rolls? Store them in an airtight container or a plastic bag at room temperature for up to 3 days. To reheat, wrap them in foil and pop them in the oven for a few minutes.
Final Thoughts
And there you have it. You now have the power to create a dinner side dish that is so much better than anything you can buy at the store, and they are a perfect way to add a little extra love to your family dinner. These homemade cloverleaf rolls are so good, so easy, and so utterly irresistible that you’ll be making them all the time. So go on, get baking, and prepare for a chorus of “Mmmms” and “Oh my gods” from your family and friends.

