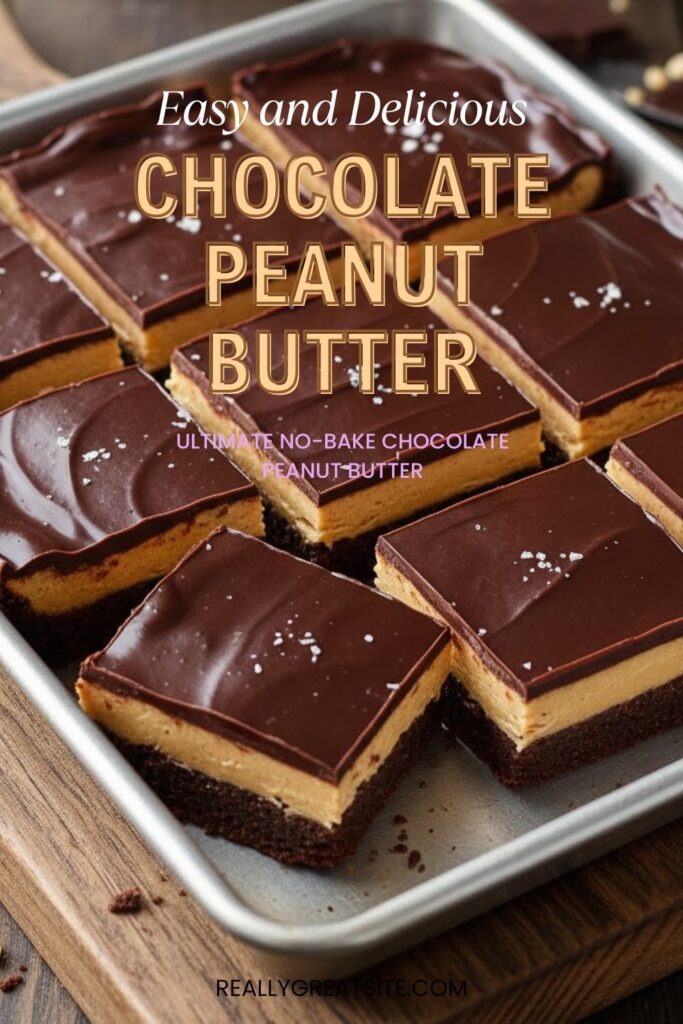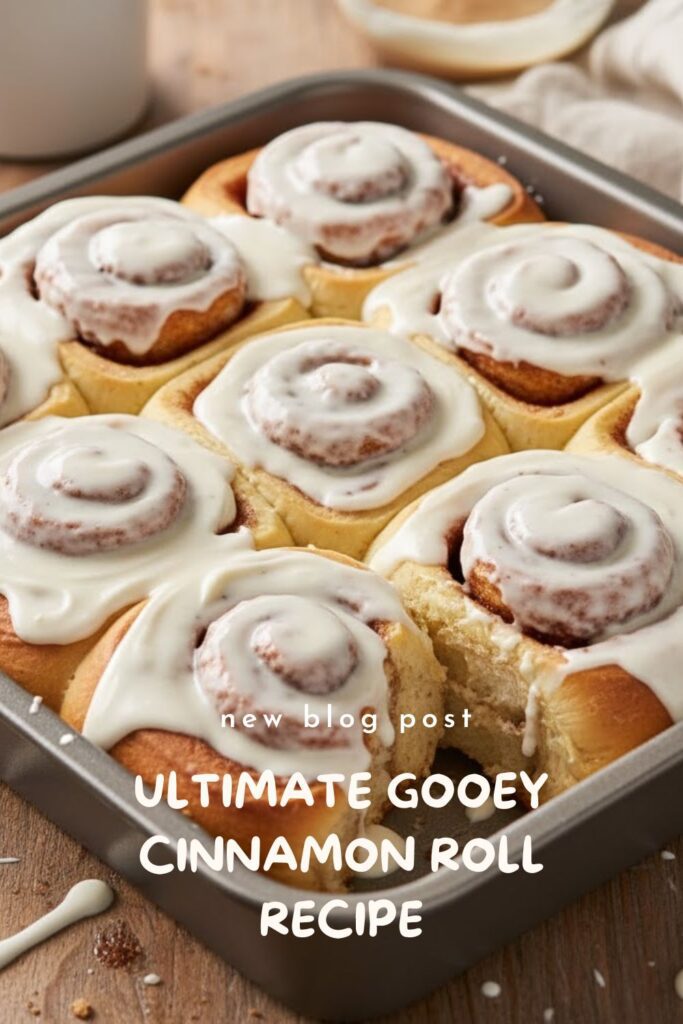
Forget the Cans: Your Guide to the Gooey, Sticky, Ultra-Fluffy Cinnamon Roll
Let’s just address the elephant in the kitchen: the smell of baking cinnamon rolls is one of the world’s great viral hooks. It makes your house feel like a giant, warm hug and instantly makes you a domestic god or goddess. I used to think the only way to get that bakery-style, pillowy-soft perfection was through a cardboard tube (shudder) or an all-day baking marathon. But, my friend, I cracked the code. This recipe gives you the ultimate cinnamon roll: soft, sweet, loaded with brown sugar goo, and topped with a creamy frosting that will make you weep. Why settle for dried-out sadness when you can have this? Seriously, you deserve this level of buttery bliss.
Why This Recipe Is Awesome (And Why You’re Now the Breakfast Queen)

You need to make this. Not just because it’s a cinnamon roll, but because this specific recipe guarantees results. It’s awesome because:
- Pillowy Soft Perfection: We use an enriched dough (meaning milk, eggs, and butter!) that stays ridiculously soft. No dry, crumbly rolls here.
- The Goo Factor: We are generous with the butter and brown sugar filling. When it bakes, it melts into the bottom of the pan, creating a sticky, caramelized sauce that coats the rolls. This is the secret to the gooey center.
- Impressive, Yet Manageable: Yes, it requires some waiting (yeast is slow, darling), but the hands-on time is totally doable. You will impress guests so much they’ll forget all your past culinary failures.
Ingredients: The Pillars of Pastry Perfection

Gather your staples. Quality ingredients matter here, especially the butter.

For the Dough:
- 1 cup (240ml) Whole Milk (Warm, about 105-115°F / 40-46°C): Crucial for waking up the yeast. Whole milk adds richness.
- 2 ¼ teaspoons (1 packet) Active Dry or Instant Yeast: Our rising agent!
- ¼ cup Granulated Sugar: Feeds the yeast and sweetens the dough.
- 1 large Egg + 1 Egg Yolk (Room Temperature): Extra yolk = extra richness and tenderness.
- 4 tablespoons (½ stick) Unsalted Butter (Melted and Cooled): Enriches the dough beautifully.
- 3 cups All-Purpose Flour (plus extra for dusting): Use a good quality brand.
- 1 teaspoon Salt: Balances the sweetness. Don’t skip this, ever!
For the Filling:
- ½ cup (1 stick) Unsalted Butter (Softened, not melted!): Must be soft enough to spread easily.
- ¾ cup Packed Light Brown Sugar: Provides deep molasses flavor and the goo.
- 2 tablespoons Ground Cinnamon: Use a high-quality, fragrant cinnamon.
For the Cream Cheese Frosting (Non-Negotiable):
- 4 ounces Cream Cheese (Softened, Full Fat): For that essential tangy note.
- 4 tablespoons Unsalted Butter (Softened): Makes the frosting smooth and luxurious.
- 1 ½ cups Powdered Sugar (Sifted): Eliminates lumps. Lumpy frosting is a tragedy.
- ½ teaspoon Vanilla Extract (Pure, not imitation): Pure vanilla is always better, IMO.
- 1-2 tablespoons Whole Milk (as needed for consistency): Thins it out perfectly.
Tools & Kitchen Gadgets Used: Your Baking Crew
Have your gear ready. It makes the whole process smoother (and gives me affiliate link opportunities—win-win!).
- Large Mixing Bowl or Stand Mixer: A stand mixer with a Dough Hook saves your arms, TBH.
- Liquid Measuring Cup and Dry Measuring Cups/Spoons: Precision matters, even if we are chatting casually.
- Kitchen Thermometer: Use it for the milk. You don’t want to kill the yeast!
- Whisk: For combining dry ingredients and making the frosting.
- Rubber Spatula: For scraping the sides of the bowl.
- Rolling Pin: For rolling out the dough rectangle.
- 9×13-inch Baking Pan: The classic size for a dozen rolls.
- Plastic Wrap or Clean Kitchen Towel: For covering the dough while it rises.
- Dental Floss (Unflavored) OR a Sharp Knife: Dental floss is the secret weapon for clean cuts!
- Pastry Brush (Optional): For brushing the dough with melted butter.
Step-by-Step Instructions: The Road to Roll Redemption
Put on some music and grab a coffee. We’re going to make some soft, delicious history.
Step 1: Proof the Yeast and Enrich the Dough (10 Minutes)
- In your large mixing bowl (or stand mixer bowl), combine the warm milk (105-115°F is the sweet spot!) and the granulated sugar. Sprinkle the yeast over the top.
- Let it sit for 5-10 minutes. You must see a foamy, bubbly cap form on the surface. That means your yeast is active and ready to work! If it doesn’t foam, your yeast is dead or your milk was too hot/cold. Start over.
- Add the melted butter, egg, and egg yolk to the yeast mixture. Give it a gentle mix.
Step 2: Mix, Knead, and Rise #1 (90-120 Minutes)
- In a separate bowl, whisk together the flour and salt.
- Gradually add the flour mixture to the wet ingredients. Mix until a shaggy dough forms.
- If using a stand mixer, knead with the dough hook for 6-8 minutes on medium-low speed. If kneading by hand, knead for 8-10 minutes on a lightly floured surface. The dough should be soft, supple, and slightly tacky, but not overly sticky.
- Place the dough in a lightly oiled bowl, turn it once to coat, and cover it tightly with plastic wrap or a kitchen towel.
- Let it rise in a warm, draft-free spot for 60-90 minutes, or until it has doubled in size.
Step 3: Fill, Roll, and Cut (15 Minutes)
- While the dough is rising, mix the softened butter, brown sugar, and cinnamon for the filling in a small bowl. It should be a creamy, spreadable paste.
- Once the dough has doubled, gently punch it down to release the air.
- Turn the dough out onto a lightly floured surface. Roll it into a large rectangle, about 12 inches wide by 18 inches long, and about ¼-inch thick. Roll evenly!
- Spread the filling evenly across the entire surface of the rectangle. Spread it all the way to the edges.
- Starting from the 18-inch side, roll the dough tightly into a log. Pinch the seam shut firmly.
Step 4: Final Rise and Bake (60 Minutes)
- Use a piece of unflavored dental floss (seriously, it gives the cleanest cut!) to slice the log into 12 rolls (each about 1.5 inches thick). Place the rolls cut-side up in your generously buttered 9×13-inch pan.
- Cover the pan loosely and let the rolls rise again in a warm spot for 30-45 minutes, or until they look puffy and are touching each other. They won’t quite double this time, but they should look much bigger.
- Optional Goo-Boost: Right before baking, pour ¼ cup of warm heavy cream over the top of the rolls. This is a game changer for gooey centers!
- Preheat your oven to 350°F (175°C).
- Bake for 20-25 minutes, or until the tops are golden brown. Do not overbake! They should look soft in the middle.
Step 5: Frosting Fiesta (5 Minutes)
- While the rolls are still warm (but not piping hot), prepare the frosting. Beat the cream cheese and butter until smooth.
- Gradually beat in the sifted powdered sugar, vanilla, and milk until you have a smooth, spreadable consistency.
- Drown the warm rolls in the frosting. Be generous. No one ever complained about too much frosting. Serve immediately!
Calories & Nutritional Info: The Delicious Truth (Estimated)

These are estimated figures for one medium-sized roll with frosting. Don’t worry about it too much; you earned this.
- Calories per serving (1 roll with frosting): ~350-420 calories
- Carbohydrates: ~50-65g
- Fat: ~15-20g
- Protein: ~6-8g
Nutritional Notes:
- This is an indulgent treat. Enjoy it!
- The richness comes from the whole milk, butter, and egg yolks.
- To reduce sugar slightly: Use less sugar in the dough and filling (though it affects the final texture).
Common Mistakes to Avoid: From Fluff to Failure
Save yourself the disappointment. Don’t make these common cinnamon roll slip-ups.
- Dead Yeast Disaster: Milk temperature is key! Too hot (above 120°F)? You kill the yeast. Too cold? The yeast sleeps. Use your thermometer! This is why we proof it first.
- Too Much Flour: Adding too much flour during kneading or rolling makes the dough stiff, which results in tough, dry rolls. The dough should be soft, even a little sticky before the first rise. Resist the urge to add all the flour!
- Under-Kneading: Not kneading enough means the gluten won’t develop, and the rolls will be flat and dense. Knead until the dough looks smooth and stretchy.
- Overbaking: The ultimate tragedy. You want the rolls barely golden on top and slightly underdone in the center. Overbaking = dry rolls. Err on the side of underbaking!
- Using a Knife to Cut: A knife crushes the layers, making the centers pop up. Use unflavored dental floss—slide it under the log, cross the ends, and pull quickly for a perfect, clean cut.
Variations & Customizations: Roll Your Own Way
Life’s too short for just one kind of roll. Try these fun tweaks!
- Pecan Caramel Rolls: After greasing your pan, spread a mixture of ½ cup brown sugar, 4 tablespoons melted butter, and ½ cup chopped pecans on the bottom. Place the rolls on top. The caramel flips over when baked!
- Orange Zest Zing: Add 1 tablespoon of fresh orange zest to the dough mixture and 1 teaspoon of orange zest to the cream cheese frosting for a bright, citrusy lift.
- Pumpkin Spice Latte Roll: Substitute ¼ cup of canned pumpkin puree into the dough and swap a tablespoon of the cinnamon for a pumpkin spice blend in the filling. Perfect for fall!
FAQ Section: All Your Gooey Questions Answered
We know this process can feel intimidating. Here’s what people usually want to know.
Q1: Can I make the cinnamon rolls ahead of time?
A: Yes! After cutting the rolls (Step 4), cover the pan tightly and refrigerate them overnight (8-12 hours). Take them out and let them come to room temperature for about 1 hour before baking. This gives them a rich flavor!
Q2: Why are my cinnamon rolls dry and tough?
A: Usually, this means you added too much flour during the kneading/rolling, or you overbaked them. Next time, measure your flour by weight (FYI, it’s more accurate!) and pull them from the oven sooner.
Q3: What is the best way to cut the rolls cleanly?
A: Unflavored dental floss! Slide a piece of floss under the log where you want to cut, cross the ends over the top, and pull them tightly in opposite directions. It slices right through without crushing the dough layers.
Q4: Why did my dough not rise?
A: Your yeast likely died. The milk was too hot, or the yeast was expired. Always check the temperature of your liquid and ensure your yeast is fresh by proofing it first (looking for that foam!).
Q5: Can I substitute all-purpose flour for bread flour?
A: Yes, you can. All-purpose flour yields a slightly more tender, less chewy roll, which is what many people prefer for a soft roll. Bread flour, with its higher protein, creates a chewier texture.
Q6: How do you store leftover cinnamon rolls?
A: Store baked, frosted rolls in an airtight container at room temperature for up to 2 days, or in the fridge for 3-5 days. Zap them in the microwave for 15-20 seconds to bring back the fresh-baked softness!
Q7: Should I use softened or melted butter for the filling?
A: Softened, room temperature butter is best. You want to mix it into a paste with the sugar and cinnamon. Melted butter will leak out during the rise and bake, making a big, sticky mess on your pan (and sacrificing the gooey center!).
Final Thoughts: The Smell of Success
You did it, you beautiful baker! You conquered the yeast, tamed the butter, and now you have a dozen perfect, gooey, ridiculously fluffy cinnamon rolls. Go ahead, take a bite that requires multiple napkins. You have officially upgraded your life. Share this recipe with a friend who still uses the cardboard can—they’ll thank you, and then they’ll bake you a batch.