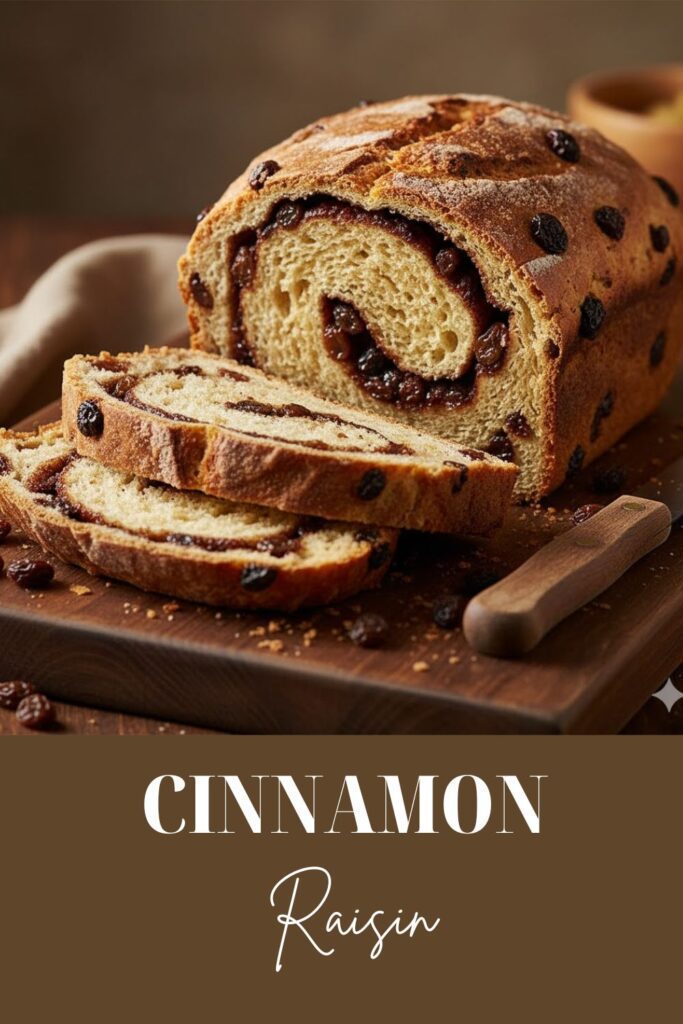
You Deserve Better Toast: The Ultimate Homemade Cinnamon Raisin Bread Recipe
Let’s just be honest. The grocery store aisle dedicated to sliced bread is a place of sadness. Especially when you look at those anemic loaves of Cinnamon raisin bread—pale, dry, and containing approximately three raisins per slice. You deserve a morning slice that is soft, rich, bursting with plump, juicy raisins, and swirled with fragrant, warming cinnamon sugar. What if I told you that you could bake that perfect loaf right in your own kitchen? I’m here to save your breakfast from mediocrity with the ultimate Cinnamon raisin bread recipe. Get ready to bake a loaf so good, you’ll feel like a professional baker (even if you’re wearing yoga pants).
Why This Cinnamon Raisin Bread Recipe is Pure Magic

Why dedicate a few hours to dough when you can buy a pre-sliced tragedy for cheap? Because this recipe is awesome, that’s why. It delivers a tender, buttery crumb, a high volume of juicy, plump raisins, and a stunning, visible swirl of cinnamon sugar that elevates it miles beyond the store-bought version.
First, the texture is incredible. This yeast dough is soft and slightly rich, perfect for slicing and toasting. Second, the flavor is intense. We use a generous amount of cinnamon and ensure every bite has a burst of sweetness. Third, the smell alone will make your house feel like a cozy, artisanal bakery. Plus, it makes the perfect gift (or the perfect self-gift, IMO). Seriously, who needs expensive candles when you have the aroma of fresh-baked cinnamon raisin bread filling your home?
Ingredients: The Sweet, Swirled Essentials
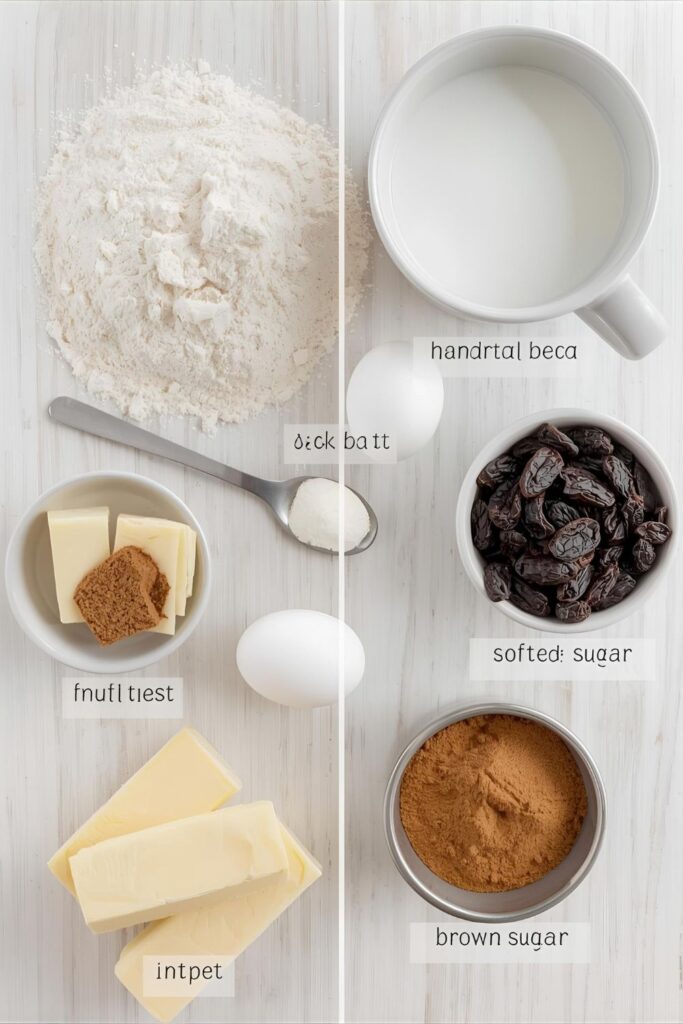

The key to a spectacular loaf is using good-quality cinnamon and ensuring your raisins are soft and plump before baking.
H3: For the Soft, Enriched Dough
- 2 ¼ teaspoons Active Dry Yeast (1 packet): Make sure it’s fresh!
- 1 cup Whole Milk: Warmed to $105^{\circ}\text{F}$ ($40^{\circ}\text{C}$).
- ¼ cup Granulated Sugar: Feeds the yeast and sweetens the dough.
- 4 tablespoons Unsalted Butter: Melted and slightly cooled.
- 1 large Egg: Room temperature.
- 3 to 3 ¼ cups All-Purpose Flour: Plus extra for dusting.
- 1 teaspoon Salt: Essential for flavor balance.
H3: For the Juicy Raisins
- 1 cup Raisins (dark or golden): Plumped (see step 1!).
- ½ teaspoon Vanilla Extract: Added to the dough for extra flavor.
H3: For the Signature Cinnamon Swirl
- 4 tablespoons Unsalted Butter: Softened to room temperature.
- ½ cup Brown Sugar (packed): Adds moisture and a deep molasses flavor to the swirl.
- 2 tablespoons Ground Cinnamon: Use fresh, high-quality cinnamon for the best aroma.
Key Substitutions:
- Yeast Swap: Use instant yeast and mix it directly into the dry flour mixture. No need to proof it first!
- Milk Swap: Any dairy milk or a good full-fat oat milk works. Avoid skim milk; the fat is important for dough texture.
- Raisin Swap: You can use dried cranberries or chopped dried cherries. Plump them just like the raisins!
- Gluten-Free: Use a high-quality 1:1 gluten-free baking blend with xanthan gum. The dough will be stickier, but still manageable.
Tools & Kitchen Gadgets Used: Your Bakery Setup
A stand mixer makes life easier, but strong arms and a good bowl work too!
- Large Mixing Bowl: For proofing the yeast and mixing the dough.
- Stand Mixer with Dough Hook (Optional): Highly recommended! Saves your arm during the kneading process.
- 2 Loaf Pans (8.5×4.5 or 9×5 inches): Or one loaf pan, which means one giant, amazing loaf! Lightly grease and flour.
- Rolling Pin: For rolling the dough into a rectangle for the swirl.
- Parchment Paper: For lining the loaf pan(s) for easy removal.
- Small Saucepan or Microwave: For warming the milk.
- Measuring Cups and Spoons: Essential for accurate baking.
Step-by-Step Instructions: Creating the Perfect Swirl
Patience with the yeast is crucial. The rest is just simple assembly!
H3: Step 1: Plump the Raisins (The Juiciness Secret)
Place the raisins in a small bowl. Pour hot tap water over them until they are completely submerged. Let them sit for 5-10 minutes. Drain the raisins completely and pat them dry. This step ensures the raisins are soft and juicy, preventing them from drying out during baking.
H3: Step 2: Wake Up the Yeast (The Foam Test)
In your large mixing bowl (or stand mixer bowl), combine the warm milk, yeast, and granulated sugar. Let it sit for 5-10 minutes until it’s foamy and bubbly. This confirms your yeast is active. If nothing happens, your yeast is dead—start over!
H3: Step 3: Mix and Knead the Dough
Add the melted butter, egg, vanilla extract, and 3 cups of flour to the yeast mixture. Add the salt. Mix until a shaggy dough forms. Knead the dough (with a dough hook on low speed or by hand) for 6-8 minutes, adding the remaining flour only if the dough is too sticky. The final dough should be soft, smooth, and slightly tacky, but not sticky.
H3: Step 4: The First Rise (Bulk Fermentation)
Place the dough in a lightly oiled bowl, turn to coat, and cover with plastic wrap or a kitchen towel. Let the dough rise in a warm spot for 60-90 minutes, or until it has doubled in size.
H3: Step 5: Roll, Fill, and Swirl
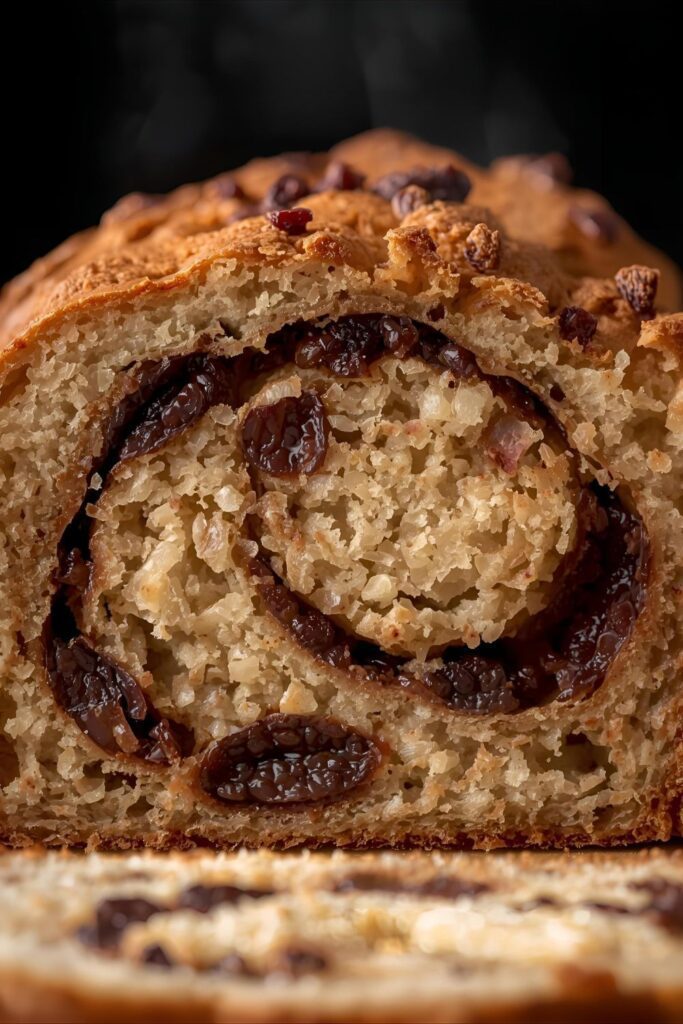
Punch the dough down (satisfying!). Turn it out onto a lightly floured surface. Roll the dough into a large rectangle, approximately 12×18 inches. In a small bowl, mix the softened butter, brown sugar, and ground cinnamon for the swirl. Spread this filling evenly over the entire surface of the dough. Sprinkle the plumped, dried raisins evenly over the cinnamon filling.
H3: Step 6: Roll and Rest (The Tight Log)
Starting from the long edge, tightly roll the dough into a log. Pinch the seam shut. Place the log seam-side down into your greased and parchment-lined loaf pan. Cover loosely and let it rise again for 30-45 minutes, or until it has nearly doubled in size and the dough crests the top of the pan.
H3: Step 7: Bake to Golden Glory
Preheat your oven to $350^{\circ}\text{F}$ ($175^{\circ}\text{C}$). Bake for 40-50 minutes. If the top begins to brown too quickly, loosely tent it with aluminum foil. The bread is done when the internal temperature reaches $200^{\circ}\text{F}$ ($93^{\circ}\text{C}$). Remove from oven.
H3: Step 8: Cool and Slice
Let the bread cool in the pan for 10 minutes, then use the parchment sling to lift it onto a wire rack. Let the bread cool completely before slicing! Slicing while warm can smash the soft dough. Serve toasted with butter or cream cheese.
Calories & Nutritional Info: The Sweet Details
This is an enriched bread, perfect for a hearty breakfast or snack. These estimates are approximate per 1-inch slice.
- Estimated Calories per slice (1/16th of a loaf): 160-200 calories
- Fat: 5-8g (from butter and milk)
- Carbohydrates: 25-35g (from flour, sugar, and raisins)
- Sugar: 10-15g
- Protein: 4-6g
- Fiber: Good source, especially if using whole wheat flour blend.
- The Bottom Line: A satisfying, energy-dense start to your day.
Common Mistakes to Avoid: Stop Making Dry Bread!
Yeast bread is a science, but you can avoid these pitfalls for a soft loaf.
- Using Cold Milk: Milk that is too hot will kill the yeast. Milk that is too cold won’t activate it. Aim for lukewarm ($105^{\circ}\text{F}$ / $40^{\circ}\text{C}$).
- Not Plumping the Raisins: Dry raisins suck moisture from the dough during baking, resulting in a dry bread. Always soak them first!
- Over-Flouring the Dough: Adding too much flour results in a dense, dry, tough loaf. The dough should be slightly tacky and soft, not stiff.
- Slicing While Hot: The steam inside sets the structure. Slicing hot bread crushes the delicate crumb and releases steam too quickly, making the inside gummy. Wait!
Variations & Customizations: Your Bread, Your Way!
The dough is forgiving. Get creative with your mix-ins!
- Cream Cheese Glaze: After cooling, whisk together ½ cup powdered sugar, 2 tablespoons milk, and ¼ teaspoon vanilla extract. Drizzle generously over the loaf for a sweet finish.
- Nutty Crunch: Add ½ cup of chopped walnuts or pecans to the raisins before rolling the dough. The crunch and richness are fantastic.
- French Toast Starter: Use stale slices of this bread to make the best Cinnamon Raisin French Toast you will ever have. It’s a next-level hack, TBH.
FAQ Section: Answering Your Doughy Dilemmas
You’ve got questions about this comforting classic. I’ve got answers.
H3: Q1: How do I get a clear, defined swirl of cinnamon sugar?
A1: Roll the dough into a uniform rectangle and spread the filling evenly to the edges. Roll the log tightly to ensure the swirl remains packed and defined during the rise and bake.
H3: Q2: Why did my bread collapse in the oven?
A2: Collapse usually happens if the dough over-proofed (rose too long) before baking, causing the gluten structure to weaken. Ensure your second rise stops when the loaf is slightly crowned, not massively puffy.
H3: Q3: How do I store homemade cinnamon raisin bread?
A3: Store the cooled bread in an airtight container or a bread bag at room temperature for up to 4 days. You can also wrap and freeze the whole loaf or individual slices for up to 3 months.
H3: Q4: Can I use this dough to make cinnamon rolls?
A4: Yes! Use this exact recipe, but slice the rolled dough into 1-inch rolls and bake for 20-25 minutes. Top with cream cheese frosting!
H3: Q5: What makes this bread enriched?
A5: This dough is enriched because it contains fat (butter) and dairy (milk), which makes the resulting bread richer, softer, and more tender than basic French or Italian bread.
H3: Q6: Is it better to knead by hand or with a stand mixer?
A6: A stand mixer is faster and produces more consistent results by ensuring proper gluten development. Kneading by hand is fine but requires more time and muscle power (about 10 minutes).
H3: Q7: How do I know if my milk is the correct temperature for the yeast?
A7: Use a kitchen thermometer to check! It should be between $105^{\circ}\text{F}$ to $115^{\circ}\text{F}$ ($40^{\circ}\text{C}$ to $46^{\circ}\text{C}$). If you don’t have a thermometer, it should feel comfortably warm on your wrist—not hot!
Final Thoughts: Never Buy Stale Bread Again!
You did it! You baked a stunning, warm, perfectly swirled loaf of Cinnamon raisin bread. Go ahead, take a big, glorious slice (after it cools!). Doesn’t that taste exactly like the perfect breakfast you deserve? I knew it would. You are now the master of artisanal breakfast baking. Are you ever going back to that sad store-bought stuff again? I highly doubt it. Enjoy your warm, buttery victory!