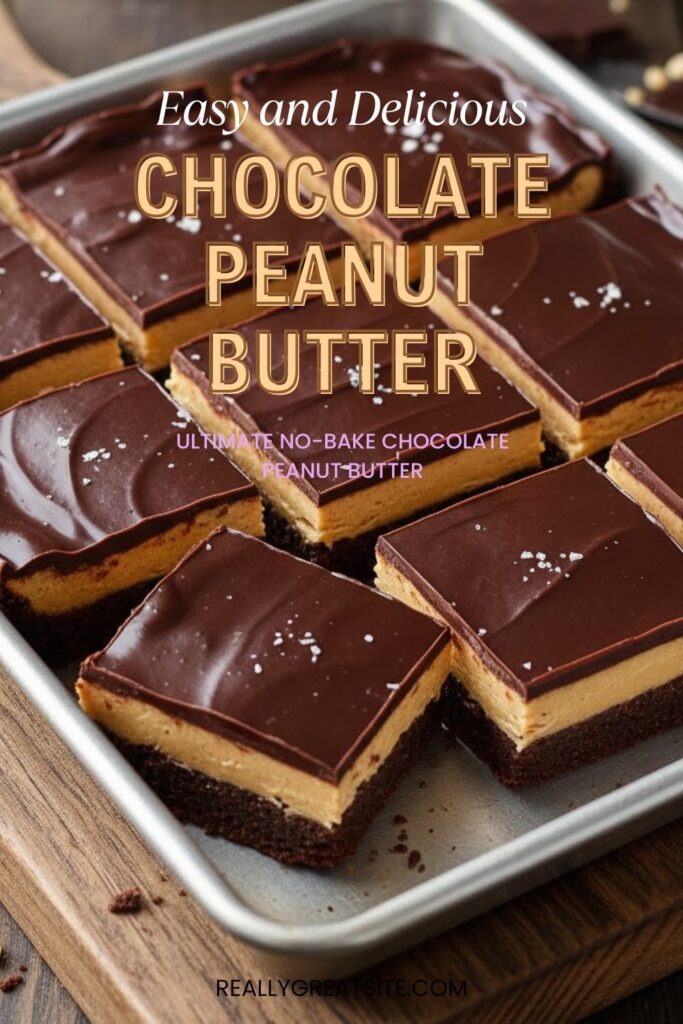
You Only Need 4 Ingredients: The Ultimate No-Bake Chocolate Peanut Butter Bars
Tell me I’m wrong: there’s a special place in the dessert hall of fame reserved for pairings so perfect, they should be illegal. And topping that list? Chocolate peanut butter. It’s the flavor combination that solves all of life’s problems (or at least, most of them). But who has time to bake a fussy cake or deal with complicated crusts when that primal craving hits? Nobody, that’s who. Enter the ultimate No-Bake Chocolate Peanut Butter bar—a ridiculously easy, rich, and ridiculously addictive dessert that you can whip up faster than you can find a parking spot at the grocery store.
Why These Chocolate Peanut Butter Bars Are Your New Obsession
Why bother with a no-bake bar? Because this recipe is awesome, that’s why. It delivers all the intense, decadent flavor of a sophisticated dessert with zero oven time. Seriously, you use the microwave and the fridge.
This recipe is awesome because it’s unbelievably easy. If you can melt and stir, you can master this. It’s also a crowd-pleaser of legendary proportions. Take a tray of these bars to a party, and watch them disappear faster than free samples. Plus, the texture—that creamy, dense peanut butter filling capped with a snappy chocolate shell—is pure, unadulterated comfort. Goodbye, complex pastry techniques. Hello, instant gratification!
Ingredients: The Four Horsemen of Deliciousness


We’re keeping this simple and relying on the pure, unadulterated power of the core ingredients.
H3: For the Rich Peanut Butter Base
- 1 cup Smooth Peanut Butter: Use a conventional, processed brand (like Jif or Skippy) for the best texture. Natural, oily peanut butter often results in a greasy base.
- ½ cup Unsalted Butter: Melted and slightly cooled.
- 1 ½ cups Powdered Sugar: Sifted, to avoid clumps in the filling.
- 1 teaspoon Vanilla Extract: Adds a subtle warmth.
H3: For the Decadent Chocolate Topping
- 1 cup Semi-Sweet Chocolate Chips: The perfect balance of sweet and dark.
- 1 tablespoon Vegetable Shortening or Coconut Oil: Crucial for the snappy, glossy shell. Don’t skip this, IMO!
Key Substitutions:
- Peanut Butter Swap: Almond butter or cashew butter works for a different flavor profile, but the consistency may require slightly less melted butter.
- Butter Swap: Use a quality vegan butter stick for a plant-based option.
- Chocolate Swap: Dark chocolate chips or a mix of milk and semi-sweet chips depending on your preference for sweetness.
- Powdered Sugar Swap: Use a powdered sugar substitute like erythritol or monk fruit for a keto-friendly base (you might need to adjust liquid).
Tools & Kitchen Gadgets Used: Your Low-Effort Setup
Since we’re skipping the oven, you only need the basics and a freezer.
- 8×8 inch Square Baking Pan: Essential size for the perfect thickness.
- Parchment Paper or Aluminum Foil: Mandatory! Line the pan with an overhang for easy removal.
- Microwave-safe Bowl (large): For melting the base ingredients.
- Microwave-safe Bowl (small): For melting the chocolate topping.
- Rubber Spatula: For mixing and pressing the base.
- Whisk (small): For blending the powdered sugar into the base smoothly.
- Measuring Cups and Spoons: Precision ensures the perfect firm texture.
Step-by-Step Instructions: The Art of the No-Bake Bar
Seriously, this is a lesson in patience (waiting for the chill time) and not much else. Embrace the ease!
H3: Step 1: Prep the Pan
Line your 8×8 inch baking pan with parchment paper or aluminum foil. Make sure the paper/foil hangs over the sides—these “sling” handles make removing the finished bars a breeze.
H3: Step 2: Create the Peanut Butter Base
In your large microwave-safe bowl, combine the smooth peanut butter and the melted butter. Microwave briefly (30-60 seconds) or until they are soft enough to stir together easily. Stir until completely smooth.
H3: Step 3: Mix and Press
Add the vanilla extract to the peanut butter mixture. Gradually whisk in the powdered sugar, half a cup at a time, until the mixture is thick, dense, and uniform. It should resemble a very thick cookie dough.
H3: Step 4: Chill the Foundation
Press the peanut butter mixture evenly into the bottom of the prepared pan using your rubber spatula or the back of a measuring cup. Press firmly to create a dense, compact layer. Place the pan in the freezer for 30 minutes while you prepare the topping. A well-chilled base prevents the chocolate layer from melting the peanut butter layer.
H3: Step 5: Melt the Chocolate Topping
In your small microwave-safe bowl, combine the chocolate chips and the shortening (or coconut oil). Microwave in 30-second intervals, stirring well after each interval, until the chocolate is smooth and glossy. The shortening ensures a shiny, sliceable crust.
H3: Step 6: The Final Pour
Remove the chilled peanut butter base from the freezer. Pour the melted chocolate topping evenly over the peanut butter layer. Gently tilt the pan to ensure the chocolate coats the entire surface smoothly.
H3: Step 7: The Grand Finale (The Long Wait)
Return the pan to the refrigerator (not the freezer!) for at least 2 to 3 hours, or until the chocolate is completely set and firm to the touch. Use the parchment paper handles to lift the chilled block out of the pan. Slice into 16 squares and try not to eat them all at once!
Calories & Nutritional Info: The Sweet Facts

These are rich, dense bars, so portion control is… recommended (but not guaranteed). Estimates are approximate per single 2×2 inch square (1/16th of the pan).
- Estimated Calories per bar: 200-250 calories
- Fat: 15-20g (high-fat, thanks to the peanut butter and butter)
- Carbohydrates: 15-25g (mostly sugar)
- Protein: 5-7g (Good protein boost from the peanut butter!)
- Note on Sugar: This is a very sweet dessert. The primary carb source is the powdered sugar.
- Source of healthy fats: Peanut butter provides unsaturated fats, so it’s basically health food, right? 😉
Common Mistakes to Avoid: Stop Ruining the Gooey Goodness
This recipe is simple, but simple things can fail spectacularly. Pay attention!
- Using Natural Peanut Butter: Natural peanut butter’s oil separates too easily, resulting in a greasy, crumbly base that won’t set properly. Use the conventional stuff for these bars.
- Skipping the Shortening/Oil: Melted chocolate alone sets up brittle and is hard to slice without cracking. The shortening/coconut oil makes the chocolate smooth, glossy, and sliceable. It’s a non-negotiable step.
- Adding Hot Chocolate to a Cold Base: This is the worst mistake. If the base isn’t well-chilled (Step 4), the hot chocolate will melt the top layer of the peanut butter, leading to a marbled, messy middle. Ensure the base is firm before pouring.
- Not Sifting the Powdered Sugar: Lumps of powdered sugar in the filling create an unpleasant, gritty texture. Always whisk or sift the powdered sugar before adding it to the mixture.
Variations & Customizations: Remix Your Favorite Duo
The classic bar is perfection, but feel free to spice things up!
- Salty Pretzel Crunch Base: Replace ½ cup of the powdered sugar with crushed salted pretzels and mix them into the base. The salt and crunch add an incredible counterpoint to the richness.
- Spicy Chili Chocolate Top: After melting the chocolate, stir in ½ teaspoon of chili powder or a dash of cayenne pepper before pouring. The heat is a surprising, sophisticated contrast to the sweet peanut butter.
- Cookie Monster Cake Base: Substitute the powdered sugar base with a crushed cookie crust! Mix 1 ½ cups of crushed vanilla or chocolate wafers with 4 tablespoons of melted butter, press into the pan, and chill. Then proceed with the peanut butter layer and chocolate topping.
FAQ Section: Decoding the Peanut Butter Bar Mysteries
You’ve got questions about these dense, dreamy bars, and I have the answers.
H3: Q1: Can I make these bars with crunchy peanut butter?
A1: Yes, you can! Crunchy peanut butter works well and adds a fantastic textural element. Use the same measurements as the smooth variety.
H3: Q2: Why did my peanut butter base crumble and feel greasy?
A2: You likely used a natural or organic peanut butter, which contains less stabilizer and separates more oil. Next time, use the conventional processed variety, or try adding a tablespoon of graham cracker crumbs to bind the oily mixture.
H3: Q3: What is the best way to slice the bars cleanly?
A3: Chill the bars thoroughly until very firm. Remove the block from the pan, and use a large, sharp knife dipped in hot water and wiped dry between each cut. The heat melts the chocolate edge instantly, giving you a clean slice every time.
H3: Q4: How long do these no-bake bars last?
A4: Store the sliced bars in an airtight container in the refrigerator for up to 2 weeks, or freeze them for up to 3 months. Let frozen bars thaw in the fridge before serving.
H3: Q5: Can I skip the shortening in the chocolate topping?
A5: You can skip it, but the chocolate will be brittle and may crack easily when you slice the bars. The topping won’t be as smooth or glossy either. It’s a small step for a big texture payoff!
H3: Q6: Why is my chocolate topping not setting?
A6: This means the base was too warm when you poured the chocolate, or you added too much liquid to the chocolate. The chocolate should set fully in the fridge within a few hours. Try placing the pan in the freezer for 15 minutes to shock it.
H3: Q7: Can I use a different size pan?
A7: Yes, but the thickness will change. If you use a 9×13 inch pan, the layers will be much thinner, and you might want to double the recipe to achieve a satisfying thickness.
Final Thoughts: Ditch the Oven, Embrace the Goo
You did it! You’ve mastered the art of the perfect, no-bake Chocolate peanut butter bar. Go ahead, take a big, blissful bite of that creamy, snappy perfection. Are you ever going to turn on your oven for a dessert again? I highly doubt it. You’ve unlocked peak lazy genius. Now, share the love (or don’t, I understand). Enjoy your new favorite sweet fix!